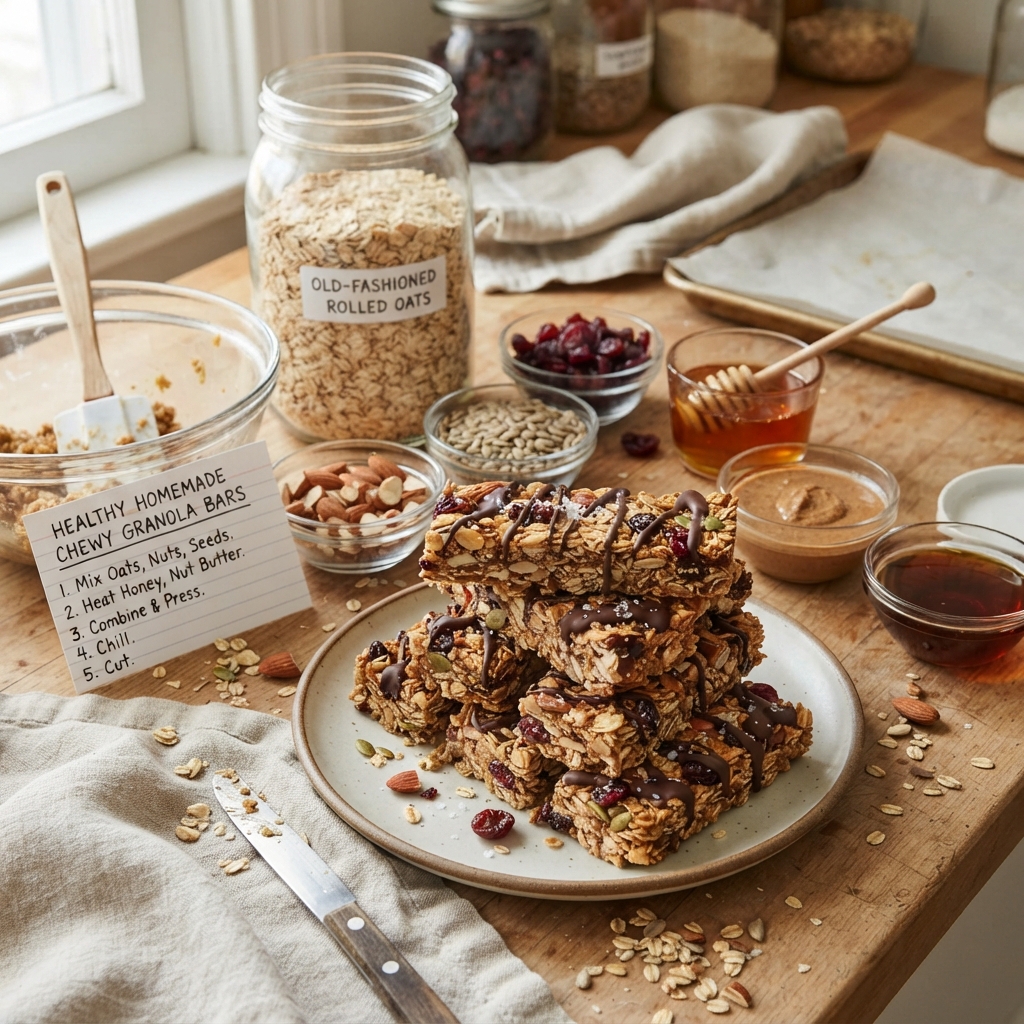
Healthy Chewy Granola Bar Recipe With Oats
Introduction
In the modern landscape of quick snacks and on-the-go nutrition, finding a granola bar that balances taste, texture, and genuine health benefits can feel like an impossible task. Store-bought options are often laden with high-fructose corn syrup, artificial preservatives, and excessive sugars that spike insulin levels rather than sustain energy. This Healthy Chewy Granola Bar Recipe With Oats is designed to reclaim your snack time, offering a wholesome alternative that delivers consistent energy without the crash. Whether you are packing lunchboxes for school, fueling up for a morning hike, or simply need a mid-afternoon pick-me-up at the office, these bars provide the perfect combination of fiber, healthy fats, and natural sweetness.
The secret to achieving the perfect chewy texture lies in the ratio of wet to dry ingredients and the specific type of oats used. Unlike crunchy granola that is baked until crisp, chewy granola bars rely on binding agents like honey or maple syrup and gentle heating to maintain a soft, pliable consistency. This recipe avoids refined sugars and unnecessary additives, focusing instead on whole foods that nourish the body. By making these bars at home, you gain complete control over what goes into your body, ensuring that every bite is as nutritious as it is delicious. Prepare to transform your snacking habits with a recipe that is simple, customizable, and fundamentally healthy.
The History
The origins of granola can be traced back to the 19th century, rooted in the health reform movements of America. It began as “Granula,” created by Dr. James Caleb Jackson in 1863 at the Jackson Sanitarium in New York. Jackson’s original creation was made from graham flour dough that was baked hard, broken into chunks, and then baked again until rock-hard. It was intended as a health food for patients, but it required soaking in milk overnight to become edible. Shortly after, Dr. John Harvey Kellogg created a similar product using oats, wheat, and corn, which he also called “Granula.” Due to legal disputes, Kellogg changed the name to “Granola,” establishing the lineage of the cereal we know today.
Throughout the 20th century, granola evolved from a sanitarium health food into a counterculture staple during the 1960s and 70s. It became synonymous with the natural food movement, embraced by hippies and health enthusiasts who sought alternatives to processed sugary cereals. However, as granola gained mainstream popularity, commercial manufacturers began adding significant amounts of sugar and oil to improve palatability, turning a health food into a calorie-dense dessert. The granola bar emerged later as a convenient portable format, pioneered by companies seeking to capture the busy consumer market.
In recent years, there has been a significant shift back towards the roots of granola. Consumers are increasingly reading labels and rejecting hidden sugars and artificial ingredients. This resurgence has sparked a home-cooking revival, where individuals are returning to kitchens to recreate the wholesome integrity of original granola recipes. This Healthy Chewy Granola Bar Recipe With Oats honors that historical trajectory, blending the convenience of the modern bar format with the nutritional philosophy of the original health reformers.
Ingredients Breakdown
Understanding the function of each ingredient is crucial for mastering this recipe. Each component plays a specific role in texture, flavor, and nutritional profile.
Old-Fashioned Rolled Oats
The foundation of any granola bar is the oat. For chewy bars, old-fashioned rolled oats are superior to quick oats or steel-cut oats. Quick oats absorb too much moisture and can become mushy, while steel-cut oats are too hard and difficult to chew without extensive baking. Rolled oats provide the perfect structural integrity, holding the bar together while maintaining a pleasant chew. They are also rich in beta-glucan, a soluble fiber that helps regulate blood sugar levels.
Natural Sweeteners (Honey or Maple Syrup)
The binding agent is arguably the most critical component for chewiness. Honey and pure maple syrup act as natural glues that hold the oats and mix-ins together when cooled. Honey tends to create a slightly chewier texture due to its hygroscopic nature (ability to retain moisture), while maple syrup offers a vegan alternative with a distinct earthy flavor. Both provide sweetness without the refined processing of white sugar.
Nut Butter
Almond butter, peanut butter, or cashew butter adds healthy fats and protein, which help sustain energy levels. The oils in the nut butter also contribute to the tenderness of the bar, preventing it from becoming too dry or crumbly. It is essential to use natural nut butters where the only ingredient is nuts, avoiding those with added hydrogenated oils or sugars.
Mix-ins (Nuts, Seeds, and Dried Fruit)
This category is where customization shines. Chopped almonds, walnuts, or pecans add crunch and healthy fats. Seeds like chia, flax, or pumpkin seeds boost the micronutrient profile with minerals like magnesium and zinc. Dried fruits such as cranberries, raisins, or apricots provide natural sweetness and chewy pockets of flavor. However, care must be taken not to overload the mixture with large chunks, which can compromise the structural integrity of the bar.
Vanilla Extract and Salt
Often overlooked, vanilla extract enhances the overall flavor profile, rounding out the sweetness of the honey and the earthiness of the oats. A pinch of sea salt is equally important; it contrasts the sweetness and makes the flavors pop, ensuring the bars do not taste bland or one-dimensional.
Step-by-Step Recipe
Creating the perfect granola bar is a process that requires attention to detail, particularly regarding temperature and pressure. Follow this narrative guide to understand the flow of the recipe.
Phase 1: Preparation and Preheating
Begin by preheating your oven to a moderate temperature, typically around 350°F (175°C). While the oven warms up, prepare your baking pan. An 8×8 inch square pan is ideal for creating thick, substantial bars. Line the pan with parchment paper, ensuring there is overhang on two opposite sides. This overhang acts as a sling, allowing you to lift the entire block of granola out of the pan once it has cooled, which makes cutting much cleaner. Lightly grease the parchment paper with a neutral oil or cooking spray to prevent sticking.
Phase 2: Toasting the Oats
While not strictly mandatory, toasting the oats before mixing enhances the flavor profile significantly. Spread the rolled oats on a separate baking sheet and bake them for 5 to 7 minutes until they are fragrant and lightly golden. This step releases the natural oils in the oats and adds a nutty depth to the final product. Allow the oats to cool slightly before mixing them with wet ingredients to prevent the heat from altering the consistency of your binders.
Phase 3: Creating the Binder
In a saucepan over low heat, combine your natural sweetener (honey or maple syrup) and nut butter. Stir constantly until the mixture is smooth and fully integrated. It is important not to boil this mixture aggressively, as high heat can degrade the beneficial enzymes in raw honey or cause the sugars to harden too much upon cooling. Once smooth, remove from heat and stir in the vanilla extract and salt. The mixture should be pourable but viscous.
Phase 4: Combining and Pressing
In a large mixing bowl, combine the toasted oats, any additional dry mix-ins (nuts, seeds), and the wet binder mixture. Use a sturdy spatula or wooden spoon to fold everything together until every oat is coated. The mixture will be sticky and dense. Transfer the mixture into your prepared baking pan. Here is the most crucial step for chewy bars: press the mixture down firmly. Use the bottom of a flat glass or a measuring cup to compress the granola into the pan. The harder you press, the better the bars will hold together. Do not skimp on this step.
Phase 5: Baking and Cooling
Bake the granola block for approximately 20 to 25 minutes. The edges should be lightly golden brown. Remove from the oven and let it cool completely in the pan. Do not attempt to cut the bars while they are warm, as they will be too soft and will crumble. For the best results, allow the pan to sit at room temperature for an hour, then transfer it to the refrigerator for another 30 minutes to set the binders fully.
Phase 6: Cutting and Storing
Once fully cooled and set, use the parchment paper overhang to lift the granola block onto a cutting board. Use a sharp chef’s knife to slice the block into bars or squares. Wipe the knife clean between cuts to ensure clean edges. Store the bars in an airtight container at room temperature for up to a week, or in the refrigerator for longer freshness.
Tips
- Pressing is Key: The number one reason granola bars fall apart is insufficient pressure. Press the mixture into the pan as hard as physically possible before baking.
- Cool Completely: Patience is vital. Cutting warm bars guarantees crumbs. Let them reach room temperature or chill them to ensure clean cuts.
- Measure Flourlessly: When measuring sticky ingredients like honey or nut butter, spray your measuring cup with oil first. This allows the ingredients to slide out easily without waste.
- Chop Mix-ins Uniformly: Ensure nuts and dried fruits are chopped to a similar size as the oats. Large chunks create weak points in the bar structure.
- Use Parchment Paper: Do not substitute parchment paper with wax paper. Wax paper can melt in the oven, while parchment is heat-resistant and non-stick.
- Room Temperature Ingredients: Allow your nut butter and honey to come to room temperature before mixing. This ensures a smoother binder without excessive heating.
- Sharp Knife: Use a sharp chef’s knife rather than a serrated bread knife for cutting. A sharp blade presses down cleanly without dragging the ingredients.
- Don’t Overbake: Overbaking dries out the moisture needed for chewiness. Remove the bars when they are just golden at the edges.
Variations and Customizations
One of the greatest advantages of homemade granola bars is the ability to tailor them to specific dietary needs and flavor preferences. Below are several variations to explore.
Nut-Free School Safe Version
To make these bars safe for nut-free schools, substitute the nut butter with sunflower seed butter or tahini. Replace chopped nuts with additional seeds such as pumpkin seeds, sunflower seeds, or hemp hearts. Ensure all ingredients are processed in a nut-free facility to avoid cross-contamination.
Vegan Adaptation
For a fully vegan recipe, replace honey with pure maple syrup or agave nectar. Ensure that the chocolate chips or dried fruits used do not contain dairy or animal-derived processing agents. Coconut oil can also be used to supplement the binder if additional fat is needed.
High-Protein Boost
To increase the protein content for post-workout recovery, stir in a scoop of unflavored or vanilla protein powder. You may need to add a teaspoon of extra liquid (like almond milk) to compensate for the dryness of the powder. Collagen peptides are another excellent option that dissolves easily without altering the texture.
Chocolate Lovers
For a dessert-like treat that remains healthy, fold in dark chocolate chips (70% cocoa or higher) after the mixture has cooled slightly but before pressing. This prevents the chocolate from melting completely into the batter. You can also drizzle melted dark chocolate over the top of the cooled bars for decoration.
Tropical Twist
Replace traditional dried fruits with chopped dried mango, pineapple, and coconut flakes. Use macadamia nut butter for a rich, tropical flavor profile. This variation pairs wonderfully with a cup of herbal tea or coffee.
Spiced Autumn Blend
Incorporate warm spices like cinnamon, nutmeg, and ginger into the wet binder mixture. Use dried apples and pecans as the primary mix-ins. This variation is perfect for fall mornings and pairs well with pumpkin spice lattes.
Health Considerations and Nutritional Value
While these bars are designed to be healthy, understanding their nutritional impact helps you integrate them wisely into your diet.
Caloric Density
Granola bars are energy-dense foods. Because they contain nuts, seeds, and sweeteners, they are high in calories relative to their size. This makes them excellent for active individuals who need sustained energy, but portion control is important for those managing weight. One bar is typically sufficient for a snack.
Sugar Content
Even though this recipe uses natural sweeteners like honey or maple syrup, they are still forms of sugar. They impact blood glucose levels, though less sharply than refined white sugar due to the presence of trace minerals and the fiber content of the oats. Diabetics should monitor their intake and consider reducing the sweetener quantity slightly.
Fiber and Digestion
Oats are an excellent source of soluble fiber, which promotes digestive health and helps maintain healthy cholesterol levels. The addition of seeds like chia or flax further boosts the fiber content, aiding in satiety and regularity.
Allergen Awareness
Oats are naturally gluten-free but are often processed in facilities that handle wheat. Individuals with Celiac disease or gluten sensitivity must ensure they purchase certified gluten-free oats. Additionally, nuts and seeds are common allergens, so always label homemade bars clearly if sharing with others.
Micronutrients
Depending on the mix-ins, these bars can be rich in Vitamin E (from almonds), Magnesium (from seeds), and Iron (from oats and dried fruit). This makes them a nutrient-dense snack compared to processed alternatives that offer empty calories.
Ingredients
- 3 cups old-fashioned rolled oats (certified gluten-free if needed)
- 1/2 cup natural almond butter (or peanut butter/sunflower seed butter)
- 1/3 cup pure honey (or maple syrup for vegan)
- 1/4 cup coconut oil, melted
- 1 teaspoon vanilla extract
- 1/2 teaspoon sea salt
- 1/2 cup chopped nuts (walnuts, almonds, or pecans)
- 1/2 cup dried fruit (cranberries, raisins, or chopped apricots)
- 2 tablespoons chia seeds or flax seeds (optional)
- 1/4 cup dark chocolate chips (optional)
Directions
- Preheat your oven to 350°F (175°C) and line an 8×8 inch baking pan with parchment paper, leaving an overhang on two sides.
- Spread the rolled oats on a baking sheet and toast in the oven for 5-7 minutes until fragrant. Remove and let cool slightly.
- In a small saucepan over low heat, combine the nut butter, honey (or maple syrup), and melted coconut oil. Stir until smooth and fully combined.
- Remove the wet mixture from heat and stir in the vanilla extract and sea salt.
- In a large mixing bowl, combine the toasted oats, chopped nuts, seeds, and dried fruit.
- Pour the wet binder mixture over the dry ingredients and fold until every piece is evenly coated.
- If using chocolate chips, fold them in now while the mixture is warm but not hot.
- Transfer the mixture to the prepared pan and press down firmly and evenly using the bottom of a glass or measuring cup.
- Bake for 20-25 minutes until the edges are lightly golden brown.
- Remove from the oven and allow to cool completely in the pan (at least 1 hour).
- For easier cutting, place the pan in the refrigerator for 30 minutes to set.
- Lift the granola block out using the parchment paper and slice into bars with a sharp knife.
- Store in an airtight container at room temperature for up to 1 week or refrigerate for up to 2 weeks.
FAQ
Why did my granola bars fall apart?
This is the most common issue and is usually caused by not pressing the mixture firmly enough into the pan before baking. The oats need to be compacted tightly to bond together. Additionally, cutting the bars before they are completely cooled will cause them to crumble. Ensure you let them cool fully and even chill them before slicing.
Can I use quick oats instead of old-fashioned oats?
It is not recommended. Quick oats are cut smaller and absorb moisture differently, often resulting in a mushy or overly soft texture that lacks the satisfying chew of rolled oats. Old-fashioned oats provide the necessary structure for a bar that holds its shape.
How do I make these bars crunchier?
To achieve a crunchier texture, bake the bars for an additional 5 to 10 minutes. You can also reduce the amount of wet binder slightly. However, note that this recipe is specifically designed for chewiness, so significant changes may alter the intended outcome.
Can I freeze these granola bars?
Yes, these bars freeze exceptionally well. Wrap individual bars in plastic wrap or parchment paper and place them in a freezer-safe bag. They can be stored in the freezer for up to 3 months. Thaw at room temperature for 15 minutes before eating.
What can I use instead of nut butter?
If you have a nut allergy, sunflower seed butter is the best direct substitute. Tahini (sesame seed paste) also works well but has a more savory flavor profile. Soy nut butter is another alternative, though less common.
My bars are too hard. What happened?
Overbaking is the likely culprit. If the bars are baked too long, the sugars harden excessively. Another possibility is using too much sweetener or not enough fat. Ensure you measure accurately and check the oven temperature with a thermometer.
Can I add protein powder?
Yes, you can add up to 1/2 cup of protein powder. However, protein powder absorbs liquid, so you may need to add an extra tablespoon of honey or coconut oil to maintain the right consistency for binding.
How do I prevent chocolate chips from melting?
Add the chocolate chips after the mixture has cooled slightly from the stove but before pressing it into the pan. If the mixture is too hot, the chocolate will melt into the batter. You can also use cacao nibs, which hold their shape better under heat.
Are these bars suitable for weight loss?
They can be part of a weight loss plan if consumed in moderation. They are high in fiber and protein, which promote satiety. However, they are calorie-dense, so stick to one bar per snack session and account for them in your daily caloric intake.
Summary
Homemade chewy granola bars offer a nutritious, customizable snack free from processed sugars and preservatives.
Follow the pressing and cooling steps carefully to ensure perfect texture and structural integrity every time.