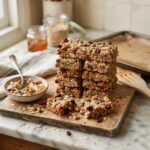
Introduction
In the fast-paced rhythm of modern life, finding a snack that balances convenience, taste, and genuine nutritional value often feels like an impossible quest. Store-bought options are plentiful, yet they frequently come loaded with hidden sugars, preservatives, and processed ingredients that undermine their health claims. This is where the homemade Healthy Chewy Granola Bar Recipe With Oats steps in as a transformative solution. By crafting your own bars, you reclaim control over what goes into your body, ensuring every bite is packed with wholesome goodness without sacrificing the satisfying texture that makes snacking enjoyable.
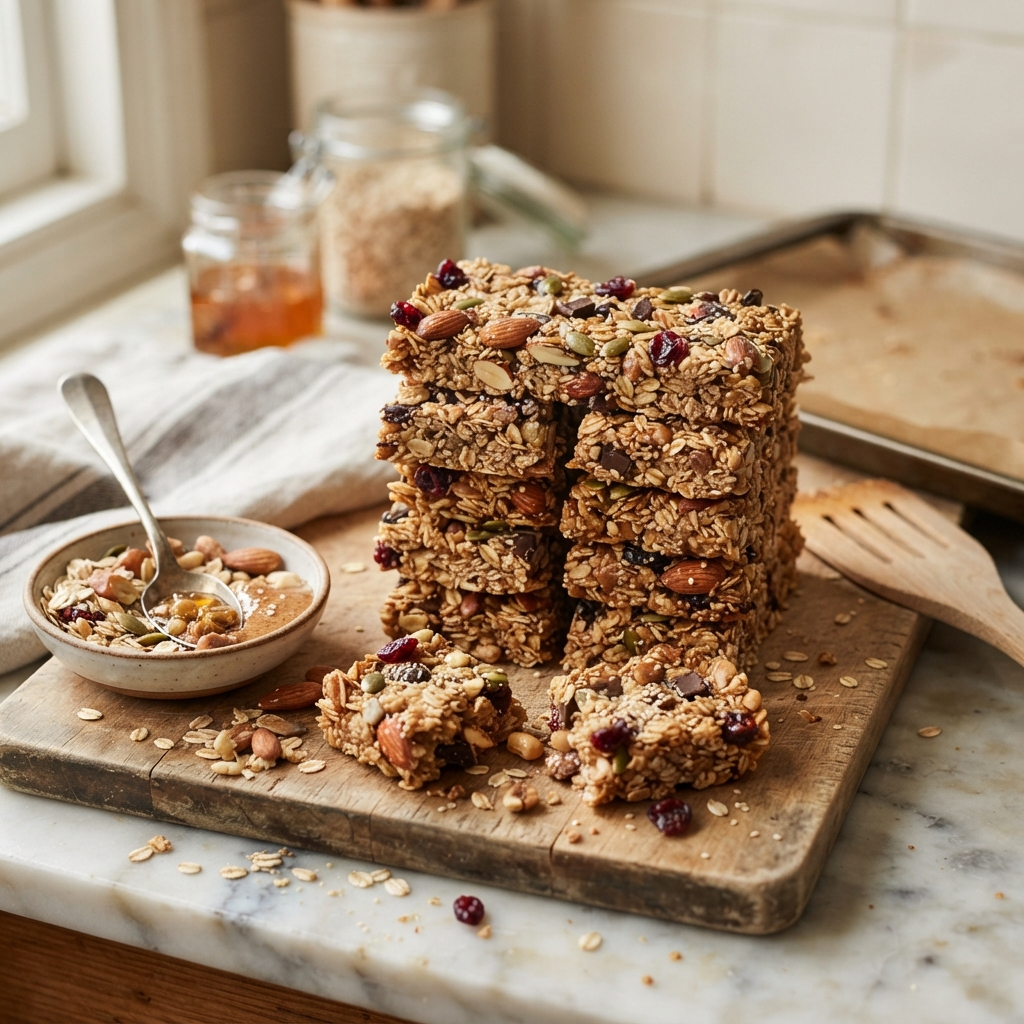
This recipe is designed specifically to achieve that elusive perfect chewiness that many commercial bars fail to replicate naturally. Unlike baked granola that turns crunchy and hard, these bars rely on a specific ratio of binding agents and oat preparation to maintain a soft, pliable texture that is easy to eat on the go. Whether you are packing lunch for school, needing a pre-workout energy boost, or seeking a mid-afternoon pick-me-up at the office, these bars provide sustained energy release thanks to the complex carbohydrates found in oats and the healthy fats from nuts and seeds. Embracing this recipe is not just about cooking; it is about adopting a lifestyle that prioritizes whole foods, mindful eating, and the simple joy of creating something nourishing with your own hands.
The History
To truly appreciate the granola bar, one must journey back to the roots of the health food movement in the 19th century. The origins of granola can be traced to Dr. James Caleb Jackson, who operated a health sanitarium in Dansville, New York. In 1863, he created a breakfast food called “Granula,” made from Graham flour dough that was baked hard and required soaking in milk to be edible. While nutritious, it was notoriously difficult to consume. Shortly thereafter, John Harvey Kellogg created a similar product, leading to a legal battle over the name, which eventually resulted in the spelling shift to “Granola” to avoid infringement.
For decades, granola remained a niche health food, primarily associated with sanitariums and strict dietary regimens. However, the cultural landscape shifted dramatically during the 1960s counterculture movement. As society began to question industrial food processing and embrace natural living, granola became a symbol of the back-to-nature ethos. It was during this era that granola evolved from a loose breakfast cereal into a portable form. The invention of the granola bar is often credited to the late 1960s and early 1970s, when companies began compressing oat mixtures with sweeteners to create handheld snacks for hikers and health enthusiasts.
By the 1980s and 1990s, granola bars had entered the mainstream, becoming a staple in school lunchboxes and office pantries. However, as popularity surged, so did the sugar content and processing levels. The modern return to homemade granola bars represents a full circle moment, echoing the original intentions of Jackson and Kellogg while utilizing contemporary nutritional knowledge to create a product that is both delicious and genuinely healthy. This recipe honors that legacy by stripping away the additives and focusing on the core elements that defined the original health food movement.
Ingredients Breakdown
Understanding the role of each component in this recipe is crucial for achieving the desired texture and flavor profile. Each ingredient serves a specific functional purpose beyond mere taste.
Old-Fashioned Rolled Oats: The foundation of the bar. Rolled oats are steamed and flattened, which allows them to absorb moisture effectively without turning into mush. They provide the structural integrity and the bulk of the fiber. Quick oats can be used but may result in a softer, less defined texture, while steel-cut oats are too hard and will not bind correctly without extensive cooking.
Natural Nut Butter: This acts as a primary binding agent and a source of healthy fats. Almond butter, peanut butter, or cashew butter all work well. The oils in the nut butter help coat the oats, preventing them from drying out completely during the setting process, which contributes significantly to the chewy texture.
Liquid Sweetener: Honey or pure maple syrup serves as the glue that holds the bar together. When heated slightly, these syrups become viscous and sticky, binding the dry ingredients. Honey offers a distinct floral note and antimicrobial properties, while maple syrup provides a rich, earthy sweetness and is vegan-friendly. Avoid refined white sugar as it crystallizes upon cooling, leading to a crunchy rather than chewy bar.
Chia Seeds or Flaxseeds: These tiny powerhouses are optional but highly recommended. When they come into contact with the moisture from the wet ingredients, they form a gel-like substance that enhances the binding capability of the mixture. Additionally, they contribute omega-3 fatty acids and extra fiber.
Mix-Ins: Dried fruits, chocolate chips, or nuts add texture and flavor complexity. It is important to choose dried fruits that are not overly hard, as they should match the chewiness of the oat base. Dark chocolate chips are preferred for their lower sugar content and higher antioxidant levels compared to milk chocolate.
Step-by-Step Recipe
Creating the perfect granola bar is a process that requires attention to detail, particularly regarding temperature and pressure. The following narrative guides you through the methodology to ensure success.
Phase 1: Preparation and Toasting
Begin by preheating your oven to a low temperature, around 300°F (150°C). While many no-bake recipes exist, a light toast enhances the nutty flavor of the oats and removes excess moisture that could make the bars soggy later. Spread your rolled oats on a baking sheet and toast them for about 10 minutes. This step is critical for depth of flavor. While the oats are toasting, prepare your pan by lining it with parchment paper. Ensure the paper overhangs the sides slightly; this creates a sling that will allow you to lift the entire block of granola out of the pan later, making cutting much easier and cleaner.
Phase 2: Creating the Binder
In a saucepan over low heat, combine your nut butter and liquid sweetener. The goal here is warmth, not boiling. You want the mixture to become fluid enough to coat every single oat flake evenly. If the mixture is too cool, it will clump; if it is too hot, you risk burning the sugars in the honey or maple syrup. Stir constantly until the consistency is smooth and glossy. Add a pinch of salt and vanilla extract at this stage to amplify the sweetness and balance the flavors.
Phase 3: Combining and Compacting
Transfer the toasted oats into a large mixing bowl. Pour the warm binder mixture over the oats. Use a spatula to fold the ingredients together gently but thoroughly. You want to see that every oat is glistening with the binder. Add your seeds and any durable mix-ins like nuts now. Once combined, dump the mixture into your lined pan. This is the most crucial step for chewiness: you must press the mixture down firmly. Use the bottom of a flat glass or a measuring cup to compress the granola into the pan. The tighter you pack it, the better it will hold together when cut.
Phase 4: Setting and Cutting
Allow the pan to cool at room temperature for at least an hour. For best results, transfer the pan to the refrigerator for another hour. The cold helps the fats in the nut butter solidify, locking the structure in place. Once fully set, lift the parchment paper sling to remove the block from the pan. Place it on a cutting board and use a sharp knife to slice into bars. If you find the bars are crumbling, they may need more chilling time or a tighter pack during Phase 3.
Tips
- Room Temperature Ingredients: Ensure your nut butter and honey are at room temperature before starting. Cold nut butter is difficult to mix evenly, leading to dry pockets in your bars.
- The Packing Technique: Do not underestimate the pressure needed when pressing the mixture into the pan. Inadequate compression is the number one reason homemade granola bars fall apart.
- Storage Matters: While these bars are stable at room temperature for a few days, storing them in an airtight container in the refrigerator will extend their freshness up to two weeks and maintain the chewy texture.
- Preventing Stickiness: If your knife sticks to the bars while cutting, lightly grease the blade with a neutral oil or wipe it with a damp cloth between cuts.
- Customizing Sweetness: Taste your binder mixture before adding it to the oats. If you prefer less sweetness, you can reduce the honey slightly, but be aware this may affect how well the bars bind together.
- Avoiding Sogginess: If adding fresh fruit, be aware it will introduce moisture that reduces shelf life. Stick to dried fruits for long-term storage.
- Parchment Paper is Key: Do not substitute parchment paper with wax paper. Wax paper can melt in the oven and does not offer the same non-stick properties for removal.
Variations and Customizations
The beauty of this recipe lies in its adaptability. You can modify the base recipe to suit dietary restrictions, flavor preferences, or nutritional goals.
Vegan Adaptation: To make this recipe entirely plant-based, simply substitute the honey with pure maple syrup or agave nectar. Ensure your chocolate chips are dairy-free. This swap does not alter the texture significantly but makes the bars suitable for vegans.
Nut-Free School Safe Version: For schools or environments that prohibit nuts, replace the nut butter with sunflower seed butter or tahini. These alternatives provide similar binding properties and healthy fats without the allergen risk. Always check labels on oats to ensure they were processed in a nut-free facility.
High-Protein Boost: To transform these into a post-workout recovery snack, stir in a scoop of vanilla or chocolate protein powder. You may need to add a teaspoon more liquid sweetener to compensate for the dryness of the powder. Collagen peptides are another excellent addition that dissolve easily without altering the flavor.
Tropical Twist: Swap standard dried fruits for dried mango, pineapple, and coconut flakes. Use macadamia nut butter if available for a rich, tropical flavor profile that pairs beautifully with the oats.
Chocolate Lover’s Delight: Increase the chocolate content by using cacao nibs instead of chips for a crunchier texture and less sugar, or swirl in a tablespoon of melted dark chocolate before pressing the mixture into the pan for a marbled effect.
Spiced Warmth: Add warm spices like cinnamon, nutmeg, or cardamom to the binder mixture. This creates a comforting flavor profile that is particularly enjoyable during the autumn and winter months.
Health Considerations and Nutritional Value
When consumed in moderation, these homemade granola bars offer a significant nutritional advantage over their processed counterparts. The primary benefit lies in the macronutrient balance. Oats are a whole grain rich in beta-glucan, a type of soluble fiber known to help lower cholesterol levels and regulate blood sugar spikes. Unlike refined carbohydrates, the complex carbs in oats provide a slow release of energy, preventing the crash often associated with sugary snacks.
The nut butter contributes monounsaturated fats, which are heart-healthy and promote satiety. This means you feel fuller for longer, reducing the likelihood of overeating later in the day. The seeds add micronutrients such as magnesium, zinc, and iron, which are essential for metabolic function and immune health. By controlling the sweetener, you avoid the high fructose corn syrup found in many commercial bars, reducing the load on your liver and minimizing inflammation.
However, portion control is still important. While the ingredients are healthy, nuts and seeds are calorie-dense. One bar is typically sufficient for a snack. For those monitoring carbohydrate intake, the ratio of oats to nuts can be adjusted to lower the carb count. Additionally, those with gluten sensitivities should ensure they purchase certified gluten-free oats, as regular oats are often cross-contaminated during processing. Overall, this recipe supports a balanced diet by providing fiber, healthy fats, and moderate protein without artificial additives.
Ingredients
- 3 cups old-fashioned rolled oats (certified gluten-free if needed)
- 1 cup natural creamy nut butter (peanut, almond, or sunflower)
- 2/3 cup pure maple syrup or honey
- 1 teaspoon vanilla extract
- 1/4 teaspoon sea salt
- 1/2 cup chia seeds or ground flaxseed
- 1/2 cup dark chocolate chips or dried fruit of choice
- 1/4 cup chopped nuts (optional, for extra crunch)
Directions
- Preheat your oven to 300°F (150°C) and line a 9×9 inch baking pan with parchment paper, leaving an overhang on two sides.
- Spread the rolled oats on a baking sheet and toast in the oven for 10 minutes to enhance flavor. Remove and let cool slightly.
- In a medium saucepan over low heat, combine the nut butter and maple syrup (or honey). Stir continuously until melted and smooth, about 2-3 minutes.
- Remove the saucepan from heat and stir in the vanilla extract and sea salt.
- In a large mixing bowl, combine the toasted oats, chia seeds, and chopped nuts. Pour the warm wet mixture over the dry ingredients.
- Mix thoroughly until all oats are evenly coated. Fold in the chocolate chips or dried fruit last to prevent melting.
- Transfer the mixture to the prepared pan. Use a flat object to press the mixture down firmly and evenly into the pan.
- Allow the bars to cool at room temperature for 1 hour, then refrigerate for at least 1 hour to set completely.
- Lift the bars out of the pan using the parchment paper overhang and cut into 12 equal bars using a sharp knife.
- Store in an airtight container in the refrigerator for up to 2 weeks or freeze for longer storage.
FAQ
Why are my granola bars falling apart?
This usually happens due to insufficient compression or not enough binder. Ensure you press the mixture very tightly into the pan and do not reduce the amount of nut butter or honey, as these are the glue.
Can I make these without an oven?
Yes, you can skip the toasting step if you prefer a no-bake version. However, toasting the oats removes moisture and intensifies the flavor, so the texture will be slightly softer if you skip this step.
How do I make them crunchier?
To achieve a crunchier texture, bake the pressed bars in the oven at 300°F for 20-25 minutes after pressing them into the pan. Let them cool completely before cutting.
Can I use steel-cut oats?
No, steel-cut oats are too hard and will not bind well in this recipe. Stick to old-fashioned rolled oats for the best chewy texture.
Are these bars suitable for freezing?
Absolutely. Wrap individual bars in parchment paper and place them in a freezer-safe bag. They can be frozen for up to 3 months and thawed at room temperature before eating.
Summary
Homemade chewy granola bars offer a nutritious, customizable snack free from processed additives and excess sugar.
With simple whole-food ingredients and easy steps, you can enjoy sustained energy and delicious flavor anytime.