Introduction
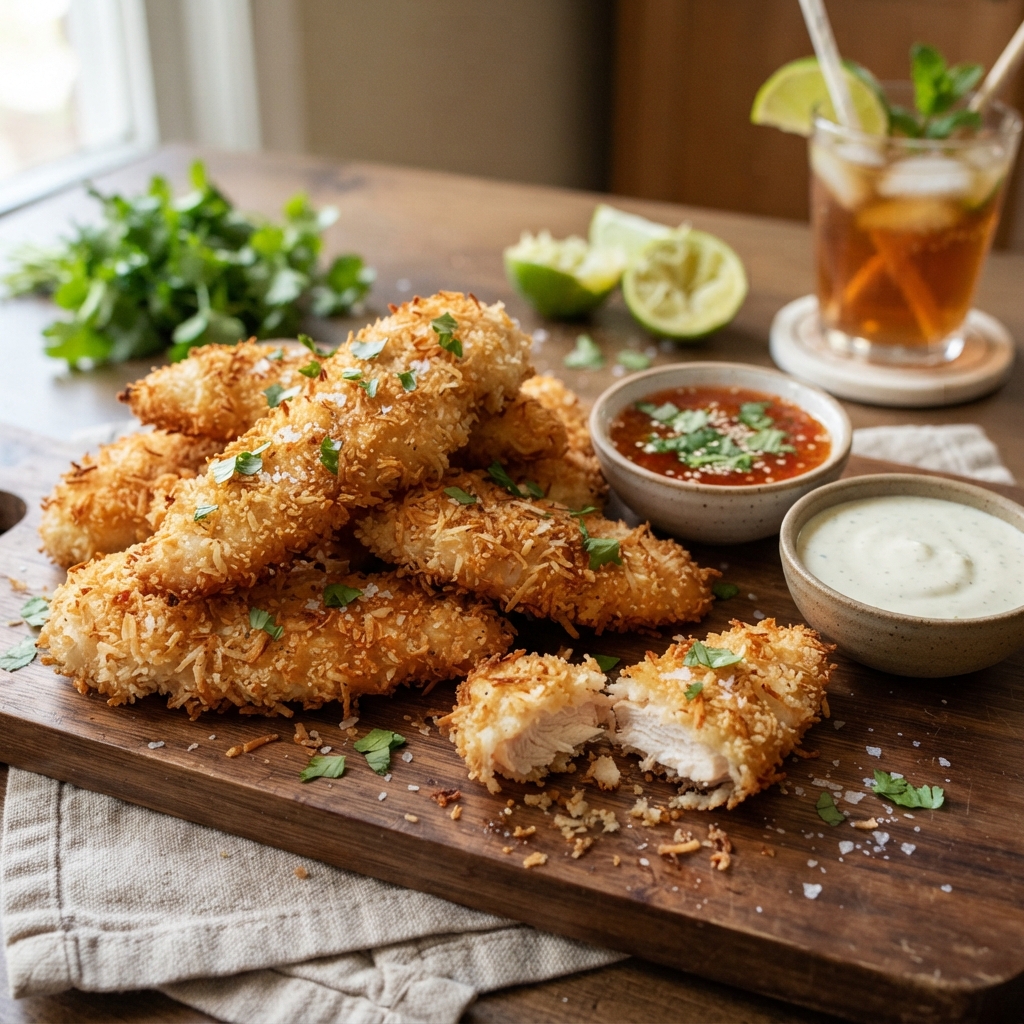
Welcome to the ultimate guide on crafting the perfect Crispy Coconut Chicken Tenders. There is something undeniably magical about the combination of savory, tender poultry encased in a golden, crunchy shell infused with the sweet, tropical aroma of toasted coconut. This dish has transcended its origins to become a staple in family dinners, party appetizers, and even gourmet restaurant menus across the globe. Whether you are looking to impress guests at a summer barbecue, prepare a kid-friendly weeknight meal that feels like a treat, or simply indulge in a comfort food classic with a tropical twist, this recipe delivers on every front. The contrast between the juicy interior and the shattering crisp exterior creates a sensory experience that is difficult to replicate with any other coating. Throughout this comprehensive guide, we will explore not just the how-to, but the why behind every step, ensuring your results are consistently restaurant-quality.
Beyond the taste, the versatility of coconut chicken tenders is remarkable. They pair beautifully with a wide array of dipping sauces, ranging from sweet and tangy duck sauce to spicy sriracha mayo or a classic honey mustard. They can be served atop a fresh green salad for a lighter option, nestled within a soft bun for a sandwich, or presented on a platter alongside rice and stir-fried vegetables for a complete meal. The aroma alone is enough to draw everyone to the kitchen, promising a dining experience that is both satisfying and exotic. By mastering this recipe, you gain the ability to create a dish that balances health-conscious ingredients with indulgent flavors, proving that you do not have to sacrifice taste for texture. Let us embark on this culinary journey to unlock the secrets of the perfect crunch.
The History
The origins of coconut chicken are a fascinating blend of cultural fusion and culinary evolution. While coconut has been a staple ingredient in tropical cuisines for centuries, particularly in Southeast Asia, the Caribbean, and Polynesia, the specific iteration of breaded coconut chicken tenders is largely considered an American innovation with heavy influences from Chinese-American cuisine. During the mid-to-late 20th century, as American palates became more adventurous and interested in tropical flavors, restaurants began experimenting with coconut as a coating for proteins. It is widely believed that the dish gained significant popularity in the 1980s and 1990s, often appearing on menus alongside other fusion dishes like General Tso’s Chicken or Orange Chicken.
The concept likely drew inspiration from traditional Polynesian cooking methods where meats were wrapped in leaves or cooked with coconut milk, but adapted to fit the Western preference for fried, breaded foods. The use of shredded coconut provided a unique texture that differed from standard breadcrumbs or batter, offering a nutty sweetness that complemented the savory chicken. Over time, the recipe migrated from restaurant kitchens to home cookbooks, evolving with the availability of ingredients. Today, it stands as a testament to globalization in food, representing a harmonious marriage between Eastern ingredients and Western cooking techniques. Understanding this history adds a layer of appreciation to the dish, reminding us that food is often a story of migration, adaptation, and creativity.
Ingredients Breakdown
To achieve the perfect Crispy Coconut Chicken Tenders, understanding the role of each ingredient is crucial. This is not merely a list of items to combine, but a blueprint for flavor and texture architecture.
The Chicken
The foundation of this dish is, of course, the chicken. We recommend using boneless, skinless chicken breasts cut into uniform strips. Breasts are preferred for their lean profile and ability to hold shape during frying. However, chicken thighs can be used for a juicier, more forgiving result, though they may require slightly longer cooking times. The quality of the chicken matters; organic or free-range options often yield a better texture and flavor. Ensure the chicken is patted completely dry before breading, as moisture is the enemy of crispiness.
The Coconut
The star of the show is the unsweetened shredded coconut. While sweetened coconut flakes are available, unsweetened is preferred for savory dishes to prevent the coating from burning too quickly due to high sugar content. The size of the shred matters; medium flakes provide the best balance of coverage and crunch. Toasting the coconut lightly before breading can enhance the nutty flavor, but be careful not to burn it, as it will continue to cook in the oil.
The Breading Matrix
A successful coating requires a three-step station: flour, egg wash, and the coconut mixture. The all-purpose flour acts as the primer, creating a dry surface for the egg to adhere to. The eggs act as the glue, binding the coconut to the chicken. For the outer layer, we mix the coconut with panko breadcrumbs. Panko is essential here because its larger, flakier structure creates air pockets that result in a lighter, crunchier texture compared to fine breadcrumbs. Adding a touch of cornstarch to the flour mixture can further enhance the crispiness by limiting gluten formation.
Seasonings and Spices
Flavor depth comes from the seasoning blend. Salt and black pepper are non-negotiable for basic seasoning. Adding garlic powder and onion powder provides savory undertones that balance the sweetness of the coconut. A pinch of paprika adds a subtle smokiness and helps achieve a golden-red hue. For those who enjoy heat, a dash of cayenne pepper can be incorporated into the flour mixture to infuse spice throughout the coating rather than just on the surface.
The Frying Medium
For frying, you need an oil with a high smoke point. Peanut oil is traditional and adds a slight nutty flavor that complements the coconut. Canola oil or vegetable oil are neutral alternatives that work perfectly well. The temperature of the oil is critical; it must be maintained between 350°F and 375°F (175°C – 190°C) to ensure the chicken cooks through without the coating burning.
Step-by-Step Recipe
Follow this detailed procedure to ensure every tender is golden, crispy, and cooked to perfection. Patience and preparation are key to this process.
- Preparation of the Chicken: Begin by placing your chicken breasts on a clean cutting board. Using a sharp knife, slice the breasts into uniform strips, approximately 1 inch in width. Uniformity is vital so that all pieces cook at the same rate. Once cut, place the strips between two sheets of plastic wrap and gently pound them with a meat mallet to an even thickness. This tenderizes the meat and ensures even cooking. Pat the chicken strips completely dry with paper towels to remove any surface moisture.
- Setting Up the Breading Station: Arrange three shallow bowls or pie dishes in an assembly line fashion. In the first bowl, whisk together the all-purpose flour, cornstarch, salt, pepper, garlic powder, onion powder, and paprika. In the second bowl, beat the eggs thoroughly with a splash of water or milk to create a smooth egg wash. In the third bowl, combine the shredded unsweetened coconut and panko breadcrumbs. Ensure there is enough room in each bowl to comfortably coat the chicken strips without spilling.
- The Breading Process: Take a chicken strip and dredge it in the flour mixture, shaking off any excess. This dry layer is crucial for adhesion. Next, dip the floured chicken into the egg wash, ensuring it is fully submerged and coated. Allow the excess egg to drip off for a second. Finally, press the chicken firmly into the coconut and panko mixture. Use your hand to pack the coating onto the chicken, ensuring full coverage. Place the breaded tender on a wire rack rather than a plate to prevent the bottom from getting soggy while you bread the remaining pieces.
- Heating the Oil: Pour enough oil into a large, heavy-bottomed skillet or Dutch oven to reach a depth of about 2 inches. Attach a deep-fry thermometer to the side of the pot. Heat the oil over medium-high heat until it reaches 350°F (175°C). Do not guess the temperature; if the oil is too cool, the chicken will absorb grease and become soggy. If it is too hot, the coconut will burn before the chicken is done.
- Frying the Tenders: Carely lower the breaded chicken tenders into the hot oil using tongs. Do not overcrowd the pan; fry in batches of 3 to 4 pieces depending on the size of your pot. Overcrowding drops the oil temperature drastically. Fry for approximately 3 to 4 minutes per side, turning once, until the coating is deep golden brown and the internal temperature of the chicken reaches 165°F (74°C).
- Draining and Serving: Remove the cooked tenders from the oil and place them on a wire rack set over a baking sheet. This allows air to circulate and keeps the crust crispy. Avoid using paper towels directly under the chicken as the steam can soften the coating. Let them rest for 5 minutes before serving to allow the juices to redistribute. Serve immediately with your choice of dipping sauce.
Tips
Mastering the art of frying requires attention to detail. Here are expert tips to elevate your coconut chicken tenders from good to exceptional.
- Double Coating Technique: For an extra thick and crunchy crust, repeat the egg wash and coconut breading step twice. This creates a substantial shell that holds up well to dipping.
- Chill Before Frying: After breading, place the chicken tenders in the refrigerator for 15 to 20 minutes before frying. This helps the coating set and adhere better to the meat, reducing the chance of it falling off in the oil.
- Oil Maintenance: Skim any burnt bits from the oil between batches. If the oil starts to smoke or darken too much, replace it entirely to avoid off-flavors.
- Uniform Sizing: Spend time cutting your chicken into identical sizes. This ensures that you do not end up with some pieces that are dry and overcooked while others are undercooked.
- Thermometer is Key: Invest in a reliable candy or deep-fry thermometer. Visual cues are often misleading when it comes to oil temperature.
- Resting Period: Do not skip the resting period after frying. Cutting into the chicken immediately will cause the juices to run out, leaving the meat dry.
Variations and Customizations
One of the best aspects of this recipe is its adaptability. You can modify it to suit dietary needs or flavor preferences without compromising the core experience.
Gluten-Free Option
To make this dish gluten-free, simply substitute the all-purpose flour with a high-quality gluten-free flour blend or almond flour. Ensure your panko breadcrumbs are replaced with gluten-free crumbs or crushed gluten-free cornflakes. Always verify that your shredded coconut is certified gluten-free to avoid cross-contamination.
Baked Version
For a healthier alternative to deep frying, you can bake the tenders. Preheat your oven to 400°F (200°C). Place the breaded chicken on a greased baking sheet lined with parchment paper. Spray the tops generously with cooking oil spray to help them brown. Bake for 20 to 25 minutes, flipping halfway through, until golden and cooked through. While not quite as crunchy as fried, this method significantly reduces the fat content.
Air Fryer Method
The air fryer is an excellent tool for this recipe. Preheat the air fryer to 375°F (190°C). Arrange the tenders in a single layer in the basket, ensuring they do not touch. Cook for 10 to 12 minutes, flipping halfway. You may need to cook in multiple batches. Lightly spray the coconut coating with oil before cooking to ensure it crisps up properly.
Spicy Coconut Twist
Add a kick to your tenders by mixing chili powder or cayenne pepper into the coconut mixture. Alternatively, serve with a spicy mayo made from mayonnaise, sriracha, and a squeeze of lime juice. This variation pairs well with the sweetness of the coconut.
Macro-Friendly Adjustment
To increase protein and reduce carbs, use crushed pork rinds instead of panko breadcrumbs. This creates a keto-friendly version that maintains the crunch without the carbohydrates associated with traditional breadcrumbs.
Health Considerations and Nutritional Value
While delicious, it is important to understand the nutritional profile of Crispy Coconut Chicken Tenders to enjoy them as part of a balanced diet.
| Nutrient | Approximate Value per Serving (3 Tenders) |
|---|---|
| Calories | 350 – 450 kcal |
| Protein | 25g |
| Carbohydrates | 20g |
| Fat | 22g |
| Fiber | 2g |
| Sodium | 450mg |
Benefits: Chicken is an excellent source of lean protein, essential for muscle repair and growth. Coconut contains medium-chain triglycerides (MCTs), which are metabolized differently than other fats and can provide a quick source of energy. However, the frying process adds significant calories and fat.
Moderation: Due to the fried nature and sodium content, this dish is best enjoyed in moderation. Pairing it with a large side of steamed vegetables or a fresh salad can help balance the meal nutritionally. Choosing to bake or air fry instead of deep frying can reduce the fat content by up to 50%.
Allergens: This recipe contains eggs, wheat (unless substituted), and coconut. Coconut is classified as a tree nut by the FDA, so those with nut allergies should exercise caution. Always check labels on shredded coconut for potential cross-contamination warnings.
Ingredients
Here is the consolidated shopping list for your convenience. Ensure all ingredients are measured accurately for the best results.
- 1.5 lbs boneless, skinless chicken breasts
- 1 cup all-purpose flour (or gluten-free alternative)
- 2 tablespoons cornstarch
- 2 large eggs, beaten
- 2 tablespoons water or milk
- 2 cups unsweetened shredded coconut
- 1 cup panko breadcrumbs
- 1 teaspoon salt
- 1/2 teaspoon black pepper
- 1 teaspoon garlic powder
- 1 teaspoon onion powder
- 1/2 teaspoon paprika
- 1/4 teaspoon cayenne pepper (optional)
- 4 cups peanut or vegetable oil for frying
- Cooking spray (if baking)
Directions
For a quick reference while you cook, here are the condensed instructions.
- Cut chicken into strips and pound to even thickness. Pat dry.
- Mix flour, cornstarch, and spices in Bowl 1.
- Whisk eggs and water in Bowl 2.
- Combine coconut and panko in Bowl 3.
- Dredge chicken in flour, dip in egg, then coat thoroughly in coconut mixture.
- Heat oil to 350°F (175°C).
- Fry chicken in batches for 3-4 minutes per side until golden and 165°F internally.
- Drain on a wire rack and rest for 5 minutes before serving.
FAQ
Here are answers to some of the most common questions regarding this recipe.
Can I make these ahead of time?
Yes, you can bread the chicken up to 24 hours in advance. Store the breaded tenders on a wire rack in the refrigerator, covered loosely with plastic wrap. Fry them just before serving for the best texture. Reheating fried chicken often results in a loss of crispiness.
Why is my coconut burning before the chicken is cooked?
This usually indicates that your oil temperature is too high. Coconut sugars can caramelize quickly. Lower the heat slightly to 340°F and ensure your chicken strips are not too thick. Pound them thin to ensure quick cooking.
What dipping sauce goes best?
Classic pairings include sweet and sour sauce, duck sauce, honey mustard, or a spicy mayo. For a tropical twist, try a mango chutney or a pineapple salsa.
How do I store leftovers?
Store leftovers in an airtight container in the refrigerator for up to 3 days. To reheat, use an oven or air fryer at 350°F to restore crispiness. Avoid microwaving, as it will make the coating chewy and soggy.
Can I use sweetened coconut?
You can, but be aware that sweetened coconut contains sugar which will burn much faster than unsweetened coconut. If you use sweetened, reduce the frying temperature slightly and watch them closely.
Summary
Crispy Coconut Chicken Tenders offer a perfect blend of tropical sweetness and savory crunch that delights all ages.
Master the breading technique and oil temperature to achieve restaurant-quality results at home every time.