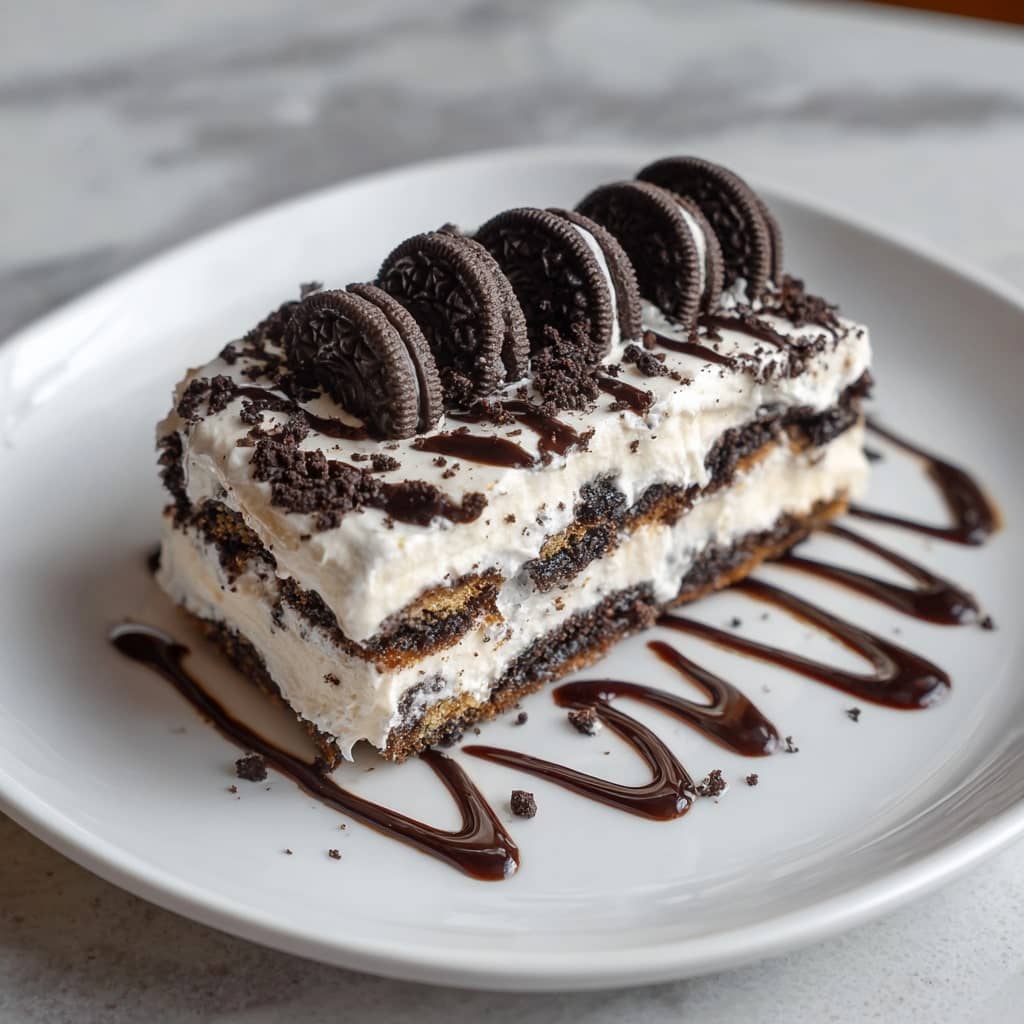
Oreo Icebox Cake The Oreo Icebox Cake is a delightfully simple yet irresistibly delicious no-bake dessert that has captured the hearts of sweet lovers everywhere. This dessert layers iconic chocolate sandwich cookies with luscious whipped cream or pudding, which then meld together after chilling in the refrigerator to form a soft, creamy cake-like treat. Easy to prepare and requiring no baking, the Oreo Icebox Cake is perfect for any occasion, from casual family dinners to festive gatherings. Its rich flavor and creamy texture, combined with the satisfying crunch of softened Oreos, create a perfect harmony of tastes and sensations. The dessert is beloved for its versatility, quick assembly, and the nostalgic comfort it brings with each bite. Whether you’re an experienced baker or a kitchen novice, this recipe offers a fun and impressive way to satisfy your sweet tooth without complicated steps or ingredients. Its growing popularity is fueled by social media and the endless creative variations that keep the classic Oreo Icebox Cake exciting and new.
The History of the Oreo Icebox Cake The Oreo Icebox Cake traces its roots to the traditional icebox cakes that gained popularity in the United States during the early to mid-20th century. The term “icebox cake” comes from the fact that these desserts required refrigeration — using the icebox, the predecessor to today’s refrigerator — to set and develop flavor. Early versions typically used wafer cookies or ladyfingers layered with whipped cream or pudding, creating a chilled, soft, and sweet treat without baking. With the invention and widespread love of Oreo cookies, first introduced by Nabisco in 1912, it was only natural for home cooks to incorporate these beloved cookies into icebox cake recipes. The Oreo Icebox Cake emerged as a modern twist on this classic concept, gaining traction in home kitchens and later becoming a viral sensation thanks to food bloggers and social media enthusiasts sharing their easy-to-make and crowd-pleasing recipes. Today, it stands as both a nostalgic nod to vintage desserts and a fresh favorite for new generations, combining convenience with indulgence.
Ingredients Breakdown The key ingredients of an Oreo Icebox Cake include the famous Oreo cookies, which provide a crunchy chocolate exterior and a sweet creamy center. Typically, the original flavor Oreos are used, but variations can include double-stuffed or flavored options like mint or peanut butter. The creamy layers are most often made from whipped cream, either homemade by whipping heavy cream with powdered sugar and vanilla extract or using pre-made whipped topping for convenience. Some recipes enhance the cream layer by incorporating cream cheese or pudding mix to add richness and complexity. Milk is sometimes used to lightly dip the Oreos before layering, helping them soften faster during refrigeration, though this step is optional. Finally, crushed Oreos or other toppings like chocolate shavings, caramel drizzle, or fresh fruit can be added to the top for extra texture and flavor.
Step-by-Step Recipe To prepare the Oreo Icebox Cake, start by whipping 2 cups of heavy cream with 2 tablespoons of powdered sugar and 1 teaspoon of vanilla extract until soft to stiff peaks form, being careful not to overwhip. Next, in an 8-inch square pan, spread a thin layer of the whipped cream to prevent sticking. Place a single layer of whole Oreo cookies over the cream, covering the base evenly. Spread half of the whipped cream over the cookie layer and smooth it out with a spatula. Repeat the process with another layer of Oreos and the remaining whipped cream, finishing with a smooth top layer. Sprinkle crushed Oreos on top for garnish. Cover the pan tightly with plastic wrap and refrigerate for at least 4 hours, preferably overnight, to allow the cookies to soften and the flavors to meld. For cleaner slicing, freeze the cake for about 30 minutes before cutting and serving.
Tips for the Perfect Oreo Icebox Cake To achieve the best texture and flavor, it’s crucial to chill the cake for several hours, ideally overnight, allowing the cookies to absorb moisture and soften fully. Use fresh, cold heavy cream for whipping to ensure a stable and fluffy texture. When layering, distribute the Oreos evenly and avoid overcrowding the pan to ensure each slice holds together nicely. Avoid overwhipping the cream, as it can become grainy or turn into butter. For faster softening, briefly dip Oreos in milk before layering, but don’t soak them too long to prevent sogginess. If using store-bought whipped topping, allow it to thaw completely before assembling. Add toppings just before serving to maintain texture. Use a sharp knife warmed under hot water to cut clean slices. This dessert can be made ahead and stored covered in the refrigerator for up to three days without compromising taste or texture.
Variations and Customizations The Oreo Icebox Cake is highly adaptable, making it easy to personalize according to your tastes and dietary needs. You can substitute the classic Oreos with flavored varieties such as mint, birthday cake, or golden Oreos for different flavor experiences. For a richer filling, incorporate cream cheese or mascarpone into the whipped cream. Swap whipped cream for pudding layers—vanilla, chocolate, or even butterscotch—to create a more decadent version. Adding fresh fruits like strawberries, bananas, or raspberries between layers introduces freshness and color. For nut lovers, sprinkle chopped nuts or peanut butter between layers. Holiday versions can feature peppermint extract, crushed candy canes, or pumpkin spice elements. Vegan adaptations can be made by using dairy-free whipped toppings and plant-based milk, with many Oreos already being vegan-friendly. Gluten-free Oreos also make this dessert accessible for those with gluten intolerance. You can also present the cake in individual jars or cups for easy serving at parties.
Health Considerations and Nutritional Value Although delicious, the Oreo Icebox Cake is a treat high in sugar, saturated fat, and calories, so it should be enjoyed in moderation. A typical serving can contain between 300 to 450 calories depending on portion size and specific ingredients used. To make a lighter version, consider using reduced-fat whipped cream or whipped topping and sugar-free pudding mixes. Incorporating Greek yogurt instead of some or all of the whipped cream can boost protein and reduce fat content. Be mindful of allergens such as gluten, dairy, and soy, and adjust ingredients accordingly for guests with dietary restrictions. Vegan and gluten-free versions are achievable with suitable ingredient swaps. Pairing the cake with fresh fruit can add fiber and nutrients while balancing sweetness. Remember, this dessert is best enjoyed as an occasional indulgence within a balanced diet.
FAQ Can I prepare the Oreo Icebox Cake ahead of time? Yes, it is best prepared at least 4 hours in advance and preferably chilled overnight for optimal texture. How long can I store it? The cake can be kept refrigerated, covered, for up to 3 days. Can I freeze it? Yes, the cake freezes well for up to one month; thaw in the fridge before serving. Which Oreo variety works best? Original Oreos are classic, but feel free to experiment with double-stuffed or flavored options. Can I substitute store-bought whipped topping for homemade whipped cream? Absolutely, store-bought whipped topping is a convenient alternative. Is it possible to add fruit or nuts? Yes, adding fresh fruit or nuts between layers adds great flavor and texture. How do I make a vegan version? Use dairy-free whipped cream and confirm the Oreos are vegan-friendly. Is the cake gluten-free? Only if gluten-free Oreos are used. Can I make individual servings? Yes, layering the cake in jars or cups is a great option. What’s the best way to cut the cake neatly? Chill thoroughly and use a sharp, warm knife for clean slices.
oreo Icebox Cake
Ingredients
- 2 cups 480 ml of heavy whipping cream
- 2 tablespoons of powdered sugar
- 1 teaspoon of pure vanilla extract
- 32 whole regular Oreo cookies from a 13.3-ounce or 377-gram package
- 3 Oreo cookies crushed
Instructions
- In the bowl of a stand mixer, combine heavy cream, powdered sugar, and vanilla extract. Beat until the mixture is whipped and creamy, being careful not to overwhip.
- In an 8-inch square pan, arrange a single layer of Oreo cookies. Spread half of the whipped cream evenly over the cookies and smooth it out with a spatula. Repeat with another layer of cookies and the remaining whipped cream.
- Sprinkle the top with crushed Oreos, cover the pan with plastic wrap, and refrigerate for at least 4 hours, ideally overnight.
- For cleaner slices, freeze the cake for 30 minutes before cutting. Slice and serve.