Introduction
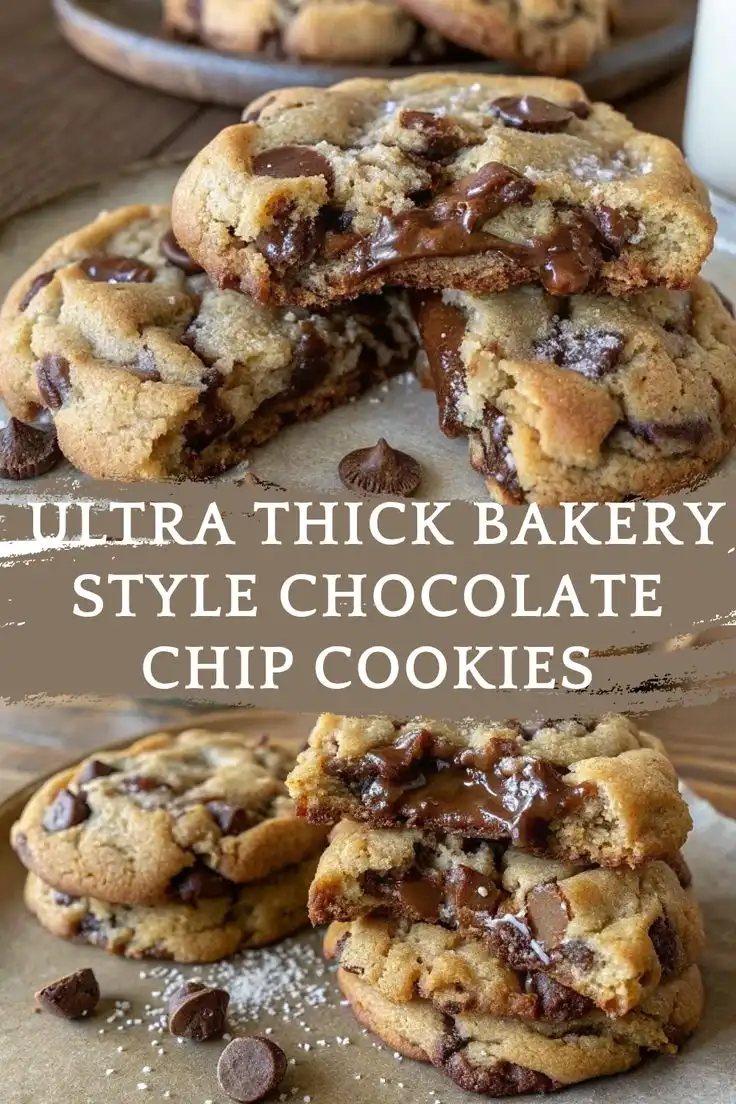
Imagine biting into a cookie so luxuriously thick it towers nearly an inch high—crisp, caramelized edges giving way to a molten, chewy, almost pudding-like center that oozes with melty chocolate and warm brown sugar richness. This isn’t just *a* chocolate chip cookie—it’s the Ultra Thick Bakery Style Chocolate Chip Cookie: the kind you’d find stacked high in the display case of a premium artisanal bakery, hand-scooped, slow-baked, and served slightly warm with a glass of cold whole milk. Designed for maximum texture contrast, depth of flavor, and nostalgic indulgence, these cookies deliver professional-level results from your home kitchen—with no fancy equipment required, just precision, patience, and a few clever techniques rooted in food science.
The History
The evolution of the ultra-thick chocolate chip cookie is a delicious tale of innovation, adaptation, and American ingenuity. While Ruth Wakefield’s 1938 “Toll House Chocolate Crunch Cookie” introduced the world to the now-iconic combination of butter, brown sugar, eggs, vanilla, flour, baking soda, salt, and semi-sweet chocolate bits, her original version was modest—thin, crisp-edged, and uniformly chewy. It wasn’t until the late 1980s and early 1990s that bakers began intentionally engineering thickness: using higher ratios of brown sugar to white sugar for moisture retention; incorporating melted (then cooled) butter for denser structure; chilling dough for 24–72 hours to hydrate flour and develop complex caramel notes; and underbaking strategically to preserve gooey centers. Iconic bakeries like Levain Bakery in New York City (founded 1995) elevated the concept into a cult phenomenon—4-ounce, palm-sized, $5 cookies with crackling crusts and lava-like interiors. Their success sparked a nationwide obsession with “bakery-style” thickness, inspiring countless copycat recipes, viral TikTok bake-offs, and even FDA-regulated labeling standards for “giant” vs. “jumbo” cookies. Today, the ultra-thick chocolate chip cookie stands as a benchmark of modern home baking—a harmonious fusion of tradition and technique, where every gram and minute matters.
Ingredients Breakdown
Every ingredient in this recipe has been selected—not just for flavor—but for its precise functional role in achieving unparalleled thickness, structural integrity, and textural duality. Here’s why each one is non-negotiable:
- Unsalted Butter (1¼ cups / 285g, melted & cooled to 65–70°F): Melting (then carefully cooling) the butter eliminates air pockets, yielding a denser, less cakey crumb. The controlled temperature ensures optimal emulsification with sugars—too warm and eggs scramble; too cold and the mixture seizes. High-fat European-style butter (82–84% fat) is strongly recommended for richer flavor and superior spread resistance.
- Brown Sugar (1 cup packed dark / 220g): Dark brown sugar contains more molasses than light—adding acidity (which activates baking soda), moisture retention, deep caramel and toffee notes, and hygroscopic properties that keep centers soft for days. The “packed” measurement is critical for consistency.
- Granulated Sugar (½ cup / 100g): Provides sweetness, aids in crispness via caramelization, and balances the intense molasses flavor. Its lower moisture content helps form the signature shattery edge.
- Large Eggs (2, cold, plus 1 yolk): Cold eggs prevent premature melting of the cooled butter. The extra yolk adds fat, emulsifiers (lecithin), and moisture—enhancing richness, chewiness, and tenderness without adding excess water that could cause spreading.
- Pure Vanilla Extract (2 tsp): Use only real Madagascar or Tahitian vanilla—its complex phenolic compounds deepen warmth and round out bitterness. Imitation extract lacks nuance and can taste medicinal when baked at length.
- All-Purpose Flour (3 cups / 375g, spooned & leveled): Not bread flour (too much gluten = tough), not cake flour (too little structure = collapse). AP flour provides the Goldilocks gluten network—enough to hold height, yet tender enough to yield. Spooning—not scooping—prevents over-measuring by up to 20%.
- Baking Soda (1 tsp, aluminum-free): The sole leavener. Reacts instantly with molasses’ acidity to create CO₂ bubbles *during baking*, lifting the cookie just enough to stay lofty—not cakey—while contributing to browning and edge crispness. Aluminum-free ensures clean flavor.
- Fine Sea Salt (1¼ tsp): Enhances all other flavors, tempers sweetness, and strengthens gluten slightly. Fine grain dissolves evenly—no salty pockets. Do not substitute table salt (iodine imparts bitterness) or flaky salt (uneven distribution).
- High-Quality Semi-Sweet Chocolate (12 oz / 340g, coarsely chopped): Bars—not chips. Chips contain stabilizers (like soy lecithin and palm oil) that resist melting and create waxy pools. Chopped bars (60–65% cacao) melt fluidly into ribbons and puddles, delivering superior mouthfeel and complexity. Reserve 1 oz for topping.
- Flaky Sea Salt (for finishing, optional but highly recommended): A tiny pinch atop each cookie pre-bake enhances perception of sweetness and adds a luxurious, gourmet finish.
Step-by-Step Recipe
- Melt & Cool Butter: In a small saucepan over low heat, melt butter gently—do not brown or simmer. Pour into a heatproof bowl and cool uncovered at room temperature for 45–60 minutes, or until precisely 65–70°F (use an instant-read thermometer). Stir occasionally to release steam and ensure even cooling.
- Whisk Dry Ingredients: In a medium bowl, whisk together flour, baking soda, and fine sea salt until fully homogenous. Set aside.
- Cream Sugars & Butter: In a large stand mixer fitted with the paddle attachment (or sturdy handheld mixer), combine cooled melted butter, brown sugar, and granulated sugar. Mix on medium-low for 2 minutes—just until glossy and slightly thickened (not fluffy). Overmixing incorporates air and causes puffing instead of spreading control.
- Add Eggs & Vanilla: Add cold eggs and extra yolk one at a time, mixing on low just until incorporated (about 15 seconds each). Scrape bowl. Add vanilla; mix 10 seconds until uniform. Batter will look thick, glossy, and slightly curdled—this is correct.
- Gradually Incorporate Dry Ingredients: With mixer on low, add dry ingredients in three equal additions, mixing just until no flour streaks remain after each addition (~10–15 seconds). Do not overmix—gluten development begins here. Batter will be very thick and stiff.
- Fold in Chocolate: Using a flexible silicone spatula, gently fold in chopped chocolate until evenly distributed. Some small clumps are desirable—they’ll become glorious melty pockets.
- Chill Dough — Non-Negotiable: Cover bowl tightly with plastic wrap, pressing it directly onto the dough surface to prevent drying. Refrigerate for a minimum of 24 hours—and ideally 36–48 hours. This allows full hydration of flour (reducing spread), starch retrogradation (improving structure), and flavor development (molasses deepens, butter mellows, vanilla blooms). Do not skip or shorten this step—even 12 hours is insufficient for true thickness.
- Portion & Prep: Line two large baking sheets with parchment paper (no greasing). Using a ¼-cup (4-tablespoon / ~80g) ice cream scoop, portion dough into tight, tall balls. Place 4 per sheet, spaced at least 4 inches apart (they expand significantly). Gently press 3–4 extra chocolate chunks onto the top of each ball. Sprinkle each with a tiny pinch (⅛ tsp) of flaky sea salt.
- Preheat & Bake: Position oven racks in upper-middle and lower-middle positions. Preheat oven to 325°F (163°C) for full 30 minutes—accuracy is vital. Rotate sheets top-to-bottom and front-to-back halfway through baking. Bake for 18–21 minutes total, until edges are deeply golden brown, cracked, and set—but centers still look soft, puffed, and slightly underdone. They will not appear “done” visually—that’s the secret. Remove from oven.
- Cool Strategically: Let cookies rest on baking sheets for exactly 12 minutes. This allows carryover cooking to finish the centers while setting the edges. Then, carefully slide parchment with cookies onto wire racks. Cool completely (≈45 minutes) before serving. For ultimate gooeyness, serve slightly warm—within 2 hours of baking.
Tips
- Thermometer is Essential: Butter temperature dictates everything—invest in a reliable instant-read digital thermometer. Guessing leads to flat cookies or greasy puddles.
- Weigh Everything: Volume measurements for flour and sugars vary wildly. A kitchen scale ($20–$30) is the single best upgrade for consistent thickness and texture.
- Chill Dough in Balls: For convenience, portion dough *before* chilling. Place scooped balls on a parchment-lined tray, freeze 1 hour, then transfer to an airtight container. Chill up to 72 hours—or freeze up to 3 months. Bake straight from frozen—add 1–2 minutes to bake time.
- Oven Calibration Matters: Most home ovens run hot or cold. Use an independent oven thermometer to verify 325°F. Even 15°F variance ruins edge-to-center balance.
- Parchment > Silpat: Parchment paper provides ideal insulation and release. Silicone mats conduct heat too aggressively, causing over-browned bottoms and uneven rise.
- No Overcrowding: Baking more than 4 per standard half-sheet pan traps steam, inhibiting crisp edges and encouraging dome collapse.
- Rotate & Swap Racks: Home ovens have hot spots. Rotating sheets top-to-bottom *and* front-to-back at the 9-minute mark ensures even browning and rise.
- The “Jiggle Test”: At 18 minutes, gently nudge a cookie’s edge—if it feels firm and holds shape, but the center ripples softly like jelly, it’s perfect. If center looks liquid, bake 30 more seconds.
- Cooling Time is Baking Time: That 12-minute rest on the hot sheet is where 80% of the center’s final texture develops. Cutting short = soupy centers that won’t hold shape.
- Storage for Maximum Freshness: Store cooled cookies airtight at room temperature for up to 5 days. To revive, microwave 5 seconds. For longer storage, freeze baked cookies—thaw at room temp, then crisp 3 minutes at 325°F.
Variations and Customizations
While the core formula is sacred for achieving ultra-thickness, thoughtful variations can elevate without compromising structure:
- Dark Chocolate + Sea Salt: Use 70% dark chocolate and double the flaky salt topping. Add 1 tsp espresso powder to dry ingredients for enhanced depth.
- Double Chocolate: Replace ¼ cup (30g) of flour with unsweetened cocoa powder (Dutch-process preferred). Add ½ cup mini chocolate chips to the fold-in step for extra melty bursts.
- Nutty Crunch: Toast 1 cup walnuts or pecans (cooled completely) and fold in with chocolate. Adds textural contrast and nutty richness—omit if avoiding allergens.
- Oatmeal Swirl: Reduce flour to 2½ cups and add 1 cup old-fashioned rolled oats (not quick oats). Soak oats in 2 tbsp hot water for 5 minutes before folding in—adds hearty chew without sacrificing height.
- Brown Butter Version: Brown 1 cup of the butter (reserve ¼ cup un-browned for temperature control), cool completely, then proceed. Imparts deep, nutty, toasty complexity—reduce vanilla to 1 tsp to avoid overwhelming.
- Gluten-Free Adaptation: Substitute 3 cups (375g) certified GF all-purpose blend (Bob’s Red Mill 1-to-1 or King Arthur Measure-for-Measure). Add ½ tsp xanthan gum if blend doesn’t include it. Chill dough 48 hours minimum—GF flours need extra hydration time.
- Vegan Option: Replace butter with 1¼ cups refined coconut oil (solid at room temp); use flax eggs (2 Tbsp ground flax + 6 Tbsp water, chilled 15 min); choose vegan chocolate. Expect slightly less chew, but excellent thickness and crisp edges.
- Stuffed Center: Before portioning, roll ½ tsp of thick caramel (like dulce de leche) or peanut butter into a ball. Wrap in dough, seal seams, then chill. Creates a decadent molten core.
Health Considerations and Nutritional Value
Let’s address this honestly: These cookies are a celebration food—not a health food. But understanding their composition empowers mindful enjoyment:
- Caloric Density: One 4-ounce (113g) cookie contains approximately 620–680 calories—primarily from complex carbohydrates (brown sugar, flour), healthy fats (butter, chocolate), and protein (eggs, dairy). This is comparable to a gourmet sandwich or hearty bowl of pasta.
- Sugar Profile: Total sugar ≈ 42–46g per cookie, of which 28–32g is added sugar (from brown and granulated). While high, the dark brown sugar contributes trace minerals (calcium, potassium, iron) and antioxidants from molasses—not found in refined white sugar alone.
- Fat Composition: Butter provides saturated fat (≈28g), but also beneficial nutrients: vitamin A, K2 (if grass-fed), butyrate (anti-inflammatory), and conjugated linoleic acid (CLA). Chocolate contributes heart-healthy flavonoids and monounsaturated fats.
- Gluten & Allergens: Contains wheat, dairy, eggs, and soy (in most chocolate). Naturally free of nuts unless added—but always verify chocolate labels for cross-contamination warnings.
- Low Sodium: Despite salt’s prominence, total sodium is moderate (~380mg per cookie)—well within daily guidelines (2,300mg) and essential for flavor perception and electrolyte balance.
- Digestibility Notes: The 48-hour chill reduces phytic acid in flour, potentially improving mineral absorption. However, high-fat, high-sugar foods may trigger reflux or blood sugar spikes in sensitive individuals—pair with protein/fiber (e.g., Greek yogurt, apple slices) to mitigate.
- Mindful Indulgence Strategy: Enjoy 1 cookie slowly, mindfully, with tea or milk. Freeze extras to prevent overconsumption. The richness satisfies deeply—fewer cookies deliver greater pleasure than multiple thin ones.
Ingredients
- 1¼ cups (285g) unsalted butter, melted & cooled to 65–70°F
- 1 cup (220g) packed dark brown sugar
- ½ cup (100g) granulated sugar
- 2 large cold eggs
- 1 large cold egg yolk
- 2 tsp pure vanilla extract
- 3 cups (375g) all-purpose flour, spooned & leveled
- 1 tsp aluminum-free baking soda
- 1¼ tsp fine sea salt
- 12 oz (340g) high-quality semi-sweet chocolate bar (60–65% cacao), coarsely chopped (plus 1 oz reserved for topping)
- Flaky sea salt, for finishing
Directions
- Melt butter in a small saucepan over low heat until fully liquid. Pour into a heatproof bowl and cool uncovered at room temperature for 45–60 minutes, stirring occasionally, until precisely 65–70°F (use a thermometer).
- In a medium bowl, whisk together flour, baking soda, and fine sea salt until no streaks remain. Set aside.
- In the bowl of a stand mixer fitted with paddle attachment, combine cooled butter, brown sugar, and granulated sugar. Mix on medium-low for 2 minutes until glossy and thickened (do not overmix).
- Add cold eggs and yolk one at a time, mixing on low 15 seconds each until just incorporated. Add vanilla; mix 10 seconds. Batter will appear thick and slightly curdled.
- With mixer on low, add dry ingredients in three parts, mixing 10–15 seconds after each addition until no flour is visible. Stop immediately when combined.
- Using a silicone spatula, fold in chopped chocolate until evenly dispersed, with some small clusters remaining.
- Cover bowl tightly with plastic wrap, pressing directly onto dough surface. Refrigerate for 24–48 hours (minimum 24).
- Line two large baking sheets with parchment paper. Scoop ¼-cup (80g) portions of dough into tall, compact balls. Place 4 per sheet, spaced 4+ inches apart.
- Gently press reserved chocolate chunks onto tops of each dough ball. Sprinkle each with a pinch of flaky sea salt.
- Preheat oven to 325°F (163°C) for 30 minutes with racks in upper-middle and lower-middle positions.
- Bake for 18–21 minutes, rotating sheets top-to-bottom and front-to-back at 9 minutes, until edges are deeply golden and set but centers look soft and puffed.
- Remove from oven. Let cookies rest on baking sheets for exactly 12 minutes.
- Slide parchment paper with cookies onto wire racks. Cool completely (≈45 minutes) before serving. Best enjoyed slightly warm within 2 hours.
FAQ
- Why do my cookies spread too much?
- Most commonly: butter too warm (>75°F), insufficient chilling time (<24 hrs), wrong flour measurement (scooped instead of spooned), or oven too hot. Verify thermometer accuracy and weigh ingredients.
- Can I use chocolate chips instead of bars?
- You can—but you’ll sacrifice melt quality, texture, and depth. Chips contain anti-staling agents that inhibit proper flow. Bars yield fluid, glossy, complex puddles. It’s the #1 upgrade for authenticity.
- My centers are cakey, not gooey. What went wrong?
- Overmixing after adding flour develops gluten excessively. Also common: under-chilling (dough too warm), baking too long, or using too much baking soda (causes puffing). Stick to the 1 tsp and 24+ hour chill.
- Can I make these gluten-free or vegan?
- Yes—see Variations section. GF requires precise flour blends and extended chill time. Vegan versions work well but yield slightly less chew due to fat structure differences.
- How do I store dough or baked cookies?
- Dough: Airtight container in fridge 3–5 days; freezer up to 3 months (bake from frozen +1–2 min). Baked: Airtight at room temp 5 days; freeze up to 3 months. Revive by warming 5 sec microwave or 3 min at 325°F.
- Why bake at 325°F instead of 350°F or 375°F?
- Lower temperature allows slow, even heat penetration—setting edges before centers overinflate or dry. Higher temps cause rapid steam expansion, leading to doming, cracking, or hollow centers.
- Can I double the batch?
- Absolutely—just ensure your mixer bowl is large enough (5-qt minimum for double). Chill dough in two separate containers to ensure even cooling. Bake in batches—never overcrowd pans.
- What if I don’t have a stand mixer?
- A sturdy handheld mixer works perfectly. For hand mixing, use a heavy-duty silicone spatula and “press-and-fold” method—avoid vigorous stirring to prevent gluten overdevelopment.
- Why add an extra yolk?
- The extra yolk adds fat, emulsifiers, and moisture without extra water—boosting chewiness, tenderness, and richness while maintaining structural integrity. Egg whites would increase spread and cakeyness.
- Can kids help make these?
- Yes—with supervision! Great for teaching measuring, mixing, chilling discipline, and oven safety. Let them fold chocolate, scoop dough, and sprinkle finishing salt. A joyful, multi-sensory learning experience.
Summary
These Ultra Thick Bakery Style Chocolate Chip Cookies redefine homemade indulgence—achieving towering height, shatteringly crisp edges, and centers so luxuriously gooey they pool with molten chocolate and caramelized brown sugar. Every step—from precisely cooled melted butter and 48-hour refrigeration to strategic chilling, low-and-slow baking, and intentional underbaking—is engineered for one goal: professional bakery excellence in your own kitchen.
They’re not just cookies—they’re edible architecture, rich with history, grounded in food science, and endlessly customizable, proving that extraordinary depth, texture, and joy can emerge from humble ingredients, meticulous technique, and the patience to let flavor evolve.