Introduction
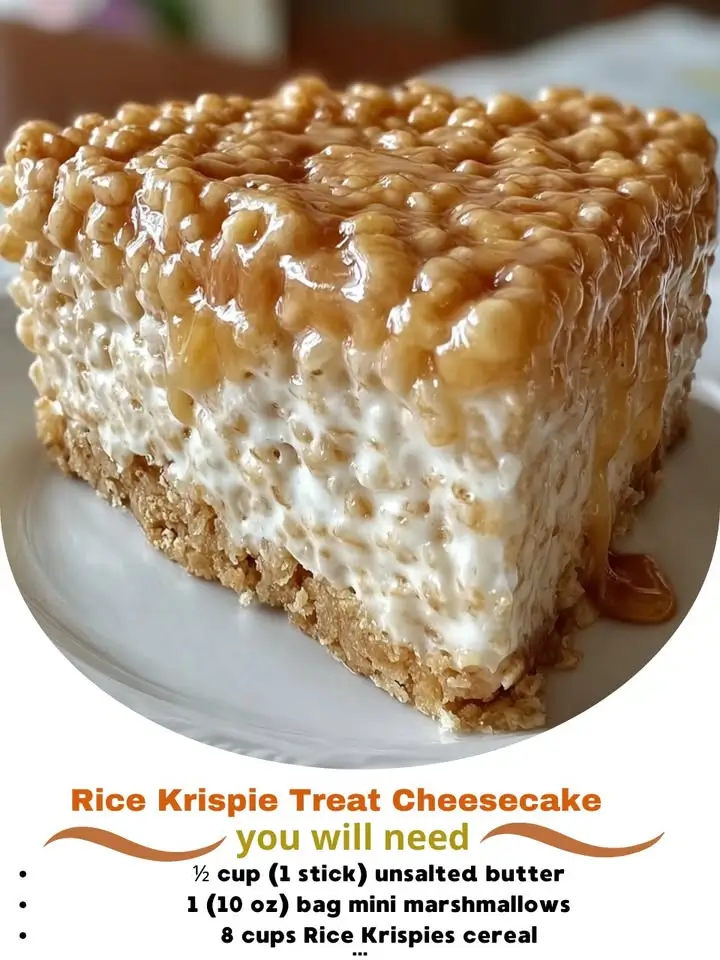
If you’re a fan of classic Rice Krispie Treats and creamy cheesecake, then this indulgent fusion dessert—Rice Krispie Treat Cheesecake—is about to become your new favorite. Combining the nostalgic crunch and sweetness of marshmallow-and-cereal squares with the rich, velvety texture of a traditional New York-style cheesecake, this unique dessert delivers the best of both worlds. Perfect for birthdays, holidays, or just because, this show-stopping treat is not only delicious but also surprisingly simple to make. Whether you’re an experienced baker or a curious beginner, this recipe will guide you through every step to create a dessert that’s as fun to make as it is to eat.
The History
The story of the Rice Krispie Treat begins in 1939 when Kellogg’s introduced the now-iconic recipe on the back of their Rice Krispies cereal box. Created by Malitta Jensen and Mildred Day at the Kellogg Company, the original “Rice Krispies Marshmallow Squares” were designed as a promotional tool to boost cereal sales during the Great Depression. Their simplicity, affordability, and kid-friendly appeal made them an instant hit across American households.
Cheesecake, on the other hand, has ancient roots—dating back to Greece, where it was served to athletes during the first Olympic Games in 776 BCE. Over centuries, the dessert evolved, with modern versions emerging in places like New York, where cream cheese became a staple ingredient in the early 20th century.
Fast forward to today, and culinary creativity has led to countless hybrid desserts. The Rice Krispie Treat Cheesecake is a modern twist that marries two beloved classics into one decadent confection. While its exact origin is hard to trace, food bloggers and dessert enthusiasts began popularizing this mashup in the 2010s, combining the crispy, gooey base of Rice Krispie Treats with a luscious cheesecake layer on top. It’s a testament to how nostalgia and innovation can come together in the most delicious ways.
Ingredients Breakdown
This recipe features two distinct layers—the bottom being a modified Rice Krispie Treat base, and the top a silky smooth cheesecake filling. Here’s a detailed breakdown of each component:
Rice Krispie Treat Base Ingredients:
- Butter (4 tablespoons): Provides richness and helps bind the cereal and marshmallows. Unsalted butter is preferred for better flavor control.
- Mini Marshmallows (6 cups): Melt down to form the sticky matrix that holds the cereal together. Mini ones melt more evenly than large.
- Rice Krispies Cereal (6 cups): The star of the show. Light, airy, and crisp, giving the base its signature texture.
- Salt (¼ teaspoon): Enhances overall flavor and balances the sweetness.
- Vanilla Extract (1 teaspoon): Adds depth and warmth to the base layer.
Cheesecake Filling Ingredients:
- Cream Cheese (32 oz or 4 blocks): Full-fat, brick-style cream cheese is essential for a rich, smooth texture. Make sure it’s softened to room temperature before mixing.
- Granulated Sugar (¾ cup): Sweetens the cheesecake without overpowering the cream cheese flavor.
- Large Eggs (4): Provide structure and help the cheesecake set properly. Add one at a time for even incorporation.
- Sour Cream (½ cup): Adds tanginess and moisture, contributing to a creamy mouthfeel.
- Vanilla Extract (2 teaspoons): Deepens the flavor profile of the cheesecake.
- All-Purpose Flour (2 tablespoons): A small amount helps stabilize the filling and prevent cracking.
Optional Garnishes & Toppings:
- Additional melted marshmallows drizzled on top
- Crushed Rice Krispies for crunch
- Chocolate drizzle or caramel sauce
- Fresh berries or fruit compote
- Whipped cream or whipped topping
Step-by-Step Recipe
- Prepare the Pan: Preheat your oven to 350°F (175°C). Grease a 9-inch springform pan thoroughly with butter or non-stick spray. For extra security against leaks, wrap the outside bottom and sides of the pan tightly with aluminum foil. This prevents water from seeping in if using a water bath later.
- Make the Rice Krispie Base: In a large saucepan over low heat, melt the butter completely. Add the mini marshmallows and stir continuously until fully melted and smooth. Remove from heat and stir in the vanilla extract and salt. Gently fold in the Rice Krispies cereal until evenly coated. The mixture will be sticky and warm.
- Press Into Pan: Transfer the Rice Krispie mixture into the prepared springform pan. Using a piece of parchment paper or a spatula greased with butter, press the mixture firmly and evenly into the bottom of the pan. Aim for a compact, level layer about ½ inch thick. Set aside to cool slightly while preparing the cheesecake batter.
- Prepare the Cheesecake Batter: In a large mixing bowl, beat the softened cream cheese on medium speed until smooth and fluffy (about 2 minutes). Gradually add the sugar and continue beating until well combined and no lumps remain. Scrape down the sides of the bowl as needed.
- Add Wet Ingredients: Mix in the sour cream and vanilla extract until incorporated. Then, add the eggs one at a time, beating gently after each addition just until blended. Do not overmix—this helps prevent cracks in the finished cheesecake.
- Incorporate Flour: Sift in the flour and mix on low speed until just combined. Overmixing at this stage can incorporate too much air and lead to cracking.
- Pour Over Base: Carefully pour the cheesecake batter over the cooled Rice Krispie base. Use a spatula to smooth the top into an even layer.
- Bake the Cheesecake: Place the springform pan into a larger roasting pan. Fill the roasting pan with hot water until it reaches halfway up the sides of the springform pan (this is the water bath method, which helps ensure even baking and prevents cracking). Carefully transfer to the preheated oven.
- Bake for 55–65 Minutes: The cheesecake is done when the edges are set but the center still has a slight jiggle—like Jell-O—when gently shaken. Avoid opening the oven door during baking to prevent temperature fluctuations.
- Cool Gradually: Turn off the oven and crack the door open slightly. Let the cheesecake cool inside for 1 hour. This slow cooling process minimizes thermal shock and reduces the chance of surface cracks.
- Chill Overnight: Remove the pan from the oven and water bath. Run a knife around the edge to loosen, but do not remove the ring yet. Refrigerate for at least 6 hours, preferably overnight, to allow the cheesecake to fully set.
- Unmold and Serve: Once chilled, carefully release the springform clamp and lift off the ring. Slice with a sharp, warm knife (dipped in hot water and wiped dry between cuts) for clean slices. Garnish as desired and serve cold.
Tips
- Use Room-Temperature Ingredients: Especially cream cheese and eggs—this ensures a lump-free, silky batter.
- Avoid Overmixing: Once you add the eggs, mix only until just combined. Overbeating incorporates excess air, leading to cracks.
- Don’t Skip the Water Bath: It provides gentle, even heat and maintains moisture in the oven—key for a smooth, creamy texture.
- Prevent Leaks: Double-wrap the springform pan in heavy-duty foil or use a slow cooker liner for added protection.
- Let It Rest: Cooling slowly in the oven and chilling overnight improves texture and makes slicing easier.
- Grease the Pan Well: Since the Rice Krispie base is sticky, proper greasing prevents sticking and simplifies removal.
- Test Doneness Properly: The center should wobble slightly—it will firm up as it chills.
Variations and Customizations
This versatile recipe can be adapted in numerous creative ways to suit different tastes and occasions:
- Flavored Bases: Add a few drops of food coloring to the Rice Krispie mixture (pink for Valentine’s, green for St. Patrick’s) or mix in sprinkles for a festive touch.
- Chocolate Swirl: Melt ½ cup chocolate chips and swirl into the cheesecake batter before baking for a marbled effect.
- Fruity Twist: Top with a layer of raspberry jam or fresh berry compote after chilling.
- S’mores Version: Mix crushed graham crackers into the Rice Krispie base and add mini marshmallows and chocolate chips to the cheesecake batter.
- Peanut Butter Lover’s: Swirl in ⅓ cup peanut butter before baking or add it to the base for a Reese’s-inspired treat.
- Gluten-Free Option: Use certified gluten-free Rice Krispies and ensure all other ingredients are GF-compliant.
- Vegan Adaptation: Substitute dairy-free margarine, vegan marshmallows, and plant-based cream cheese alternatives (results may vary).
- Mini Versions: Make individual servings using muffin tins lined with paper liners for bite-sized treats.
- Crustless Shortcut: Skip the Rice Krispie base and pour the cheesecake into a regular graham cracker crust for a quicker version.
Health Considerations and Nutritional Value
While undeniably delicious, this dessert is high in sugar and fat, so it’s best enjoyed in moderation. Here’s a general nutritional overview per serving (assuming 12 servings):
- Calories: ~480–520 kcal
- Total Fat: ~30g (including 18g saturated fat)
- Cholesterol: ~120mg
- Sodium: ~400–500mg
- Total Carbohydrates: ~45g
- Sugars: ~35g
- Protein: ~8g
Health Notes:
- Lactose-intolerant individuals should consider lactose-free or plant-based substitutes.
- Those managing diabetes should be cautious due to the high sugar content; sugar substitutes like erythritol or monk fruit can be used, though texture may change.
- To reduce fat, low-fat cream cheese and sour cream can be used, but the texture may be less creamy.
- The Rice Krispie base contains refined carbs and minimal fiber—pairing with fresh fruit can add nutrients.
- Portion control is key. Serve smaller slices and balance with lighter meals.
Ingredients
Rice Krispie Treat Base:
- 4 tablespoons unsalted butter
- 6 cups mini marshmallows
- 6 cups Rice Krispies cereal
- ¼ teaspoon salt
- 1 teaspoon vanilla extract
Cheesecake Filling:
- 32 oz (4 packages) full-fat cream cheese, softened
- ¾ cup granulated sugar
- 4 large eggs
- ½ cup sour cream
- 2 teaspoons vanilla extract
- 2 tablespoons all-purpose flour
Directions
- Preheat oven to 350°F (175°C). Grease a 9-inch springform pan and wrap the outside with aluminum foil.
- Melt butter in a large saucepan over low heat. Add marshmallows and stir until completely melted and smooth.
- Remove from heat. Stir in vanilla and salt. Fold in Rice Krispies until fully coated.
- Press mixture firmly into the bottom of the prepared pan. Cool slightly.
- In a large bowl, beat cream cheese until smooth. Add sugar and beat until creamy.
- Mix in sour cream and vanilla. Add eggs one at a time, mixing just until combined.
- Sift in flour and mix until smooth. Do not overbeat.
- Pour batter over Rice Krispie base and smooth the top.
- Place springform pan in a roasting pan. Add hot water to reach halfway up the sides.
- Bake for 55–65 minutes until edges are set and center jiggles slightly.
- Turn off oven, crack door open, and let cool inside for 1 hour.
- Remove from oven and water bath. Chill in refrigerator for at least 6 hours or overnight.
- Release springform and slice with a warm knife. Garnish and serve cold.
FAQ
Can I make this ahead of time?
Yes! This cheesecake actually benefits from being made a day in advance. Chilling overnight enhances flavor and texture.
Why did my cheesecake crack?
Cracks are usually caused by overmixing, rapid cooling, or too much heat. Using a water bath and gradual cooling helps prevent this.
Can I freeze Rice Krispie Treat Cheesecake?
Yes. Wrap individual slices or the whole cake tightly in plastic and foil. Freeze for up to 2 months. Thaw overnight in the fridge before serving.
Can I use store-bought Rice Krispie Treats for the base?
Technically yes, but they may not hold up well under the wet cheesecake layer. Homemade ensures a firmer, more cohesive base.
Is a water bath really necessary?
Highly recommended. It prevents cracking and ensures a creamy texture. If skipped, monitor closely and expect possible surface imperfections.
Can I make this without a springform pan?
It’s difficult. A springform allows clean release without damaging the layers. Alternatives include a deep pie dish, but unmolding may be tricky.
How long does it last in the fridge?
Up to 5 days when stored covered in the refrigerator.
Can I add mix-ins to the cheesecake?
Yes! Fold in chocolate chips, chopped candies, or swirl in fruit preserves before baking.
Summary
The Rice Krispie Treat Cheesecake is a delightful fusion of childhood nostalgia and elegant dessert craftsmanship, combining a crunchy, sweet cereal base with a luxuriously smooth cheesecake topping. Easy to customize and perfect for any celebration, this crowd-pleasing dessert is sure to become a family favorite.