Introduction
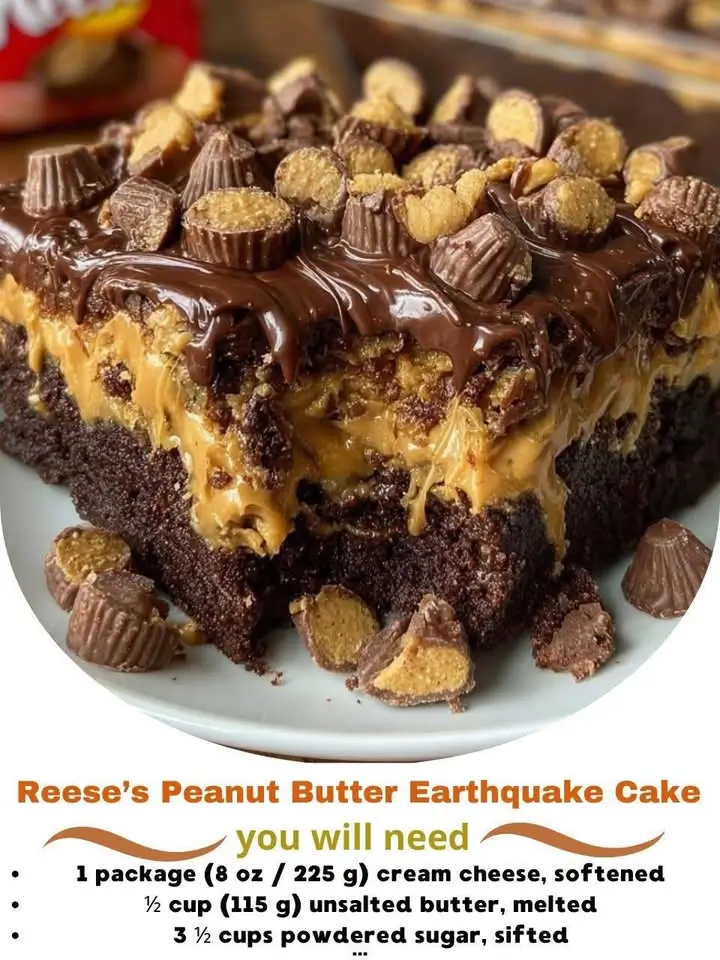
Welcome to a decadent dessert experience that combines the rich, creamy essence of peanut butter with the deep, indulgent flavor of chocolate in one unforgettable treat—Reese’s Peanut Butter Earthquake Cake. This cake isn’t just a dessert; it’s a seismic event on your taste buds. With its luscious layers, gooey peanut butter filling, and a crackled chocolate top that gives way to moist, fudgy goodness beneath, this cake lives up to its name by creating an earthquake of flavor in every bite. Whether you’re preparing it for a special occasion, a family gathering, or simply treating yourself to something extraordinary, Reese’s Peanut Butter Earthquake Cake is guaranteed to be the star of the table.
The History
The origins of the Earthquake Cake trace back to American home baking traditions, particularly popularized during the mid-20th century when convenience ingredients and bold flavors began dominating kitchen experiments. Also known as “Texas Sheet Cake” or “Crack Cake,” this dessert earned its “earthquake” nickname due to the dramatic cracking effect that occurs on the surface during baking—a visual representation of the dessert’s intense, eruptive flavor profile. Over time, bakers began customizing the base recipe, infusing regional twists and favorite candies. The Reese’s Peanut Butter version emerged as a cult favorite, marrying the nostalgic appeal of Reese’s Peanut Butter Cups with the already beloved texture and richness of the original Earthquake Cake. Today, it stands as a modern classic, often shared at potlucks, bake sales, and holiday feasts, cherished for its simplicity, depth of flavor, and crowd-pleasing power.
Ingredients Breakdown
To truly appreciate the magic of Reese’s Peanut Butter Earthquake Cake, let’s break down the ingredients and understand their roles in building its signature texture and flavor:
- All-Purpose Flour: Provides the structural foundation of the cake, giving it body without making it too dense.
- Granulated Sugar & Brown Sugar: Granulated sugar sweetens and helps create a light crumb, while brown sugar adds moisture, chewiness, and a hint of molasses depth.
- Cocoa Powder: High-quality unsweetened cocoa powder delivers the rich chocolate backbone essential for the cake’s fudgy character.
- Baking Soda and Salt: Baking soda acts as a leavening agent, helping the cake rise slightly and crack dramatically. Salt enhances all the other flavors, balancing sweetness and richness.
- Eggs: Bind the ingredients together and contribute to the cake’s structure and moistness.
- Vegetable Oil: Keeps the cake incredibly moist and tender, far more so than butter-based cakes, which can firm up when cooled.
- Vanilla Extract: Adds a warm, aromatic complexity that complements both chocolate and peanut butter.
- Buttermilk: Reacts with baking soda to create lift and tenderness, while also adding a subtle tang that cuts through the sweetness.
- Peanut Butter (creamy): The heart of the filling, providing a smooth, nutty layer that melts into the cake as it bakes.
- Heavy Cream or Whipping Cream: Blended with peanut butter to create a silky, pourable filling that spreads evenly and sinks slightly into the batter.
- Reese’s Peanut Butter Cups (chopped): These are non-negotiable—their melty, candy-center surprise elevates every bite. Use full-size or mini cups, but always chop them for even distribution.
- Chocolate Chips (semi-sweet or milk): Sprinkled on top before baking, they melt into glossy pools that enhance the cracked appearance and add bursts of chocolatey joy.
- Optional Toppings: Crushed peanuts, extra Reese’s pieces, or a drizzle of melted chocolate or peanut butter for garnish.
Each ingredient plays a pivotal role in achieving the perfect balance between gooey, fudgy, nutty, and crunchy—making this cake a masterpiece of texture and taste.
Step-by-Step Recipe
- Preheat and Prepare: Begin by preheating your oven to 350°F (175°C). Grease a 9×13-inch baking pan thoroughly and line it with parchment paper for easy removal. Set aside.
- Mix Dry Ingredients: In a large mixing bowl, whisk together 1 ¾ cups all-purpose flour, 1 ½ cups granulated sugar, ½ cup brown sugar, ¾ cup unsweetened cocoa powder, 1 teaspoon baking soda, and ½ teaspoon salt until fully combined and no lumps remain.
- Combine Wet Ingredients: In another bowl, beat 2 large eggs, then add ½ cup vegetable oil, 1 teaspoon vanilla extract, and 1 cup buttermilk. Whisk until smooth and well incorporated.
- Create the Batter: Gradually pour the wet ingredients into the dry ingredients. Stir gently with a spatula or whisk until just combined. Avoid overmixing to keep the cake tender. The batter will be thick but pourable.
- Transfer to Pan: Pour the chocolate batter into the prepared 9×13-inch pan. Use an offset spatula to spread it evenly into the corners.
- Prepare the Peanut Butter Filling: In a medium microwave-safe bowl, combine 1 cup creamy peanut butter and ¼ cup heavy cream. Microwave in 20-second intervals, stirring between each, until the mixture is smooth and pourable. Alternatively, heat gently in a saucepan over low heat.
- Add the Filling: Drizzle the warm peanut butter mixture evenly over the chocolate batter. Use a knife or skewer to gently swirl it into the top layer—do not mix it in completely. This creates pockets of peanut butter that will sink and meld as the cake bakes.
- Top with Chocolate and Candy: Sprinkle 1 cup semi-sweet chocolate chips evenly over the surface, followed by 1 ½ cups chopped Reese’s Peanut Butter Cups. Press them lightly into the batter so they don’t burn on top.
- Bake to Perfection: Place the pan in the center of the preheated oven. Bake for 30–35 minutes, or until a toothpick inserted into the edges comes out clean (the center may still be slightly soft due to the peanut butter layer, which is normal).
- Cool and Set: Remove the cake from the oven and let it cool completely in the pan on a wire rack—this takes about 1.5 to 2 hours. Cooling allows the layers to set and makes slicing cleaner.
- Serve: Once cooled, cut into squares. For best presentation, wipe the knife between cuts. Serve as-is or with optional toppings like whipped cream, peanut butter drizzle, or a scoop of vanilla ice cream.
Tips
- Don’t Overbake: The cake should look cracked and set around the edges, but still slightly soft in the center. It continues cooking from residual heat after removal from the oven.
- Use Room Temperature Eggs: They blend more smoothly into the batter, reducing the risk of curdling when mixed with oil and buttermilk.
- Chop Reese’s Cups Evenly: Uniform pieces ensure consistent flavor in every bite. A sharp knife works best—don’t forget to include the wrappers if using full-size cups (just remove them before serving).
- Swirl Gently: When adding the peanut butter layer, use a few figure-eight motions to create marbling without sinking it too deeply.
- Cool Completely: This cake firms up significantly as it cools. Cutting too early results in messy, gooey slices—even if that’s tempting!
- Storage Tip: Keep leftovers covered at room temperature for up to 2 days or refrigerate for up to 5 days. Reheat individual slices briefly in the microwave for a warm, fresh-baked feel.
- Pan Size Matters: Stick to a 9×13-inch pan. Using a smaller pan will increase baking time and risk overflow; larger pans yield thinner, drier results.
- Enhance Flavor: Add a pinch of cinnamon or espresso powder to the dry ingredients to deepen the chocolate notes.
Variations and Customizations
One of the joys of Reese’s Peanut Butter Earthquake Cake is how easily it can be adapted to suit different tastes and dietary needs:
- Nut-Free Version: Replace peanut butter with sunflower seed butter and omit Reese’s cups or substitute with M&Ms or dairy-free chocolate chunks.
- Gluten-Free Option: Swap all-purpose flour for a high-quality gluten-free 1:1 baking blend. Ensure cocoa powder and other ingredients are certified gluten-free.
- Dairy-Free Adaptation: Use coconut cream instead of heavy cream, almond or oat milk with 1 tablespoon lemon juice as a buttermilk substitute, and dairy-free chocolate chips.
- Vegan Earthquake Cake: Combine gluten-free flour, flax eggs (2 tablespoons ground flaxseed + 6 tablespoons water), coconut oil, maple syrup, and plant-based milk. Use vegan chocolate and peanut butter cups.
- Mini Earthquake Bars: Bake in a jelly roll pan or muffin tin for portable treats. Adjust baking time accordingly—bars take 20–25 minutes; cupcakes about 18–22 minutes.
- Flavor Twists: Add caramel swirls, crushed pretzels for salty crunch, banana slices, or a layer of Nutella for a gourmet twist.
- Alcohol Infusion: Soak the cake lightly with a simple syrup infused with bourbon or Baileys for an adult version.
- Frosting Finish: While traditional versions skip frosting, you can top cooled cake with peanut butter buttercream or chocolate ganache for extra decadence.
Health Considerations and Nutritional Value
While Reese’s Peanut Butter Earthquake Cake is undeniably a treat, understanding its nutritional profile helps in enjoying it mindfully:
- Calories: One square (1/12 of cake) contains approximately 380–450 calories, depending on size and ingredients.
- Fats: High in fat due to peanut butter, oil, chocolate, and whole eggs. Contains both healthy monounsaturated fats (from peanut butter and oil) and saturated fats (from chocolate and dairy). Total fat per serving: ~20–25g.
- Sugars: Significant added sugars from granulated sugar, brown sugar, and Reese’s cups. Each serving has roughly 35–45g of sugar—equivalent to several candy bars.
- Protein: Moderate protein content (~6–8g per serving) thanks to eggs, peanut butter, and milk components.
- Carbohydrates: High in carbs (~50–60g per serving), primarily from refined flour and sugars.
- Sodium: Contains about 250–350mg per serving due to peanut butter, salt, and processed chocolate.
Considerations:
- This cake is best enjoyed occasionally as part of a balanced diet.
- Portion control is key—serve smaller squares, perhaps with fruit or yogurt on the side.
- Those with peanut allergies must avoid this recipe unless adapted safely with alternative butters.
- Diabetics should consume sparingly and consider sugar substitutes like erythritol or monk fruit blends, though texture may vary.
- For a lighter version, try using applesauce in place of half the oil, low-sugar peanut butter, and dark chocolate with higher cocoa content.
Ingredients
- 1 ¾ cups (220g) all-purpose flour
- 1 ½ cups (300g) granulated sugar
- ½ cup (100g) packed brown sugar
- ¾ cup (65g) unsweetened cocoa powder (preferably Dutch-process)
- 1 teaspoon baking soda
- ½ teaspoon salt
- 2 large eggs (room temperature)
- ½ cup (120ml) vegetable oil (or canola oil)
- 1 teaspoon pure vanilla extract
- 1 cup (240ml) buttermilk (shake well before measuring)
- 1 cup (250g) creamy peanut butter (not natural or oily style)
- ¼ cup (60ml) heavy cream or whipping cream
- 1 cup (175g) semi-sweet chocolate chips
- 1 ½ cups (about 10–12) Reese’s Peanut Butter Cups, chopped
- Optional: Crushed peanuts, extra chocolate drizzle, or whipped cream for garnish
Directions
- Preheat oven to 350°F (175°C). Grease and line a 9×13-inch baking pan with parchment paper. Set aside.
- In a large bowl, sift together flour, granulated sugar, brown sugar, cocoa powder, baking soda, and salt. Whisk until uniform.
- In a separate bowl, beat eggs, then add oil, vanilla, and buttermilk. Mix until smooth.
- Pour wet ingredients into dry ingredients. Stir gently until just combined. Do not overmix.
- Transfer batter to prepared pan, spreading evenly with a spatula.
- In a microwave-safe bowl, combine peanut butter and heavy cream. Heat in 20-second bursts, stirring between, until smooth and fluid.
- Drizzle warm peanut butter mixture over the batter. Use a knife to gently swirl in a figure-eight pattern.
- Sprinkle chocolate chips and chopped Reese’s Peanut Butter Cups evenly over the top. Lightly press into the surface.
- Bake for 30–35 minutes, until edges are set and a toothpick in the edge comes out clean.
- Remove from oven and cool completely in the pan on a wire rack (1.5–2 hours).
- Cut into squares using a sharp knife, wiping blade between cuts for clean edges.
- Serve plain or with optional garnishes. Store leftovers covered at room temperature or refrigerated.
FAQ
Can I make this cake ahead of time?
Yes! Bake and cool completely, then cover and store at room temperature for up to 2 days or refrigerate for 5 days. Bring to room temperature before serving for best texture.
Why is my cake too gooey in the middle?
This is likely due to underbaking or cutting too soon. Remember, the center stays soft because of the peanut butter layer. Always cool completely before slicing.
Can I freeze Reese’s Peanut Butter Earthquake Cake?
Absolutely. Wrap tightly in plastic and foil, then freeze for up to 3 months. Thaw overnight in the refrigerator and bring to room temperature before serving.
Can I use natural peanut butter?
Not recommended. Natural peanut butter is often oily and less stable, which can cause separation and greasiness in the cake. Stick to shelf-stable brands like Jif or Skippy.
What can I use instead of buttermilk?
Mix 1 cup milk with 1 tablespoon lemon juice or white vinegar. Let sit 5–10 minutes until slightly curdled. Works perfectly as a substitute.
Can I double the recipe?
Only if you have two 9×13 pans. Doubling in one pan leads to uneven baking and potential overflow. Better to make two separate batches.
Is this cake supposed to be dense?
Yes, it’s meant to be fudgy and dense, almost like a cross between brownies and a coffee cake. It’s not light or fluffy, which is part of its charm.
Can I add nuts?
Of course! Chopped peanuts or pecans sprinkled on top with the Reese’s cups add a delightful crunch. Just be mindful of allergies.
Summary
Reese’s Peanut Butter Earthquake Cake is a rich, fudgy chocolate cake layered with melty peanut butter and studded with chunks of Reese’s Peanut Butter Cups—creating a dessert that trembles with flavor in every bite. Easy to make and impossible to resist, it’s the ultimate treat for chocolate and peanut butter lovers alike.