Introduction
If you’re a fan of rich chocolate, creamy peanut butter, and decadent desserts that feel like a warm hug in cake form, then Reese’s Peanut Butter Earthquake Cake is your new favorite treat. Known for its wobbly, jiggly layers and explosive flavor, this dessert earned its name because it literally quakes when you tap the pan—thanks to its soft, custard-like center. Originating from Southern home kitchens and popularized through church potlucks and family gatherings, this cake has become a beloved staple at parties, holidays, and bake sales across the United States. With its irresistible combination of chocolate cake mix, sweetened condensed milk, peanut butter cups, and whipped topping, it’s no wonder this dessert continues to win hearts one bite at a time.
The History
The origins of the Earthquake Cake trace back to the mid-20th century American South, where simple, pantry-friendly recipes reigned supreme. It was during the post-war era that cake mixes became widely available and affordable, sparking a wave of creative dessert experimentation among home bakers. The term “Earthquake Cake” refers not only to the cake’s trembling texture but also to the dramatic effect it has on taste buds. While early versions were typically made with pecans or walnuts and a streusel topping, evolving into what some call “Texas Sheet Cake,” the Reese’s Peanut Butter variation emerged in the 1980s and 1990s as peanut butter candies gained popularity.
Reese’s Peanut Butter Cups, introduced by H.B. Reese in the 1920s and later acquired by Hershey’s, became iconic symbols of American candy culture. Their integration into baked goods was inevitable. Combining them with the already tremulous Earthquake Cake base created a fusion of textures and flavors that elevated the dessert into legendary status. Over time, bloggers, food network hosts, and Pinterest enthusiasts helped spread the recipe far beyond regional borders, turning it into a nationwide sensation. Today, Reese’s Peanut Butter Earthquake Cake stands as a nostalgic yet modern indulgence—a perfect blend of convenience, creativity, and comfort.
Ingredients Breakdown
The magic of Reese’s Peanut Butter Earthquake Cake lies in its simplicity and strategic layering of ingredients. Each component plays a crucial role in building the dessert’s signature texture and flavor profile:
- Chocolate Cake Mix: Serves as the base structure, providing a moist, fudgy foundation without requiring eggs or oil (since other wet ingredients compensate).
- Sweetened Condensed Milk: Adds richness, sweetness, and creaminess while helping create the custard-like middle layer that gives the cake its quake.
- Peanut Butter: Offers a smooth, nutty depth; preferably creamy and natural-style for balance, though any brand works.
- Reese’s Peanut Butter Cups: The star ingredient—chopped into chunks for melty pockets of chocolate and peanut butter bliss.
- Cool Whip or Whipped Topping: Lightens the top layer, adding airy sweetness and contrast to the dense bottom layers.
- Vanilla Pudding Mix (optional): Some variations include instant vanilla pudding to enhance thickness and flavor complexity.
- Heavy Cream or Milk (as needed): Used to adjust consistency, especially when blending peanut butter or folding in whipped topping.
- Mini Reese’s Pieces (optional garnish): For extra crunch and visual appeal on top.
These ingredients work together harmoniously, relying on minimal prep and maximum impact—perfect for last-minute desserts or crowd-pleasing occasions.
Step-by-Step Recipe
- Preheat Oven: Begin by preheating your oven to 350°F (175°C). Grease a 9×13-inch baking dish thoroughly with butter or non-stick spray to prevent sticking.
- Prepare Chocolate Base: In a large mixing bowl, combine one box (approximately 18.5 oz) of devil’s food or chocolate cake mix with 1 cup of water, ½ cup of vegetable oil, and 3 large eggs. Beat with an electric mixer on medium speed for about 2 minutes until smooth and well-blended. Pour this batter into the prepared pan and spread evenly with a spatula.
- Create Peanut Butter Layer: In a separate bowl, beat 1 cup of creamy peanut butter with 1 can (14 oz) of sweetened condensed milk until smooth and creamy. You may add ½ teaspoon of vanilla extract for enhanced flavor. Gently spoon dollops of this mixture over the chocolate base and use a knife to swirl it lightly—don’t overmix.
- Add Reese’s Layer: Chop approximately 1.5 cups of full-sized Reese’s Peanut Butter Cups into small pieces. Sprinkle them evenly over the peanut butter-swirled layer, pressing down gently so they adhere slightly.
- Bake the Cake: Place the pan in the center of the preheated oven and bake for 30–35 minutes. The edges should be set and slightly pulled away from the sides, while the center remains soft and slightly jiggly—this is key for the earthquake effect!
- Cool Completely: Remove from oven and allow the cake to cool on a wire rack for at least 1 hour. Then transfer to the refrigerator and chill for a minimum of 3 hours, preferably overnight. This chilling step is essential for setting the layers and enhancing the quake.
- Top with Whipped Cream: Once chilled, spread 1 tub (8 oz) of frozen whipped topping (thawed), such as Cool Whip, evenly over the surface. For a homemade touch, you can use freshly whipped cream sweetened with powdered sugar and vanilla.
- Garnish and Serve: Sprinkle chopped mini Reese’s cups or Reese’s Pieces on top for decoration and added flavor. Slice with a sharp knife dipped in hot water for clean cuts.
Tips
- Don’t Overbake: The center should remain soft and underdone-looking—it will firm up during chilling. Overbaking leads to a dry, crumbly texture instead of the desired wobble.
- Use Room Temperature Eggs: They blend more smoothly into the cake batter, ensuring a uniform texture.
- Chill Thoroughly: Skipping the refrigeration step means missing out on the true “earthquake” experience. Cold temperatures intensify the jiggle and meld the flavors.
- Swirl Gently: When combining the peanut butter and cake layers, a few gentle swirls are enough. Too much mixing dilutes the visual appeal and structural integrity.
- Sharp Knife Technique: For clean slices, dip your knife in hot water and wipe it dry between each cut. This prevents sticking and maintains neat edges.
- Make Ahead Friendly: This cake actually tastes better the next day! Prepare it a day in advance for stress-free entertaining.
- Double the Fun: Consider doubling the recipe for a larger crowd using a half-sheet pan (18×13 inches), adjusting baking time accordingly.
Variations and Customizations
While the classic Reese’s Peanut Butter Earthquake Cake is undeniably delicious, there are countless ways to personalize it based on dietary preferences, seasonal themes, or creative flair:
- Nut-Free Version: Replace peanut butter with sunflower seed butter and use chocolate cups without peanuts (like SunButter Bliss Bits or allergen-safe alternatives).
- Dairy-Free Option: Use dairy-free chocolate cake mix, coconut-based sweetened condensed milk, vegan whipped topping, and dairy-free Reese’s alternatives (available in specialty stores).
- Gluten-Free Twist: Substitute regular cake mix with a gluten-free chocolate version and ensure all other ingredients are certified GF.
- Flavor Infusions: Add a shot of espresso powder to the cake mix for mocha notes, or a tablespoon of bourbon to the peanut butter layer for adult sophistication.
- Fruit Fusion: Layer sliced bananas or strawberries beneath the peanut butter for a PB&J-inspired twist.
- Cookie Crust Base: Swap the cake layer for a crushed Oreo crust pressed into the pan for a no-bake version.
- Seasonal Themes: Decorate with red and green sprinkles for holidays, orange-tinted whipped cream for Halloween, or pastel candies for Easter.
- Layered Parfaits: Serve in glasses as individual parfaits—crumbled cake, peanut butter mixture, chopped Reese’s, and whipped cream in layers.
- Mini Versions: Bake in muffin tins for bite-sized earthquake cupcakes, adjusting bake time to 18–22 minutes.
Health Considerations and Nutritional Value
While Reese’s Peanut Butter Earthquake Cake is undeniably indulgent, it’s important to enjoy it in moderation, especially for those monitoring sugar intake, weight, or specific health conditions. Here’s a general nutritional estimate per serving (based on 12 servings):
- Calories: ~450–550 kcal
- Total Fat: 25–30g (including saturated fat from chocolate, oils, and dairy)
- Carbohydrates: 50–60g (mostly from sugars in cake mix, condensed milk, and candy)
- Protein: 6–8g (from eggs, peanut butter, and milk solids)
- Sodium: 300–400mg
- Sugars: 35–45g (high due to multiple sweetened components)
Health Notes:
- This dessert is high in added sugars and fats, making it best suited for occasional enjoyment rather than daily consumption.
- Peanut butter contributes heart-healthy monounsaturated fats and protein, but portion control is key.
- Sweetened condensed milk is calorie-dense and not recommended for diabetics without medical guidance.
- For lighter versions, consider reduced-sugar cake mixes, sugar-free peanut butter, and low-fat whipped toppings—though flavor and texture may vary.
- Always check labels if managing allergies—many store-bought versions contain traces of nuts, soy, wheat, or dairy.
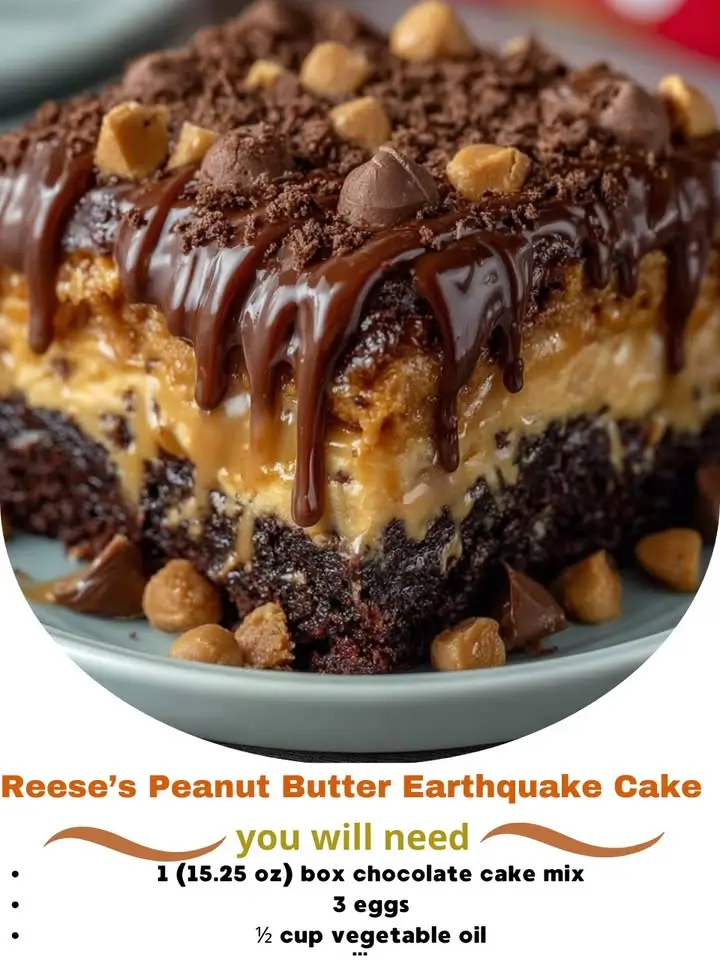
Ingredients
- 1 box (18.5 oz) chocolate cake mix (devil’s food preferred)
- 1 cup water
- ½ cup vegetable oil
- 3 large eggs
- 1 cup creamy peanut butter (regular or natural)
- 1 can (14 oz) sweetened condensed milk
- 1½ cups Reese’s Peanut Butter Cups, chopped (plus extra for garnish)
- 1 tub (8 oz) frozen whipped topping (Cool Whip), thawed
- Optional: ½ tsp vanilla extract, pinch of salt, mini Reese’s Pieces for topping
Directions
- Preheat oven to 350°F (175°C). Grease a 9×13-inch baking dish.
- In a large bowl, mix cake mix, water, oil, and eggs until smooth. Pour into the prepared pan and spread evenly.
- In another bowl, beat peanut butter and sweetened condensed milk until creamy. Stir in vanilla and salt if using.
- Spoon peanut butter mixture over the cake batter. Sprinkle chopped Reese’s cups evenly on top.
- Using a butter knife, gently swirl the peanut butter mixture into the cake batter—just a few passes to create a marbled effect.
- Bake for 30–35 minutes or until edges are set and center still jiggles slightly.
- Cool on a wire rack for 1 hour, then refrigerate for at least 3 hours or overnight.
- Once chilled, spread whipped topping evenly over the surface.
- Garnish with additional chopped Reese’s or Reese’s Pieces.
- Slice and serve cold. Store leftovers covered in the refrigerator for up to 5 days.
FAQ
Q: Why is it called Earthquake Cake?
A: Because when you gently tap the pan after baking and cooling, the center jiggles dramatically like an earthquake—thanks to the soft, custard-like middle layer formed by the peanut butter and condensed milk.
Q: Can I make this cake ahead of time?
A: Absolutely! It actually improves in flavor and texture after chilling overnight. Make it a day in advance for events.
Q: Can I use a different type of cake mix?
A: Yes! Yellow, white, or even red velvet cake mix can be used for a different flavor base, though chocolate pairs best with peanut butter.
Q: Is it necessary to refrigerate the cake?
A: Yes. Refrigeration sets the layers, enhances the quake effect, and ensures food safety due to the perishable ingredients like eggs and whipped topping.
Q: Can I freeze Reese’s Earthquake Cake?
A: Yes, though texture may change slightly. Wrap tightly in plastic and foil; freeze for up to 2 months. Thaw in the fridge before serving.
Q: What can I substitute for sweetened condensed milk?
A: There isn’t a direct substitute, but you can make your own by simmering regular milk with sugar until reduced and thickened (about 1 can worth takes 1 hour).
Q: Can I make this without peanut butter?
A: Technically yes, but you’d lose the defining flavor. Try almond butter or cookie butter for alternative nutty profiles.
Q: Why did my cake turn out dry?
A: Likely overbaked. Remember—the center should still jiggle when removed from the oven. It firms up during chilling.
Summary
Reese’s Peanut Butter Earthquake Cake is a show-stopping dessert that combines a fudgy chocolate base, gooey peanut butter swirls, melty Reese’s chunks, and a cloud-like whipped topping for an unforgettable treat. Easy to make, impossible to resist, and guaranteed to quake with every slice!