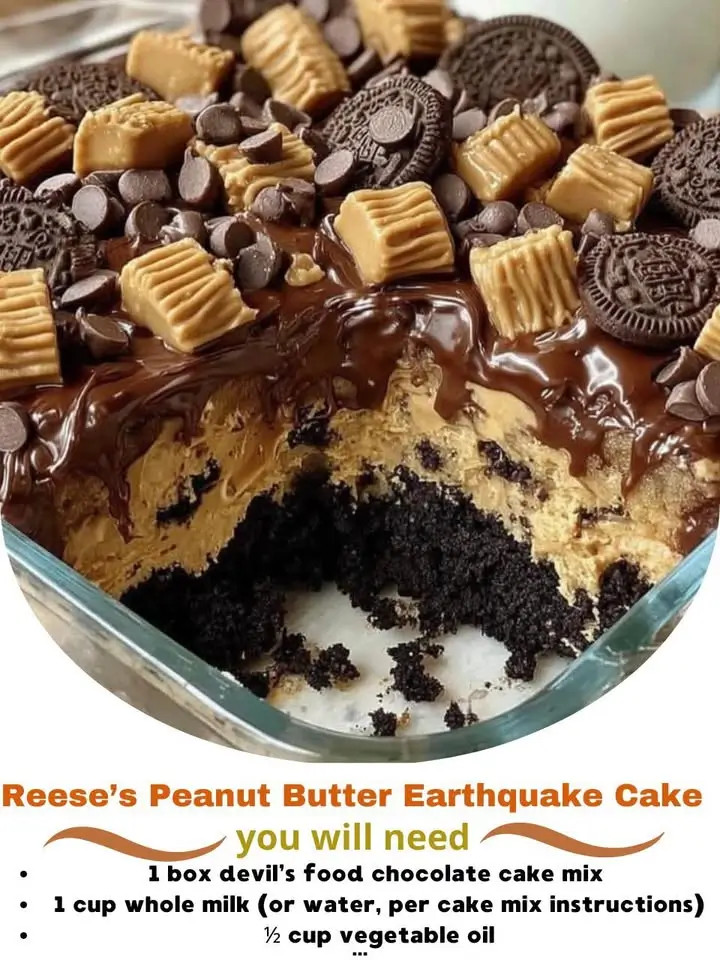
Reese’s Peanut Butter Earthquake Cake: A Decadent Dessert Sensation
If you’re a fan of rich chocolate, creamy peanut butter, and the nostalgic flavors of Reese’s Peanut Butter Cups, then you’re in for a treat. The Reese’s Peanut Butter Earthquake Cake is a show-stopping dessert that combines all your favorite elements into one indulgent, gooey, and irresistibly delicious cake. Known for its wavy, “earthquake-like” surface caused by the movement during baking, this cake has earned a cult following across America, especially at potlucks, family gatherings, birthday parties, and holiday celebrations. It’s not just a dessert—it’s an experience. With layers of moist chocolate cake, a luscious peanut butter filling, melty Reese’s cups, and a glossy chocolate glaze, this cake lives up to its reputation as a crowd-pleaser. Whether you’re baking for a special occasion or simply treating yourself, this recipe promises to deliver maximum flavor with minimal effort. Let’s dive deep into everything you need to know about making the ultimate Reese’s Peanut Butter Earthquake Cake.
The History of Reese’s Peanut Butter Earthquake Cake
The origins of the Reese’s Peanut Butter Earthquake Cake are deeply rooted in American home baking culture, particularly from the Southern United States where decadent, easy-to-make desserts have long been staples. While the exact creator remains unknown, the recipe began circulating widely in community cookbooks, church fundraisers, and regional baking contests during the 1980s and 1990s. Its name comes from the cake’s signature cracked and rippled appearance after baking—resembling the aftermath of a seismic event—caused by the dense peanut butter layer shifting beneath the chocolate batter when shaken in the oven.
The use of boxed cake mix in many versions reflects the era’s rise in convenience foods, while the inclusion of Reese’s Peanut Butter Cups ties it to the growing popularity of branded candy in baked goods. Over time, bakers began sharing their own twists online, turning this humble dessert into a viral sensation on social media platforms like Pinterest, Facebook cooking groups, and food blogs. Today, the Reese’s Peanut Butter Earthquake Cake stands as a beloved classic—a perfect fusion of nostalgia, simplicity, and over-the-top flavor that continues to win hearts (and stomachs) nationwide.
Ingredients Breakdown: What Makes This Cake So Irresistible?
The magic of the Reese’s Peanut Butter Earthquake Cake lies in its layered composition and the synergy between sweet, salty, creamy, and crunchy textures. Here’s a detailed look at each component and why it matters:
- Chocolate Cake Mix: Typically a devil’s food or fudge variety, this forms the base structure. Using a high-quality mix ensures a moist, fluffy crumb that holds up well against the heavy fillings.
- Eggs: Bind the ingredients together and contribute to the cake’s rise and tenderness.
- Vegetable Oil: Adds moisture and richness without overpowering other flavors.
- Water: Hydrates the dry mix and helps achieve the right consistency.
- Peanut Butter: Creamy, unsweetened peanut butter is ideal for balancing sweetness and adding depth. Natural peanut butter can be used, but ensure it’s well-stirred to avoid separation.
- Butter: Melted butter enhances the richness of the peanut butter layer and promotes a smooth texture.
- Powdered Sugar: Sweetens the peanut butter filling slightly and gives it body.
- Vanilla Extract: Enhances overall flavor complexity in both cake and filling.
- Reese’s Peanut Butter Cups: The star ingredient! Chopped into chunks, these provide bursts of chocolate and peanut butter throughout the cake. Full-size or mini cups work—mini ones distribute more evenly.
- Chocolate Chips: Usually semi-sweet or milk chocolate, they melt into gooey pockets during baking.
- Heavy Cream or Milk: Used in the glaze to create a silky, pourable consistency.
- Additional Toppings (Optional): Crushed peanuts, extra Reese’s pieces, sea salt flakes, or whipped cream for garnish.
Each ingredient plays a crucial role in creating the cake’s signature texture contrast—dense yet tender, chewy yet creamy—all wrapped in bold peanut butter-chocolate harmony.
Step-by-Step Recipe: How to Make Reese’s Peanut Butter Earthquake Cake
Follow these detailed instructions to bake a flawless Reese’s Peanut Butter Earthquake Cake that will impress everyone at your table.
- Preheat Oven & Prepare Pan: Preheat your oven to 350°F (175°C). Grease a 9×13-inch baking dish thoroughly with non-stick spray or butter, then line it with parchment paper for easy removal.
- Make the Chocolate Cake Batter: In a large mixing bowl, combine the chocolate cake mix, eggs, vegetable oil, water, and vanilla extract. Beat with an electric mixer on medium speed for 2–3 minutes until smooth and well blended. Set aside half of this batter for later use.
- Prepare the Peanut Butter Filling: In another bowl, mix the softened cream cheese (optional for extra richness), peanut butter, melted butter, powdered sugar, and a teaspoon of vanilla extract. Stir until smooth and spreadable. If too thick, add a splash of milk to loosen.
- Layer the First Half of Cake Batter: Pour the remaining half of the chocolate batter into the prepared pan. Use a spatula to spread it evenly into a thin, consistent layer covering the entire bottom.
- Add the Peanut Butter Layer: Carefully spoon the peanut butter mixture over the chocolate base. Gently spread it into a uniform layer, being careful not to mix it into the batter below.
- Incorporate Reese’s and Chocolate Chips: Sprinkle chopped Reese’s Peanut Butter Cups and chocolate chips evenly over the peanut butter layer. This creates those delightful pockets of candy goodness.
- Add the Top Cake Layer: Drop spoonfuls of the reserved chocolate batter over the top. Don’t spread it—just let it fall randomly. Then, using a knife or offset spatula, gently swirl the batter through the layers below. This step is key to creating the “earthquake” effect.
- Create the Quake Effect: Hold the pan with both hands and shake it back and forth gently several times. You’ll see the layers ripple and blend slightly, forming natural cracks and waves—this is exactly what you want!
- Bake to Perfection: Place the pan in the preheated oven and bake for 30–38 minutes, or until a toothpick inserted near the center comes out with moist crumbs (not wet batter). Avoid overbaking to keep the cake fudgy.
- Cool Slightly: Remove from oven and allow the cake to cool in the pan for at least 20–30 minutes before glazing. Cooling helps set the layers and prevents the glaze from melting away.
- Make the Chocolate Glaze: In a microwave-safe bowl, heat chocolate chips and heavy cream in 20-second intervals, stirring between each, until fully melted and smooth. Add a pinch of salt and a dash of vanilla for enhanced flavor.
- Glaze the Cake: Pour the warm glaze evenly over the cooled cake. Tilt the pan slightly to help the glaze spread. For extra flair, drizzle with melted peanut butter or sprinkle crushed Reese’s pieces on top while the glaze is still wet.
- Final Chill (Optional): Refrigerate for 30–60 minutes to firm up the glaze and make slicing easier, though serving warm is also delicious.
Tips for Baking the Perfect Reese’s Peanut Butter Earthquake Cake
- Don’t Overmix: When combining the cake batter and swirling layers, gentle handling preserves the distinct strata and quake effect.
- Use Room Temperature Ingredients: Especially important for eggs and peanut butter to ensure even blending and prevent curdling.
- Chop Reese’s Cups Uniformly: Cut them into pea-sized pieces so they distribute evenly and don’t sink.
- Shake with Confidence: The shaking motion is essential for the earthquake look. Do it firmly but carefully to avoid spilling.
- Check Early: Ovens vary—start checking for doneness at 30 minutes. A clean toothpick means overbaked; a few moist crumbs mean perfect.
- Let It Rest: Allowing the cake to cool slightly before glazing prevents the chocolate from soaking in too quickly.
- Slice Cleanly: Use a sharp knife dipped in hot water and wiped dry between cuts for neat slices.
- Double the Glaze: If you love extra chocolate, double the glaze recipe for a thicker, more decadent finish.
- Storage Tip: Store leftovers covered at room temperature for 2 days or refrigerate for up to 5 days. Reheat individual slices briefly in the microwave for a warm, gooey treat.
Variations and Customizations
One of the best things about this cake is how adaptable it is. Try these creative spins to personalize your dessert:
- Nut-Free Version: Replace peanut butter with sunflower seed butter or soy nut butter, and use chocolate cups without peanuts.
- Gluten-Free Option: Use a gluten-free chocolate cake mix and verify all other ingredients (like Reese’s) are certified GF.
- Vegan Twist: Opt for vegan cake mix, flax eggs, dairy-free butter, and vegan chocolate chips. Use plant-based Reese’s alternatives (available in some stores).
- Different Candy Swaps: Substitute Reese’s with Snickers, Twix, M&M’s, or chopped peanut butter cups from other brands.
- Flavor Infusions: Add espresso powder to the cake mix for mocha notes, or a dash of cinnamon to the peanut butter layer for warmth.
- Layered Look: Bake in a round springform pan and create defined layers for a restaurant-style presentation.
- Mini Earthquakes: Make cupcakes using the same method—fill liners halfway, add peanut butter and candy, then top with more batter.
- Alcohol-Infused Glaze: Stir a tablespoon of bourbon, Baileys, or Kahlúa into the chocolate glaze for an adult version.
- Fruity Fusion: Add banana slices between layers for a peanut butter-banana twist reminiscent of a classic sandwich.
- Salted Caramel Drizzle: Swirl homemade or store-bought salted caramel sauce over the finished cake for added complexity.
Health Considerations and Nutritional Value
While undeniably delicious, the Reese’s Peanut Butter Earthquake Cake is a high-calorie, sugar-dense dessert best enjoyed in moderation. Here’s a general nutritional breakdown per average serving (based on 12 servings):
- Calories: ~450–550 kcal
- Total Fat: 25–30g (including saturated fat from chocolate and butter)
- Carbohydrates: 50–60g (mostly from sugars in cake mix and candy)
- Protein: 6–8g (from eggs, peanut butter, and milk solids)
- Sodium: 300–400mg
- Sugars: 35–45g
Health Notes:
- Peanut butter provides healthy monounsaturated fats, protein, and vitamin E, but processed varieties may contain added oils and sugars.
- Dark chocolate (if used) offers antioxidants like flavonoids, though most recipes use milk chocolate or standard chips.
- This cake is not suitable for those with peanut allergies unless modified.
- To reduce sugar, consider using a reduced-sugar cake mix and dark chocolate chips with higher cocoa content.
- Portion control is key—serve small squares with a dollop of Greek yogurt instead of whipped cream for a lighter touch.
Full Ingredient List
- 1 box (18.25 oz) chocolate or devil’s food cake mix
- 3 large eggs
- 1/2 cup vegetable oil
- 1/2 cup water
- 1 teaspoon vanilla extract
- 1 cup creamy peanut butter (no-stir preferred)
- 1/4 cup unsalted butter, melted
- 1 cup powdered sugar
- 1 (8 oz) block cream cheese, softened (optional, for richer filling)
- 1 1/2 cups Reese’s Peanut Butter Cups, chopped
- 1 cup semi-sweet chocolate chips
- 1 cup semi-sweet chocolate chips (for glaze)
- 1/3 cup heavy cream or whole milk
- Pinch of sea salt (for glaze)
- Optional toppings: crushed peanuts, extra Reese’s pieces, flaky sea salt
Detailed Directions
- Preheat oven to 350°F (175°C). Grease and line a 9×13-inch baking pan with parchment paper.
- In a large bowl, whisk together cake mix, eggs, oil, water, and 1 tsp vanilla until smooth. Reserve half of this batter in a separate bowl; set aside.
- In another bowl, beat peanut butter, melted butter, powdered sugar, and cream cheese (if using) until creamy and lump-free.
- Pour the first half of the chocolate batter into the pan, spreading evenly with a spatula.
- Drop spoonfuls of peanut butter mixture over the base and spread gently into a thin layer.
- Sprinkle chopped Reese’s cups and chocolate chips evenly over the peanut butter layer.
- Drop the reserved chocolate batter in blobs over the top. Use a knife to lightly swirl through the layers—don’t overmix.
- Lift the pan and gently shake it back and forth 5–6 times to create ripples and cracks (the “earthquake” effect).
- Bake for 30–38 minutes, until edges are set and center springs back slightly when touched.
- Cool on a wire rack for 20–30 minutes.
- For the glaze: Combine chocolate chips and heavy cream in a bowl. Microwave in 20-second bursts, stirring until smooth. Stir in salt.
- Pour glaze over the cake, tilting pan to cover completely. Immediately add toppings if desired.
- Cool completely before slicing, or chill briefly for cleaner cuts.
- Serve at room temperature or slightly warmed. Store covered for up to 5 days.
Frequently Asked Questions (FAQ)
Q: Can I make this cake ahead of time?
A: Absolutely! Bake and glaze the cake one day in advance. Store covered at room temperature or refrigerate, then bring to room temperature before serving.
Q: Why is my cake too wet in the middle?
A: This usually happens if the cake isn’t baked long enough or if too much liquid was added. Ensure accurate measurements and check with a toothpick for doneness.
Q: Can I freeze Reese’s Peanut Butter Earthquake Cake?
A: Yes! Wrap tightly in plastic and foil, then freeze for up to 3 months. Thaw overnight in the fridge and reheat slices if desired.
Q: Can I use natural peanut butter?
A: Yes, but because natural peanut butter has more oil, the filling might be runnier. Chill it briefly before spreading to firm it up.
Q: What can I use instead of a boxed cake mix?
A: You can make a homemade chocolate cake batter using 1 cup flour, 1 cup sugar, 1/2 cup cocoa powder, 1 tsp baking soda, 1/2 tsp salt, 1/2 cup water, 1/4 cup oil, 1 egg, and 1 tsp vinegar—but results may vary slightly in texture.
Q: How do I get more pronounced “quake” lines?
A: Shake the pan more vigorously after pouring, and avoid over-swirling the top batter. The contrast between layers enhances the visual effect.
Q: Is this cake supposed to be gooey?
A: Yes! The center should remain soft and fudgy. It’s not meant to be dry or fully cake-like throughout.
Q: Can I make this in a different size pan?
A: An 8×8-inch pan works but will require longer baking time (up to 45 mins). A larger jelly roll pan will yield a thinner cake with shorter bake time.
Summary
The Reese’s Peanut Butter Earthquake Cake is a rich, multi-layered dessert featuring a moist chocolate base, a creamy peanut butter filling studded with Reese’s cups, and a glossy chocolate glaze—all baked to create a dramatic, cracked “earthquake” surface. Easy to make and impossible to resist, it’s the ultimate treat for peanut butter and chocolate lovers alike.