Introduction
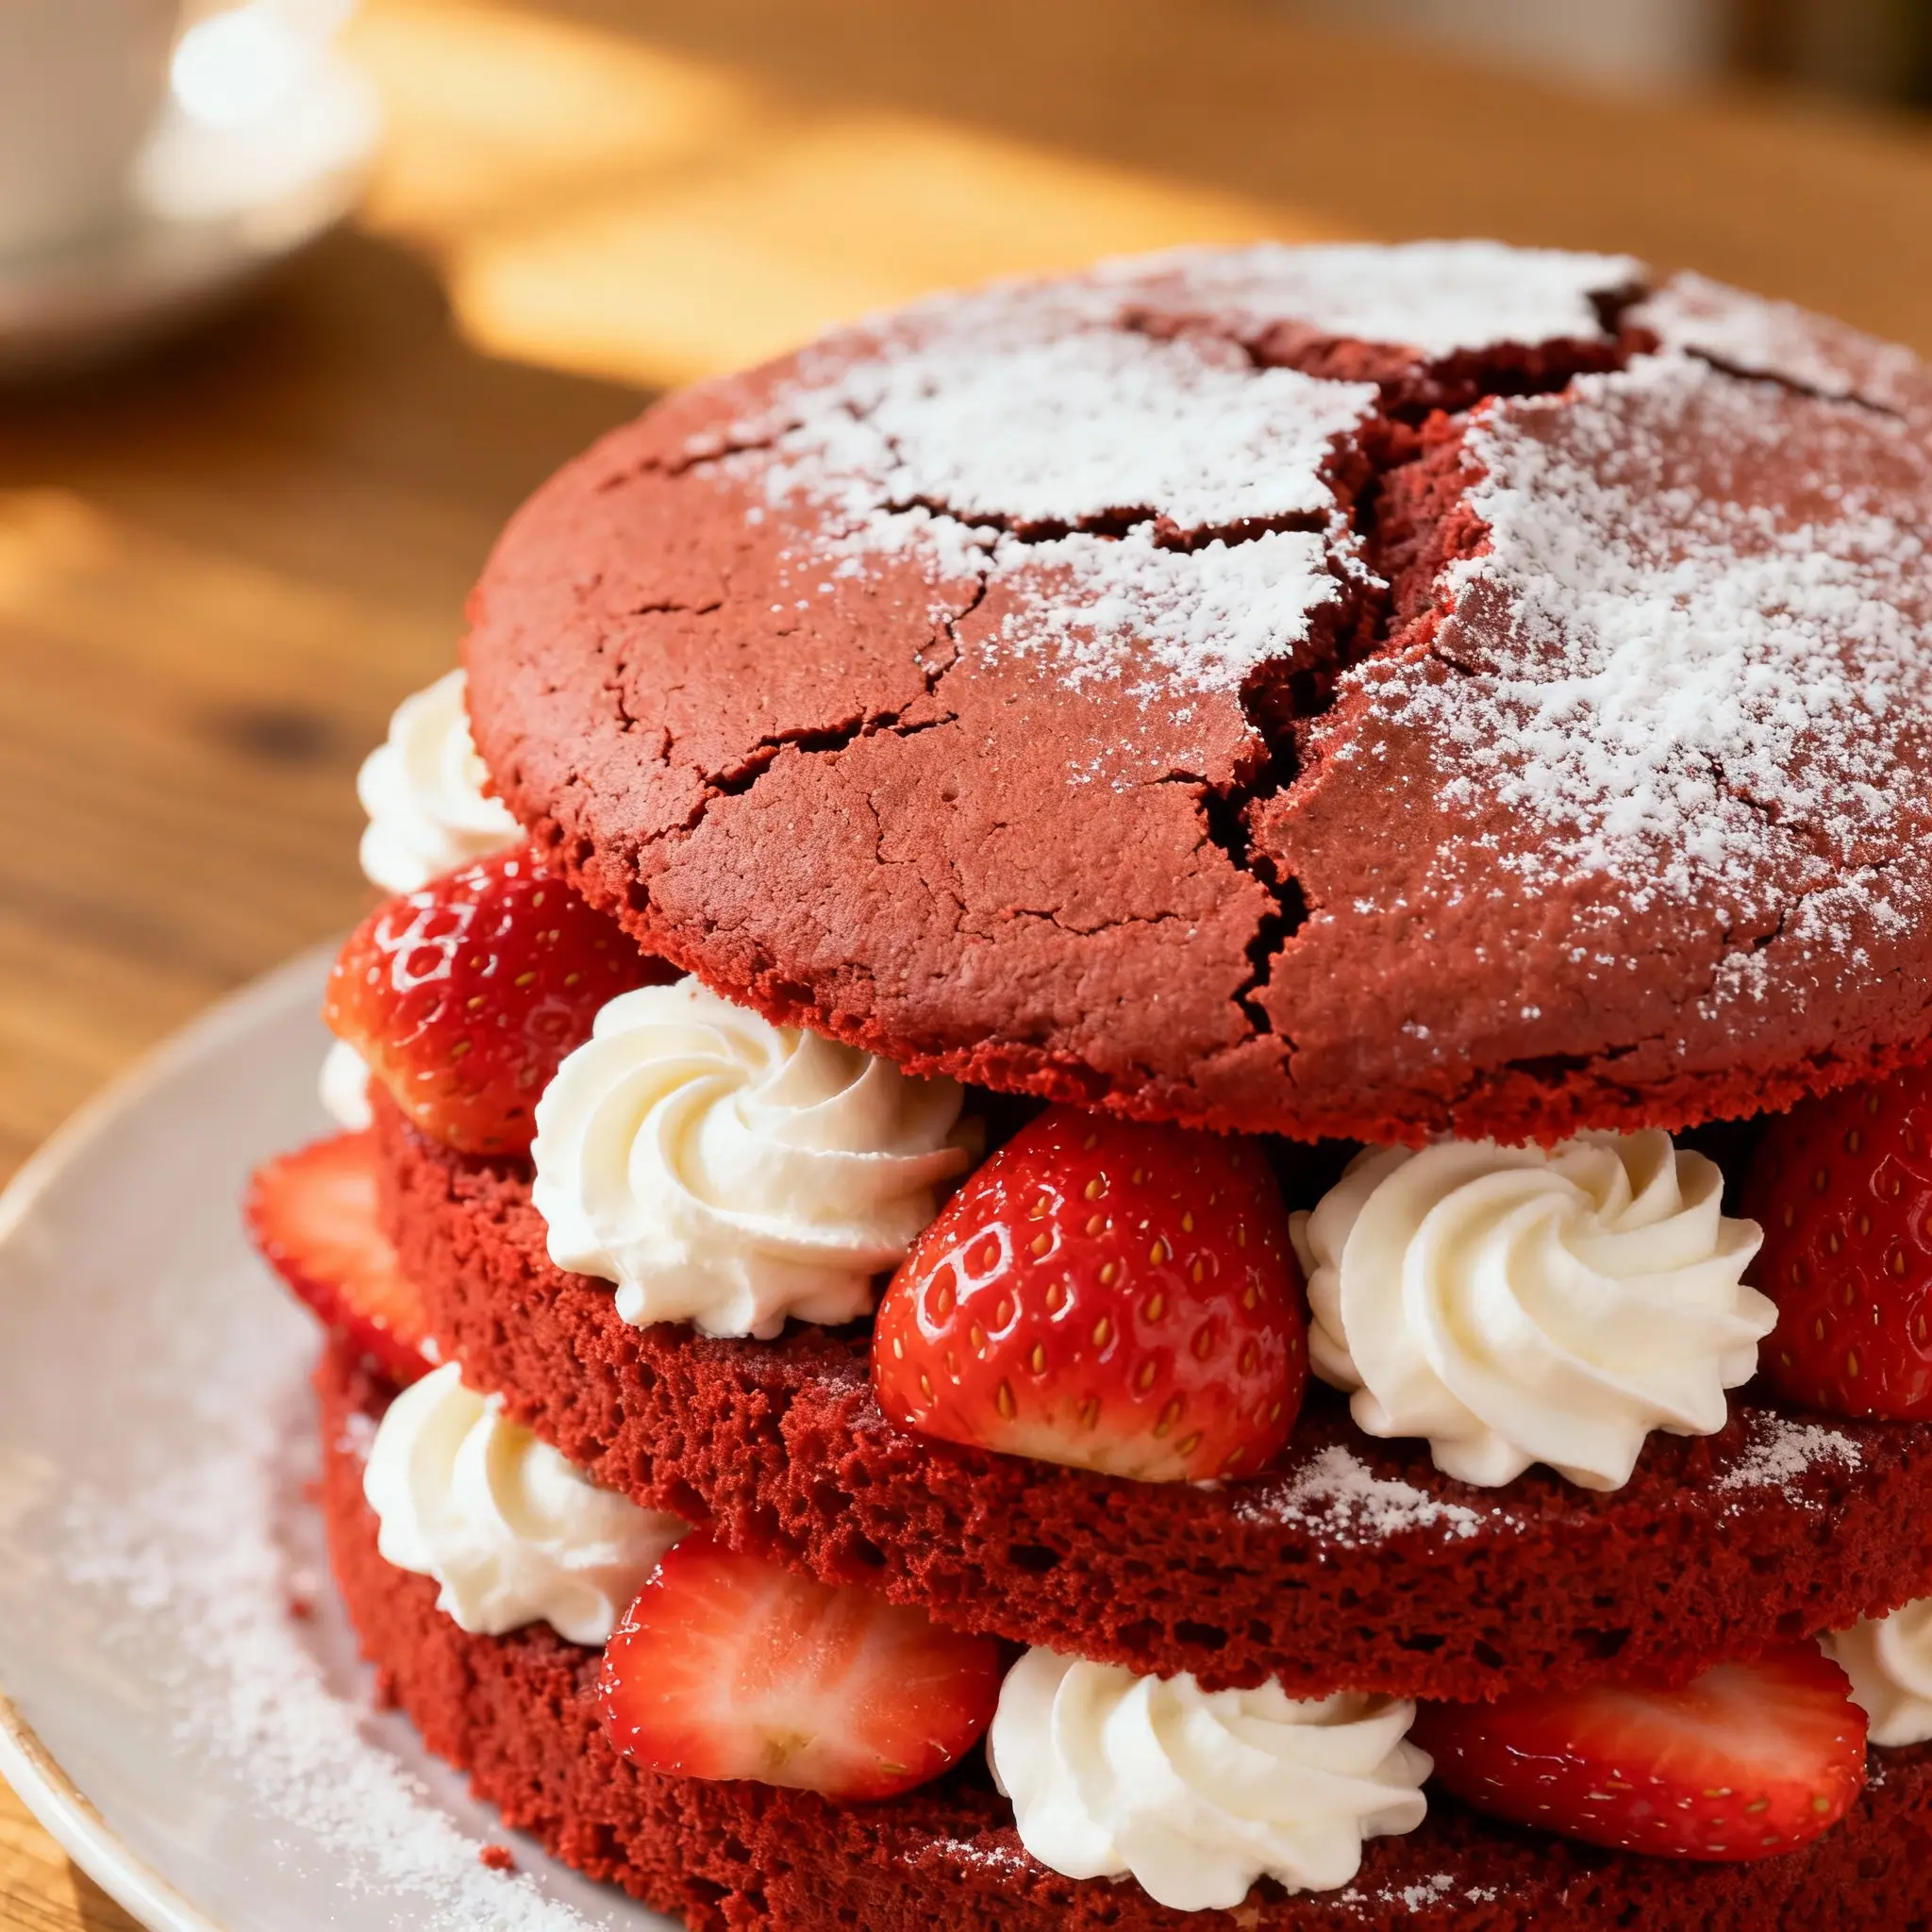
Red Velvet Strawberry Shortcake is a stunning fusion dessert that marries the velvety elegance of classic red velvet cake with the sun-kissed sweetness and vibrant freshness of ripe strawberries—and the delicate, buttery charm of traditional shortcake. Unlike conventional strawberry shortcake—which typically features golden biscuit or sponge layers—this modern masterpiece reimagines the structure with rich, cocoa-infused red velvet layers, tender crumb, and signature crimson hue, all harmonized by luscious macerated strawberries and luxuriously whipped cream. It’s more than just a dessert; it’s a celebration on a plate—ideal for birthdays, bridal showers, summer picnics, holiday gatherings, or any moment deserving of indulgence and visual splendor. With its striking contrast of deep ruby cake, glistening ruby-red berries, and snowy white cream, Red Velvet Strawberry Shortcake delivers not only unforgettable flavor but also an Instagram-worthy centerpiece that sparks delight before the first bite.
The History
The origins of Red Velvet Strawberry Shortcake are delightfully layered—like the dessert itself—rooted in the confluence of two iconic American traditions: red velvet cake and strawberry shortcake. Red velvet cake traces its lineage to the early 20th century, evolving from “velvet cakes” (a term denoting fine, soft-textured cakes made with cocoa and acidic ingredients like buttermilk or vinegar). The distinctive red tint originally came from a natural reaction between non-Dutched cocoa and acidic components—a subtle rust-red blush that later intensified with the advent of beet juice (popularized during WWII due to ingredient rationing) and, eventually, synthetic red food coloring in the 1940s–50s, notably popularized by the Waldorf Astoria Hotel. Meanwhile, strawberry shortcake dates back to 16th-century England as “strawberry sops”—a rustic dish of strawberries over bread soaked in cream—but evolved into its modern American form by the 1850s, featuring biscuits or sponge cake layered with berries and cream.
The intentional marriage of these two classics is a relatively recent innovation—gaining momentum in the early 2000s through food blogs, Southern baking communities, and celebrity chefs seeking to elevate familiar desserts with dramatic color, texture, and depth. Red Velvet Strawberry Shortcake emerged as a seasonal reinterpretation: a way to honor spring and early summer’s strawberry bounty while adding sophistication, moisture, and nuanced chocolate-cocoa notes missing in traditional shortcake. Its rise coincided with the gourmet cupcake boom and the “deconstructed dessert” trend—leading many bakers to serve it in elegant trifle glasses, mini mason jars, or tiered cake stands. Today, it appears on menus at upscale brunch spots, wedding dessert tables, and viral TikTok baking tutorials alike—a testament to its irresistible balance of nostalgia and novelty.
Ingredients Breakdown
Every exceptional Red Velvet Strawberry Shortcake begins with thoughtfully selected, high-quality ingredients—each playing a precise functional and sensory role:
- Unbleached All-Purpose Flour: Provides structure without toughness; protein content (~10–11%) ensures tenderness while supporting the cake’s delicate crumb. Sifting is essential to aerate and prevent dense layers.
- Granulated Sugar: Not only sweetens but also tenderizes by inhibiting gluten formation and contributes to browning and moisture retention via caramelization.
- Natural Unsweetened Cocoa Powder (Non-Alkalized): Critical for authentic red velvet flavor and chemical reactivity—its acidity interacts with vinegar and baking soda to enhance lift and deepen the red hue. Dutch-processed cocoa is avoided here, as it neutralizes acidity and dulls both color and rise.
- Baking Soda & Baking Powder: A dual-leavening system—baking soda reacts instantly with acidic ingredients (cocoa, buttermilk, vinegar) for initial lift and color enhancement, while baking powder provides secondary, heat-activated rise for consistent height and even texture.
- Distilled White Vinegar: A key “secret weapon”—its sharp acidity activates the cocoa’s anthocyanins (natural pigments), intensifying the red tone, while also tenderizing gluten and balancing sweetness.
- Buttermilk: Adds tang, moisture, and tenderness; its lactic acid further supports leavening and contributes to the cake’s signature moist, fine-grained texture. Full-fat, cultured buttermilk yields superior flavor and richness compared to powdered substitutes.
- Neutral Oil (e.g., canola or grapeseed): Ensures unparalleled moisture and shelf stability—oil remains liquid at room temperature, unlike butter, which solidifies and can lead to drier crumb over time. It also creates a silkier mouthfeel and extends freshness up to 4 days.
- Eggs (room temperature): Provide emulsification, structure, and richness. Extra egg whites (often included in premium versions) increase volume and lightness; yolks add fat and color.
- Red Food Coloring (gel-based preferred): High-potency gel color delivers intense, vibrant red without diluting batter or altering texture—liquid dyes require larger volumes, risking thinning and muted hues. “No-dye” versions exist using beet powder or pomegranate juice, though color intensity and flavor neutrality vary.
- Vanilla Extract (pure, Madagascar Bourbon-grade): Enhances aromatic complexity and rounds out the cocoa-vinegar tang with warm, floral-sweet notes.
- Sea Salt (fine, non-iodized): Balances sweetness and heightens all other flavors—especially crucial in countering the slight bitterness of cocoa and acidity of vinegar.
- Fresh Strawberries (peak-season, locally grown if possible): Choose firm-ripe, fragrant berries with deep red color and glossy sheen. Varieties like Albion, Seascape, or Jewel offer exceptional sweetness, low acidity, and minimal water content—critical for preventing soggy layers.
- Granulated Sugar (for maceration): Draw out juices gently without oversaturating; a small amount of balsamic vinegar or lemon zest may be added to brighten and concentrate flavor.
- Heavy Whipping Cream (36–40% fat, cold): Essential for stable, cloud-like whipped cream that holds shape for hours. Ultra-pasteurized cream is less ideal—it often whips slower and yields grainier texture. Organic or grass-fed options impart subtle nutty, golden notes.
- Confectioners’ Sugar & Pure Vanilla: Sweeten and flavor the whipped cream without graininess; a pinch of salt prevents cloying sweetness.
- Optional Garnishes: Fresh mint leaves (for aroma and visual contrast), edible rose petals, white chocolate shavings, freeze-dried strawberry dust, or a drizzle of reduced balsamic glaze for gourmet flair.
Step-by-Step Recipe
Makes one 9-inch, three-layer shortcake (serves 12–14)
- Prep & Preheat: Position oven racks in upper and lower thirds. Preheat oven to 350°F (175°C). Line three 9-inch round cake pans with parchment paper circles; grease sides lightly with unsalted butter or non-stick spray. Sift together flour, cocoa powder, granulated sugar, baking soda, baking powder, and salt into a large bowl—set aside.
- Prepare Wet Ingredients: In a separate large mixing bowl, whisk buttermilk, oil, eggs, vanilla, and vinegar until fully emulsified and slightly frothy (~1 minute). Gradually add red gel food coloring, 1 tsp at a time, whisking thoroughly after each addition until desired deep burgundy-red is achieved (typically 1½–2 tsp for vivid color).
- Combine Batter: Pour wet mixture into dry ingredients. Using a hand-held or stand mixer fitted with paddle attachment, mix on low speed for 30 seconds to moisten. Increase to medium speed and beat for exactly 2 minutes—scraping down bowl halfway—to develop structure without overmixing. Batter will be smooth, thick, and pourable—not runny.
- Divide & Bake: Evenly divide batter among prepared pans (use a kitchen scale for precision: ~580g per pan). Tap pans firmly on counter twice to release air bubbles. Bake for 22–26 minutes—rotating pans top-to-bottom and front-to-back at 15 minutes—until a toothpick inserted into center comes out with moist crumbs (not wet batter). Avoid overbaking—cakes should spring back when lightly pressed.
- Cool Completely: Let cakes cool in pans on wire racks for 15 minutes. Run a thin offset spatula around edges, then invert onto racks, peel off parchment, and reinvert right-side-up. Cool fully (minimum 2 hours, preferably overnight refrigerated) before assembling—warm cake absorbs cream and becomes fragile.
- Prepare Strawberries: Hull and slice 2 lbs (about 6 cups) strawberries. In a non-reactive bowl, combine with ¼ cup granulated sugar, 1 tsp fresh lemon juice, and optional ½ tsp finely grated lemon zest. Gently fold, cover, and refrigerate for 1–4 hours—stirring once—to draw out syrupy, jewel-toned juices without breaking fruit.
- Whip the Cream: Chill mixing bowl and whisk attachment in freezer 15 minutes. Pour 3 cups cold heavy cream into bowl. Add ⅓ cup confectioners’ sugar and 1½ tsp pure vanilla. Whip on medium-low until frothy (~1 min), then increase to medium-high. Whip just until stiff peaks form—do not overwhip into butter. Fold in 2 tbsp reserved strawberry syrup for subtle pink hue and flavor (optional but recommended).
- Assemble with Precision: Level cooled cake layers with serrated knife if needed. Place bottom layer on cake stand or serving platter. Brush lightly with 1 tbsp strawberry syrup (strained from macerated berries) for moisture and flavor. Spread 1 cup whipped cream evenly. Top with ⅓ of strawberries (including syrup). Repeat with second layer, cream, and berries. Cap with final cake layer. Apply thin “crumb coat” of remaining cream over entire cake; chill 20 minutes. Finish with final smooth or textured coat of cream. Decorate generously with remaining strawberries, mint, and optional garnishes.
- Chill & Serve: Refrigerate assembled shortcake for minimum 2 hours (up to 6 hours) before slicing—this allows flavors to meld and cream to set. Serve chilled with extra strawberry syrup on the side. Use a hot, clean knife for clean slices.
Tips
- Room-Temperature Ingredients Are Non-Negotiable: Cold eggs or buttermilk cause uneven emulsification, leading to curdled batter and dense layers. Pull dairy and eggs from fridge 60–90 minutes before baking.
- Weigh Your Ingredients: Volume measurements (cups) vary wildly—especially flour and cocoa. A digital scale ensures perfect ratios every time. For reference: 1 cup all-purpose flour = 120g; ¼ cup cocoa = 20g.
- Vinegar + Buttermilk = Color Catalyst: Never omit or substitute either—their combined acidity is what unlocks the deepest red tones and optimal rise. Apple cider vinegar works but adds subtle apple notes; white vinegar is most neutral.
- Gel Food Coloring Is Superior: Liquid dye requires 1–2 tbsp to match gel potency—adding excess liquid throws off batter hydration and weakens structure. Americolor Super Red or Chefmaster Red are professional favorites.
- Don’t Skip the Resting Step: Fully cooled, even chilled, cake layers are sturdier, less crumbly, and absorb less cream—preserving clean layer definition. Overnight chilling also enhances flavor development.
- Strawberry Prep Matters: Slice berries uniformly (¼-inch thick) for consistent texture. Macerate no longer than 4 hours—prolonged sitting turns them mushy. Always strain excess syrup before layering to avoid sogginess—but reserve it for brushing or serving.
- Whip Cream Like a Pro: Stop whipping at *stiff peaks*, not beyond. Overwhipped cream separates into butter and buttermilk. If accidentally overwhipped, add 1–2 tbsp cold cream and gently fold to revive.
- Assembly Timing Is Key: Assemble no more than 6 hours before serving. Longer storage causes cake to soften excessively and cream to weep. For make-ahead convenience, bake and freeze layers (wrapped tightly in plastic + foil) up to 3 months; thaw overnight in fridge before assembling.
- Knife Technique: Dip a long, thin serrated knife in hot water and wipe dry before each cut. This yields flawless, picture-perfect layers with intact strawberries and defined cream borders.
- Flavor Layering: Elevate depth by infusing the whipped cream with ¼ tsp almond extract (complements strawberry and cocoa) or folding in 2 tbsp crushed freeze-dried strawberries for tart brightness and crunch.
Variations and Customizations
Red Velvet Strawberry Shortcake is gloriously adaptable—whether accommodating dietary needs, seasonal produce, or creative whims:
- Gluten-Free Version: Substitute 1:1 gluten-free all-purpose flour blend (with xanthan gum, e.g., King Arthur or Bob’s Red Mill). Add ½ tsp additional xanthan gum if blend doesn’t include it. Increase buttermilk by 1 tbsp for moisture compensation. Verify all other ingredients (cocoa, baking soda, etc.) are certified GF.
- Vegan Adaptation: Replace eggs with flax eggs (3 tbsp ground flax + 9 tbsp water, rested 10 min); use plant-based buttermilk (1 cup unsweetened almond milk + 1 tbsp apple cider vinegar); swap oil for refined coconut oil; and whip chilled full-fat coconut cream (solid part only) with maple syrup and vanilla for “cream.” Note: texture and color intensity may differ slightly.
- Layered Trifle Style: Cube day-old red velvet cake and layer in glass bowls with strawberries, cream, and crumbled shortbread cookies for a casual, deconstructed presentation. Ideal for potlucks or individual servings.
- Mini Mason Jar Edition: Bake cake in mini bundt or muffin tins, cool, then layer in 12-oz mason jars: cake cube → macerated berries → whipped cream → more cake → berries → cream → garnish. Perfect for weddings, baby showers, or grab-and-go treats.
- Seasonal Fruit Swaps: While strawberries define the classic, adapt year-round: blackberries + lemon zest in summer; roasted pears + cinnamon in fall; blood oranges + cardamom in winter; or peaches + basil in late summer. Adjust maceration sugar based on fruit sweetness.
- Decadent Chocolate Upgrade: Add 2 oz finely chopped dark chocolate (65–70%) to batter for melty pockets. Or brush each layer with red velvet ganache (white chocolate + red velvet crumb + cream) before adding cream.
- Boozy Infusion: Add 1 tbsp Chambord (raspberry liqueur) or Grand Marnier to macerated strawberries for sophisticated depth—or fold 1 tsp into whipped cream.
- Crunch Element: Sandwich layers with toasted pecans, candied walnuts, or crushed amaretti cookies for textural contrast against creamy and tender elements.
- Miniature Shortcakes: Bake batter in lined muffin tins (20–22 minutes) for individual portions. Top each with dollop of cream, 3–4 whole berries, and mint. Great for portion control and visual impact.
- “Naked Cake” Rustic Look: Skip the full exterior cream coat—just fill and stack, then lightly swirl cream around sides, leaving cake visible. Accent with cascading strawberries and edible flowers for garden-party elegance.
Health Considerations and Nutritional Value
While Red Velvet Strawberry Shortcake is undeniably indulgent, mindful preparation can enhance its nutritional profile without sacrificing joy or authenticity:
- Sugar Awareness: Traditional recipes contain significant added sugars—from cake batter, maceration, and whipped cream. To moderate: reduce granulated sugar in batter by 2–3 tbsp (compensate with 1 extra tbsp buttermilk for moisture); use only 2 tbsp sugar for strawberries (rely on peak-season sweetness); and sweeten whipped cream with 2 tbsp confectioners’ sugar + 1 tsp honey or monk fruit blend.
- Whole Grain Option: Substitute up to 30% of all-purpose flour with whole wheat pastry flour or oat flour for added fiber and B vitamins—maintains tenderness better than regular whole wheat flour.
- Reduced-Fat Alternatives (With Caveats): Replacing oil with applesauce or Greek yogurt reduces saturated fat but risks denser, drier texture. Best used in 50% substitution (e.g., ½ cup oil + ½ cup unsweetened applesauce). Heavy cream has no true low-fat substitute for stability and mouthfeel—though coconut cream (full-fat, chilled) offers a plant-based, medium-chain triglyceride-rich alternative.
- Nutrient Highlights: Fresh strawberries contribute vitamin C (1 cup = 149% DV), folate, manganese, and antioxidant-rich ellagic acid and anthocyanins—linked to anti-inflammatory and heart-healthy benefits. Cocoa powder (especially non-alkalized) provides flavanols, magnesium, and iron. Buttermilk adds calcium, potassium, and gut-friendly probiotics.
- Allergen Notes: Contains gluten (wheat), dairy (buttermilk, cream), and eggs. Vegan and GF versions address these, but always verify labels on food coloring, cocoa, and baking powder (some contain cornstarch or wheat derivatives).
- Portion Mindfulness: A standard slice (1/12 of cake) contains approximately 420–480 calories, 22–26g sugar, 5–7g protein, and 24–28g carbs. Serving alongside a mixed green salad or grilled vegetables balances the meal contextually.
- No Artificial Dyes Alternative: For families avoiding synthetic red #40, use 3 tbsp concentrated beet powder + 1 tbsp pomegranate juice in wet ingredients. Color will be deeper magenta than classic red, with earthy-sweet undertones—still stunning and naturally derived.
- Dietitian Tip: Pair dessert with a cup of green tea—its catechins may aid digestion and antioxidant synergy with strawberry and cocoa polyphenols.
Ingredients
For the Red Velvet Cake Layers:
- 3 cups (360g) unbleached all-purpose flour
- ¾ cup (75g) natural unsweetened cocoa powder (non-alkalized)
- 2 cups (400g) granulated sugar
- 1½ tsp baking soda
- 1½ tsp baking powder
- 1 tsp fine sea salt
- 1½ cups (360ml) full-fat cultured buttermilk, room temperature
- ¾ cup (180ml) neutral oil (canola, grapeseed, or light olive oil)
- 2 large eggs + 2 large egg whites, room temperature
- 2 tsp pure vanilla extract
- 1 tbsp distilled white vinegar
- 1½–2 tsp red gel food coloring (e.g., Americolor Super Red)
For the Macerated Strawberries:
- 2 lbs (about 6 cups) fresh strawberries, hulled and sliced ¼-inch thick
- ¼ cup (50g) granulated sugar
- 1 tsp fresh lemon juice
- ½ tsp finely grated lemon zest (optional, for brightness)
For the Whipped Cream:
- 3 cups (720ml) cold heavy whipping cream (min. 36% fat)
- ⅓ cup (40g) confectioners’ sugar, sifted
- 1½ tsp pure vanilla extract
- Pinch of fine sea salt
- 2 tbsp reserved strawberry syrup (from macerated berries, optional for pink hue)
For Assembly & Garnish:
- 1 tbsp reserved strawberry syrup (for brushing layers)
- Fresh mint leaves
- Additional whole or halved strawberries
- Edible flowers or white chocolate curls (optional)
Directions
- Preheat & Prep Pans: Preheat oven to 350°F (175°C). Grease three 9-inch round cake pans; line bottoms with parchment paper circles. Set aside.
- Sift Dry Ingredients: In a large bowl, sift together flour, cocoa powder, granulated sugar, baking soda, baking powder, and salt. Whisk 30 seconds to fully combine. Set aside.
- Mix Wet Ingredients: In another large bowl, whisk buttermilk, oil, eggs, egg whites, vanilla, and vinegar until smooth and slightly bubbly (~1 minute). Add red gel food coloring 1 tsp at a time, whisking vigorously after each addition until deep red is achieved.
- Combine Batter: Pour wet mixture into dry ingredients. Mix on low speed with hand mixer or stand mixer for 30 seconds to moisten. Increase to medium speed and beat for exactly 2 minutes, scraping bowl halfway. Batter should be thick, smooth, and uniformly red.
- Bake Layers: Divide batter evenly among pans (weigh for accuracy: ~580g each). Tap pans firmly twice. Bake 22–26 minutes, rotating at 15 minutes, until toothpick shows moist crumbs. Cool in pans 15 minutes, then invert onto wire racks. Peel parchment, reinvert, and cool completely (2+ hours).
- Macerate Berries: In non-reactive bowl, combine sliced strawberries, sugar, lemon juice, and zest. Gently fold. Cover and refrigerate 1–4 hours. Strain syrup into small bowl; reserve both syrup and berries separately.
- Whip Cream: Chill metal bowl and whisk attachment 15 minutes. Pour cold cream into bowl. Add confectioners’ sugar, vanilla, and salt. Whip on medium-low until foamy (~1 min), then medium-high until stiff peaks form (~2–3 min). Gently fold in 2 tbsp strawberry syrup if using.
- Assemble: Level cake layers if domed. Place first layer on stand. Brush with 1 tbsp strawberry syrup. Spread 1 cup whipped cream evenly. Top with ⅓ berries (drained). Repeat with second layer. Cap with third layer. Crumb coat entire cake with thin cream layer; chill 20 minutes. Apply final coat smoothly. Decorate with remaining berries, mint, and garnishes.
- Chill & Serve: Refrigerate assembled shortcake for at least 2 hours (up to 6 hours). Serve chilled with extra strawberry syrup on the side. Store leftovers covered in refrigerator up to 3 days.
FAQ
- Can I make this cake ahead of time?
- Yes! Bake and cool cake layers up to 3 days ahead—store wrapped tightly at room temperature. Or freeze layers (double-wrapped in plastic + foil) up to 3 months; thaw overnight in fridge before assembling. Whipped cream and strawberries should be prepared no more than 1 day ahead and stored separately.
- Why did my red velvet cake turn brown instead of red?
- This commonly occurs due to alkaline cocoa (Dutched), insufficient vinegar/buttermilk acidity, or too little food coloring. Ensure you’re using natural (non-alkalized) cocoa, full-fat cultured buttermilk, and high-potency gel dye. Also, avoid baking in aluminum or uncoated copper pans—these react with acid and mute color.
- Can I use cake flour instead of all-purpose?
- You can—but expect a more delicate, potentially fragile crumb that may not hold up well under cream and berries. All-purpose flour provides ideal structure for layering. If substituting, use 1:1 by weight (not volume) and reduce liquid by 1 tbsp.
- My whipped cream deflated—what went wrong?
- Cream was likely not cold enough, the bowl wasn’t chilled, or it was overwhipped. Always chill cream, bowl, and whisk. Whip only until stiff peaks form—overwhipping breaks fat globules. If cream starts looking grainy, stop immediately.
- How do I prevent soggy cake layers?
- Use well-drained strawberries (strain maceration syrup before layering), brush layers lightly with syrup (not soak), and assemble no more than 6 hours before serving. Fully cooled, even chilled, layers resist absorption far better than warm ones.
- Is there a way to make this dairy-free?
- Absolutely. Use plant-based buttermilk (soy or oat milk + vinegar), vegan butter or oil, flax eggs, and full-fat coconut cream (chilled overnight—use only solid part) for whipping. Flavor with extra vanilla and a pinch of apple cider vinegar to mimic tang.
- Can I bake this as a sheet cake or 9×13 pan?
- Yes! Pour batter into a greased and parchment-lined 9×13-inch pan. Bake at 350°F for 30–35 minutes. Cool completely, then cut into squares. Layer with cream and berries in the pan or serve individual squares topped with components.