Introduction
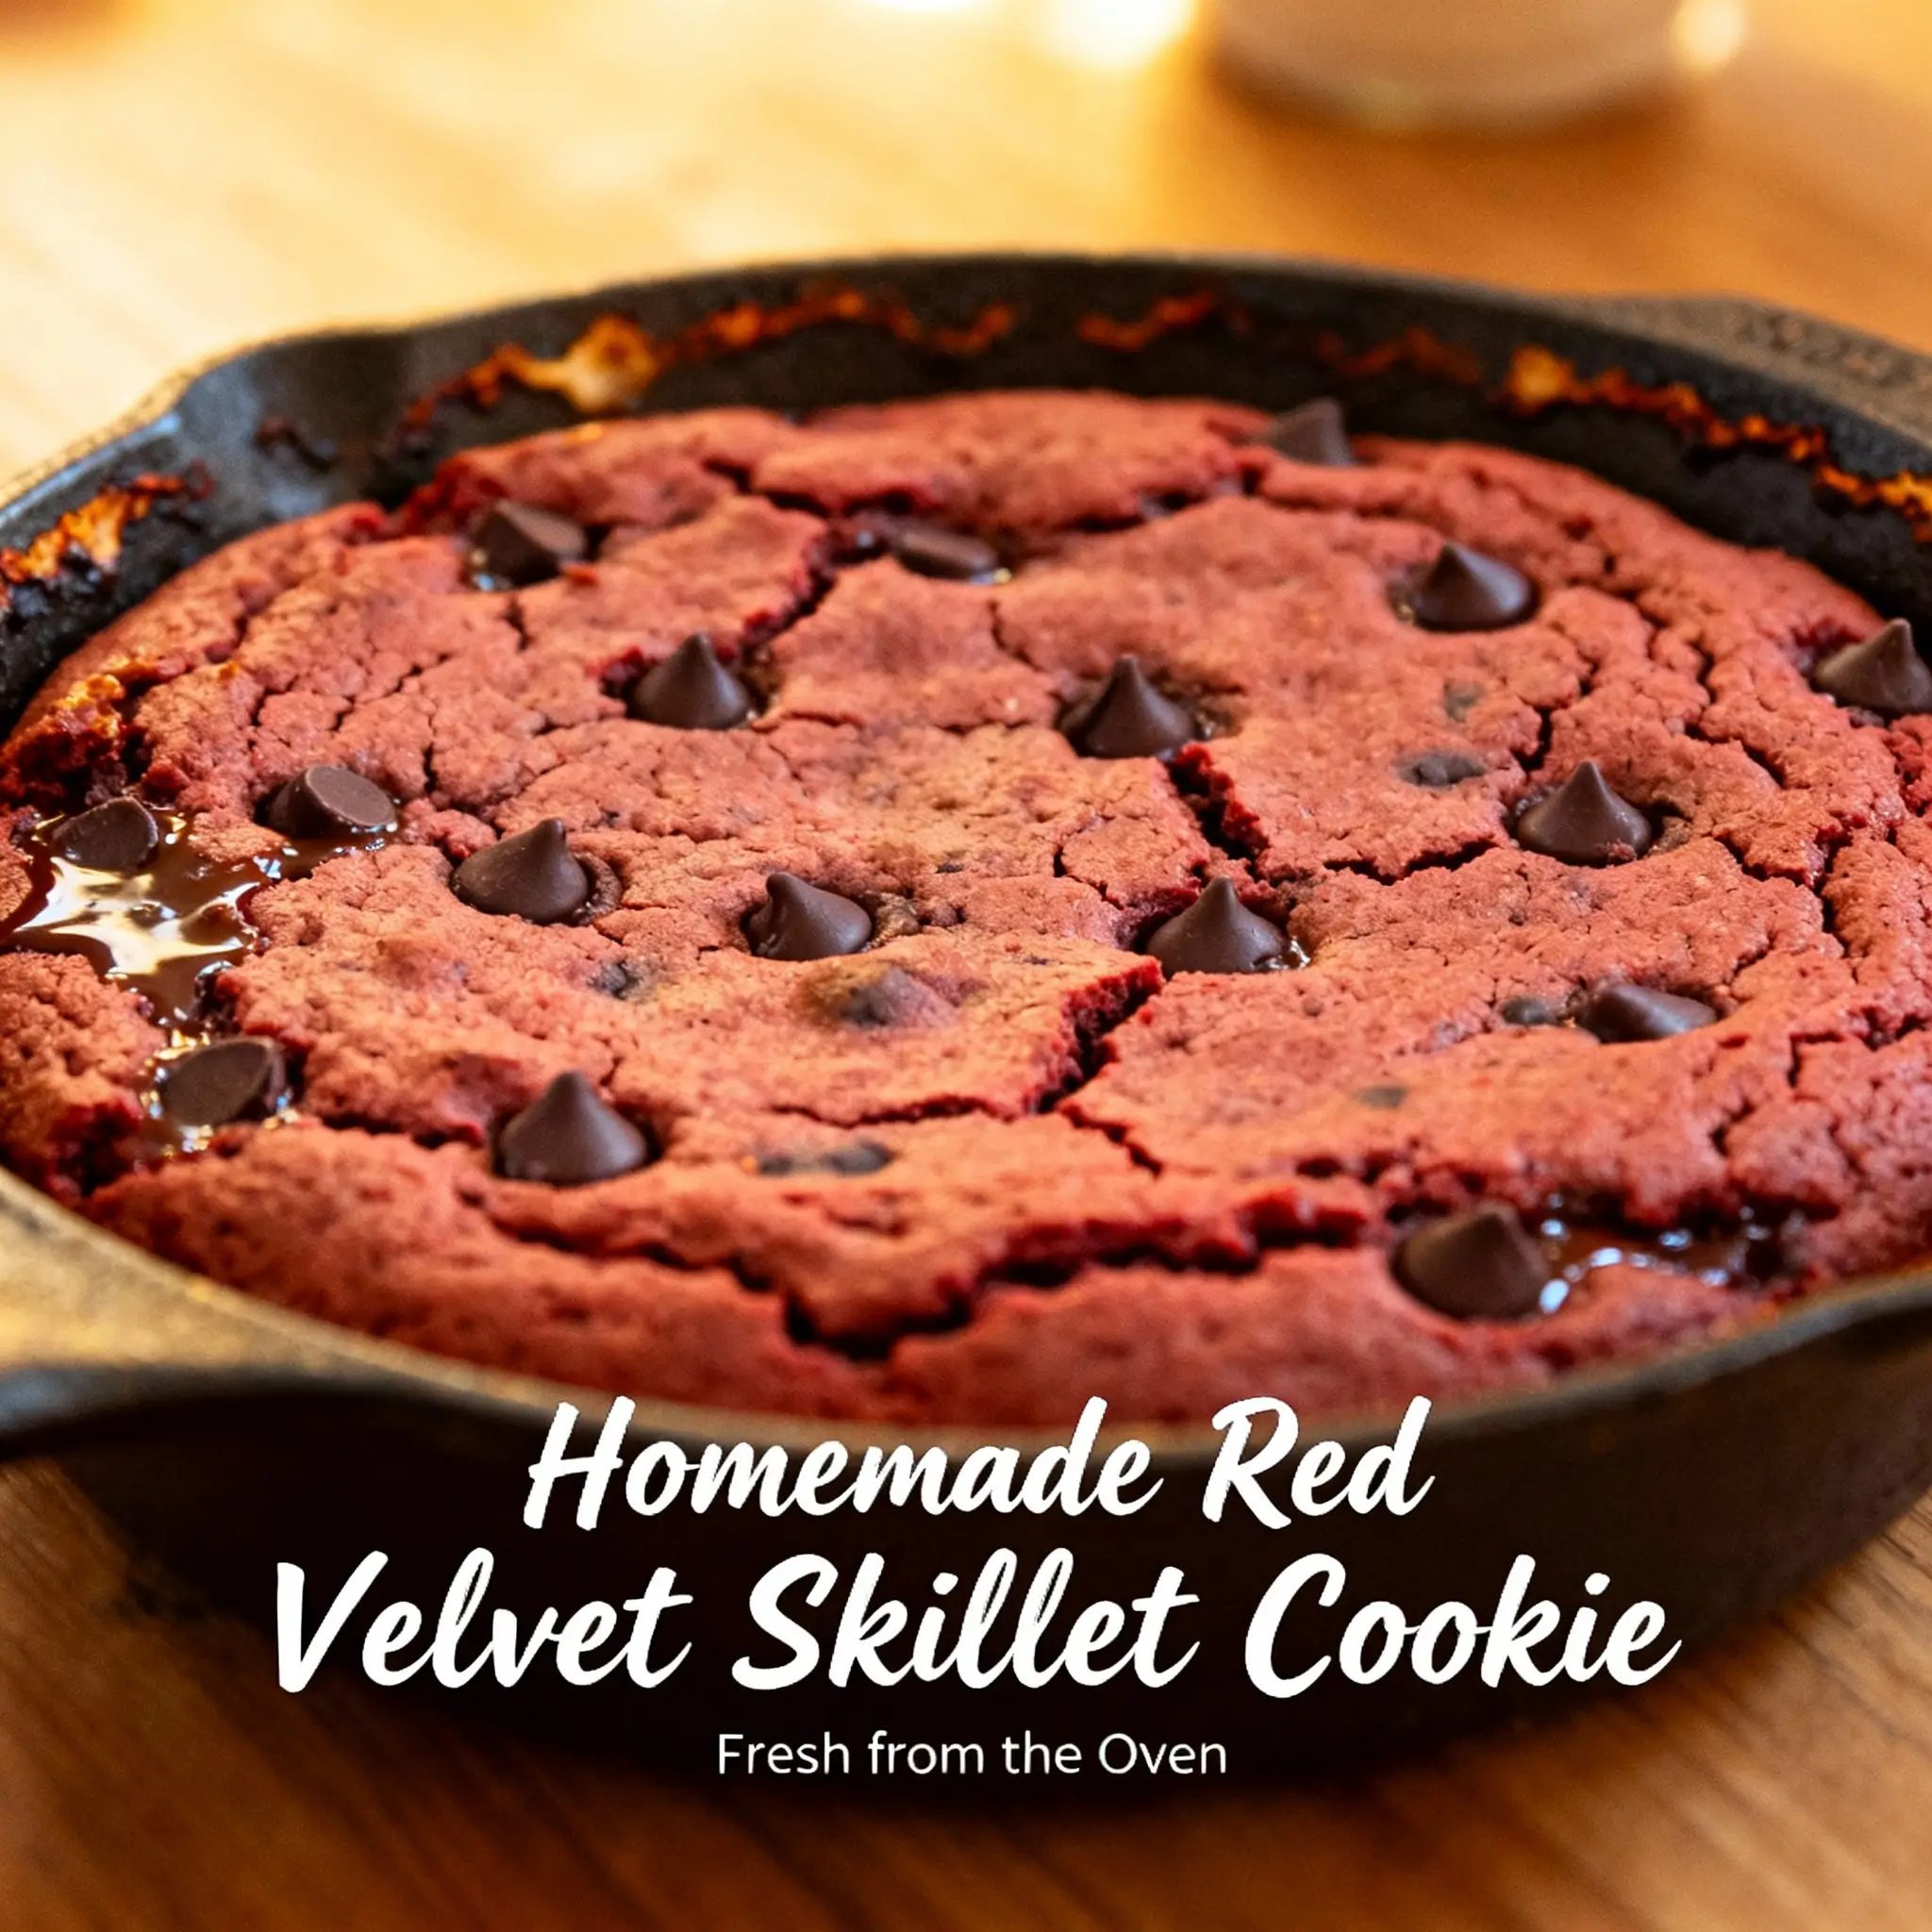
The Red Velvet Skillet Cookie is a decadent, show-stopping dessert that marries the beloved flavors of classic red velvet cake with the warm, gooey, chewy texture of a giant, pan-baked cookie. Served straight from a cast-iron skillet—often topped with a generous scoop of vanilla ice cream, a drizzle of cream cheese glaze, or a dusting of powdered sugar—it transforms an everyday treat into an unforgettable, shareable experience. This dessert has surged in popularity across social media platforms and food blogs for its photogenic appeal, rich aroma, and comforting contrast of crisp edges and molten center. More than just a novelty, the Red Velvet Skillet Cookie embodies modern baking: indulgent yet approachable, nostalgic yet inventive, and perfectly engineered for moments of celebration, cozy gatherings, or simply treating yourself to something luxuriously satisfying.
The History
While the exact origin of the Red Velvet Skillet Cookie remains undocumented in culinary archives, its evolution can be traced through two distinct but intertwined American dessert traditions: red velvet cake and skillet cookies. Red velvet cake emerged in the early 20th century—likely as a variation of mahogany or crimson cocoa cakes—where natural cocoa reacted with acidic ingredients (like buttermilk and vinegar) and beet juice (in some early versions) to produce a subtle reddish hue. By the 1940s, the advent of red food coloring standardized the vibrant shade we now associate with red velvet, popularized further by the Waldorf Astoria Hotel’s legendary recipe and later by Southern bakeries and home cooks across the U.S.
Skillet cookies, on the other hand, have roots in frontier and Depression-era cooking—when bakers repurposed cast-iron skillets as versatile, heat-retaining baking vessels due to limited oven space or lack of proper bakeware. The trend resurged in the 2010s with the rise of “giant cookie” culture—think bakery-style thick chocolate chip cookies—and was amplified by food stylists and influencers who recognized the skillet’s rustic charm and functional superiority: even heat distribution, superior browning, and effortless transition from oven to table. The fusion of these two icons—red velvet and skillet cookie—began appearing in niche food magazines and Instagram feeds around 2015–2016, gaining viral traction thanks to its visual drama (deep ruby crumb, glossy glaze, melting ice cream) and flavor harmony. Today, it’s a staple at boutique bakeries, wedding dessert tables, holiday open houses, and even gourmet food trucks—representing both heritage technique and contemporary creativity.
Ingredients Breakdown
Every exceptional Red Velvet Skillet Cookie begins with intentional, high-quality ingredients—each playing a precise role in color, texture, acidity, richness, and structure:
- All-Purpose Flour: Provides essential gluten structure while remaining tender—not too elastic, not too fragile. Measured correctly (spoon-and-level method recommended) to prevent density.
- Unsweetened Cocoa Powder (Natural, not Dutch-process): Critical for authentic red velvet flavor and proper acid-reactive chemistry. Natural cocoa is acidic and works synergistically with vinegar and buttermilk to deepen color and enhance leavening.
- Granulated Sugar & Brown Sugar (light or dark): Granulated sugar contributes to spread and crispness; brown sugar adds moisture, chewiness, and subtle caramel notes. The ratio balances tenderness with structural integrity.
- Unsalted Butter (softened, not melted): Adds richness, flakiness at the edges, and emulsifying power. Using unsalted butter allows full control over sodium levels—especially important when pairing with salted toppings or cream cheese glaze.
- Egg (large, room temperature): Acts as binder and leavening aid; contributes to lift and cohesive crumb. Room temperature ensures even incorporation and prevents seizing.
- Buttermilk (full-fat, cultured): The cornerstone of red velvet authenticity—its lactic acid reacts with baking soda to create lift *and* intensifies the red pigment in cocoa and food coloring. Substitutes like milk + vinegar or yogurt + milk are acceptable but yield slightly less nuanced tang and rise.
- Distilled White Vinegar: Amplifies acidity for optimal color development and tenderizing effect on gluten. A small amount makes a dramatic difference in both hue and mouthfeel.
- Red Food Coloring (gel-based preferred): While traditional recipes used beet juice or relied solely on cocoa-acid reactions, modern red velvet depends on concentrated gel food coloring (e.g., AmeriColor Super Red or Wilton No-Taste Red) for consistent, vibrant, non-watery results. Liquid coloring dilutes batter and weakens structure.
- Baking Soda: Reacts immediately with buttermilk and vinegar to produce carbon dioxide bubbles—creating airy pockets and helping the cookie rise without heaviness. Must be fresh (<6 months old) for full potency.
- Sea Salt or Kosher Salt: Enhances all other flavors and balances sweetness. Fine sea salt integrates seamlessly; flaky varieties are reserved for finishing.
- White Chocolate Chips or Chopped White Chocolate (optional but highly recommended): Complements the tart-sweet profile with creamy, vanilla-forward notes—echoing traditional red velvet pairings. Semi-sweet or dark chocolate chips may be used, but white chocolate best mirrors the classic cake-frosting dynamic.
- Vanilla Extract (pure, not imitation): Adds aromatic depth and rounds out the cocoa and tang. Madagascar bourbon vanilla is ideal.
Step-by-Step Recipe
- Preheat & Prep: Position oven rack to center. Preheat oven to 350°F (175°C). Generously grease a 10-inch cast-iron skillet with unsalted butter or neutral oil—ensure interior surface, sides, and rim are fully coated. Optional but recommended: line the bottom with a round of parchment paper for foolproof release.
- Mix Dry Ingredients: In a medium bowl, whisk together 1 ½ cups (188g) all-purpose flour, ¼ cup (25g) natural unsweetened cocoa powder, ½ tsp baking soda, and ½ tsp fine sea salt. Set aside.
- Cream Butter & Sugars: In a large stand mixer fitted with paddle attachment (or using a hand mixer), beat ¾ cup (170g) softened unsalted butter, ¾ cup (150g) granulated sugar, and ½ cup (100g) packed light brown sugar on medium-high speed for 3–4 minutes—until pale, fluffy, and completely homogenous. Scrape bowl thoroughly.
- Incorporate Egg & Vanilla: Add 1 large room-temperature egg and 1 tsp pure vanilla extract. Beat on medium speed for 1 minute until fully emulsified and glossy. Scrape bowl again.
- Combine Wet Acidics: In a small liquid measuring cup, stir together ¼ cup (60ml) full-fat buttermilk, 1 tsp distilled white vinegar, and 1 tbsp (15g) red gel food coloring until uniformly blended and deep crimson.
- Alternate Wet & Dry: With mixer on low speed, add one-third of dry mixture—mix until just combined. Pour in half of the buttermilk-vinegar-color mixture—mix until incorporated. Repeat: another third dry, remaining wet, final third dry—pausing to scrape bowl each time. Do *not* overmix; stop as soon as no dry streaks remain. Batter will be thick, glossy, and vividly red.
- Fold in Mix-Ins: Using a silicone spatula, gently fold in 1 cup (175g) high-quality white chocolate chips (or finely chopped white chocolate). Avoid overworking—just distribute evenly.
- Transfer & Smooth: Spoon batter into prepared skillet. Use an offset spatula or back of spoon to smooth into an even layer, pressing gently to eliminate air pockets and ensure uniform thickness (approx. 1 inch at center). Optional: sprinkle top with flaky sea salt or a few extra white chocolate shards.
- Bake: Place skillet on center oven rack. Bake for 28–34 minutes—timing varies based on skillet thickness and oven calibration. Cookie is done when edges are deeply set, slightly cracked, and pulling away from skillet sides; center should look *just* set (no jiggle when gently shaken) but still appear soft and slightly underbaked—do not wait for full firmness, or it will overbake during carryover cooking.
- Cool & Serve: Remove skillet from oven and let rest on a wire rack for *at least 15 minutes* before slicing. This allows residual heat to finish cooking the center and structure to stabilize. For ultimate indulgence, serve warm with scoops of premium vanilla bean ice cream, a generous drizzle of cream cheese glaze, and optional garnishes: fresh raspberries, crushed pecans, or edible rose petals.
Tips
- Skillet Matters: Use a well-seasoned 10-inch cast-iron skillet (not enameled) for optimal heat retention, browning, and crust formation. Enameled skillets work but produce softer edges. Avoid nonstick or aluminum—uneven heating leads to burnt spots or pale centers.
- Temperature Control: Ensure all refrigerated ingredients (butter, egg, buttermilk) are truly at room temperature (65–70°F)—cold fats cause separation; cold liquids curdle batter. Let butter sit 60–90 minutes; submerge egg in warm water for 5 minutes.
- Color Consistency: Gel food coloring is non-negotiable. Start with 1 tbsp red gel, then add ¼ tsp at a time until desired intensity is reached—some brands require more. Never substitute liquid dye unless doubling all other liquids proportionally (which compromises texture).
- No Overmixing: Once dry and wet ingredients meet, mix only until *just* combined. Overmixing develops gluten → tough, cakey, or rubbery texture instead of tender-chewy.
- Underbake Intentionally: The center should look softly set—not firm—when removed. Carryover cooking adds 3–5 minutes of residual heat setting. A toothpick inserted 1 inch from edge should come out clean; center insertion should yield moist crumbs—not wet batter, not dry cake.
- Cooling Is Crucial: Cutting too soon releases steam, collapses structure, and causes crumbling. Minimum 15-minute rest is mandatory; 25 minutes yields cleaner slices and intensified flavor melding.
- Make-Ahead Flexibility: Unbaked dough can be chilled in skillet (covered tightly) for up to 48 hours—let sit at room temp 20 minutes before baking. Or freeze shaped dough disc (wrapped in parchment + foil) for up to 3 months—bake frozen, adding 5–7 minutes.
- Even Baking Hack: Rotate skillet 180° halfway through bake if your oven has hot spots. Use an oven thermometer—many ovens run 25°F+ off calibration.
- Serving Warmth: Reheat individual slices in a toaster oven at 325°F for 4–5 minutes—or skillet slice in a 350°F oven for 8 minutes—to revive crisp edges and molten center.
Variations and Customizations
This versatile base invites endless creative expression—whether adapting for dietary needs, seasonal ingredients, or regional flair:
- Gluten-Free Version: Substitute 1:1 gluten-free all-purpose flour blend (with xanthan gum included, e.g., King Arthur Measure for Measure or Bob’s Red Mill). Add ½ tsp psyllium husk powder to improve elasticity and prevent crumbliness. Verify cocoa and food coloring are GF-certified.
- Vegan Adaptation: Replace butter with vegan butter stick (Miyoko’s or Earth Balance); egg with flax egg (1 tbsp ground flax + 2.5 tbsp warm water, rested 5 min); buttermilk with almond milk + 1 tsp vinegar; use dairy-free white chocolate (Enjoy Life or Pascha). Note: texture becomes denser and less chewy—add 1 tsp apple cider vinegar for extra lift.
- Whole Grain Twist: Replace ⅓ of flour with toasted oat flour or whole wheat pastry flour for nutty depth and fiber boost—maintain ⅔ all-purpose for structure.
- Decadent Upscale Additions: Fold in ½ cup toasted walnuts or pecans + 2 tbsp crumbled goat cheese (for savory-sweet contrast); swirl in 3 tbsp raspberry coulis before baking; top with candied ginger or orange zest before serving.
- Seasonal Infusions: Stir 1 tsp pumpkin pie spice into dry ingredients (fall); add 1 tbsp freeze-dried strawberry powder + lemon zest (spring); incorporate 1 tsp cardamom + crushed pistachios (winter holidays).
- Mini Skillet Edition: Divide batter among four 4-inch mini cast-iron skillets—bake 14–17 minutes. Perfect for portion control or gifting.
- Boozy Boost: Add 1 tbsp high-quality bourbon or cherry brandy to wet mixture for complex warmth—reduce buttermilk by 1 tbsp to compensate.
- Lower-Sugar Option: Replace half granulated sugar with erythritol-based blend (e.g., Swerve Brown); retain brown sugar for moisture. Expect slightly drier, less spread—but still flavorful with added 1 tbsp applesauce.
- “Cake-Layered” Presentation: Press half batter into skillet, top with ½ cup crumbled red velvet cake pieces or mini cupcakes, then cover with remaining batter before baking for surprise texture bursts.
Health Considerations and Nutritional Value
As an indulgent dessert, the Red Velvet Skillet Cookie is best enjoyed mindfully—not as a daily staple, but as a joyful, intentional part of a balanced lifestyle. A standard 10-inch skillet yields 8 generous servings; per slice (approx. 1/8 of recipe, without glaze or ice cream), nutritional estimates are as follows:
- Calories: ~380–420 kcal
- Total Fat: 22–25g (13–15g saturated, primarily from butter and white chocolate)
- Carbohydrates: 46–50g (34–38g sugars, including naturally occurring lactose and added sucrose)
- Protein: 4–5g
- Fiber: 1.5–2g (modest, unless whole grain flour or added oats are used)
- Sodium: 220–280mg (easily adjusted by reducing added salt)
Key Considerations:
- Food Coloring Safety: FDA-approved red dyes (Red #40, Red #3) are considered safe for most people in typical consumption amounts. However, sensitive individuals (especially children with ADHD sensitivities) may prefer natural alternatives: beetroot powder (¼ tsp, though color is muted burgundy), hibiscus tea reduction (simmer ¼ cup dried hibiscus + ½ cup water until syrupy), or pomegranate juice concentrate (reduced ¼ cup to 1 tbsp).
- Butter vs. Oil Debate: Butter contributes essential fat-soluble vitamins (A, D, E, K2) and beneficial short-chain fatty acids like butyrate—linked to gut health. While higher in saturated fat, recent meta-analyses suggest moderate intake within a whole-foods diet poses minimal cardiovascular risk for most adults.
- White Chocolate Notes: Contains cocoa butter, milk solids, and sugar—no cocoa solids, hence no flavonoids. Opt for brands with real vanilla and minimal emulsifiers (soy lecithin is acceptable; avoid PGPR or artificial flavors).
- Digestive Sensitivity: Buttermilk’s probiotics and lactic acid may support digestion for many—but those with lactose intolerance should choose lactose-free buttermilk or cultured coconut milk alternative.
- Portion Mindfulness: Serving alongside protein-rich toppings (Greek yogurt instead of ice cream) or fiber-rich sides (fresh berries, apple compote) slows glucose absorption and enhances satiety.
- Occasional Indulgence Benefit: Research in psychoneuroimmunology shows that pleasurable, shared desserts can lower cortisol, strengthen social bonds, and contribute meaningfully to emotional well-being—making this cookie as nourishing for the spirit as it is for the palate.
Ingredients
- 1 ½ cups (188g) all-purpose flour, spooned & leveled
- ¼ cup (25g) natural unsweetened cocoa powder (not Dutch-process)
- ½ teaspoon baking soda
- ½ teaspoon fine sea salt
- ¾ cup (170g) unsalted butter, softened to 65–70°F
- ¾ cup (150g) granulated sugar
- ½ cup (100g) packed light brown sugar
- 1 large egg, room temperature
- 1 teaspoon pure vanilla extract
- ¼ cup (60ml) full-fat cultured buttermilk, room temperature
- 1 teaspoon distilled white vinegar
- 1 tablespoon (15g) red gel food coloring (e.g., AmeriColor Super Red)
- 1 cup (175g) high-quality white chocolate chips or finely chopped white chocolate
- Optional garnishes: flaky sea salt, vanilla ice cream, cream cheese glaze, fresh raspberries
Directions
- Preheat oven to 350°F (175°C). Generously grease a 10-inch cast-iron skillet with butter or neutral oil, coating bottom, sides, and rim thoroughly. Optional: line bottom with parchment round.
- In medium bowl, whisk flour, cocoa powder, baking soda, and salt. Set aside.
- In large bowl of stand mixer with paddle attachment, beat softened butter, granulated sugar, and brown sugar on medium-high 3–4 minutes until light, fluffy, and pale. Scrape bowl.
- Add egg and vanilla; beat on medium 1 minute until smooth and emulsified. Scrape bowl.
- In small cup, stir together buttermilk, vinegar, and red gel food coloring until deep, uniform crimson.
- With mixer on low, add one-third dry mixture; mix until just incorporated. Add half colored buttermilk mixture; mix until absorbed. Repeat alternating, ending with dry ingredients. Scrape bowl thoroughly between additions. Stop immediately when no dry streaks remain—do not overmix.
- Gently fold in white chocolate chips with silicone spatula until evenly distributed.
- Transfer batter to prepared skillet. Smooth top with offset spatula, pressing gently to level and eliminate air pockets.
- Bake 28–34 minutes—until edges are deeply set, slightly cracked, and pulling from skillet sides; center should appear soft and just-set (no jiggle). A toothpick 1 inch from edge should come out clean; center insertion yields moist crumbs.
- Let cool in skillet on wire rack for minimum 15 minutes (25 minutes ideal) before slicing. Serve warm with desired accompaniments.
FAQ
- Can I use Dutch-process cocoa?
- No—Dutch-process cocoa is alkalized and neutral in pH, so it won’t react with vinegar and baking soda to develop the signature red hue or proper lift. Natural cocoa is essential for both color and chemical leavening.
- Why is my red velvet cookie brown instead of red?
- Most commonly due to: (1) Using liquid food coloring (dilutes batter and fades), (2) Old or weak baking soda (no acid reaction), (3) Substituting buttermilk with milk + vinegar (lacks lactic acid complexity), or (4) Overbaking—heat degrades anthocyanin pigments in cocoa and dye. Use fresh gel coloring and verify leavening agents.
- Can I bake this in a regular cake pan instead of a skillet?
- Yes—but texture and presentation change significantly. A 9-inch square pan yields a thinner, more cake-like bar cookie. Reduce bake time to 22–26 minutes. Skillet is preferred for superior crust-to-center ratio and rustic aesthetic.
- My batter seems too thick or too thin—what went wrong?
- Too thick = likely overmeasured flour (use spoon-and-level method) or cold buttermilk causing fat to seize. Too thin = overmixed batter, excess liquid dye, or melted butter. Always measure flour correctly and ensure ingredients are at specified temperatures.
- How do I store leftovers?
- Cool completely, cover skillet tightly with plastic wrap or transfer slices to airtight container. Store at room temperature up to 2 days, or refrigerate up to 5 days. Reheat individual slices in toaster oven or skillet at 325°F for 4–5 minutes to restore texture.
- Can I freeze the baked cookie?
- Yes—wrap cooled, uncut skillet cookie tightly in plastic wrap + aluminum foil. Freeze up to 2 months. Thaw overnight in fridge, then reheat covered in 350°F oven for 12–15 minutes.
- Is cream cheese frosting necessary?
- No—it’s traditional for red velvet cake, but the skillet cookie shines beautifully with simpler pairings: high-quality vanilla ice cream, lightly sweetened whipped cream, or even crème fraîche with honey. Frosting is optional enhancement, not requirement.
- Can I make this dairy-free?
- Absolutely—with substitutions: vegan butter, flax egg, dairy-free buttermilk (unsweetened almond milk + 1 tsp vinegar), and dairy-free white chocolate. See Variations section for full guidance and texture expectations.
- Why does my cookie sink in the center after cooling?
- Usually caused by underbaking (center wasn’t structurally set before removal), opening oven door too early (temperature shock), or insufficient baking soda. Also check oven calibration—low temps cause collapse.
- What size skillet is ideal?
- A standard 10-inch (25cm) cast-iron skillet yields perfect thickness and bake time. An 8-inch produces a thicker, longer-baking cookie (add 4–6 minutes); 12-inch yields thinner, crispier results (reduce time by 3–5 minutes). Adjust accordingly.
Summary
The Red Velvet Skillet Cookie is a masterful fusion of Southern red velvet tradition and modern skillet-baking artistry—delivering vibrant color, velvety crumb, tangy-sweet balance, and irresistible textural contrast in every warm, shareable slice.
With meticulous attention to ingredient quality, acid-driven chemistry, and mindful baking technique, it transforms humble pantry staples into a celebratory centerpiece that satisfies nostalgia, curiosity, and pure dessert desire—all from one stunning cast-iron vessel.