Red Velvet Sheet Cake: A Moist, Decadent Southern Classic
The Red Velvet Sheet Cake is more than just a dessert—it’s a celebration on a platter. Known for its striking crimson hue, velvety texture, and subtle cocoa flavor balanced with a hint of tanginess, this cake has become a staple at gatherings, birthdays, holidays, and Sunday dinners across the American South—and now, the world. Whether served at a family reunion or a wedding reception, its large surface area makes it ideal for feeding a crowd, while its elegant cream cheese frosting adds richness that complements the soft crumb perfectly. In this comprehensive guide, we’ll dive deep into the history, science, ingredients, techniques, variations, health considerations, and everything you need to know to bake the perfect Red Velvet Sheet Cake every single time.
The History of Red Velvet Cake
The origins of red velvet cake are as rich and layered as the dessert itself. While its exact beginnings are debated, most food historians trace its roots back to the early 20th century in the American South. One popular theory attributes its rise in popularity to the Adams Extract Company, which promoted the use of red food coloring in cakes during the Great Depression as a way to make desserts appear more luxurious with minimal ingredients. The vibrant color helped mask the fact that less butter, eggs, or flour were used, making it an economical yet impressive treat.
Another theory points to the Waldorf-Astoria Hotel in New York City, where a version of red velvet cake was allegedly served in the 1920s. According to legend, a guest fell in love with the cake, paid a substantial fee for the recipe, only to later discover it was widely available—all part of a clever marketing ploy by the hotel or a food company.
Originally, the red color came not from artificial dye but from a chemical reaction between natural cocoa powder (which contains anthocyanin, a pH-sensitive compound) and acidic ingredients like buttermilk and vinegar. This reaction gave the cake a faint reddish tint. However, as Dutch-processed cocoa (alkalized to reduce acidity) became more common, the natural red hue faded, prompting bakers to add food coloring to restore the signature look.
The term “velvet” in the name refers to the cake’s fine, soft crumb—smooth like velvet—achieved through the use of buttermilk and careful mixing techniques. Over time, red velvet evolved from a subtly tinted cocoa cake into the boldly colored, cream cheese-frosted showstopper we know today, especially popularized by chain bakeries and holiday menus.
Ingredients Breakdown: Why Each Component Matters
Baking a perfect Red Velvet Sheet Cake isn’t just about following steps—it’s about understanding how each ingredient contributes to flavor, texture, and structure. Let’s break down the components:
- All-Purpose Flour: Provides the foundational structure. It contains moderate gluten-forming proteins that give the cake enough support without becoming tough. Sifting ensures no lumps and promotes even mixing.
- Granulated Sugar: Sweetens the cake, tenderizes the crumb by interfering with gluten formation, and helps retain moisture. It also aids in browning during baking.
- Cocoa Powder (Unsweetened, Natural): Adds depth of chocolate flavor without overwhelming sweetness. Natural cocoa (not Dutch-processed) is essential because its acidity reacts with baking soda to help the cake rise and enhances the red color when combined with acid.
- Baking Soda: Reacts with acidic ingredients (buttermilk, vinegar, cocoa) to produce carbon dioxide, which leavens the cake, giving it a light, airy texture.
- Salt: Enhances all other flavors and balances sweetness. Without salt, the cake can taste flat and one-dimensional.
- Vegetable Oil: Keeps the cake moist and tender. Unlike butter, oil remains liquid at room temperature, contributing to a softer crumb. It also helps distribute fat more evenly throughout the batter.
- Eggs: Provide structure, emulsification, and leavening. The proteins in eggs coagulate during baking, helping set the cake’s structure, while yolks add richness and aid in moisture retention.
- Buttermilk: The star of tanginess and tenderness. Its acidity activates the baking soda and tenderizes gluten, resulting in a softer texture. It also enhances the red color naturally.
- Distilled White Vinegar: Boosts acidity for better leavening and color development. It also intensifies the tangy flavor profile that distinguishes red velvet from regular chocolate cake.
- Vanilla Extract: Adds warmth and depth to the flavor. Pure extract is preferred over imitation for a more authentic aroma.
- Red Food Coloring (Liquid or Gel): Gives the cake its iconic appearance. While traditional versions used minimal coloring, modern recipes often call for generous amounts. Gel coloring is more concentrated and provides intense color without thinning the batter.
For the frosting:
- Cream Cheese: Must be full-fat and softened. It provides the signature tangy flavor and creamy texture. Low-fat versions may result in a runny frosting.
- Unsalted Butter: Adds richness and helps stabilize the frosting. Softened to room temperature for smooth blending.
- Powdered Sugar (Confectioners’ Sugar): Sweetens and thickens the frosting. Sifted to avoid lumps and ensure a silky finish.
- Vanilla Extract: Complements the cream cheese and ties the flavor profile together.
- Salt (pinch): Balances the sweetness and enhances overall flavor.
Step-by-Step Recipe for Red Velvet Sheet Cake
Ingredients
For the Cake:
- 3 cups (360g) all-purpose flour, sifted
- 2 cups (400g) granulated sugar
- 2 teaspoons baking soda
- 1 teaspoon salt
- 1/4 cup (25g) unsweetened natural cocoa powder
- 1 1/2 cups (360ml) vegetable oil
- 3 large eggs, at room temperature
- 1 tablespoon vanilla extract
- 1 cup (240ml) buttermilk, at room temperature
- 1 tablespoon distilled white vinegar
- 2 tablespoons (30ml) red food coloring (liquid), or 1–2 teaspoons gel coloring
- 1 teaspoon red food coloring (optional, for deeper hue)
For the Cream Cheese Frosting:
- 16 oz (450g) full-fat cream cheese, softened
- 1/2 cup (115g) unsalted butter, softened
- 4 cups (480g) powdered sugar, sifted
- 1 1/2 teaspoons vanilla extract
- Pinch of salt
Directions
- Preheat and Prepare: Preheat your oven to 350°F (175°C). Generously grease a 9×13-inch or a 12×18-inch half-sheet pan (depending on desired thickness) with non-stick spray or butter, then line the bottom with parchment paper for easy removal.
- Mix Dry Ingredients: In a large bowl, whisk together the sifted flour, sugar, cocoa powder, baking soda, and salt until fully combined and no streaks remain.
- Combine Wet Ingredients: In a separate medium bowl, whisk together the vegetable oil, eggs, and vanilla extract until smooth and emulsified. Then, add the buttermilk, vinegar, and red food coloring. Mix until the color is uniform.
- Combine Wet and Dry: Gradually pour the wet mixture into the dry ingredients. Use a rubber spatula or hand mixer on low speed to blend just until incorporated. Do not overmix—this can lead to a dense cake. Scrape the sides and bottom of the bowl to ensure even mixing.
- Pour and Smooth: Pour the batter into the prepared pan and use an offset spatula to spread it into an even layer. Tap the pan gently on the counter to release air bubbles.
- Bake: Place in the center of the preheated oven and bake for 30–35 minutes for a 9×13-inch pan, or 25–30 minutes for a 12×18-inch sheet. The cake is done when a toothpick inserted into the center comes out clean or with a few moist crumbs. Avoid overbaking.
- Cool Completely: Allow the cake to cool in the pan on a wire rack for at least 30 minutes. Then, carefully lift it out using the parchment overhang. Let it cool completely before frosting—about 1.5 to 2 hours. Frosting a warm cake will cause the frosting to melt.
- Make the Frosting: In a large bowl, beat the softened cream cheese and butter together with a hand mixer or stand mixer until smooth, creamy, and no lumps remain (about 2–3 minutes). Gradually add the sifted powdered sugar, one cup at a time, mixing on low speed to avoid a sugar cloud. Once incorporated, increase speed to medium and beat until fluffy. Add vanilla and a pinch of salt, and beat for another 30 seconds.
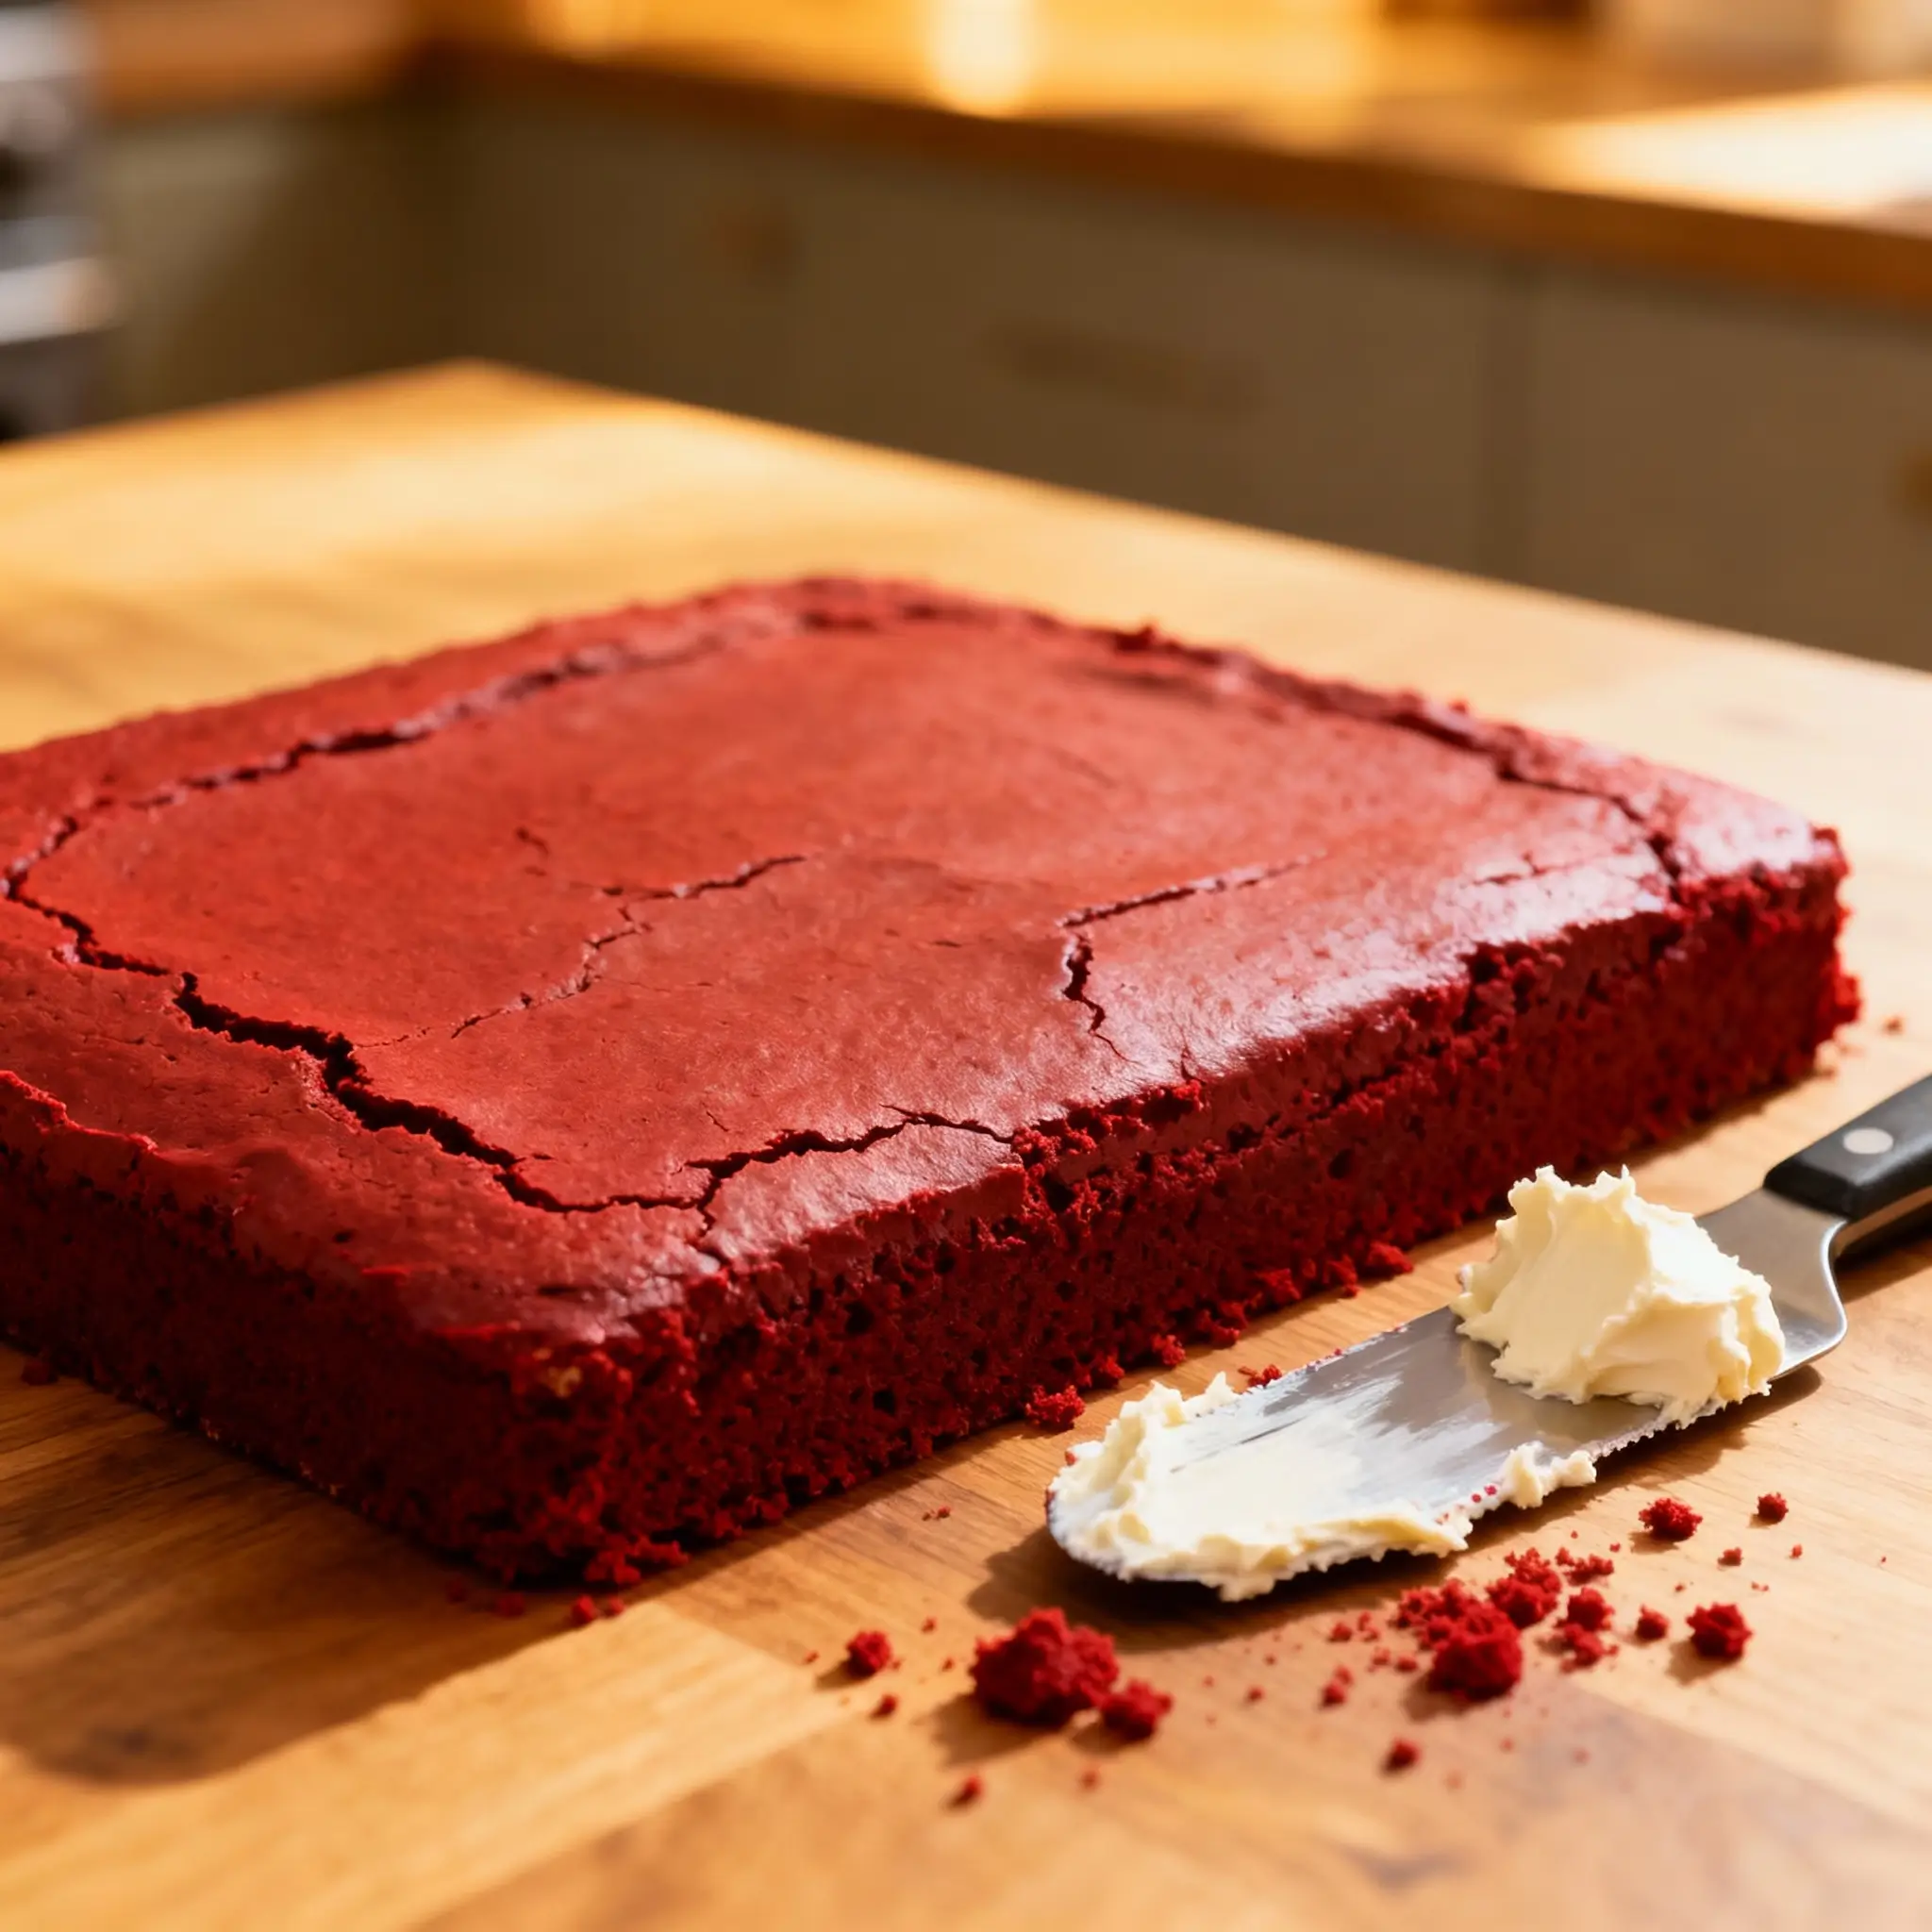
- Frost the Cake: Once the cake is completely cool, spread the frosting evenly over the top using an offset spatula. For a polished look, dip the spatula in hot water and wipe it dry between strokes. You can leave the sides unfrosted for a rustic look, or frost them if desired.
- Serve or Store: Slice and serve at room temperature. Store leftovers covered in the refrigerator for up to 5 days, or freeze unfrosted cake layers for up to 3 months.
Tips for Baking the Perfect Red Velvet Sheet Cake
- Use Room Temperature Ingredients: Cold eggs, buttermilk, or butter can cause the batter to curdle or bake unevenly. Take ingredients out 1–2 hours before baking.
- Sift Dry Ingredients: Prevents clumping and ensures even distribution of leavening agents and cocoa.
- Don’t Overmix: Once wet and dry ingredients are combined, mix only until just incorporated. Overmixing develops gluten, leading to a tough cake.
- Check Oven Temperature: Use an oven thermometer to ensure accuracy. An oven that runs hot or cold can affect rise and texture.
- Rotate the Pan: Halfway through baking, rotate the pan 180 degrees for even browning, especially in ovens with hot spots.
- Test for Doneness Early: Start checking a few minutes before the minimum bake time. Overbaked red velvet dries out quickly.
- Cool Completely Before Frosting: Warm cake melts the frosting, causing it to slide off or become greasy.
- Use Gel Food Coloring: More concentrated, so you get vibrant color without adding excess liquid.
- Chill Before Slicing: For cleaner slices, refrigerate the frosted cake for 30 minutes before cutting.
- Store Properly: Keep covered in the fridge due to the cream cheese frosting. Bring to room temperature before serving for best flavor and texture.
Variations and Customizations
While the classic red velvet sheet cake is timeless, there are countless ways to personalize it for different tastes and occasions:
- Mini Version: Bake in an 8×8 or 9×9 pan for a smaller batch. Reduce baking time to 25–28 minutes.
- Gluten-Free: Substitute all-purpose flour with a 1:1 gluten-free baking blend. Ensure it contains xanthan gum for structure.
- Dairy-Free: Replace buttermilk with a mix of almond milk and vinegar (1 tbsp vinegar + 1 cup milk). Use dairy-free butter and vegan cream cheese for frosting.
- Less Sugar: Reduce granulated sugar to 1.5 cups and use a monk fruit/powdered erythritol blend in the frosting for a lower-sugar option.
- Flavor Twists: Add 1/2 teaspoon cinnamon or espresso powder to enhance warmth. For a citrus note, add orange zest to the batter.
- Chocolate Drizzle: Melt dark chocolate and drizzle over the frosted cake for added elegance.
- White Chocolate Chips: Fold 1/2 cup into the batter for texture contrast.
- Layered Sheet Cake: Bake two thin layers and stack with frosting in between for a double-decker effect.
- Decorative Toppings: Sprinkle with red velvet crumbs, chopped pecans, edible gold flakes, or fresh berries for visual appeal.
- Alcohol-Infused: Brush cooled cake layers with a simple syrup made with bourbon or buttermilk for extra moisture and complexity (adults only).
Health Considerations and Nutritional Value
Red Velvet Sheet Cake is undeniably indulgent. While delicious, it’s important to enjoy it in moderation, especially for those monitoring sugar, fat, or calorie intake.
Nutritional Breakdown (Per Serving, 1/12 of a 9×13-inch cake):
- Calories: ~450–500
- Total Fat: 22–25g (Saturated Fat: 8–10g)
- Cholesterol: 70–80mg
- Sodium: 350–400mg
- Total Carbohydrates: 60–65g (Sugars: 45–50g)
- Protein: 4–5g
Considerations:
- High in Sugar: Both the cake and frosting contain significant added sugars. Excessive sugar intake is linked to obesity, type 2 diabetes, and heart disease.
- Saturated Fat: Cream cheese and butter contribute saturated fats. The American Heart Association recommends limiting saturated fat to 5–6% of daily calories.
- Food Coloring: Some people are sensitive to artificial dyes (especially Red 40). Natural alternatives include beet juice or powdered beet root, though they may yield a less vibrant color.
- Lactose Intolerance: Buttermilk and cream cheese contain lactose. Dairy-free substitutions are available.
- Gluten Sensitivity: Traditional recipe contains gluten. Use certified gluten-free flour for celiac-safe versions.
To make a healthier version:
- Reduce sugar by 25% and rely on vanilla and cocoa for flavor.
- Replace half the oil with unsweetened applesauce or mashed banana.
- Use Greek yogurt instead of cream cheese in frosting (lower fat, higher protein).
- Serve smaller portions and pair with fresh fruit.
Frequently Asked Questions (FAQ)
Q: Why is my red velvet cake not red enough?
A: Natural cocoa and buttermilk create only a faint red tint. For a bold color, you must add food coloring. Use gel coloring for intensity without thinning the batter.
Q: Can I make red velvet cake ahead of time?
A: Yes! Bake and cool the cake, then wrap tightly in plastic and refrigerate for up to 2 days. Frost the day of serving. Unfrosted layers can be frozen for 3 months.
Q: Can I use Dutch-processed cocoa?
A: Not recommended. It’s less acidic and won’t react properly with baking soda, potentially affecting rise and color. Stick to natural cocoa.
Q: Why did my cake sink in the middle?
A: Possible causes include underbaking, too much leavening, opening the oven too early, or overmixing. Always measure ingredients accurately and avoid jarring the cake during baking.
Q: Can I bake this in round pans?
A: Absolutely. Divide the batter into three 9-inch round pans and adjust baking time to 25–28 minutes. This makes a classic layered red velvet cake.
Q: Is red velvet just chocolate cake with food coloring?
A: No. The combination of buttermilk, vinegar, cocoa, and baking soda creates a unique texture and slightly tangy flavor distinct from regular chocolate cake.
Q: How long does cream cheese frosting last?
A: It should be refrigerated and consumed within 5 days. Do not leave at room temperature for more than 2 hours due to perishable ingredients.
Q: Can I pipe decorations with this frosting?
A: Yes, but chill the frosting for 15–20 minutes first to thicken it. Use a piping bag with a star tip for borders or rosettes.
Summary
The Red Velvet Sheet Cake is a beloved Southern dessert known for its moist, tender crumb, subtle cocoa flavor, and vibrant red color, crowned with rich cream cheese frosting. Perfect for crowds and celebrations, it combines tradition, science, and artistry in every slice.