Introduction
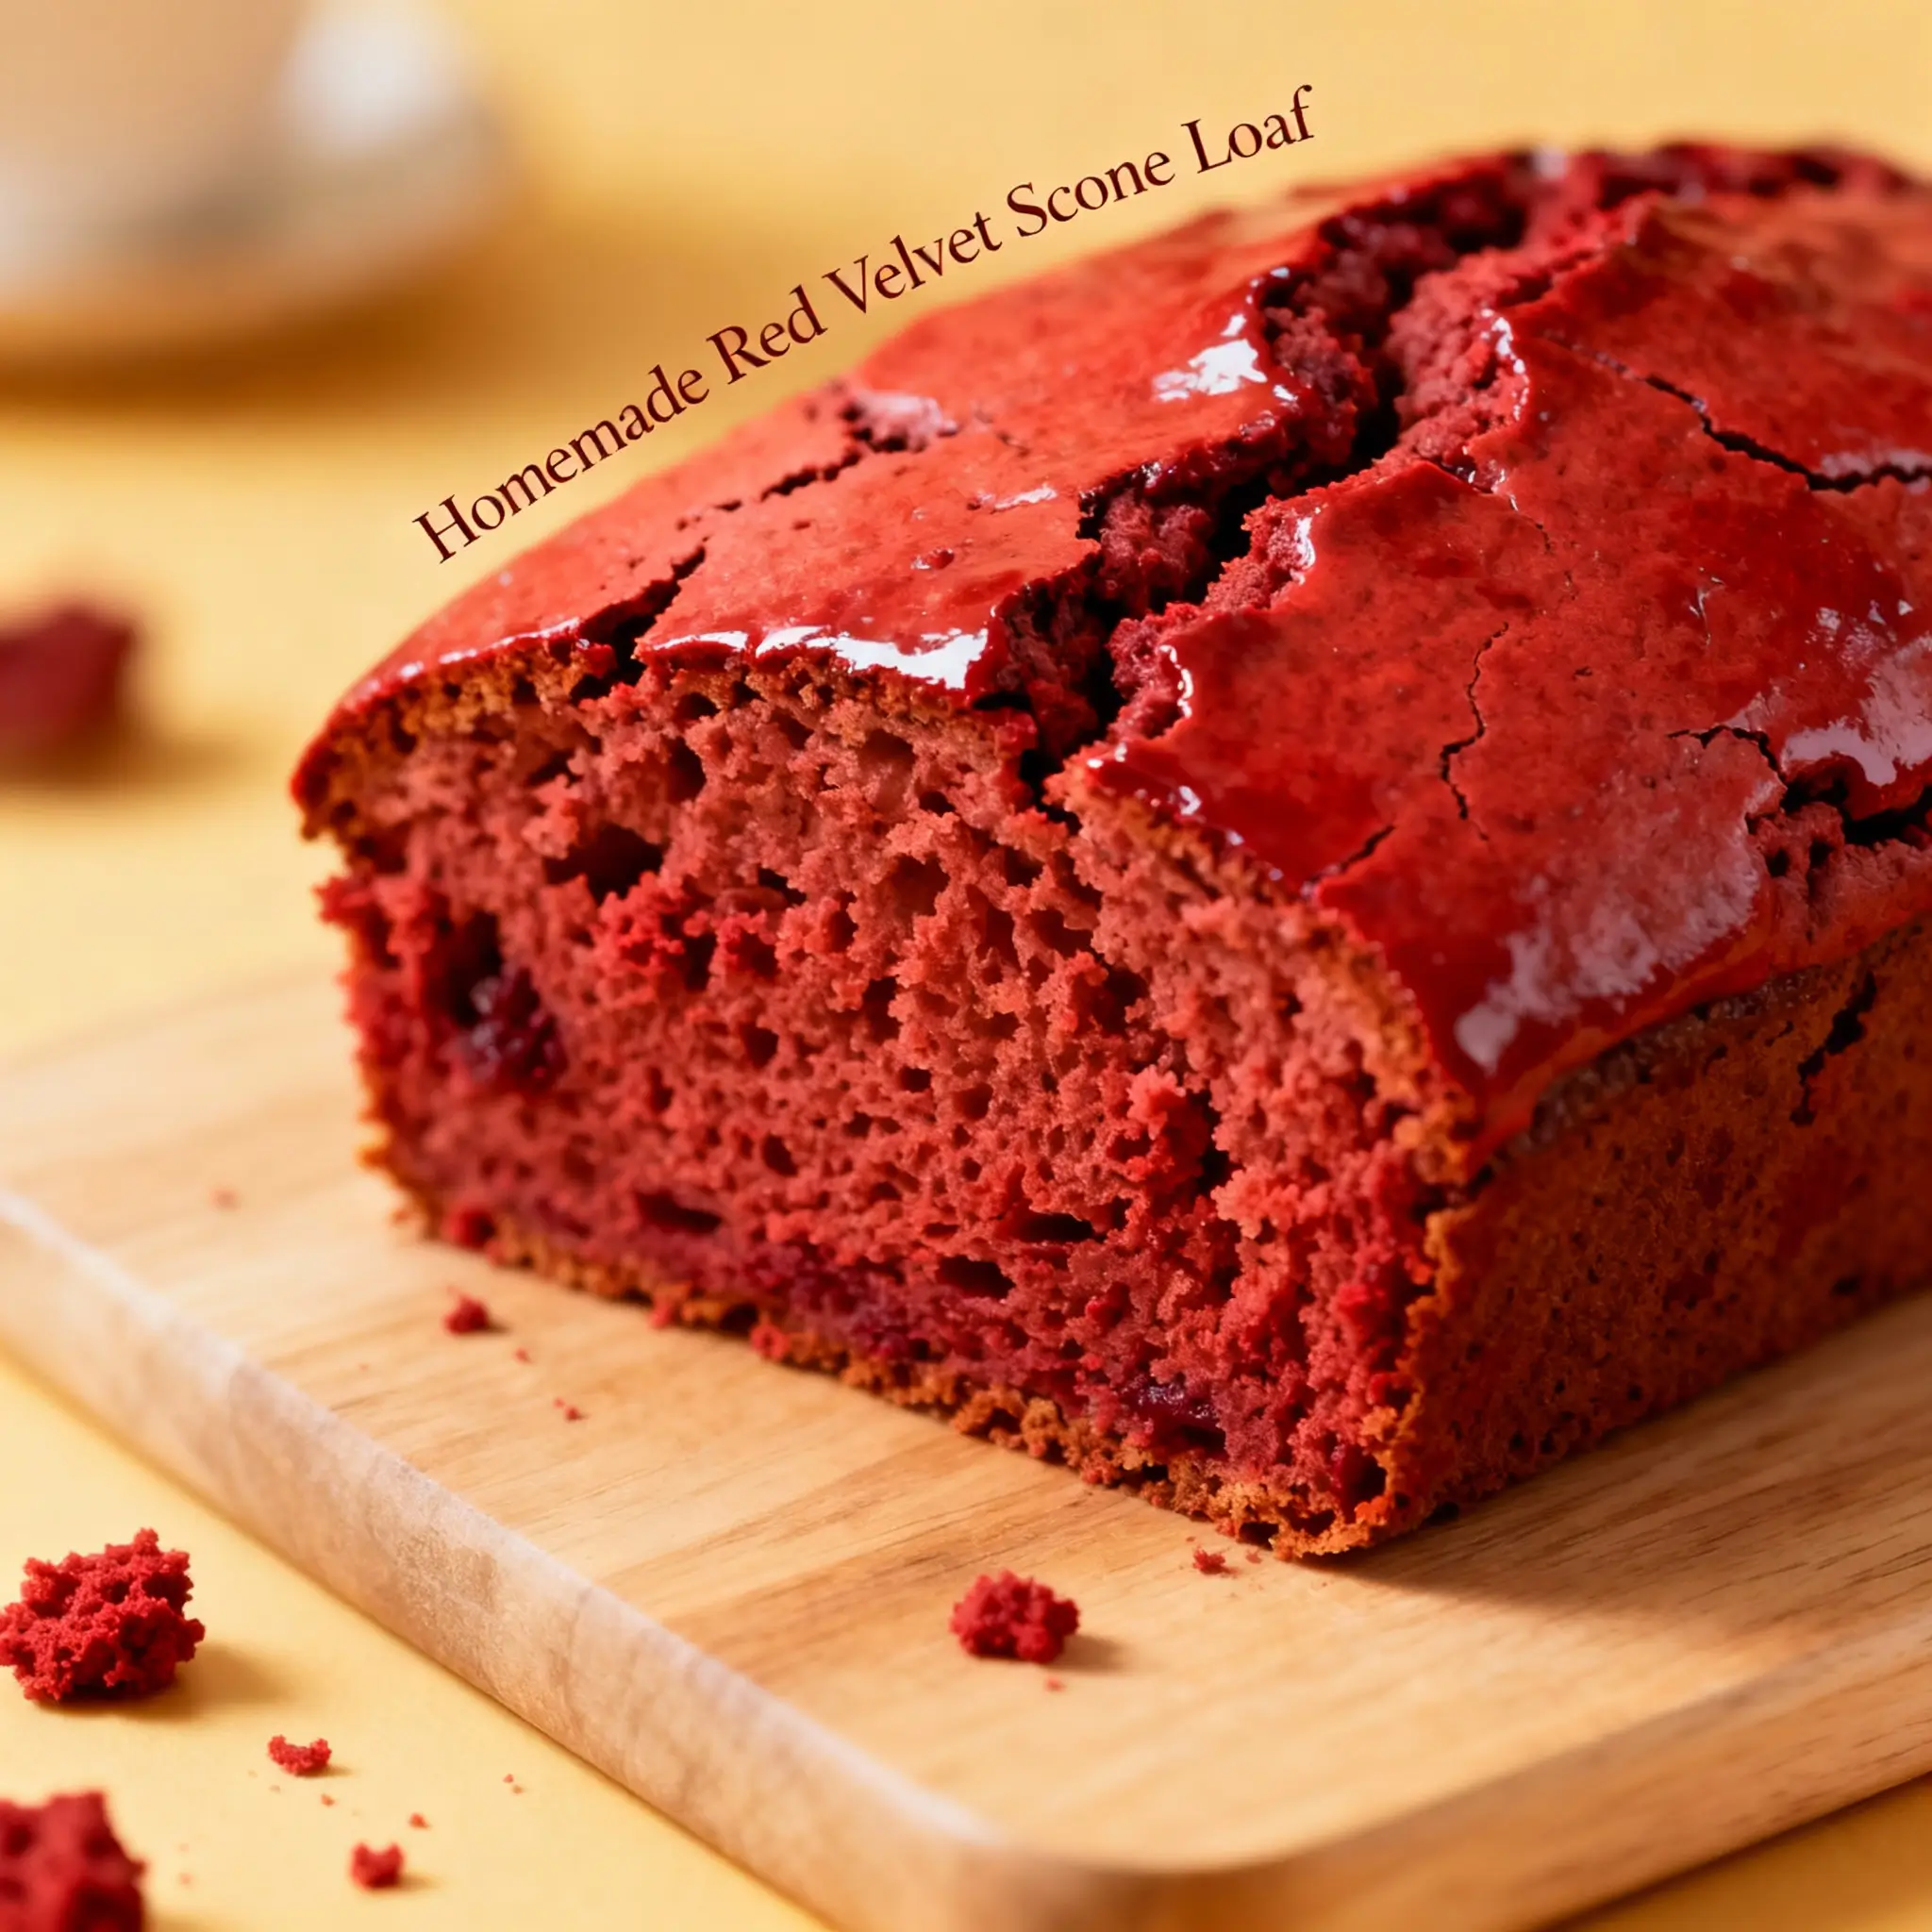
Red Velvet Scone Loaf is a decadent, modern twist on two beloved American baked goods—the tender, crumbly scone and the rich, velvety red velvet cake. This hybrid creation marries the buttery, flaky structure of a scone with the iconic cocoa-infused, crimson-hued elegance of red velvet—complete with subtle tang from buttermilk and a whisper of vinegar, all elevated by cream cheese glaze and optional white chocolate or walnut accents. Unlike traditional scones, which are often served individually and best enjoyed fresh, the Red Velvet Scone Loaf is designed for ease, shareability, and visual impact: baked in a loaf pan for uniform rise, clean slicing, and impressive presentation—perfect for brunch gatherings, holiday tables, afternoon tea, or as a gourmet gift. Its moist-yet-structured crumb strikes a delicate balance—neither cakey nor dry—offering a sophisticated flavor profile that’s simultaneously nostalgic and refreshingly inventive.
The History
While the exact origin of the Red Velvet Scone Loaf remains undocumented in culinary archives, its evolution can be traced through several converging food trends over the past two decades. Red velvet cake itself dates back to at least the early 20th century, with roots possibly in the use of natural cocoa (containing anthocyanins) reacting with acidic ingredients like buttermilk and vinegar to produce a subtle reddish tint—a phenomenon amplified post–World War II with the advent of beet juice and, later, synthetic red food coloring. The scone, by contrast, hails from Scotland in the early 16th century, originally baked on griddles before evolving into oven-baked, leavened quick breads across Britain and the Commonwealth. The fusion began gaining traction around 2010–2012, as artisanal bakeries and food bloggers experimented with “cake-scone hybrids”—seeking richer textures and bolder flavors without sacrificing the comforting integrity of traditional scone technique. Pioneering blogs like Handle the Heat and Baker Bettie published early adaptations using cream cheese in scone dough, while Southern-based patisseries (notably in Atlanta and Nashville) introduced red velvet variations for Valentine’s Day and Christmas markets. By 2018, the loaf format emerged as a practical solution to portion control, even baking, and transport-friendly serving—especially popular among meal-prep enthusiasts and café owners seeking Instagrammable, slice-and-serve offerings. Today, the Red Velvet Scone Loaf stands as a testament to the creative elasticity of American baking: honoring tradition while embracing innovation, acidity, color, and crave-worthy indulgence.
Ingredients Breakdown
Every ingredient in this Red Velvet Scone Loaf serves a precise functional and sensory role—no component is arbitrary. Below is an in-depth analysis of each element:
- All-Purpose Flour (3 cups / 360g): Provides gluten structure for lift and cohesion. A moderate protein content (~10–11%) ensures tenderness without toughness. For enhanced texture, some bakers substitute up to ¼ cup with cake flour to soften crumb density.
- Granulated Sugar (¾ cup / 150g): Adds sweetness, aids browning (via caramelization), and contributes to tenderness by interfering with gluten development. A small portion also feeds yeast if using a hybrid yeast-leavened version (optional variation).
- Baking Powder (2 tsp) + Baking Soda (½ tsp): Dual-acting leaveners create optimal rise. Baking powder provides primary lift during baking, while baking soda neutralizes the acidity from buttermilk and vinegar—enhancing both rise and the signature red hue (anthocyanin stabilization). Omitting soda dulls color and yields denser texture.
- Unsweetened Natural Cocoa Powder (¼ cup / 24g): Must be *natural* (non-alkalized), not Dutch-process—critical for pH-dependent red color development and proper reaction with baking soda. Imparts deep chocolate notes without bitterness; brands like Hershey’s Natural or Ghirardelli’s Natural Cocoa are ideal.
- Red Food Coloring (2 tbsp liquid or 1½ tsp gel): While historically derived from beets or anthocyanins, modern versions rely on high-potency red dye (e.g., AmeriColor Super Red or Wilton No-Taste Red) for consistent, vibrant crimson. Gel coloring is preferred—it adds negligible liquid, preserving dough hydration and intensity. “No-taste” formulations prevent metallic or chemical aftertastes.
- Buttermilk (1 cup / 240ml, well-shaken): Adds acidity (for leavener activation and color enhancement), fat for tenderness, and lactic tang that balances sweetness. Full-fat buttermilk yields superior richness; low-fat versions may result in drier crumb. Buttermilk substitutes (milk + 1 tbsp lemon juice/vinegar, rested 5 min) work—but lack cultured complexity and may mute red tone.
- Unsalted Butter (10 tbsp / 140g, cold & cubed): The backbone of scone texture. Cold butter creates steam pockets during baking, yielding flakiness and open crumb. European-style butter (82–84% fat) enhances richness and reduces water content, minimizing gluten activation. Grating frozen butter is a pro tip for even distribution and minimal handling.
- Large Egg (1, cold): Adds structure, moisture, emulsification, and golden hue to crust. Using a cold egg helps maintain overall dough temperature—critical for butter integrity.
- White Vinegar or Apple Cider Vinegar (1 tsp): Reinforces acidity for optimal color development and leavener efficiency. Also brightens flavor—counteracting heaviness from cocoa and sugar. Do not omit, even if using cultured buttermilk.
- Vanilla Extract (1½ tsp, pure): Enhances aromatic complexity and rounds out cocoa’s earthiness. Mexican or Tahitian vanilla adds floral nuance; avoid imitation extract, which can taste artificial against delicate red velvet notes.
- Salt (1 tsp fine sea salt or kosher): Essential for flavor balance—heightens sweetness, tempers bitterness, and strengthens gluten just enough for structure without chewiness.
- Optional Add-Ins:
- White Chocolate Chips (½ cup): Adds creamy sweetness and textural contrast; use high-cocoa-butter chips (e.g., Callebaut or Guittard) to prevent melting into streaks.
- Chopped Walnuts or Pecans (⅓ cup): Introduces nutty depth and crunch; toast first for maximum aroma and oil stability.
- Freeze-Dried Raspberries (2 tbsp, crushed): Boosts natural red pigment and adds bright, tart complexity—complements the velvet profile beautifully.
Step-by-Step Recipe
- Prep & Chill (15 min): Place mixing bowl, whisk, pastry cutter (or food processor bowl), and metal loaf pan (8.5″ x 4.5″) in freezer for 10 minutes. Cube butter and return to freezer for 5 minutes. Measure all dry ingredients and sift together (flour, sugar, baking powder, baking soda, cocoa, salt) into a large chilled bowl. Whisk vigorously to aerate and evenly distribute leaveners and cocoa.
- Cut in Butter (3–4 min): Add frozen butter cubes to dry mixture. Using a pastry cutter (or pulse in food processor 8–10 times), cut butter until mixture resembles coarse cornmeal with pea-sized butter pieces visible. Avoid overworking—cold, distinct butter pockets are essential for flakiness.
- Combine Wet Ingredients (2 min): In a separate chilled bowl, whisk buttermilk, egg, vinegar, vanilla, and red food coloring until fully emulsified and uniformly pink-red (no streaks). For gel coloring, ensure full dispersion with vigorous whisking—gel can clump if added too quickly.
- Form Dough (2–3 min): Pour wet mixture over dry. Using a flexible silicone spatula or fork, gently fold *just until* shaggy dough forms and no dry flour remains—about 12–15 folds. Do not knead or overmix. If adding white chocolate or nuts, fold in gently during last 2–3 strokes. Dough will be soft, slightly sticky, and cohesive—not wet or runny.
- Chill Dough (30–45 min): Turn dough onto lightly floured surface. Pat into rough 8″ x 4″ rectangle (matching loaf pan dimensions). Wrap tightly in parchment paper, then plastic wrap. Refrigerate minimum 30 minutes (up to 2 hours). Chilling solidifies butter, relaxes gluten, improves slice definition, and prevents spreading.
- Prepare Pan & Preheat (5 min): Preheat oven to 375°F (190°C) with rack in center position. Grease loaf pan thoroughly with butter, then line bottom and long sides with parchment paper, leaving 1″ overhang on two opposite sides for easy removal. Lightly flour parchment.
- Shape & Load (2 min): Remove dough from fridge. Gently transfer rectangle into pan, pressing evenly into corners. Smooth top with damp hands or offset spatula. Optional: brush surface with extra buttermilk and sprinkle with turbinado sugar for sparkle and crunch.
- Bake (45–55 min): Bake 45 minutes, then rotate pan front-to-back. Continue baking 5–10 more minutes until deep mahogany-red crust forms and a skewer inserted into center emerges with *moist crumbs* (not wet batter, not completely clean). Internal temperature should read 205–210°F (96–99°C) on instant-read thermometer. Overbaking leads to dryness—red velvet’s moisture is non-negotiable.
- Cool & Glaze (25 min): Cool loaf in pan on wire rack 15 minutes. Use parchment overhang to lift loaf out. Cool completely on rack (minimum 45 minutes) before glazing—warm loaf absorbs glaze, causing sogginess. Prepare Cream Cheese Glaze (see below) and drizzle generously over cooled loaf. Let glaze set 10 minutes before slicing.
Tips
- Temperature is Everything: Keep *everything* cold—butter, buttermilk, egg, bowl, tools—until dough is shaped and chilled. Warm ingredients melt butter prematurely, creating greasy, dense loaves instead of tender, layered crumb.
- Measure by Weight: Volume measurements for flour vary wildly (up to 25% difference). Use a digital kitchen scale—360g flour is non-negotiable for accuracy. Spoon-and-level method is acceptable only if you’re meticulous; never scoop directly from bag.
- Gel > Liquid Coloring: Liquid red dye adds excess water, diluting flavor and weakening structure. Gel delivers intense color with zero hydration impact. Start with 1 tsp gel, add more drop-by-drop until desired hue is reached pre-mixing.
- Don’t Skip the Vinegar: Even with buttermilk, the extra acidity ensures full baking soda activation and maximizes anthocyanin bloom in cocoa. It’s the secret behind the “velvet” depth—not just color, but nuanced tang.
- Undermix, Then Undermix Again: Scone dough is forgiving of undermixing—but unforgiving of overmixing. When in doubt, stop folding 2 strokes early. Lumps are welcome; smooth batter is a red flag.
- Chill Twice: First chill (post-mixing) hydrates flour and firms butter. Second chill (post-shaping) tightens gluten and prevents oven spring distortion. Skipping either results in uneven bake and poor slice retention.
- Loaf Pan Matters: Use a light-colored, non-stick or aluminized steel loaf pan—not dark non-stick (causes over-browning) or glass (uneven heating). An 8.5″ x 4.5″ standard size ensures optimal thickness-to-surface ratio for even cooking.
- Test Doneness Correctly: The skewer test is essential—but interpret “clean” loosely. A few moist, chocolate-speckled crumbs clinging to skewer = perfect. Dry skewer = overbaked. Wet batter = underbaked. Trust your thermometer more than time.
- Cool Completely Before Slicing: Cutting into warm loaf releases trapped steam, collapsing structure and making slices crumble. Wait full 45–60 minutes—even if it’s agony. Use a serrated knife with gentle sawing motion for clean edges.
- Glaze Timing is Critical: Apply cream cheese glaze *only* to fully cooled loaf. Warmth melts glaze into absorption rather than setting. For decorative flair, reserve 1 tbsp glaze in piping bag for drizzle lines after base coat sets.
Variations and Customizations
This Red Velvet Scone Loaf is inherently adaptable—designed for dietary needs, seasonal inspiration, and creative expression. Below are rigorously tested variations, each preserving structural integrity and signature flavor balance:
- Gluten-Free Version: Substitute 360g King Arthur Gluten-Free Measure-for-Measure Flour (contains xanthan gum). Increase buttermilk by 1 tbsp (GF flours absorb more liquid). Add ½ tsp xanthan gum if blend doesn’t include it. Chill dough 60 minutes—GF dough benefits from extra hydration time. Expect slightly denser, moister crumb—equally delicious.
- Vegan Adaptation: Replace butter with 140g cold vegan butter (Miyoko’s or Earth Balance); egg with flax egg (1 tbsp ground flax + 2.5 tbsp water, rested 5 min); buttermilk with 1 cup unsweetened soy milk + 1 tbsp lemon juice; use maple syrup (¼ cup) in place of 2 tbsp sugar for added binding. Omit glaze or use vegan cream cheese + powdered sugar + almond milk. Best served same-day.
- Protein-Boosted Loaf: Add 2 scoops (60g) unflavored collagen peptides or whey isolate to dry ingredients. Reduce flour by 2 tbsp to compensate. Increases satiety without altering taste—ideal for breakfast-focused baking.
- Black Cocoa “Midnight Velvet” Loaf: Swap natural cocoa for black cocoa (2 tbsp) + keep 2 tbsp natural cocoa. Black cocoa (Dutch-processed, intensely alkalized) yields near-black crumb with deep, roasted, almost licorice-like notes—stunning contrast under white glaze. Reduce baking soda to ¼ tsp to avoid excessive browning.
- Spiced Velvet Loaf: Add 1 tsp ground cinnamon, ¼ tsp ground cardamom, and pinch of freshly grated nutmeg to dry ingredients. Complements red velvet’s warmth—especially lovely with candied ginger (¼ cup, finely chopped) folded in.
- Mini Loaf Trio: Divide dough among three 5.75″ x 3.25″ mini loaf pans. Reduce bake time to 32–38 minutes. Perfect for gifting or portion-controlled servings. Glaze individually.
- Streusel-Topped Loaf: Before baking, prepare streusel: ¼ cup flour, 3 tbsp brown sugar, 2 tbsp cold butter, ½ tsp cinnamon, pinch salt. Rub until pebbly. Sprinkle thickly over loaf. Adds caramelized crunch and bakery-style appeal.
- Boozy Velvet Loaf: Replace 2 tbsp buttermilk with 2 tbsp high-quality red velvet liqueur (e.g., St. George Red Vodka) or bourbon. Enhances complexity—best paired with toasted pecans. Reduce vinegar to ½ tsp to balance added alcohol acidity.
- Low-Sugar Option: Reduce granulated sugar to ⅓ cup (65g) and add 2 tbsp monk fruit-erythritol blend. Use unsweetened cocoa and natural red coloring. Glaze with sugar-free powdered erythritol blend. Crumb remains tender—slightly less browning, but rich flavor intact.
- Seasonal Fruit Swirl: After shaping dough in pan, swirl in ⅓ cup seedless raspberry jam or strained blackberry coulis using a knife. Creates stunning marbled effect and bursts of tart fruit against sweet velvet base.
Health Considerations and Nutritional Value
A single 1-slice (approx. 100g) serving of Red Velvet Scone Loaf—un-glazed, made with full-fat ingredients—contains approximately:
- Calories: 320–350 kcal
- Total Fat: 16–18g (including 10–11g saturated fat from butter)
- Carbohydrates: 42–45g (of which 24–26g sugars, primarily from added sucrose)
- Protein: 5–6g
- Fiber: 2g (from cocoa and whole grain options in variations)
- Sodium: 320–360mg
Nutritional Highlights & Considerations:
- Cocoa Benefits: Natural cocoa is rich in flavanols—antioxidants linked to improved endothelial function and mild blood pressure support. To maximize benefit, avoid Dutch-process cocoa in original recipe (alkalization degrades flavanols).
- Buttermilk Advantage: Contains probiotics (Lactobacillus species) when cultured, supporting gut microbiome health. Also provides calcium, vitamin B12, and potassium—often lacking in baked goods.
- Food Coloring Notes: FDA-approved red dyes (Red #40, etc.) are deemed safe at approved levels, though some individuals report sensitivity (e.g., hyperactivity in children with ADHD). Natural alternatives include beet powder (adds earthy sweetness, less vibrant red) or purple carrot juice (neutral flavor, stable color).
- Portion Mindfulness: While indulgent, this loaf is significantly lower in refined sugar per serving than traditional red velvet cupcakes (which average 45–50g sugar each). Serving size control via slicing makes moderation easier.
- Dietary Modifications: Gluten-free, vegan, and low-sugar versions maintain core satisfaction while accommodating medical needs. Note: Vegan butter often contains palm oil—opt for RSPO-certified brands for sustainability.
- Not a “Health Food”—But Not Empty Calories Either: This loaf delivers meaningful macronutrients (fat for satiety, protein for muscle support, complex carbs for energy) alongside phytonutrients from cocoa and dairy. Enjoy as part of a balanced diet—not daily, but meaningfully.
Ingredients
- 3 cups (360g) all-purpose flour, spooned & leveled
- ¾ cup (150g) granulated sugar
- 2 tsp aluminum-free baking powder
- ½ tsp baking soda
- ¼ cup (24g) unsweetened natural cocoa powder (NOT Dutch-process)
- 2 tbsp (30ml) liquid red food coloring or 1½ tsp high-quality red gel food coloring
- 1 cup (240ml) full-fat buttermilk, well-shaken
- 10 tbsp (140g) unsalted butter, cold & cubed
- 1 large egg, cold
- 1 tsp white vinegar or apple cider vinegar
- 1½ tsp pure vanilla extract
- 1 tsp fine sea salt
- For Cream Cheese Glaze: 4 oz (113g) full-fat brick cream cheese, softened • 1½ cups (180g) powdered sugar, sifted • 1 tsp vanilla extract • 2–3 tbsp heavy cream or whole milk • Pinch of salt
- Optional Add-Ins: ½ cup white chocolate chips • ⅓ cup toasted walnuts or pecans • 2 tbsp crushed freeze-dried raspberries
Directions
- Chill mixing bowl, pastry cutter, and 8.5″ x 4.5″ loaf pan in freezer for 10 minutes. Cube butter and return to freezer 5 minutes. Sift together flour, sugar, baking powder, baking soda, cocoa, and salt into chilled bowl. Whisk 30 seconds.
- Add cold butter cubes. Cut in with pastry cutter (or pulse in food processor) until mixture resembles coarse crumbs with visible pea-sized butter pieces.
- In separate chilled bowl, whisk buttermilk, egg, vinegar, vanilla, and red food coloring until fully blended and uniformly colored.
- Pour wet mixture over dry. Fold gently with silicone spatula just until shaggy dough forms—about 12–15 strokes. If using add-ins, fold in now.
- Turn dough onto lightly floured surface. Pat into 8″ x 4″ rectangle. Wrap in parchment, then plastic. Refrigerate 30–45 minutes.
- Preheat oven to 375°F (190°C). Grease loaf pan and line with parchment (overhanging ends).
- Transfer dough to pan. Press evenly. Optional: brush with buttermilk, sprinkle turbinado sugar.
- Bake 45 minutes. Rotate. Bake 5–10 more minutes until deep red crust forms and skewer has moist crumbs. Internal temp: 205–210°F.
- Cool in pan 15 min. Lift out using parchment. Cool completely on wire rack (45+ min).
- Make glaze: beat cream cheese until smooth. Gradually add powdered sugar, vanilla, salt. Beat in cream 1 tbsp at a time until pourable. Drizzle over cooled loaf. Let set 10 min. Slice with serrated knife.
FAQ
- Can I make this ahead and freeze it?
- Yes! Cool completely, wrap *tightly* in plastic wrap + foil, and freeze up to 3 months. Thaw overnight in fridge, then bring to room temperature before glazing and serving. Glaze *after* thawing—never before freezing.
- Why did my loaf turn brown instead of red?
- Most likely causes: (1) Used Dutch-process cocoa (alkalized), which neutralizes acidity needed for red hue; (2) Omitted vinegar or used insufficient buttermilk; (3) Baking soda was expired or improperly measured; (4) Too much baking soda (causes excessive browning). Always use natural cocoa and verify leavener freshness.
- Can I use self-rising flour?
- Not recommended. Self-rising flour contains baking powder and salt—but not baking soda, and ratios are inconsistent. You’ll lose color intensity, rise control, and flavor balance. Stick with all-purpose + added leaveners.
- My dough was too sticky to shape—what went wrong?
- Common culprits: (1) Buttermilk measured by volume (not weight)—too much liquid; (2) Butter wasn’t cold enough, releasing water; (3) Overmixed, developing gluten. Next time, weigh buttermilk (240g), grate frozen butter, and fold minimally. A *slightly* tacky dough is fine—chilling firms it.
- Can I bake this as individual scones instead of a loaf?
- Absolutely. Portion chilled dough into 8 wedges or rounds on parchment-lined sheet. Space 2″ apart. Brush with buttermilk, sprinkle sugar. Bake at 400°F (200°C) for 16–18 minutes until set and lightly browned. Glaze cooled scones individually.
- Is the cream cheese glaze necessary?
- It’s traditional and highly recommended—it adds tangy contrast, moisture barrier, and visual polish. However, you may omit it for a less sweet, more scone-forward experience. Dust with powdered sugar or serve with clotted cream instead.
- Why does the recipe call for both baking powder AND baking soda?
- Baking powder provides primary lift. Baking soda reacts instantly with acid (buttermilk + vinegar) to create carbon dioxide *and* neutralize acidity—which is required to develop the vibrant red color from natural cocoa’s anthocyanins. One cannot replace the other.
- Can I use Greek yogurt instead of buttermilk?
- Yes—with adjustment. Mix ¾ cup plain full-fat Greek yogurt + ¼ cup whole milk to reach 1 cup volume. Stir well. Yogurt adds more protein and thickness—resulting in a denser, richer crumb (still delicious, but less “scone-like”).
- How do I store leftovers?
- Keep unglazed loaf wrapped tightly at room temperature up to 2 days. Glazed loaf refrigerated up to 5 days—bring to room temp 30 minutes before serving. For longer storage, freeze (see above).
- What’s the best way to get clean, even slices?
- Use a sharp, long serrated knife (bread knife). Wipe blade clean between cuts. Let loaf cool completely—warm loaf compresses. Saw gently without downward pressure. Chill loaf 10 minutes before slicing for ultra-clean edges.
Summary
Red Velvet Scone Loaf is a masterful fusion of classic scone technique and iconic red velvet flavor—yielding a tender