Introduction
Red Velvet Pancakes are a decadent twist on the classic breakfast favorite, blending the rich, velvety flavor of red velvet cake with the light, fluffy texture of pancakes. With their vibrant crimson hue and subtle cocoa undertones, these pancakes offer a luxurious experience that’s perfect for special weekend mornings, holiday brunches, or anytime you’re craving something indulgent. Whether you’re surprising your family with a festive breakfast or treating yourself to a sweet morning delight, Red Velvet Pancakes deliver both visual appeal and delicious taste in every bite.
The History
The origins of Red Velvet Pancakes trace back to the beloved Southern dessert known as red velvet cake, which gained popularity in the early 20th century. The cake itself is believed to have first emerged in the United States during the 1920s, with its signature color coming from a chemical reaction between natural cocoa powder and acidic ingredients like buttermilk and vinegar—originally giving it a reddish tint. Over time, food coloring was added to enhance this hue, especially after the advent of more processed cocoa powders that lacked the same reactive properties.
The Waldorf-Astoria Hotel in New York City is often credited with popularizing the modern version of red velvet cake, adding to its prestige and widespread appeal. As culinary creativity evolved, so did the concept of incorporating red velvet flavor into other desserts and breakfast items. By the 2000s, Red Velvet Pancakes began appearing in diners, specialty cafes, and home kitchens across America, transforming the traditional pancake into a festive, cake-inspired treat. Today, they symbolize comfort, celebration, and the joy of reinventing classics with flair.
Ingredients Breakdown
The magic behind Red Velvet Pancakes lies in the careful balance of ingredients that create their distinctive color, flavor, and texture:
- All-Purpose Flour: Provides structure and fluffiness. You can substitute with whole wheat flour or gluten-free blends for dietary needs.
- Granulated Sugar: Adds sweetness without overpowering the delicate cocoa notes.
- Baking Powder & Baking Soda: Leavening agents that help the pancakes rise and become light and airy.
- Salt: Enhances overall flavor and balances sweetness.
- Cocoa Powder (Unsweetened): Imparts the characteristic chocolate undertone found in red velvet desserts. Dutch-processed or natural cocoa can be used, though natural cocoa may react better with acidic ingredients.
- Buttermilk: Contributes tenderness and a slight tang while activating the baking soda for extra lift. If unavailable, regular milk mixed with lemon juice or vinegar works as a substitute.
- Egg: Binds the ingredients together and adds richness.
- Unsalted Butter (melted): Adds moisture and a buttery flavor. Can be replaced with oil or plant-based butter for vegan versions.
- Vanilla Extract: Enhances aroma and complements the cocoa and cream cheese flavors.
- Red Food Coloring (liquid or gel): Gives the pancakes their iconic bright red color. Gel coloring is preferred for deeper pigmentation without altering batter consistency.
- White Vinegar (optional): Reacts with baking soda and cocoa to deepen the red hue naturally.
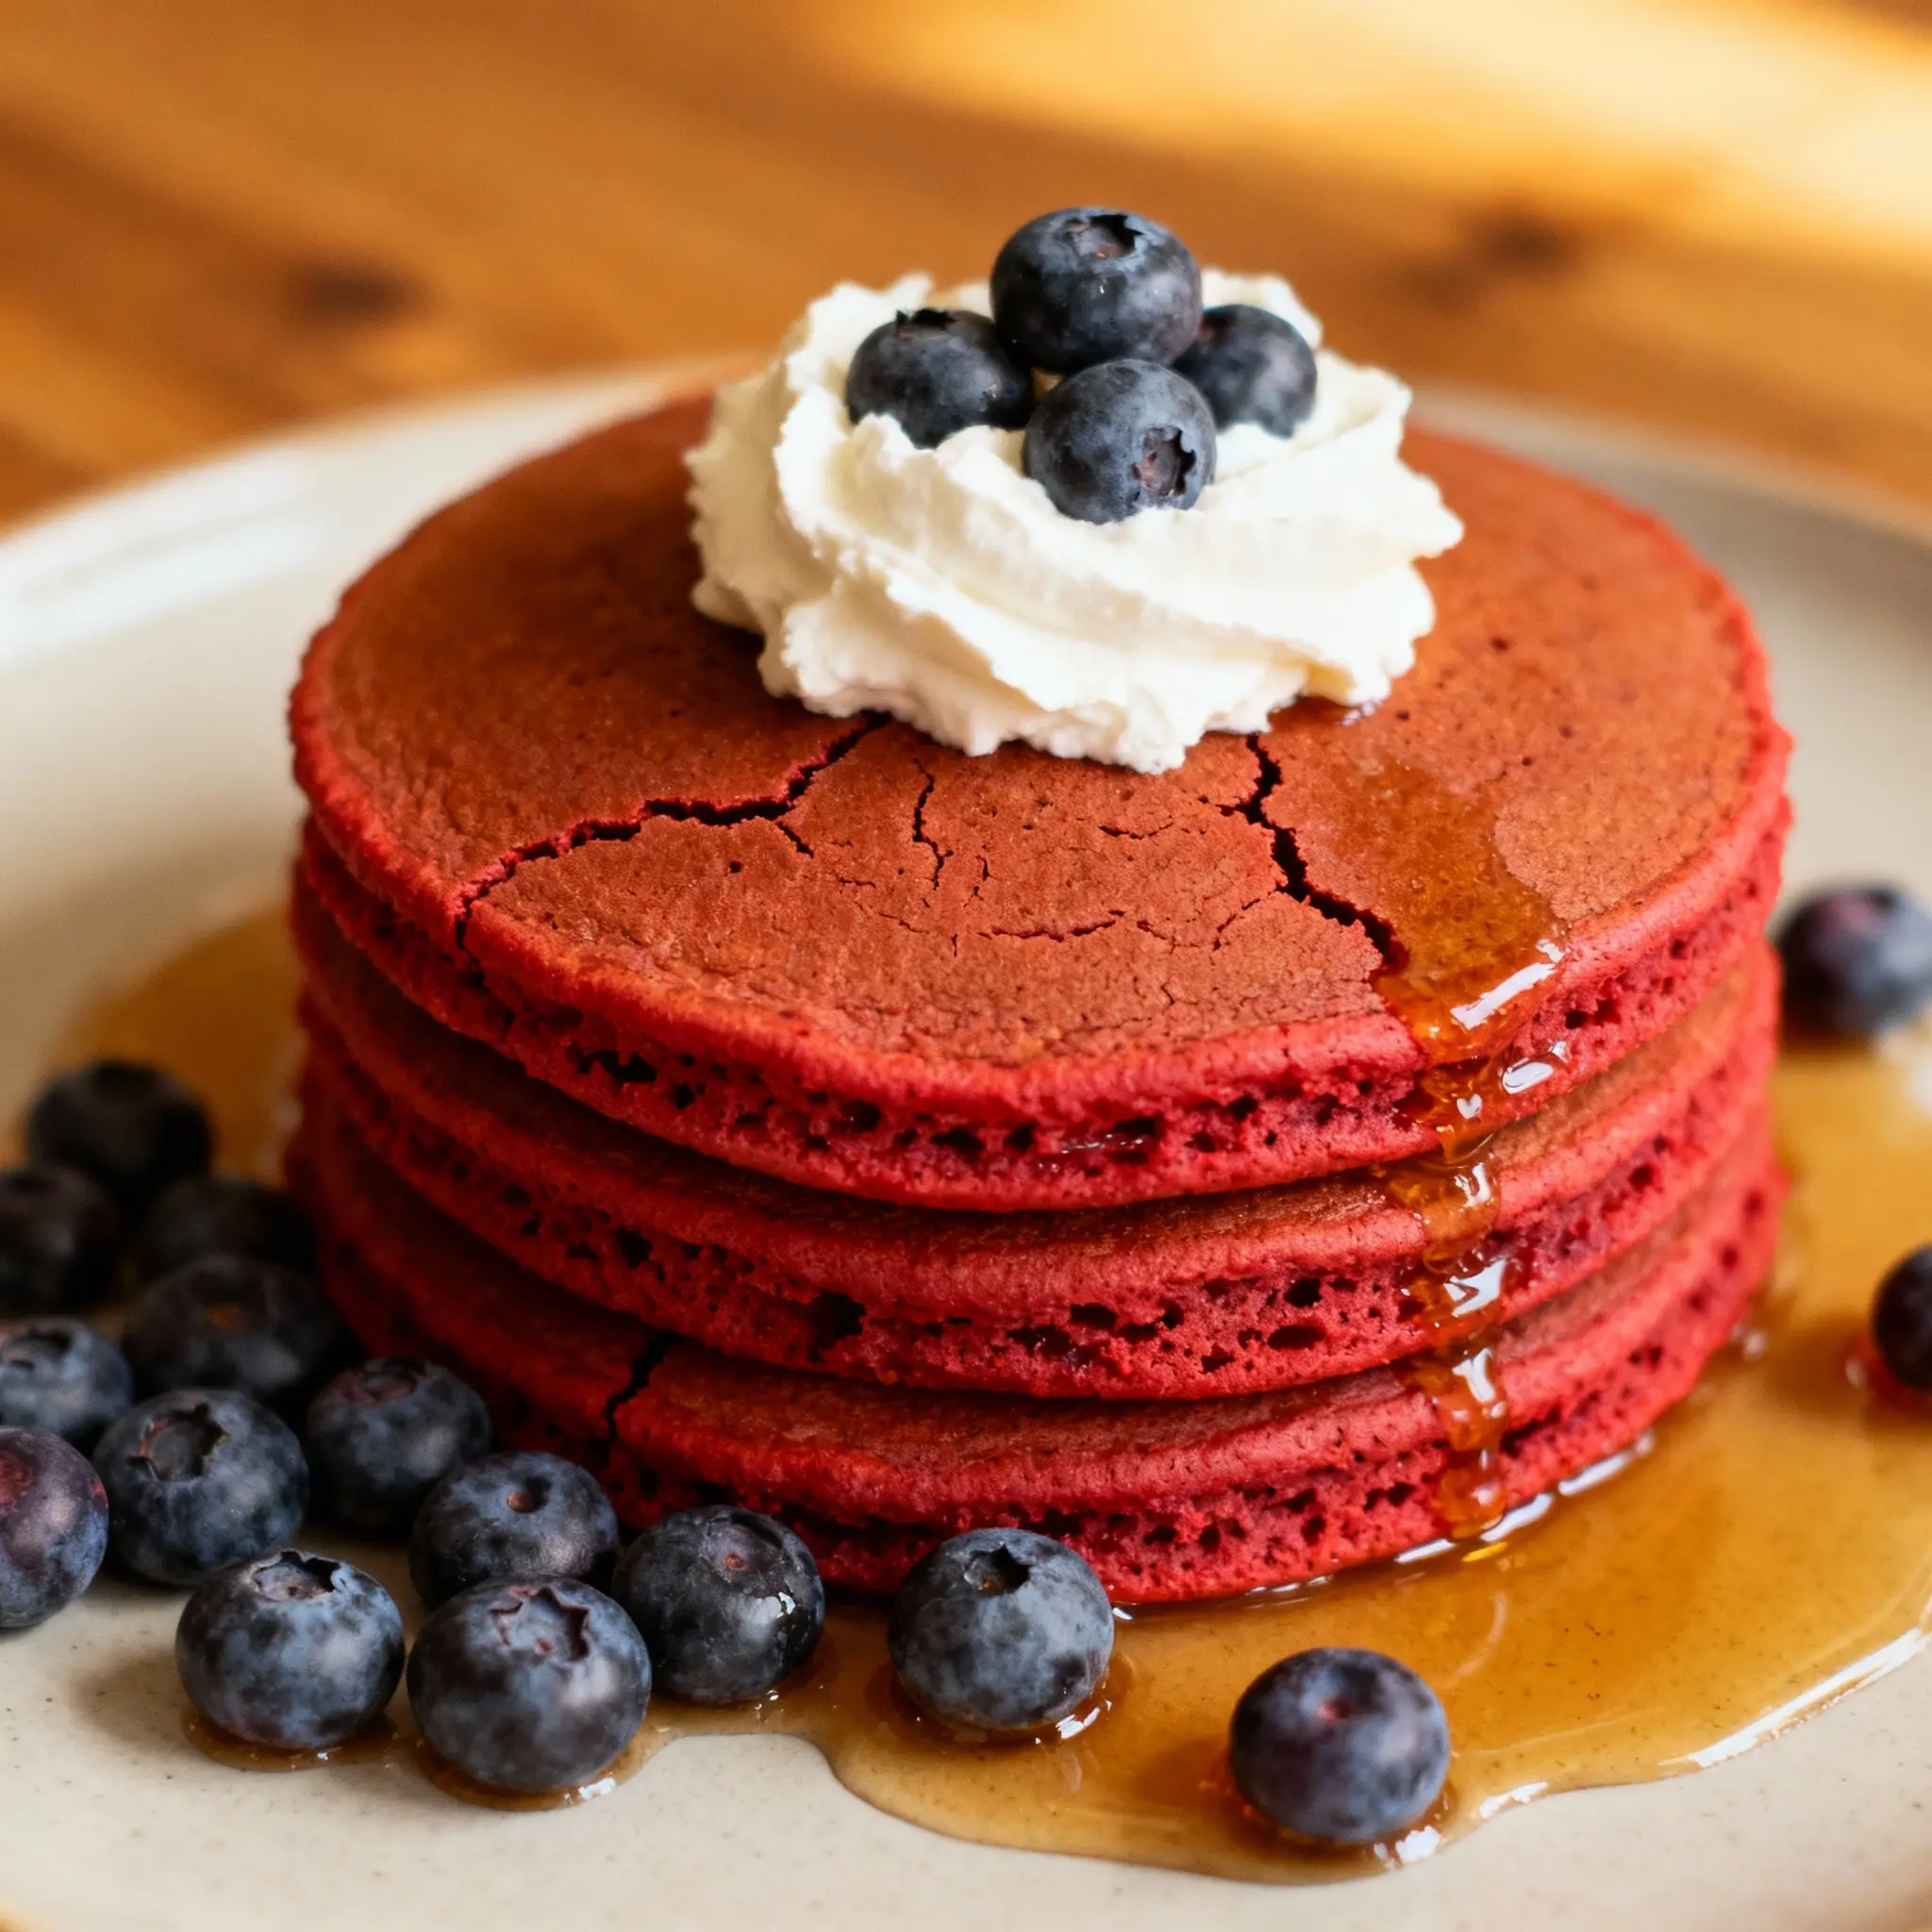
For serving: whipped cream, maple syrup, fresh berries, or cream cheese glaze elevate the experience to dessert-level indulgence.
Step-by-Step Recipe
- Prepare Dry Ingredients: In a large mixing bowl, sift together 2 cups of all-purpose flour, 2 tablespoons of granulated sugar, 2 teaspoons of baking powder, ½ teaspoon of baking soda, ¼ teaspoon of salt, and 2 tablespoons of unsweetened cocoa powder. Sifting ensures a lump-free batter and even distribution of leavening agents.
- Mix Wet Ingredients: In a separate bowl, whisk together 1¾ cups of buttermilk, 1 large egg, 3 tablespoons of melted unsalted butter (cooled slightly), 1 teaspoon of vanilla extract, and 1–2 tablespoons of red food coloring (depending on desired intensity). For a natural color boost, add ½ teaspoon of white vinegar.
- Combine Wet and Dry Mixtures: Gradually pour the wet ingredients into the dry ingredients. Gently fold using a spatula until just combined. Do not overmix—small lumps are okay. Overmixing leads to tough pancakes.
- Rest the Batter: Let the batter sit for 5–10 minutes. This allows the flour to hydrate fully and the leavening agents to activate, resulting in fluffier pancakes.
- Preheat the Griddle or Pan: Heat a non-stick griddle or skillet over medium heat. Lightly grease with butter or cooking spray. To test if it’s ready, sprinkle a few drops of water—if they sizzle and evaporate quickly, the pan is hot enough.
- Pour the Batter: Using a ¼-cup measuring cup, pour the batter onto the griddle for evenly sized pancakes. Leave space between each for spreading.
- Cook Until Bubbles Form: Cook for 2–3 minutes, or until bubbles form on the surface and the edges begin to look set.
- Flip Carefully: Use a thin spatula to flip the pancakes gently. Cook for another 1–2 minutes until golden brown and cooked through. Avoid pressing down, which can make them dense.
- Keep Warm: Transfer cooked pancakes to a baking sheet and place in a 200°F (95°C) oven to keep warm while finishing the batch.
- Serve Immediately: Stack high and top with cream cheese frosting, a drizzle of maple syrup, fresh strawberries, or a dusting of powdered sugar.
Tips
- Use Gel Food Coloring: Gel-based dyes provide intense color with minimal liquid, preserving the batter’s consistency.
- Don’t Overmix: Stir the batter only until ingredients are incorporated. Overmixing develops gluten, leading to chewy pancakes.
- Control the Heat: Medium heat is ideal. Too high, and the outsides burn before the insides cook; too low, and the pancakes won’t rise properly.
- Consistent Size: Use a measuring cup or ice cream scoop for uniform pancakes that cook evenly.
- Add Cream Cheese to Batter (Optional): For an extra-rich flavor, mix in 2–3 tablespoons of softened cream cheese into the wet ingredients.
- Double Batch Freezing: Freeze untopped pancakes in a single layer on a tray, then transfer to a zip-top bag. Reheat in toaster or microwave for quick future breakfasts.
- Check Freshness of Leavening Agents: Old baking powder or soda reduces rise. Test by mixing a teaspoon of baking powder with hot water—if it doesn’t fizz, replace it.
Variations and Customizations
Red Velvet Pancakes are incredibly versatile and can be adapted to suit various tastes and dietary preferences:
- Vegan Version: Replace the egg with a flax egg (1 tbsp ground flaxseed + 3 tbsp water), use plant-based milk with 1 tbsp lemon juice instead of buttermilk, and substitute butter with coconut oil. Use vegan-certified food coloring.
- Gluten-Free: Swap all-purpose flour with a 1:1 gluten-free baking blend. Ensure xanthan gum is included for binding.
- Protein-Packed: Add 1–2 scoops of vanilla or chocolate protein powder and adjust milk quantity as needed to maintain pourable consistency.
- Mini Pancakes (Pancake Bites): Use a squeeze bottle or piping bag to make small rounds on the griddle—perfect for kids or appetizers.
- Stuffed Pancakes: Drop a spoonful of cream cheese filling or chocolate chips into the center before flipping.
- Layered Dessert Pancakes: Make thicker cakes and assemble like a cake with cream cheese frosting and berries between layers.
- Spiced Red Velvet: Add a pinch of cinnamon, nutmeg, or pumpkin spice for a warm, seasonal twist.
- Almond or Coconut Flavor: Substitute vanilla extract with almond extract or coconut extract, and use coconut milk for a tropical flair.
Health Considerations and Nutritional Value
While undeniably delicious, Red Velvet Pancakes should be enjoyed in moderation due to their sugar and fat content. Here’s a general nutritional estimate per serving (3 medium pancakes, without toppings):
- Calories: ~380 kcal
- Total Fat: 14g (mostly from butter and egg)
- Saturated Fat: 6g
- Cholesterol: 75mg
- Sodium: 500mg
- Total Carbohydrates: 55g
- Dietary Fiber: 2g
- Sugars: 20g (including added sugar)
- Protein: 8g
Health Tips:
- Reduce sugar by cutting the amount in half or using a natural sweetener like monk fruit or erythritol.
- Boost fiber by replacing half the flour with oat flour or whole wheat flour.
- Use Greek yogurt instead of buttermilk for added protein and probiotics.
- Avoid artificial food dyes by using beetroot powder or pureed beets—though the color will be more maroon than bright red.
- Serve with fresh fruit instead of syrup to lower glycemic load.
- Lactose-intolerant individuals can opt for lactose-free or plant-based alternatives.
Overall, these pancakes are best treated as an occasional indulgence rather than a daily breakfast staple.
Ingredients
- 2 cups all-purpose flour
- 2 tablespoons granulated sugar
- 2 teaspoons baking powder
- ½ teaspoon baking soda
- ¼ teaspoon salt
- 2 tablespoons unsweetened cocoa powder (natural or Dutch-process)
- 1¾ cups buttermilk
- 1 large egg
- 3 tablespoons unsalted butter, melted and cooled
- 1 teaspoon vanilla extract
- 1–2 tablespoons red food coloring (gel recommended)
- (Optional) ½ teaspoon white vinegar
For serving: Cream cheese frosting, maple syrup, fresh strawberries, blueberries, whipped cream, or powdered sugar.
Directions
- In a large bowl, sift together flour, sugar, baking powder, baking soda, salt, and cocoa powder.
- In another bowl, whisk buttermilk, egg, melted butter, vanilla extract, food coloring, and vinegar (if using) until smooth.
- Pour wet ingredients into dry ingredients and stir gently until just combined. Small lumps are acceptable.
- Let the batter rest for 5–10 minutes.
- Heat a non-stick griddle or skillet over medium heat and lightly grease.
- Pour ¼ cup of batter per pancake onto the griddle.
- Cook for 2–3 minutes until bubbles form and edges are set.
- Flip and cook for another 1–2 minutes until golden and cooked through.
- Keep finished pancakes warm in a low oven.
- Serve immediately with your favorite toppings.
FAQ
Q: Why are my Red Velvet Pancakes not turning red enough?
A: The intensity depends on the type of food coloring. Liquid coloring may require more volume, which can affect texture. Use high-quality gel food coloring for a vibrant hue without altering the batter.
Q: Can I make the batter ahead of time?
A: Yes, but note that the leavening agents start working as soon as wet and dry ingredients mix. For best results, prepare the batter the night before and store it in the fridge, but add a splash of buttermilk in the morning to refresh consistency. Alternatively, separate dry and wet ingredients and combine just before cooking.
Q: Are Red Velvet Pancakes the same as chocolate pancakes?
A: Not exactly. While both contain cocoa, red velvet has a milder chocolate flavor, a tangy note from buttermilk, and a distinct red color. The taste is closer to red velvet cake than standard chocolate pancakes.
Q: Can I bake these as muffins or a cake?
A: Absolutely! Pour the batter into a greased muffin tin and bake at 375°F (190°C) for 18–22 minutes, or into a cake pan for a mini red velvet cake (adjust time accordingly).
Q: What can I use instead of buttermilk?
A: Mix 1¾ cups of regular milk with 1 tablespoon of lemon juice or white vinegar. Let it sit for 5–10 minutes until slightly curdled.
Q: How do I store leftovers?
A: Cool completely, then store in an airtight container in the fridge for up to 3 days or freeze for up to 2 months. Reheat in a toaster, oven, or microwave.
Summary
Red Velvet Pancakes combine the beloved flavor of red velvet cake with the comforting warmth of fluffy homemade pancakes, creating a show-stopping breakfast treat. Perfect for celebrations or lazy weekends, they’re easy to customize and sure to impress with every crimson-hued bite.