Introduction
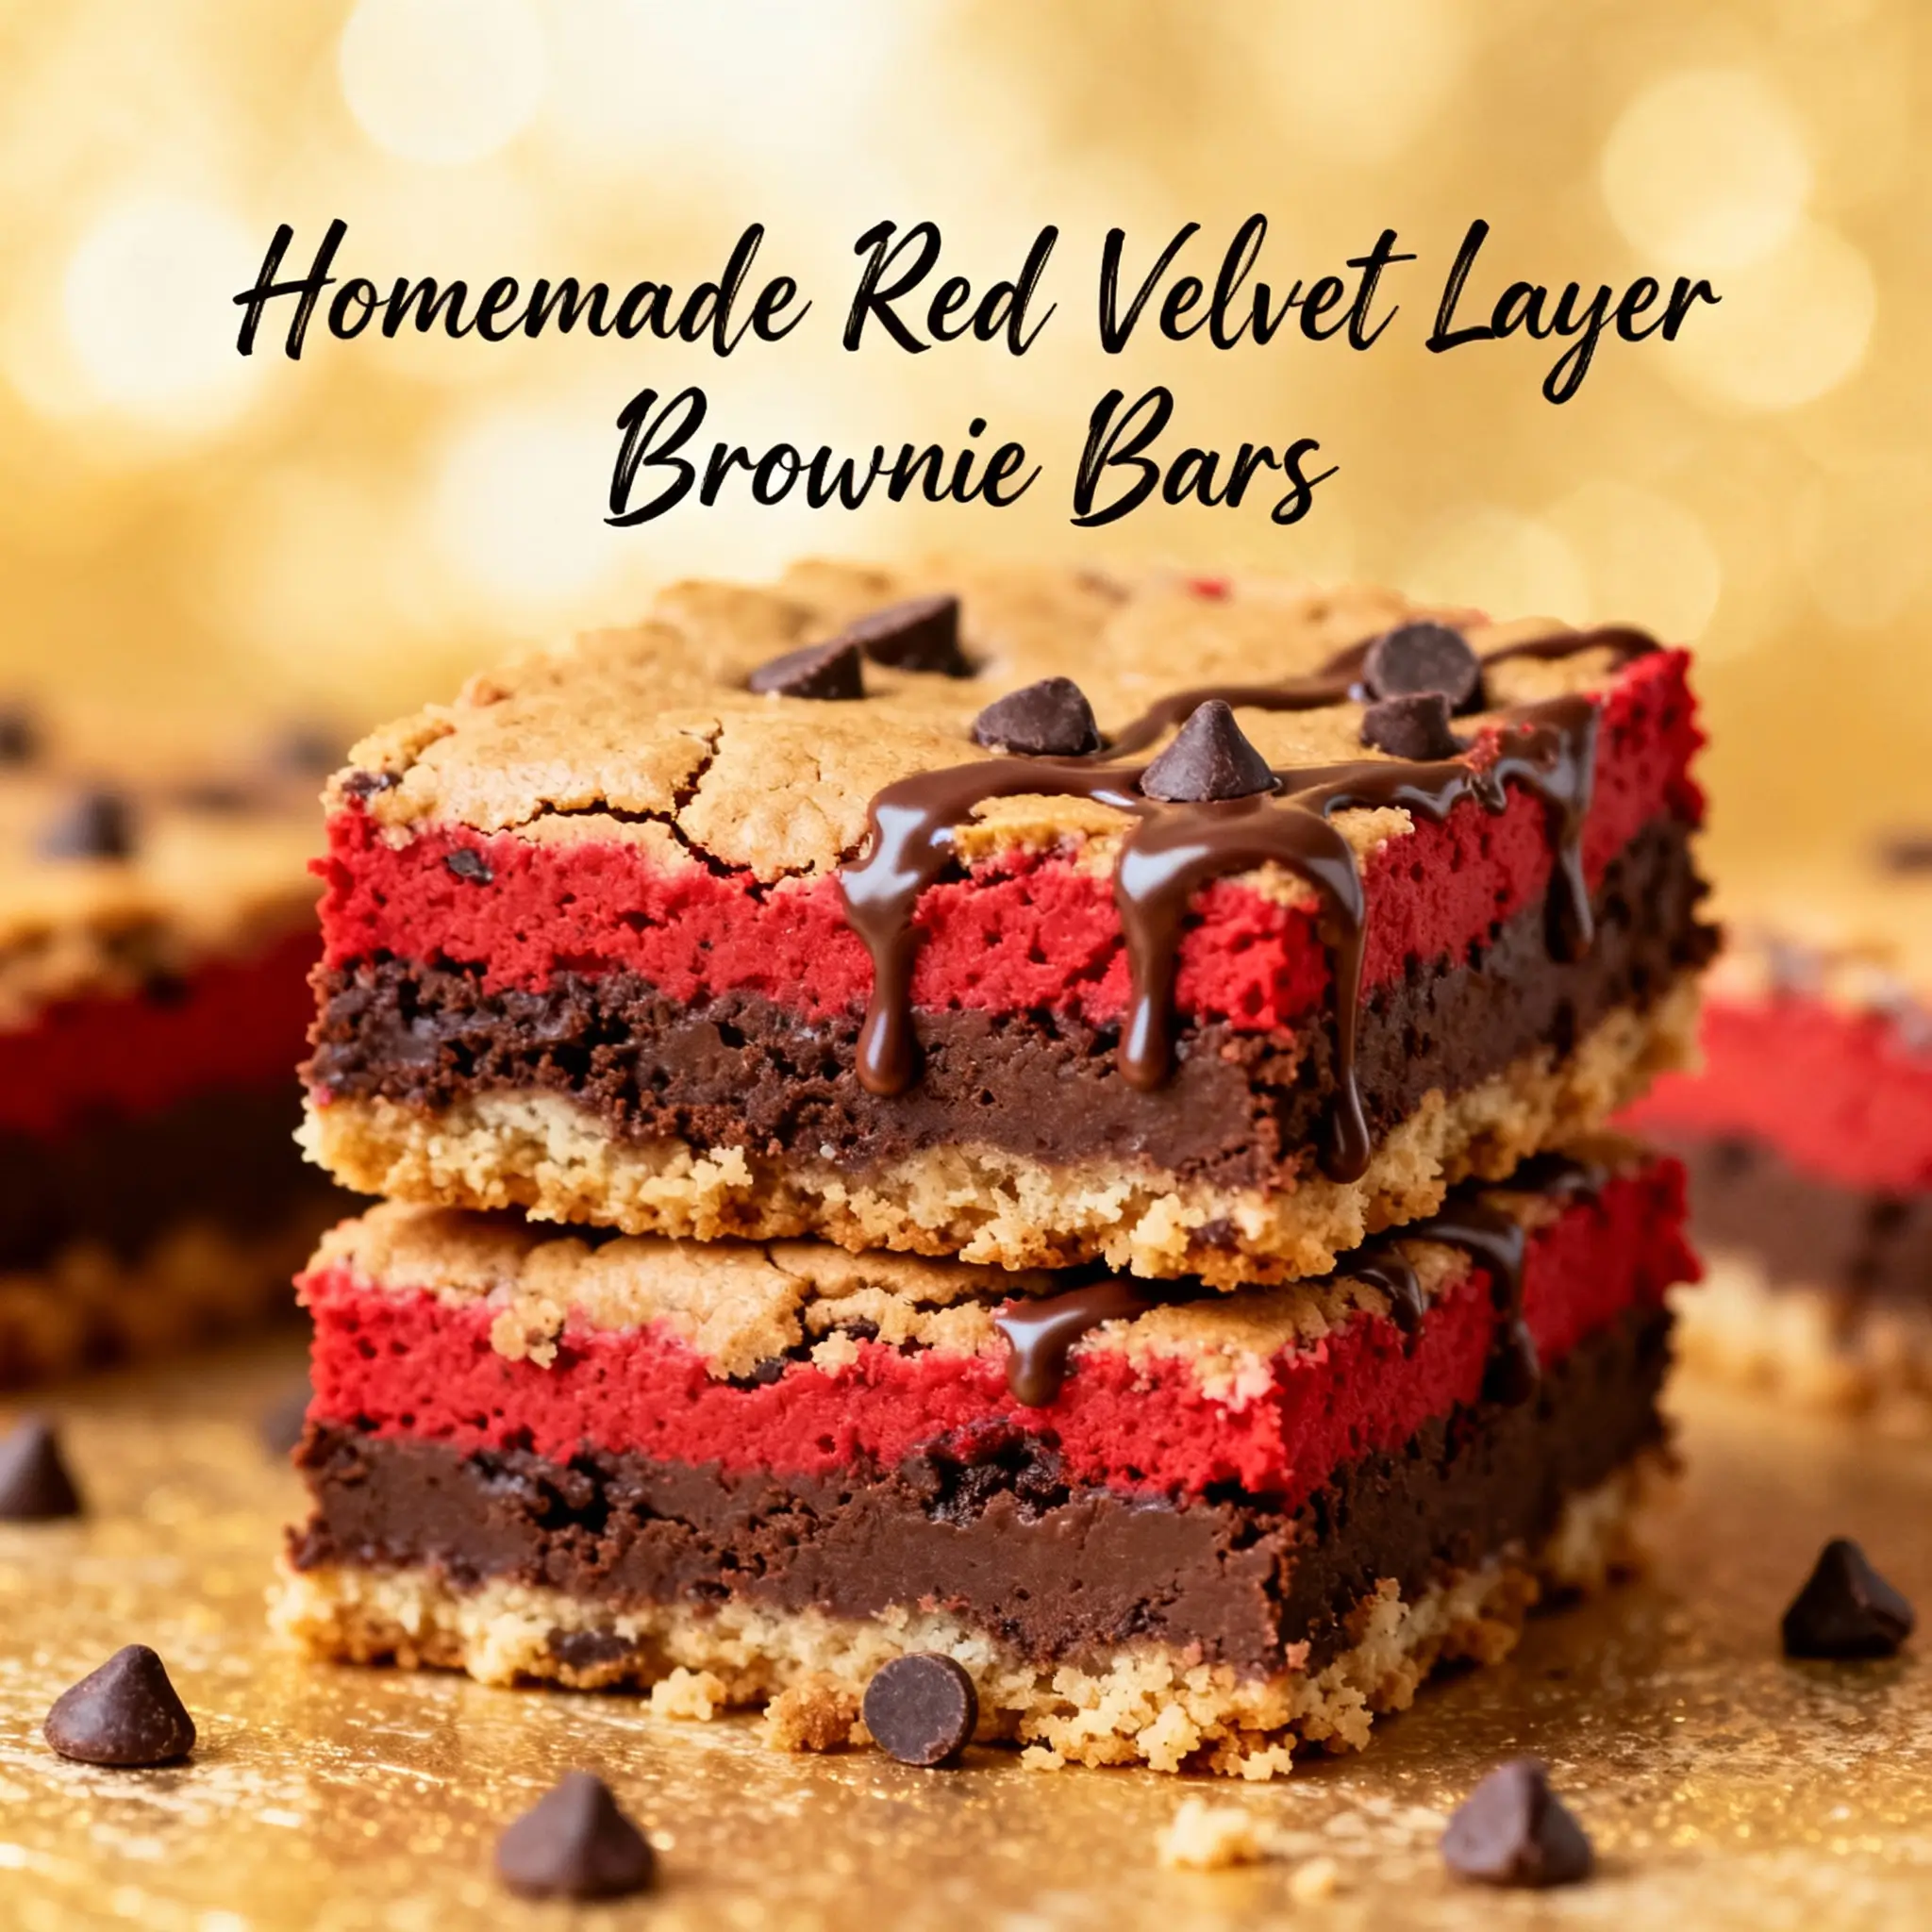
Red Velvet Layer Brownie Bars are the ultimate decadent fusion dessert — a showstopping hybrid that marries the velvety richness of classic red velvet cake with the dense, fudgy indulgence of premium brownies. Unlike traditional single-layer treats, these bars feature meticulously layered components: a deeply chocolatey brownie base, a luxuriously smooth red velvet cake layer infused with cocoa and buttermilk tang, and a crowning cloud of cream cheese frosting — all baked together in one pan for effortless elegance and maximum flavor harmony. Perfect for holidays, birthdays, potlucks, or any occasion demanding both visual drama and soul-satisfying taste, these bars deliver the nostalgic allure of red velvet with the satisfying chew and cocoa intensity of a gourmet brownie — no compromise, no separation, just seamless, layered perfection in every square.
The History
The Red Velvet Layer Brownie Bars are a relatively modern confection born from the creative convergence of two iconic American desserts: red velvet cake and fudge brownies. Red velvet cake traces its origins to the early 20th century, with roots possibly in the Waldorf-Astoria Hotel (though this is widely debated), gaining national prominence during the Great Depression when home bakers used buttermilk and vinegar to activate cocoa’s natural anthocyanins — producing a subtle reddish tint even before food coloring became commonplace. The “red” intensified post-WWII with the advent of affordable, vibrant red food dyes, cementing its status as a Southern staple and Valentine’s Day favorite. Meanwhile, brownies emerged around 1893 at the Palmer House Hotel in Chicago — a dense, gooey, un-iced chocolate square designed as a portable, elegant dessert. As baking culture evolved through the 1970s–1990s, layered bar desserts gained traction for their convenience and visual appeal; publications like Bon Appétit and Martha Stewart Living championed “bar cake” hybrids, inspiring bakers to experiment with textural contrasts. The Red Velvet Layer Brownie Bar concept crystallized in the late 2000s on food blogs and Pinterest, where home cooks began stacking red velvet batter over brownie batter pre-bake — discovering that careful layering, precise baking times, and temperature control yielded stunning stratified results. Today, it stands as a beloved hallmark of contemporary baking innovation: a dessert that honors tradition while boldly reimagining structure, color, and contrast.
Ingredients Breakdown
Every element of the Red Velvet Layer Brownie Bars serves a precise functional and sensory purpose — from chemistry to mouthfeel. Below is an in-depth breakdown of *why* each ingredient matters:
- Unsweetened Cocoa Powder (Dutch-processed preferred): Provides deep, non-acidic chocolate backbone for the brownie base. Dutch-process cocoa yields smoother, richer notes and better color stability against the red velvet layer’s acidity.
- Granulated Sugar & Brown Sugar (light or dark): Granulated sugar ensures crisp edges and structural lift; brown sugar contributes moisture, caramel depth, and slight acidity that enhances cocoa and balances the red velvet’s tang.
- Eggs (large, room temperature): Act as emulsifiers, leaveners, and binders. Room temperature eggs incorporate air more efficiently, aiding lift without overmixing — critical when layering batters with different densities.
- Buttermilk (full-fat, cultured): The secret weapon of red velvet — its lactic acid reacts with baking soda to create tenderness and subtle tang, while also activating cocoa’s red hue when paired with food coloring. Low-fat or powdered buttermilk substitutes lack the necessary fat content and acidity consistency.
- White Vinegar: Works synergistically with baking soda and buttermilk to maximize leavening and intensify the crimson pigment in cocoa — a true “color catalyst.” Its sharpness vanishes during baking, leaving only brightness.
- Red Food Coloring (gel-based, high-intensity): Gel color is essential — liquid dyes add unwanted moisture, diluting batter viscosity and risking streaking or bleeding between layers. High-pigment gels (e.g., AmeriColor Super Red or Chefmaster) deliver vibrant, consistent ruby tones without altering texture.
- Vegetable Oil (or light olive oil): Keeps the red velvet layer exceptionally moist and tender — unlike butter-based cakes, oil prevents gluten formation, ensuring a fine, velvety crumb that complements the brownie’s density.
- Cream Cheese (full-fat, brick-style, cold but pliable): Must be cold enough to hold shape during mixing yet soft enough to cream smoothly. Low-fat or spreadable varieties contain excess water and stabilizers, leading to runny, unstable frosting prone to melting or curdling.
- Powdered Sugar (confectioners’ sugar, sifted): Sifting eliminates lumps and prevents grittiness in frosting. The cornstarch content also helps stabilize the emulsion and adds subtle body.
- Vanilla Extract (pure, not imitation): Adds aromatic complexity and rounds out the tangy-sweet profile. Mexican or Tahitian vanilla introduces floral nuance that elevates the entire dessert.
- High-Quality Dark Chocolate (60–70% cacao, chopped): Used in the brownie layer for nuanced bitterness and glossy melt-in-the-mouth texture. Couverture or baking bars (e.g., Valrhona Guanaja, Callebaut 66%) yield superior sheen and snap compared to chips.
- Espresso Powder (instant, unsweetened): A tiny amount (¼ tsp) doesn’t make it “coffee-flavored” — it deepens chocolate perception and amplifies richness without detectable coffee notes.
Step-by-Step Recipe
- Prep & Preheat: Position oven rack in center position. Preheat oven to 350°F (175°C). Grease a 9×13-inch metal baking pan *thoroughly*, then line with two overlapping sheets of parchment paper — leaving 2-inch overhang on two opposite sides for easy lifting. Lightly grease parchment.
- Make the Brownie Base: In a medium heatproof bowl, combine 1 cup unsalted butter (cut into tablespoons), 8 oz finely chopped dark chocolate (60–70% cacao), and ¼ tsp instant espresso powder. Melt gently using a double boiler (or microwave in 20-sec bursts, stirring between) until smooth and glossy. Cool slightly (about 5 min). Whisk in 2 cups granulated sugar, 1 cup light brown sugar, and 1 tsp pure vanilla extract until combined. Add 4 large room-temperature eggs one at a time, whisking vigorously for 30 seconds after each addition until batter thickens and becomes glossy (this incorporates air for lift). Sift together ¾ cup Dutch-process cocoa powder, 1 cup all-purpose flour, 1 tsp salt, and ½ tsp baking powder; fold gently into wet mixture until *just* combined — do not overmix. Batter will be thick and shiny. Pour into prepared pan and spread evenly with an offset spatula. Tap pan firmly on counter twice to release air bubbles. Set aside.
- Prepare the Red Velvet Layer: In a large bowl, whisk together 2 ½ cups all-purpose flour, 2 cups granulated sugar, 1 tsp baking soda, 1 tsp salt, and ¾ cup unsweetened cocoa powder (natural or Dutch-process — both work here). In a separate bowl, combine 1 ½ cups buttermilk, ½ cup neutral oil (e.g., vegetable or grapeseed), 2 large eggs, 2 tsp pure vanilla extract, 1 tbsp white vinegar, and 1 tbsp red gel food coloring. Whisk until fully emulsified and uniformly pink-red (add extra ½ tsp gel if deeper hue desired). Gradually pour wet ingredients into dry ingredients. Whisk *just* until no dry streaks remain — batter will be fluid but not runny (like heavy cream). Overmixing develops gluten and causes toughness.
- Layer with Precision: Gently spoon red velvet batter over the brownie base in 4–5 large dollops. Using the back of a spoon or small offset spatula, carefully spread *just enough* to cover the brownie — do not press down or swirl. Aim for even ½-inch thickness. If batter resists spreading, let it sit 1 minute for slight settling, then glide spatula lightly across surface. Avoid dragging through brownie layer.
- Bake with Control: Place pan in preheated oven. Bake for 38–42 minutes — *do not open oven door before 35 minutes*. Cake is done when a toothpick inserted 1 inch from edge comes out with *moist crumbs* (not wet batter), and center springs back lightly when touched. Overbaking causes cracking and dryness. Rotate pan front-to-back at 25 minutes for even baking.
- Cool Completely: Remove pan from oven and place on a wire rack. Cool *undisturbed* for 1 hour in pan. Then, using parchment overhang, lift bars gently onto rack. Carefully peel away bottom parchment. Cool completely to room temperature (minimum 2 hours — refrigeration accelerates condensation and dulls flavors).
- Make Cream Cheese Frosting: In a stand mixer fitted with paddle attachment, beat 16 oz full-fat brick cream cheese (cold but pliable) and ½ cup unsalted butter (room temp) on medium until creamy and lump-free (~2 min). Scrape bowl. Add 1 tsp vanilla and ¼ tsp salt; mix 30 sec. Gradually add 4 cups sifted powdered sugar (1 cup at a time), mixing on low until incorporated. Increase speed to medium and beat 2–3 min until ultra-smooth, glossy, and spreadable. If too stiff, add 1 tsp heavy cream; if too soft, chill 15 min.
- Frost & Finish: Once bars are *completely cool*, spread frosting evenly over red velvet layer using an offset spatula. For clean cuts, chill frosted bars uncovered for 30–45 minutes. Use a hot, dry knife (dipped in hot water and wiped clean between cuts) to slice into 12–16 uniform rectangles. Wipe knife after every cut for pristine edges.
Tips
- Temperature Is Non-Negotiable: Eggs, butter, and cream cheese must be at true room temperature (68–72°F) — cold ingredients cause separation, grainy frosting, and uneven baking. To warm quickly: submerge eggs in warm (not hot) water for 5 minutes; cut cream cheese into ½-inch cubes and leave on counter 25 minutes.
- No Swirling, No Stirring: Resist the urge to marble or swirl the layers — the magic lies in distinct strata. Any agitation causes bleeding and muddied color boundaries.
- Parchment Is Your Anchor: Skipping parchment almost guarantees sticking and torn layers. Overhanging parchment enables clean, stress-free removal — crucial for preserving the delicate red velvet surface.
- Gel Color > Liquid Every Time: Liquid food dye adds ~1 tsp water per tablespoon — enough to thin batter, delay setting, and cause sinking or pooling. Gel concentrates pigment without moisture interference.
- Underbake Slightly, Not Over: The residual heat continues cooking the bars as they cool. Pull them out when the center still jiggles faintly — it firms up perfectly during cooling.
- Chill Before Slicing — But Not Too Long: Refrigerating frosted bars for 30–45 minutes firms frosting for clean cuts, but longer than 1 hour makes brownie base overly firm and less fudgy. Serve at cool room temperature for ideal texture contrast.
- Test Your Cocoa: Natural cocoa is acidic; Dutch-process is alkalized. If substituting, adjust leavening: for natural cocoa, increase baking soda to 1¼ tsp in red velvet layer. For Dutch-process, keep baking soda at 1 tsp.
- Rotate & Monitor Oven Hotspots: Most home ovens have uneven heating zones. Rotating at 25 minutes prevents one side from browning faster. Use an oven thermometer to verify accuracy — many ovens run 25°F off.
- Frosting Consistency Mastery: If frosting appears curdled, it’s likely too cold. Warm bowl gently over steaming water for 10 seconds, then re-beat. If too soft, add 1 tbsp powdered sugar at a time until stable — never refrigerate mid-mixing.
- Storage Wisdom: Keep unfrosted bars wrapped tightly at room temperature up to 2 days. Frosted bars last 4 days refrigerated (cover loosely with inverted cake dome or toothpick-lifted parchment). Freeze unfrosted layers for up to 3 months; thaw overnight before frosting.
Variations and Customizations
These bars are a canvas for creativity — whether adapting for dietary needs, seasonal flair, or bold flavor experiments. All variations maintain structural integrity and layer definition:
- Gluten-Free: Substitute brownie base and red velvet layers with certified GF 1:1 baking blend (e.g., King Arthur Measure for Measure or Bob’s Red Mill). Add ½ tsp xanthan gum to red velvet dry ingredients. Ensure cocoa and food coloring are GF-certified.
- Vegan: Replace eggs with flax eggs (2 tbsp ground flax + 6 tbsp water per egg, rested 10 min); use dairy-free butter and cream cheese (e.g., Miyoko’s or Kite Hill); swap buttermilk for 1 ½ cups almond milk + 1½ tbsp apple cider vinegar; use vegan chocolate and gel food coloring.
- Red Velvet Swirl Variation: Instead of strict layering, drop spoonfuls of red velvet batter onto brownie base, then drag a skewer in figure-eights for a marbled effect — retains color pop with rustic charm.
- White Chocolate–Cream Cheese Drizzle: After frosting, melt 4 oz white chocolate with 1 tsp coconut oil; drizzle artfully over top. Sprinkle with crushed freeze-dried raspberries for tart contrast.
- Spiced Red Velvet: Add ½ tsp ground cinnamon + ¼ tsp ground cardamom to red velvet dry ingredients for warm, aromatic depth — pairs beautifully with dark chocolate base.
- Black Cocoa Edition: Replace ¼ cup regular cocoa in brownie base with black cocoa (e.g., King Arthur or Hoosier Hill Farm) for dramatic matte-black base and intensified red velvet contrast.
- Boozy Infusion: Add 2 tbsp bourbon or raspberry liqueur to red velvet wet ingredients — reduces alcohol during baking but leaves sophisticated nuance.
- Nutty Crunch Topper: Press ½ cup toasted pecans or walnuts into frosting before chilling — adds textural surprise and earthy richness.
- Mini Mason Jar Layers: For individual servings: layer brownie batter (2 tbsp), red velvet (1½ tbsp), and dollop of frosting in 4-oz wide-mouth mason jars. Bake at 350°F for 22–26 min.
- Valentine’s Heart Cutouts: Bake as directed in a heart-shaped 9-inch pan. Once cooled, use heart-shaped cookie cutter to stamp individual portions — dip cutter in powdered sugar between uses.
Health Considerations and Nutritional Value
While undeniably indulgent, mindful preparation allows Red Velvet Layer Brownie Bars to align thoughtfully with balanced eating principles — without sacrificing joy or authenticity. A standard 2×2-inch bar (1/16th of recipe) contains approximately:
- Calories: 385–420 kcal (varies with cocoa %, frosting thickness, and sugar type)
- Total Fat: 22–26g (14–16g saturated; primarily from cocoa butter, dairy, and chocolate — rich in stearic acid, shown to have neutral effect on LDL cholesterol)
- Carbohydrates: 48–52g (38–42g sugars; 2g fiber from cocoa and whole-grain flour substitutions)
- Protein: 4–5g (from eggs, dairy, and cocoa)
- Sodium: 240–290mg (moderate; easily reduced by cutting salt by ¼ tsp in both batters)
- Key Micronutrients: Iron (12% DV from cocoa), Magnesium (15% DV), Copper (20% DV), and flavonoid antioxidants (epicatechin, procyanidins) linked to vascular health and cognitive support.
Dietary Notes & Adaptations:
- Lower-Sugar Option: Reduce granulated sugar in brownie base by ¼ cup and in red velvet by ⅓ cup. Compensate with 2 tbsp monk fruit-allulose blend (e.g., Lakanto Golden) — maintains volume, browning, and moisture without aftertaste.
- Higher-Fiber Boost: Substitute ¼ cup of flour in red velvet layer with oat fiber or resistant starch (e.g., King Arthur Unmodified Potato Starch) — adds 3g soluble fiber per bar, supporting gut health and satiety.
- Dairy-Reduced: Use lactose-free buttermilk and butter — identical functionality with improved digestibility for sensitive individuals.
- Allergen Awareness: Naturally nut-free (unless added as topping); always verify cocoa, food coloring, and chocolate for soy or dairy derivatives if needed. For egg allergy, flax or commercial egg replacer works reliably in both layers.
- Portion Mindfulness: Serving size matters — presenting as 16 bars (instead of 12) reduces calories per portion by ~20% and encourages slower, more intentional enjoyment.
- Functional Additions: Stir 1 tsp matcha powder into red velvet batter for L-theanine calm + antioxidant synergy; or add 1 tbsp ground flaxseed to brownie base for omega-3 ALA and lignans.
Remember: Nutrition is holistic. These bars offer psychological nourishment — celebration, comfort, creativity — which are vital components of well-being. Enjoyed mindfully and occasionally, they harmonize pleasure with purpose.
Ingredients
For the Brownie Base:
- 1 cup (2 sticks / 227g) unsalted butter, cut into tablespoons
- 8 oz (227g) high-quality dark chocolate (60–70% cacao), finely chopped
- ¼ tsp instant espresso powder
- 2 cups (400g) granulated sugar
- 1 cup (200g) light brown sugar, packed
- 1 tsp pure vanilla extract
- 4 large eggs, room temperature
- ¾ cup (75g) Dutch-process cocoa powder
- 1 cup (125g) all-purpose flour
- 1 tsp fine sea salt
- ½ tsp baking powder
For the Red Velvet Layer:
- 2 ½ cups (313g) all-purpose flour
- 2 cups (400g) granulated sugar
- ¾ cup (75g) unsweetened cocoa powder (natural or Dutch-process)
- 1 tsp baking soda
- 1 tsp fine sea salt
- 1 ½ cups (360ml) full-fat cultured buttermilk, room temperature
- ½ cup (120ml) neutral oil (vegetable, canola, or grapeseed)
- 2 large eggs, room temperature
- 2 tsp pure vanilla extract
- 1 tbsp white vinegar
- 1 tbsp (15g) high-intensity red gel food coloring (e.g., AmeriColor Super Red)
For the Cream Cheese Frosting:
- 16 oz (454g) full-fat brick cream cheese, cold but pliable
- ½ cup (1 stick / 113g) unsalted butter, room temperature
- 1 tsp pure vanilla extract
- ¼ tsp fine sea salt
- 4 cups (480g) powdered sugar, sifted
- Optional: 1–2 tsp heavy cream or whole milk, if needed for consistency
For Garnish (Optional):
- Crushed freeze-dried raspberries
- White chocolate curls
- Edible gold dust
- Chocolate-covered espresso beans
Directions
- Preheat & Prep Pan: Adjust oven rack to center position. Preheat oven to 350°F (175°C). Generously grease a 9×13-inch metal baking pan with butter or non-stick spray. Line with two perpendicular sheets of parchment paper, allowing 2 inches of overhang on the long sides. Lightly grease parchment.
- Make Brownie Batter: In a medium heatproof bowl, combine butter, chopped chocolate, and espresso powder. Melt over barely simmering water (double boiler), stirring constantly until smooth and glossy (~4–5 min). Remove from heat; cool 5 minutes. Whisk in granulated sugar, brown sugar, and vanilla until combined. Add eggs one at a time, whisking vigorously for 30 seconds after each until batter thickens and becomes glossy. Sift cocoa, flour, salt, and baking powder over mixture; fold gently with silicone spatula until *just* incorporated. Spread evenly into prepared pan. Tap pan firmly on counter twice. Set aside.
- Make Red Velvet Batter: In large bowl, whisk flour, sugar, cocoa, baking soda, and salt. In separate bowl, whisk buttermilk, oil, eggs, vanilla, vinegar, and red gel until uniformly colored. Gradually pour wet into dry; stir with whisk *just* until no dry pockets remain (15–20 seconds). Batter should resemble heavy cream.
- Layer Batters: Spoon red velvet batter in 4–5 large dollops over brownie base. Using small offset spatula, gently spread to cover completely — avoid pressing down or swirling. Aim for even ½-inch thickness.
- Bake: Place pan in oven. Bake 38–42 minutes, rotating front-to-back at 25 minutes. Do not open oven before 35 minutes. Done when toothpick 1 inch from edge has moist crumbs (not wet batter) and center springs back when lightly touched.
- Cool Thoroughly: Cool in pan on wire rack 1 hour. Lift bars out using parchment overhang; carefully peel off bottom parchment. Cool completely to room temperature (min. 2 hours).
- Make Frosting: In stand mixer with paddle, beat cream cheese and butter on medium 2 min until smooth. Add vanilla and salt; mix 30 sec. Gradually add powdered sugar (1 cup at a time) on low speed. Beat 2–3 min on medium until glossy and spreadable. Adjust with 1 tsp cream if too stiff.
- Frost & Slice: Once bars are fully cool, spread frosting evenly. Chill uncovered 30–45 min. Using hot, dry knife (wiped clean between cuts), slice into 12–16 rectangles. Store covered at room temperature (unfrosted) or refrigerated (frosted).
FAQ
- Can I make these bars ahead of time?
- Yes! Unfrosted bars stay fresh, wrapped tightly at room temperature, for up to 2 days. Frosted bars last 4 days refrigerated. For best texture, frost within 24 hours of baking. You may also freeze *unfrosted* bars: wrap tightly in plastic, then foil; freeze up to 3 months. Thaw overnight in fridge, then bring to room temperature before frosting.
- Why did my red velvet layer sink into the brownie?
- This usually occurs due to temperature mismatch (cold red velvet batter poured over warm brownie base), overmixing red velvet (developing gluten), or using liquid food coloring (adding excess moisture). Always ensure both batters are at room temperature, mix red velvet minimally, and use gel coloring exclusively.
- Can I use boxed brownie or red velvet mixes?
- Technically yes — but strongly discouraged. Boxed brownie mixes often contain stabilizers that resist layering; red velvet boxes vary wildly in cocoa type and acid balance, risking color failure or texture clash. Homemade batters give you complete control over density, moisture, and chemical reactions — essential for clean stratification.
- My frosting is runny — what went wrong?
- Most common causes: cream cheese was too warm or partially melted, butter was too soft, or you added too much liquid (cream/milk). Fix: chill bowl and beaters 10 min, then re-beat on low. If still soft, add 2 tbsp powdered sugar at a time until stable. Never frost warm bars — condensation melts frosting instantly.
- Can I bake these in a different size pan?
- Avoid 8×8 or 9×9 pans — layers become too thick, causing uneven baking and sinking. A 9×13 is ideal. For mini bars, use a 13×9×2-inch pan and reduce bake time by 5–7 minutes — check at 32 minutes.
- Is there a substitute for buttermilk?
- Yes — but precision matters. Mix 1 ½ cups whole milk + 1½ tbsp lemon juice