Introduction
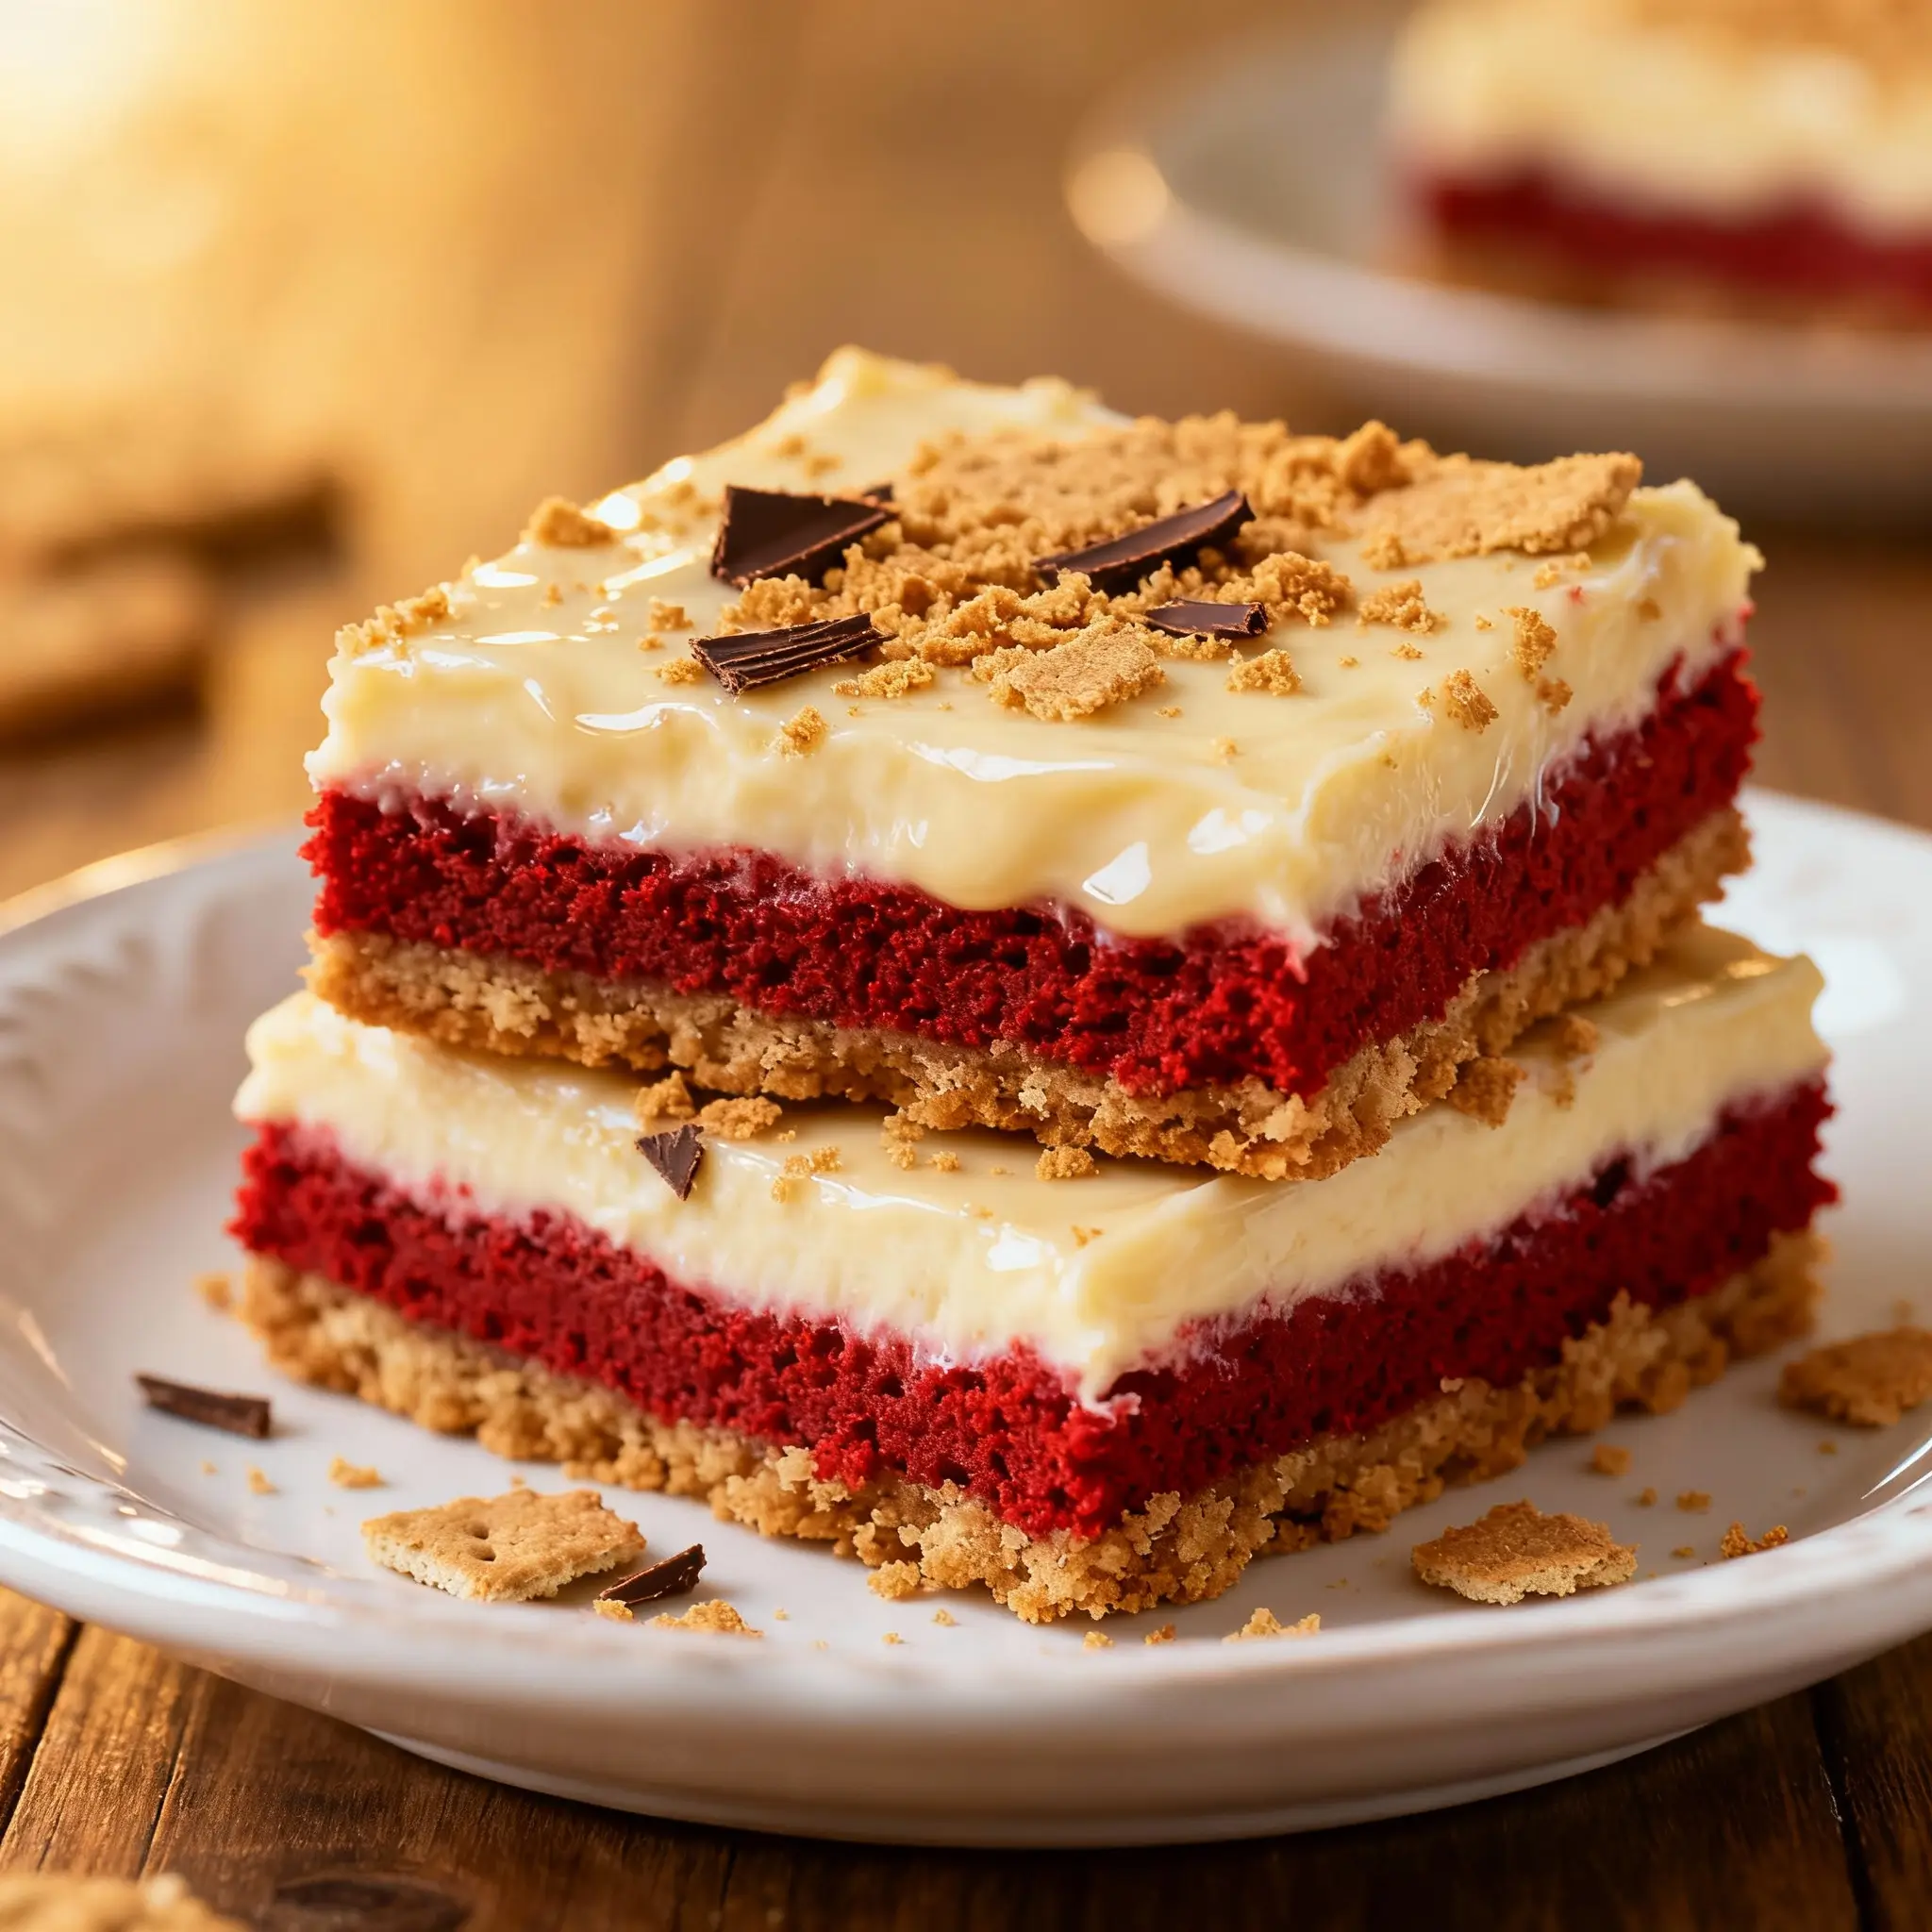
Red Velvet Dream Bars are the ultimate fusion of elegance and indulgence—a luscious, velvety dessert that marries the iconic richness of red velvet cake with the buttery tenderness of a bar cookie. Unlike traditional layer cakes that require meticulous assembly and frosting, these bars deliver the same luxurious crumb, signature crimson hue, and subtle cocoa tang in an effortlessly sliceable, shareable format. With their moist, tender interior, delicate cream cheese swirl, and optional white chocolate drizzle or crushed pecan garnish, Red Velvet Dream Bars evoke nostalgia while offering modern convenience—perfect for holiday trays, bake sales, potlucks, or quiet moments of self-care with a tall glass of cold milk. Whether you’re a seasoned baker or a curious beginner, these bars promise foolproof results, stunning visual appeal, and a flavor profile so captivating it earns its “Dream” moniker without compromise.
The History
The origins of red velvet cake stretch back to the early 20th century, with documented recipes appearing as early as the 1920s—though some food historians trace its roots even further to Victorian-era “velvet” cakes, named for their luxuriously soft, fine-textured crumb achieved through the use of cake flour and acidic ingredients like buttermilk or vinegar. The vibrant red color was originally a natural byproduct: anthocyanin pigments in non-Dutched (natural) cocoa reacted with acidic components (buttermilk, vinegar, and brown sugar), yielding a subtle russet-red tint. As food dyes became commercially available in the 1930s and ’40s, bakers began enhancing the hue intentionally—most famously at New York’s Waldorf Astoria Hotel, where legend claims the cake gained national fame after a guest requested the recipe (and was allegedly billed $100 for it—a clever marketing ploy that cemented its mystique). Red velvet evolved through the decades—adopted by Southern home cooks, elevated by gourmet patisseries, and reimagined in countless formats from cupcakes to cheesecakes. The bar iteration emerged in the late 2000s and early 2010s, driven by consumer demand for portable, portion-controlled desserts and the viral rise of “swirl” aesthetics on social media. Red Velvet Dream Bars represent this evolution: honoring tradition while embracing accessibility, visual storytelling, and textural contrast—transforming a beloved classic into a versatile, no-fuss confection that feels both timeless and refreshingly contemporary.
Ingredients Breakdown
Every element in Red Velvet Dream Bars serves a precise functional and sensory role—no ingredient is arbitrary. Let’s explore them in depth:
- All-Purpose Flour (2 ½ cups, spooned & leveled): Provides essential gluten structure. Spooning and leveling—not scooping—prevents excess flour, which can lead to dense, dry bars. For a more refined texture, substitute up to ½ cup with cake flour.
- Unsweetened Natural Cocoa Powder (¾ cup): Non-alkalized (natural) cocoa is critical—it contains the anthocyanins that react with acid to deepen color and enhance the characteristic tang. Dutch-processed cocoa lacks this reactivity and will mute both hue and flavor complexity.
- Granulated Sugar (1 ¾ cups): Sweetness, tenderness, and moisture retention. Sugar interferes with gluten formation and caramelizes during baking, contributing to golden edges and a delicate crust.
- Brown Sugar (½ cup, packed): Adds molasses-derived moisture, subtle caramel notes, and enhances chewiness—especially important in bar cookies where texture balance is paramount.
- Baking Soda (1 tsp): Reacts with acidic ingredients (vinegar, buttermilk, cocoa) to produce carbon dioxide, lifting the batter and creating an airy yet dense crumb—key to the “velvet” mouthfeel.
- Salt (1 tsp): Not just for seasoning—salt heightens all other flavors, balances sweetness, and strengthens gluten bonds for optimal structure.
- Buttermilk (1 cup, full-fat preferred): The cornerstone of tang and tenderness. Its acidity activates the baking soda, tenderizes gluten, and contributes fat and protein for richness. If unavailable, make a substitute: 1 cup whole milk + 1 tbsp white vinegar or lemon juice, rested 5–10 minutes until curdled.
- Vegetable Oil (⅔ cup): Ensures unparalleled moisture and shelf stability. Unlike butter, oil remains liquid at room temperature, yielding a supremely tender, non-crumbly crumb ideal for bars. Can be substituted with melted coconut oil (refined for neutral flavor) or high-oleic sunflower oil.
- Large Eggs (3, room temperature): Bind ingredients, add structure via coagulation, and contribute emulsification for smooth batter consistency. Room temperature eggs incorporate more evenly and reduce mixing time—minimizing gluten development.
- Distilled White Vinegar (2 tsp): A double-duty powerhouse: boosts acidity to intensify the red hue and activate leavening, while also adding a clean, bright tang that defines authentic red velvet.
- Red Food Coloring (2 tbsp liquid or 1 tbsp gel concentrate): While natural reactions yield rose tones, modern expectations demand bold crimson. Gel coloring is highly concentrated—provides vivid color without thinning batter. Liquid coloring works but may require up to 3 tbsp; avoid “natural” beet-based dyes if intense red is desired—they fade and impart earthy notes.
- Vanilla Extract (2 tsp, pure): Deepens aroma and rounds out cocoa and dairy notes. Imitation vanilla lacks nuance and can taste medicinal when baked.
- Cream Cheese Swirl Component: 8 oz full-fat brick-style cream cheese (room temperature), ⅓ cup granulated sugar, 1 large egg yolk, 1 tsp vanilla, and a pinch of salt. This isn’t mere decoration—it’s a strategic contrast: cool, tangy, slightly dense against the warm, airy cake layer. Full-fat cream cheese ensures richness and prevents curdling.
- Optional Garnishes: White chocolate drizzle (melted high-cocoa-content white chocolate), toasted pecans or walnuts, freeze-dried raspberries for tart pop, edible gold dust for luxury occasions, or a dusting of freeze-dried beet powder for natural color enhancement.
Step-by-Step Recipe
- Preheat & Prep: Position oven rack in center position. Preheat oven to 350°F (177°C). Generously grease a 9×13-inch metal baking pan (not glass or ceramic—metal ensures even heating and crisp edges) and line with parchment paper, leaving 2-inch overhangs on two opposing sides for easy removal. Lightly grease parchment.
- Mix Dry Ingredients: In a large bowl, whisk together flour, natural cocoa powder, granulated sugar, brown sugar, baking soda, and salt until fully homogenized and no cocoa lumps remain—about 45 seconds. Whisking aerates and evenly distributes leaveners.
- Combine Wet Ingredients: In a separate medium bowl, vigorously whisk buttermilk, vegetable oil, eggs, vinegar, food coloring, and vanilla until emulsified and uniformly pink—approximately 60 seconds. The mixture will thicken slightly due to the reaction between acid and dairy.
- Combine Batter: Pour wet ingredients into dry ingredients. Using a silicone spatula or wooden spoon, gently fold—do not stir or beat—just until *no dry streaks remain*. Overmixing develops excess gluten, resulting in tough, rubbery bars. Batter will be thick, glossy, and vibrantly red—like velvet paint.
- Prepare Cream Cheese Swirl: In a small bowl, beat softened cream cheese with sugar using a hand mixer on medium until completely smooth and creamy (no lumps!). Add egg yolk and vanilla; beat 30 seconds more until homogenous. Transfer to a piping bag fitted with a wide round tip (or use a zip-top bag with corner snipped).
- Layer & Swirl: Pour red velvet batter into prepared pan, spreading evenly with offset spatula. Pipe cream cheese mixture in parallel lines across surface. Using a toothpick or skewer, drag vertically through lines in a gentle “S” or zigzag motion to create elegant marbling. Avoid over-swirling—just 6–8 passes preserves distinct ribbons.
- Bake with Precision: Place pan in preheated oven. Bake 38–42 minutes. Begin checking at 35 minutes: bars are done when edges are set and lightly pulling away from pan, top springs back when gently pressed, and a toothpick inserted 1 inch from edge comes out with moist crumbs (not wet batter). Center may appear slightly soft—that’s intentional; residual heat finishes cooking. Do not overbake—this is the #1 cause of dryness.
- Cool Completely: Remove pan from oven. Cool on wire rack for 20 minutes. Then, using parchment overhangs, carefully lift bars onto rack. Peel off parchment and cool completely—minimum 2 hours, preferably 4 hours or overnight. This step is non-negotiable: cooling allows starches to retrograde, setting the crumb and enabling clean slicing.
- Chill for Clean Cuts (Optional but Recommended): For razor-sharp squares, refrigerate cooled bars, uncovered, for 1 hour before cutting. Cold bars hold shape better under knife pressure.
- Finish & Serve: Using a sharp, hot knife (dip blade in hot water and wipe dry between cuts), slice into 15–24 uniform bars. Wipe knife clean after every 2–3 cuts. Drizzle with melted white chocolate or garnish as desired. Store covered at room temperature for up to 3 days, refrigerated for up to 1 week, or frozen for 3 months.
Tips
- Color Consistency Matters: Use gel food coloring for reliable, vibrant results. Liquid coloring varies widely in potency—test a drop in a spoonful of batter first. For deeper burgundy, add ¼ tsp black gel coloring with your red.
- Room Temperature Is Key: Cold cream cheese will not blend smoothly and may cause lumps or break the swirl. Take cream cheese out 1–1.5 hours before baking; if rushed, cut into cubes and microwave at 50% power for 15-second bursts until pliable but not melted.
- Measure Flour Correctly: Too much flour = dry bars. Use the “spoon-and-level” method: fluff flour in bag, spoon into measuring cup until heaping, then level with straight edge. Never scoop directly from bag—that compacts flour and adds up to 25% extra.
- Don’t Skip the Vinegar: Even if using gel coloring, vinegar provides essential acidity for flavor balance and leavening synergy. Omitting it flattens taste and weakens rise.
- Pan Choice Impacts Texture: Dark nonstick metal pans promote faster browning—reduce oven temp by 25°F if using one. Light-colored aluminum pans yield the most consistent results. Avoid glass: it retains heat longer, increasing risk of overbaked edges.
- Swirl Like a Pro: Pipe cream cheese in ½-inch-wide parallel lines, spaced ¾ inch apart. Drag skewer perpendicular to lines—not parallel—to create maximum contrast. Practice swirling on a plate first if nervous!
- Cooling Is Part of Baking: Cutting warm bars causes crumbling and smearing. Patience rewards you with defined layers and glossy, intact swirls. Overnight cooling also deepens flavor as cocoa and vanilla compounds meld.
- Knife Technique: Use a long, thin-bladed chef’s knife or serrated knife. Heat blade in hot water, dry thoroughly, slice firmly downward (no sawing!), then wipe and reheat. For perfect edges, trim outer “crust” bars first and use them for tasting.
- Freeze for Future Joy: Wrap *fully cooled* bars individually in plastic wrap, then place in freezer bag. Thaw wrapped at room temperature 1 hour before serving—moisture stays locked in, and swirls stay pristine.
- Troubleshooting Guide: If bars sink in center: oven temp too low or underbaked. If edges burn: pan too dark or oven inaccurate—use oven thermometer. If swirl disappears: overmixed batter or swirled too aggressively. If color fades: used Dutch-process cocoa or insufficient vinegar.
Variations and Customizations
Red Velvet Dream Bars are a canvas for creativity—elevating tradition while respecting core texture and flavor principles. Here are rigorously tested, bakery-worthy adaptations:
- White Chocolate–Pecan Crunch Bars: Fold ¾ cup toasted, chopped pecans and ½ cup white chocolate chips into red velvet batter before pouring. Top with additional white chocolate drizzle and pecan halves post-bake.
- Black Cocoa Midnight Bars: Replace ¼ cup natural cocoa with black cocoa (like King Arthur’s) for an intensified, almost charcoal-hued crumb with roasted, espresso-like depth—ideal for sophisticated palates.
- Maple-Bourbon Swirl: Substitute ¼ cup buttermilk with pure maple syrup and add 1 tbsp real bourbon to wet ingredients. For the swirl, replace vanilla with bourbon and add 1 tsp maple extract.
- Gluten-Free Dream Bars: Use 1:1 gluten-free flour blend (Bob’s Red Mill or King Arthur recommended) + ½ tsp xanthan gum. Increase buttermilk by 1 tbsp and add 1 tsp apple cider vinegar for extra lift. Verify all other ingredients (baking soda, cocoa, food coloring) are GF-certified.
- Vegan Velvet Bars: Replace eggs with flax eggs (3 tbsp ground flax + 9 tbsp water, rested 10 min), buttermilk with almond milk + 1 tbsp vinegar, and cream cheese swirl with blended silken tofu (8 oz), coconut cream (¼ cup), maple syrup (3 tbsp), lemon juice (1 tsp), and cornstarch (1 tsp). Bake 5 minutes longer.
- Strawberry-Balsamic Swirl: Replace cream cheese swirl with reduced balsamic-strawberry compote (1 cup hulled strawberries + 2 tbsp balsamic + 2 tbsp sugar, simmered 12 min until thick). Swirl gently—compote is thicker, so use a small spoon instead of piping.
- Spiced Chai Velvet Bars: Add 1 ½ tsp ground cinnamon, ½ tsp ginger, ¼ tsp cardamom, and ⅛ tsp cloves to dry ingredients. Infuse buttermilk with 1 chai tea bag for 10 minutes before using.
- Mini Linzer Dream Bars: Press half the batter into mini muffin tin cups. Add ½ tsp seedless raspberry jam per cup. Top with remaining batter. Swirl with cream cheese mixture using toothpick. Bake 18–22 minutes.
- Luxury Gold-Dusted Bars: After cooling, brush tops lightly with warmed apricot jam (strained) and dust generously with edible gold luster dust mixed with clear alcohol (vodka or lemon extract) for shimmer.
- St. Patrick’s Day Emerald Bars: Add 1 tsp spirulina powder + 1 tsp matcha to dry ingredients for natural green hue and earthy note. Swap cream cheese swirl for pistachio paste swirl (blended roasted pistachios + powdered sugar + cream).
Health Considerations and Nutritional Value
While Red Velvet Dream Bars are undeniably a treat—not a health food—their nutritional profile can be contextualized thoughtfully. Per standard 2″x2″ bar (recipe yields approx. 24 servings), values average:
- Calories: 225–240 kcal
- Total Fat: 11–13g (including 4–5g saturated fat from cream cheese and cocoa butter)
- Carbohydrates: 28–31g (of which 20–22g are sugars—primarily added from granulated and brown sugars)
- Protein: 3–4g (from eggs, dairy, and minimal protein in cocoa)
- Fiber: 1g (naturally low; can be increased to 2–3g by substituting ¼ cup flour with oat fiber or resistant starch)
- Sodium: 190–220mg (moderate; mostly from baking soda and salt—reducible to 150mg by cutting salt to ¾ tsp)
Key Health Notes:
- No Artificial Preservatives or Hydrogenated Oils: When made from scratch with quality ingredients, these bars contain no trans fats, artificial colors (unless using synthetic dyes), or chemical preservatives—unlike many store-bought versions.
- Cocoa Benefits: Natural cocoa is rich in flavonoids (epicatechin, procyanidins) linked to improved endothelial function and antioxidant activity. To maximize benefits, use high-cocoa-content, minimally processed natural cocoa.
- Calcium & Vitamin D: Buttermilk and cream cheese contribute modest amounts of calcium (≈50mg/serving) and—if fortified—vitamin D, supporting bone health.
- Mindful Indulgence Framework: These bars fit well within a balanced dietary pattern when enjoyed intentionally—not mindlessly. Pairing one bar with a cup of unsweetened herbal tea or Greek yogurt adds protein and slows glucose absorption.
- Allergen Awareness: Contains dairy (buttermilk, cream cheese), eggs, wheat (gluten), and soy (in most vegetable oils and food coloring). Vegan/GF versions address these—but always verify labels on specialty ingredients.
- Lower-Sugar Options: Reduce granulated sugar to 1 ¼ cups and brown sugar to ⅓ cup—bars remain moist due to oil and buttermilk, though sweetness drops ~25%. Stevia or monk fruit blends can replace up to ½ cup sugar, but require added bulking agents (like erythritol) to maintain texture.
- Portion Control Advantage: As bars—not cake slices—they naturally encourage mindful serving. Pre-cutting and storing individually helps prevent overconsumption.
Ultimately, Red Velvet Dream Bars celebrate culinary joy—not deprivation. Their value lies in craftsmanship, shared moments, and sensory delight—elements proven to support emotional well-being as meaningfully as macronutrients support physical health.
Ingredients
- 2 ½ cups (300g) all-purpose flour, spooned & leveled
- ¾ cup (65g) unsweetened natural cocoa powder (non-alkalized)
- 1 ¾ cups (350g) granulated sugar
- ½ cup (100g) packed light brown sugar
- 1 teaspoon baking soda
- 1 teaspoon fine sea salt
- 1 cup (240ml) full-fat buttermilk, room temperature
- ⅔ cup (160ml) neutral vegetable oil (e.g., canola, grapeseed, or refined coconut)
- 3 large eggs, room temperature
- 2 teaspoons distilled white vinegar
- 2 tablespoons red gel food coloring (or 3 tbsp liquid)
- 2 teaspoons pure vanilla extract
- Cream Cheese Swirl:
- 8 oz (227g) full-fat brick-style cream cheese, room temperature
- ⅓ cup (67g) granulated sugar
- 1 large egg yolk, room temperature
- 1 teaspoon pure vanilla extract
- Pinch of fine sea salt
- Optional Garnish: ½ cup high-quality white chocolate, melted and drizzled
Directions
- Preheat oven to 350°F (177°C). Grease a 9×13-inch metal baking pan and line with parchment paper, leaving overhang on two sides.
- In a large bowl, whisk together flour, cocoa powder, granulated sugar, brown sugar, baking soda, and salt until uniform.
- In a medium bowl, whisk buttermilk, oil, eggs, vinegar, food coloring, and vanilla until smooth and evenly colored.
- Pour wet ingredients into dry. Fold gently with a silicone spatula until *just combined*—no dry streaks visible. Do not overmix.
- In a small bowl, beat cream cheese and sugar with electric mixer until smooth (~1 min). Beat in egg yolk, vanilla, and salt until cohesive.
- Pour red velvet batter into prepared pan. Spread evenly. Pipe or spoon cream cheese mixture in parallel lines across surface.
- Drag a toothpick vertically through lines in gentle, spaced zigzags to swirl. Do not overmix.
- Bake 38–42 minutes, until edges are set, top springs back, and toothpick near edge shows moist crumbs.
- Cool in pan 20 minutes. Lift out using parchment. Cool completely on wire rack (2–4 hours).
- Refrigerate 1 hour for cleanest cuts. Slice with hot, wiped knife into 24 bars. Drizzle with white chocolate if desired. Store covered.
FAQ
- Can I use Dutch-process cocoa?
- No—it lacks the acidity needed to react with baking soda and develop the signature red hue and tang. Natural cocoa is essential for authenticity and performance.
- Why did my bars turn brown instead of red?
- Most likely causes: Dutch-process cocoa used, insufficient vinegar, too little food coloring, or oven temperature too high (causing caramelization over oxidation). Always use natural cocoa + vinegar + gel coloring.
- Can I make these ahead for a party?
- Absolutely! Bake 1–2 days ahead. Store covered at room temperature. Flavor actually improves overnight as cocoa and vanilla notes bloom. Add garnishes day-of.
- My cream cheese swirl sank or disappeared—why?
- This happens when batter is overmixed (too thin), cream cheese is too warm or too cold, or swirl is overworked. Ensure cream cheese is cool but pliable, batter is thick, and swirl gently.
- Can I omit the food coloring entirely?
- You can—but the result will be a lovely mahogany-brown “velvet” bar with all the flavor, minus the visual drama. It’s still delicious and authentically vintage-style.
- What’s the best way to store leftovers?
- Store in an airtight container at room temperature up to 3 days, refrigerated up to 1 week, or frozen up to 3 months. Bring chilled bars to room temp 15 minutes before serving for optimal texture.
- Can I use low-fat cream cheese or buttermilk?
- Full-fat dairy is strongly recommended. Low-fat cream cheese contains more water and stabilizers, risking curdling and a grainy swirl. Low-fat buttermilk reduces richness and can yield drier bars.
- Are these bars suitable for mailing or gifting?
- Yes! Fully cooled bars freeze exceptionally well. Wrap individually in parchment + plastic, pack in rigid box with cushioning, and ship via 2-day service. Thaw sealed at room temp.
- Can I double the recipe for a larger batch?
- Not recommended for a single pan—it won’t bake evenly. Instead, bake two separate 9×13 batches. Doubling increases mixing time and risk of overdevelopment.
- My bars cracked on top—is that normal?
- A fine, delicate crack is common and harmless—it occurs as the surface sets faster than the interior rises. To minimize: avoid opening oven before 30 minutes, ensure accurate oven temp, and cool gradually.
Summary
Red Velvet Dream Bars are a masterclass in nostalgic reinvention—melding the historic depth of red velvet cake with the effortless elegance of a premium bar cookie, complete with a luxuriously tangy cream cheese swirl and vibrant, velvety crumb.
They reward precision (natural cocoa, vinegar, gel coloring), patience (cooling, chilling), and creativity (endless customizations)—delivering not just dessert, but a multisensory experience rooted in history, science, and heartfelt hospitality.