Red Velvet Cupcakes: A Luxurious Classic with a Velvety Twist
Indulge in the rich, moist delight of Red Velvet Cupcakes—fluffy, crimson-hued treats that have captured hearts across generations. With their subtle cocoa flavor, creamy frosting, and eye-catching appearance, these cupcakes are more than just dessert; they’re an experience. Whether you’re baking for a birthday, holiday, or simply because you crave something sweet and luxurious, red velvet cupcakes offer the perfect balance of elegance and comfort. In this comprehensive guide, we’ll explore every aspect of this beloved confection—from its mysterious origins to step-by-step instructions, expert tips, health insights, and creative variations.
The History: Where Did Red Velvet Cupcakes Come From?
The origin of red velvet cupcakes is as rich and layered as the cake itself. While the exact beginnings are debated, most food historians trace red velvet back to the early 20th century in the American South. The term “velvet” referred to the fine, soft crumb texture achieved by using ingredients like buttermilk, vinegar, and cornstarch, which were believed to tenderize the cake and give it a velvety mouthfeel.
One popular theory links the rise of red velvet to the Adams Extract Company, which began promoting red food coloring in recipes during the 1920s to boost sales. Their marketing efforts included a red velvet cake recipe that eventually became iconic. Another famous chapter in red velvet lore involves the Waldorf-Astoria Hotel in New York City, where a guest allegedly requested the hotel’s famed red velvet cake recipe, only to receive a bill for it later—sparking outrage and widespread reproduction of the recipe at home.
Originally, the red hue came from a chemical reaction between natural cocoa powder (which contains anthocyanin, a pH-sensitive pigment) and acidic ingredients like buttermilk and vinegar. This reaction created a faint reddish tint. However, as cocoa processing changed over time (with Dutch-processed cocoa becoming common), the natural red color diminished, prompting bakers to rely on artificial red food coloring to achieve the vibrant look we know today.
Over the decades, red velvet evolved from a regional specialty into a national phenomenon, especially popular around holidays like Valentine’s Day, Christmas, and Southern celebrations such as Juneteenth. Today, red velvet cupcakes are a staple in bakeries, grocery stores, and home kitchens across the United States and beyond.
Ingredients Breakdown: What Makes Red Velvet Special?
Red velvet cupcakes owe their signature taste and texture to a carefully balanced combination of ingredients. Each component plays a crucial role in creating the final product’s unique profile:
- All-Purpose Flour: Provides the structure of the cupcake. Sifting ensures a light, airy crumb.
- Cocoa Powder (Unsweetened, Natural): Adds a mild chocolate flavor without overpowering sweetness. Natural cocoa (not Dutch-processed) reacts with acids to enhance color and tenderness.
- Baking Soda & Baking Powder: Leavening agents that help the cupcakes rise. Baking soda reacts with acidic ingredients (like vinegar and buttermilk), while baking powder provides additional lift.
- Salt: Enhances flavor and balances sweetness.
- Granulated Sugar: Sweetens the batter and contributes to moisture retention.
- Butter (Unsalted, Room Temperature): Adds richness and helps create a tender crumb. Creaming butter with sugar incorporates air for a fluffy texture.
- Eggs (Large, Room Temperature): Bind ingredients together and add structure and moisture.
- Buttermilk: Key to the velvet texture. Its acidity reacts with baking soda and tenderizes gluten, resulting in a soft, moist cake.
- Distilled White Vinegar: Works with buttermilk and cocoa to activate leavening and deepen the red hue through chemical reaction.
- Vanilla Extract: Enhances overall flavor with warm, aromatic notes.
- Red Food Coloring (Liquid or Gel): Gives the cupcakes their iconic crimson shade. Gel coloring is more concentrated and produces a deeper color without altering consistency.
For the frosting, typically cream cheese-based:
- Cream Cheese (Full-Fat, Room Temperature): Tangy and smooth, it balances the sweetness of the cupcakes.
- Unsalted Butter (Room Temperature): Adds body and creaminess to the frosting.
- Powdered Sugar (Sifted): Sweetens and thickens the frosting. Sifting prevents lumps.
- Vanilla Extract: Complements the tangy cream cheese with warmth.
- Salt (Pinch): Sharpens flavors and reduces cloying sweetness.
Step-by-Step Recipe: How to Make Perfect Red Velvet Cupcakes
Follow this detailed recipe to create bakery-quality red velvet cupcakes right in your kitchen. Yields approximately 24 standard-sized cupcakes.
Ingredients
For the Cupcakes:
- 2 ½ cups (315g) all-purpose flour
- 2 tablespoons (10g) unsweetened natural cocoa powder
- 1 ½ teaspoons baking soda
- 1 teaspoon baking powder
- ½ teaspoon salt
- 2 cups (400g) granulated sugar
- 1 cup (230g) unsalted butter, softened
- 2 large eggs, room temperature
- 1 cup (240ml) buttermilk, room temperature
- 2 teaspoons vanilla extract
- 2 tablespoons (30ml) distilled white vinegar
- 2–3 tablespoons (30–45ml) red gel food coloring (adjust for desired intensity)
For the Cream Cheese Frosting:
- 8 oz (226g) full-fat cream cheese, softened
- ½ cup (115g) unsalted butter, softened
- 4 cups (480g) powdered sugar, sifted
- 2 teaspoons vanilla extract
- Pinch of salt
Directions
- Preheat Oven & Prepare Pans: Preheat your oven to 350°F (175°C). Line two 12-cup muffin tins with cupcake liners. Set aside.
- Mix Dry Ingredients: In a medium bowl, whisk together the flour, cocoa powder, baking soda, baking powder, salt, and sugar. Set aside.
- Cream Butter and Sugar: In a large mixing bowl, beat the softened butter and granulated sugar with an electric mixer on medium-high speed until light and fluffy (about 3–4 minutes).
- Add Eggs: Add the eggs one at a time, beating well after each addition. Scrape down the sides of the bowl as needed.
- Combine Wet Ingredients: In a measuring cup or small bowl, mix the buttermilk, vinegar, vanilla extract, and red food coloring.
- Incorporate Dry and Wet Mixtures: Gradually add the dry ingredients to the butter mixture in three parts, alternating with the wet ingredients in two parts, starting and ending with the dry. Begin mixing on low speed until just combined after each addition. Do not overmix.
- Fill Muffin Cups: Divide the batter evenly among the prepared cupcake liners, filling each about ⅔ to ¾ full to allow room for rising.
- Bake: Bake for 18–22 minutes, or until a toothpick inserted into the center comes out clean or with a few moist crumbs.
- Cool: Allow cupcakes to cool in the pan for 5 minutes, then transfer them to a wire rack to cool completely before frosting.
- Make Frosting: In a large bowl, beat the softened cream cheese and butter together until smooth and creamy (about 2 minutes). Gradually add the sifted powdered sugar, one cup at a time, mixing on low speed. Once incorporated, increase speed to medium and beat until fluffy. Add vanilla extract and a pinch of salt, then beat for another minute.
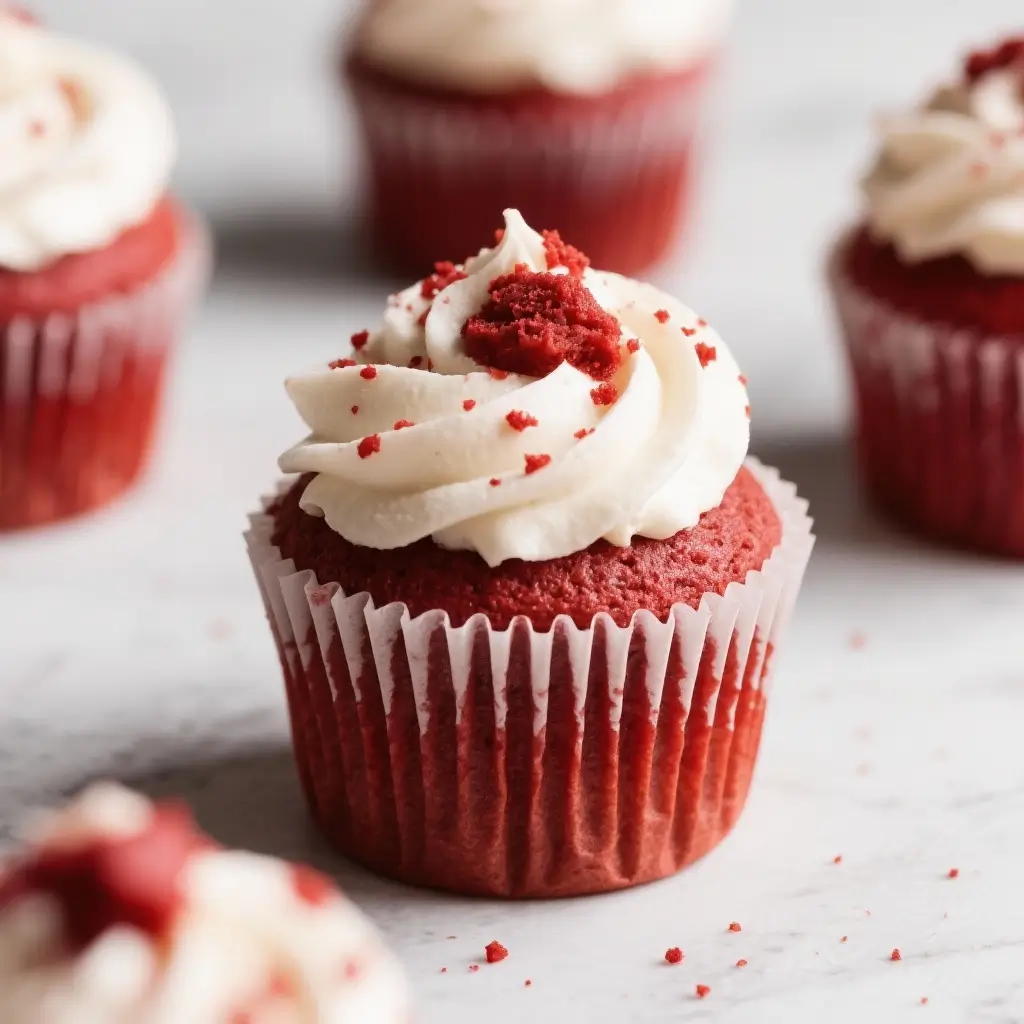
- Frost Cupcakes: Once cupcakes are completely cooled, use a piping bag fitted with a star tip (e.g., Wilton 1M) to swirl the frosting onto each cupcake. Alternatively, spread with a knife for a rustic look.
- Serve or Store: Serve immediately or refrigerate if not consuming within a few hours. Bring to room temperature before serving for best texture.
Tips for Success: Expert Advice for Flawless Cupcakes
- Room Temperature Ingredients: Ensure butter, eggs, and buttermilk are at room temperature. Cold ingredients can lead to uneven mixing and dense cupcakes.
- Sift Dry Ingredients: Sifting flour and cocoa prevents clumping and aerates the mixture for a lighter texture.
- Don’t Overmix: Overmixing develops gluten, leading to tough cupcakes. Mix only until ingredients are incorporated.
- Use Gel Food Coloring: Liquid coloring may alter batter consistency and require larger quantities. Gel gives intense color with minimal volume.
- Check Oven Temperature: Use an oven thermometer to ensure accuracy. Hot spots or incorrect temps can cause uneven baking.
- Cool Completely Before Frosting: Warm cupcakes will melt the frosting, causing it to slide off.
- Pipe Like a Pro: Chill frosted cupcakes for 15 minutes before serving to set the frosting and enhance presentation.
- Line with Double Liners: Prevents staining from red dye, especially important for white or light-colored liners.
Variations and Customizations: Make It Your Own
While classic red velvet cupcakes are timeless, feel free to get creative! Here are some delicious twists:
- Gluten-Free Red Velvet: Substitute all-purpose flour with a 1:1 gluten-free baking blend. Add ½ teaspoon xanthan gum if not included in the mix.
- Vegan Version: Replace eggs with flax eggs (2 tbsp ground flaxseed + 6 tbsp water), use plant-based butter and cream cheese, and swap buttermilk with almond milk + 1 tbsp vinegar.
- Mini Red Velvet Cupcakes: Use a mini muffin tin and reduce baking time to 10–12 minutes.
- Stuffed Cupcakes: Add a surprise center—fill with cream cheese filling, raspberry jam, or white chocolate chunks before baking.
- Boozy Red Velvet: Add 1–2 tablespoons of bourbon or buttermilk liqueur to the batter for a sophisticated twist.
- Different Frostings: Try whipped cream frosting for a lighter option, or ermine frosting (cooked flour buttercream) for a vintage Southern touch.
- Flavor Infusions: Add orange zest, cinnamon, or espresso powder to enhance complexity.
- Decorations: Top with edible glitter, sprinkles, fresh berries, or chopped pecans for added flair.
Health Considerations and Nutritional Value
While red velvet cupcakes are undeniably delicious, they are considered a treat food due to their sugar, fat, and calorie content. Here’s a general nutritional breakdown per cupcake (including frosting):
- Calories: ~350–400
- Total Fat: 18–22g (saturated fat: 10–12g)
- Carbohydrates: 45–50g (sugars: 35–40g)
- Protein: 3–4g
- Sodium: 200–250mg
Health Notes:
- Sugar Content: High in added sugars. Consider reducing sugar slightly in the batter (down to 1½ cups) or using a sugar substitute like erythritol for a lower-glycemic option.
- Dairy & Gluten: Contains both, so not suitable for those with allergies or intolerances unless modified.
- Food Coloring: Some artificial dyes (like Red #40) have been linked to hyperactivity in sensitive individuals. Opt for natural alternatives made from beet juice or carmine if preferred.
- Moderation is Key: Enjoy as an occasional treat rather than a daily indulgence.
- Balanced Pairing: Serve with fresh fruit or a green salad to offset richness and add nutrients.
Frequently Asked Questions (FAQ)
Why are my red velvet cupcakes dry?
Overbaking, overmixing, or inaccurate ingredient measurements can cause dryness. Always use a timer and measure flour correctly (spoon and level method).
Can I make red velvet cupcakes without food coloring?
Yes, but the color will be more brownish-red or maroon, not vibrant red. The natural reaction between cocoa and acid gives a faint tint, but it won’t match the classic look.
Can I freeze red velvet cupcakes?
Yes! Freeze unfrosted cupcakes in an airtight container for up to 3 months. Thaw at room temperature and frost before serving. Frosted cupcakes can also be frozen—place them on a tray to freeze solid, then wrap individually.
Why did my cupcakes sink in the middle?
Possible causes include underbaking, opening the oven too early, too much leavening, or overfilling the liners. Ensure proper oven temperature and avoid drafts.
Can I use Dutch-process cocoa?
It’s not recommended. Dutch-process cocoa is neutralized and won’t react with vinegar or buttermilk, reducing the traditional flavor and color development.
How long do red velvet cupcakes last?
Stored in an airtight container in the refrigerator, they last 5–7 days. At room temperature (if frosting is stable), consume within 2 days.
Can I make the batter ahead of time?
It’s best to bake immediately. However, you can prepare dry and wet ingredients separately and combine just before baking.
Summary
Red velvet cupcakes are a timeless dessert combining a soft, moist crumb with a hint of cocoa and a striking red hue, crowned with luscious cream cheese frosting. Loved for their elegant flavor and festive appearance, they remain a favorite for celebrations and everyday indulgences alike.