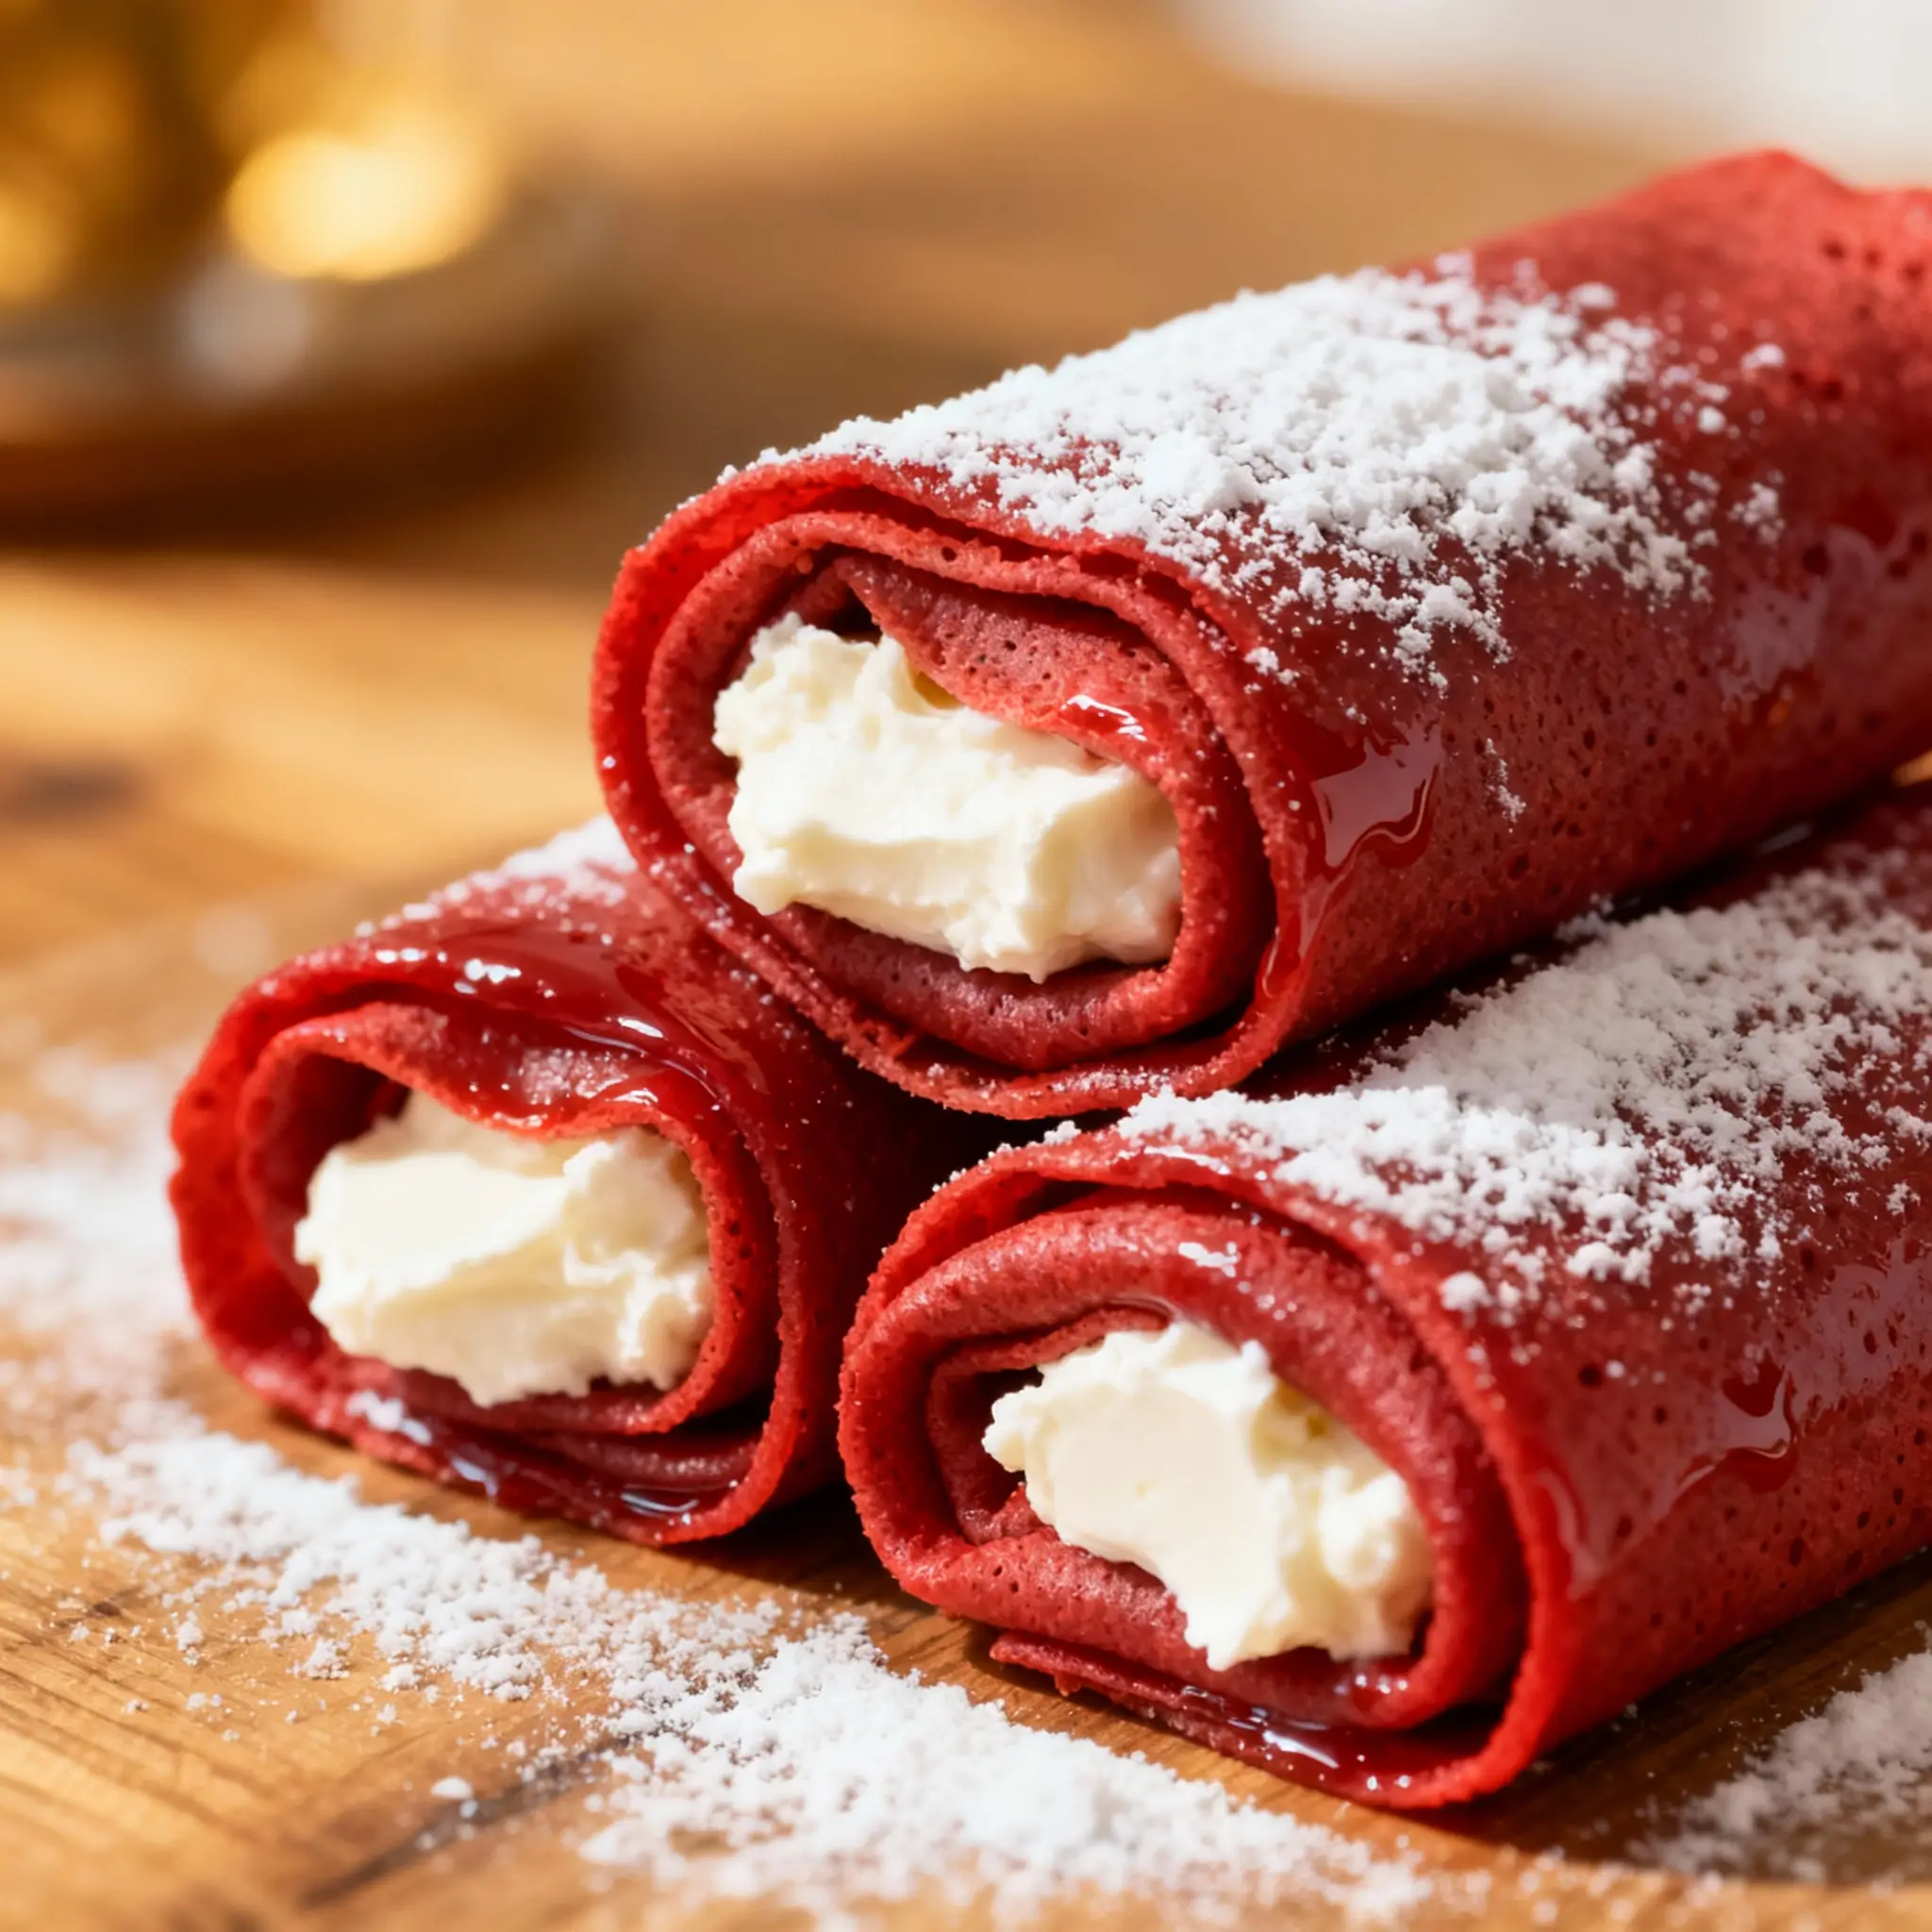
Red Velvet Crepe Rolls: A Decadent Fusion of Flair and Flavor
Indulge in the luxurious world of dessert innovation with Red Velvet Crepe Rolls—a stunning fusion of French elegance and American dessert tradition. These eye-catching treats combine the delicate layers of soft crepes with the rich, velvety flavor of red velvet cake, rolled into a show-stopping spiral that’s as delightful to look at as it is to eat. Whether you’re preparing for a special occasion or simply treating yourself, Red Velvet Crepe Rolls offer a perfect balance of creamy, chocolatey, and subtly tangy flavors wrapped in a visually captivating package.
The History Behind the Treat
The concept of crepe rolls emerged from the global street food trend popularized in East Asia during the early 2010s, particularly in countries like South Korea, Japan, and Taiwan. Vendors began rolling thin, delicate crepes around generous fillings of whipped cream, fresh fruit, and sweet spreads, creating portable desserts that were both photogenic and delicious. Over time, bakers and pastry chefs began experimenting with flavor infusions, leading to creative variations like matcha, taro, and eventually, red velvet.
Red velvet, on the other hand, has roots tracing back to the early 20th century in the American South. Originally, the reddish hue came from a reaction between natural cocoa (which contains anthocyanin) and acidic ingredients like buttermilk and vinegar. The modern version, however, relies heavily on red food coloring to achieve its signature deep crimson shade. When the vibrant red velvet flavor met the trendy crepe roll format, a new dessert sensation was born—one that marries Southern charm with modern culinary artistry.
Ingredients Breakdown: What Makes It Special
Creating perfect Red Velvet Crepe Rolls requires attention to each ingredient’s role in achieving the right texture, color, and taste. Below is a detailed breakdown:
- All-Purpose Flour: Provides structure to the crepe batter. Too much can make the crepes tough; too little results in tearing. Sifting ensures lump-free consistency.
- Cocoa Powder (Unsweetened): Adds the signature chocolate undertone of red velvet without overpowering sweetness. Use natural, not Dutch-processed, for proper acidity balance.
- Granulated Sugar: Enhances sweetness and contributes to browning. Keeps the crepes tender.
- Baking Powder: A small amount helps create slightly fluffy crepes, differentiating them from ultra-thin traditional ones.
- Salt: Balances the sweetness and enhances overall flavor depth.
- Eggs: Bind the batter and add richness. They also help the crepes hold together when rolled.
- Milk: Thins the batter and adds moisture. Whole milk is preferred for creaminess.
- Vegetable Oil or Melted Butter: Adds fat for tenderness and prevents sticking. Oil gives a neutral flavor; butter adds richness.
- White Vinegar: Reacts with baking soda (if used) and mimics the tangy note typical of red velvet cake.
- Red Food Coloring (Gel Preferred): Gives the iconic red hue. Gel coloring is more concentrated and won’t thin the batter like liquid.
- Vanilla Extract: Adds warmth and complements the cocoa and cream filling.
For the filling:
- Heavy Cream: Must be cold for best whipping results. Forms the base of the light, airy filling.
- Cream Cheese: Softened, adds tanginess and body—essential for authentic red velvet flavor pairing.
- Powdered Sugar: Sweetens the filling without adding moisture. Sifted to prevent lumps.
- Butter (Optional): Enriches the filling for a silkier mouthfeel.
- Vanilla and a Pinch of Salt: Round out the flavor profile.
Step-by-Step Recipe: Crafting the Perfect Red Velvet Crepe Roll
Ingredients
For the Crepes:
- 1 cup (120g) all-purpose flour, sifted
- 2 tablespoons (10g) unsweetened cocoa powder, sifted
- 2 tablespoons granulated sugar
- 1/4 teaspoon baking powder
- Pinch of salt
- 2 large eggs
- 1 1/4 cups (300ml) whole milk
- 1 tablespoon vegetable oil or melted butter
- 1/2 teaspoon white vinegar
- 1/2 – 1 teaspoon red gel food coloring (adjust for intensity)
- 1/2 teaspoon vanilla extract
For the Filling:
- 1 cup (240ml) cold heavy cream
- 4 oz (115g) full-fat cream cheese, softened
- 1/4 cup (30g) powdered sugar, sifted
- 1 tablespoon unsalted butter, softened (optional)
- 1/2 teaspoon vanilla extract
- A pinch of salt
Garnishes (Optional):
- Crushed red velvet cake crumbs
- White chocolate shavings
- Fresh berries (strawberries, raspberries)
- Edible gold flakes or sprinkles
- Drizzle of white chocolate or cream cheese glaze
Directions
- Prepare the Crepe Batter: In a large mixing bowl, whisk together the sifted flour, cocoa powder, sugar, baking powder, and salt until well combined.
- Add the eggs one at a time, whisking thoroughly after each addition to ensure smooth incorporation.
- Gradually pour in the milk while whisking continuously to avoid lumps. Mix until the batter is smooth and silky.
- Stir in the vegetable oil (or melted butter), vinegar, vanilla extract, and red food coloring. Mix until the color is evenly distributed. The batter should resemble heavy cream in consistency. If too thick, add a splash more milk. Cover and refrigerate for 30 minutes to relax the gluten and improve texture.
- Make the Filling: While the batter chills, prepare the filling. Using a stand mixer or hand mixer, beat the softened cream cheese until smooth and creamy, about 1–2 minutes.
- Add the powdered sugar, vanilla, salt, and optional butter. Beat until fully incorporated and fluffy.
- In a separate chilled bowl, whip the cold heavy cream until stiff peaks form. This is crucial—warm cream will not whip properly.
- Gently fold the whipped cream into the cream cheese mixture in two additions, using a spatula. Be careful not to deflate the mixture. The result should be light, airy, and spreadable. Refrigerate until ready to use.
- Cook the Crepes: Heat a non-stick skillet or crepe pan (8–9 inches) over medium heat. Lightly grease with butter or oil using a paper towel.
- Stir the batter, then pour about 1/4 cup into the center of the pan. Immediately tilt and swirl the pan to spread the batter into a thin, even circle.
- Cook for 1.5–2 minutes, until the edges begin to lift and the surface looks set. Flip carefully using a spatula and cook for another 30–60 seconds. The crepe should be flexible but not browned.
- Transfer to a parchment-lined tray and let cool completely. Repeat with remaining batter, stacking crepes between sheets of parchment paper. You should get 8–10 crepes.
- Assemble the Rolls: Lay one crepe flat on a clean surface, colored side down if preferred. Spread about 2–3 tablespoons of filling evenly across the crepe, leaving a small border at the edges.
- Starting from one edge, gently but firmly roll the crepe into a tight log. Don’t rush—rolling too quickly may cause cracking.
- Place seam-side down on a serving plate or tray. Repeat with all crepes.
- Chill and Set: Cover loosely with plastic wrap and refrigerate for at least 1 hour. This helps the rolls firm up and hold their shape.
- Garnish and Serve: Just before serving, decorate with crushed red velvet crumbs, berries, chocolate shavings, or a drizzle of glaze. Slice in half diagonally for a beautiful cross-section display, or serve whole.
Tips for Success
- Use Gel Food Coloring: Liquid coloring can alter the batter’s consistency. Gel provides intense color without affecting texture.
- Don’t Skip Chilling the Batter: Allowing the batter to rest improves elasticity and reduces tearing during rolling.
- Control the Heat: Medium heat is ideal. Too hot, and crepes burn; too low, and they become rubbery.
- Roll While Slightly Warm (Optional): Some prefer rolling crepes when just warm—they’re more pliable. But cooling prevents melting the filling.
- Keep Fillings Cold: Warm filling will seep through the crepe. Always assemble with chilled components.
- Sharp Knife for Cutting: If slicing, use a sharp, slightly warmed knife wiped between cuts for clean edges.
- Uniform Thickness: Swirl the pan quickly and consistently for even crepes—this ensures uniform cooking and rolling.
Variations and Customizations
Red Velvet Crepe Rolls are incredibly versatile. Here are some inspired twists to suit different tastes and occasions:
- Gluten-Free: Substitute all-purpose flour with a 1:1 gluten-free blend containing xanthan gum for structure.
- Dairy-Free: Use almond or oat milk, vegan butter, and dairy-free cream cheese. Coconut cream can replace heavy cream (chill overnight and whip the solid part).
- Chocolate Drizzle Version: Add a layer of chocolate ganache beneath the cream or drizzle dark chocolate over the finished rolls.
- Fruity Twist: Layer in fresh raspberries or strawberries before rolling. The tartness contrasts beautifully with the sweet cream.
- Alcohol-Infused: Add 1 teaspoon of bourbon or Kahlúa to the filling for an adult twist.
- Mini Crepe Bites: Make smaller crepes and roll into bite-sized pieces for party appetizers or dessert platters.
- Ombre Effect: Use varying amounts of food coloring in different crepes to create a gradient roll.
- Seasonal Themes: Add peppermint extract and green sprinkles for Christmas, or pastel colors for Easter.
Health Considerations and Nutritional Value
While undeniably decadent, it’s important to enjoy Red Velvet Crepe Rolls in moderation due to their calorie and sugar content. Here’s a rough nutritional estimate per serving (1 roll, assuming 8 servings):
- Calories: ~320–380 kcal
- Fat: 22–28g (mostly from cream, butter, and egg yolks)
- Saturated Fat: 12–15g
- Carbohydrates: 28–35g
- Sugars: 18–22g (from both batter and filling)
- Protein: 5–7g
- Cholesterol: Moderate (from eggs and dairy)
- Sodium: ~150–200mg
Health Notes:
- High in saturated fats and added sugars—best enjoyed occasionally.
- Lactose intolerant? Opt for lactose-free dairy products or plant-based alternatives.
- Food coloring concerns? Natural options like beetroot powder can be used, though the color will be less vibrant.
- To reduce sugar: Use less powdered sugar in filling and substitute with monk fruit or erythritol blends.
- Add nutrition by garnishing with fresh berries, which provide antioxidants and fiber.
Frequently Asked Questions (FAQ)
Can I make Red Velvet Crepe Rolls ahead of time?
Yes! Assembled rolls can be refrigerated for up to 24 hours. Add garnishes just before serving to maintain freshness and texture.
Why did my crepes tear when rolling?
This could be due to overly thick crepes, insufficient cooking (too moist), or rolling too aggressively. Ensure even thickness and allow crepes to cool completely before handling.
Can I freeze crepe rolls?
Freezing is not recommended. The high moisture content in the cream filling can lead to sogginess upon thawing. However, unfilled crepes can be frozen between parchment sheets and defrosted before use.
Is there a substitute for cream cheese in the filling?
Greek yogurt can be used for a lighter option, though it will be tangier and less stable. Mascarpone offers a richer, smoother alternative.
Can I use pancake mix instead of making batter from scratch?
Not ideal. Pancake mixes are thicker and sweeter, resulting in dense, cake-like crepes that won’t roll well.
How do I store leftovers?
Store in an airtight container in the refrigerator for up to 2 days. Place parchment between layers to prevent sticking.
Are red velvet crepe rolls safe for kids?
Yes, but be mindful of food coloring sensitivities. Use natural dyes if needed, and supervise young children due to choking hazards from hard garnishes.
Summary
Red Velvet Crepe Rolls are a breathtaking dessert that combines the classic flavor of red velvet cake with the elegant presentation of rolled crepes, filled with luscious cream cheese whipped cream. Visually stunning and irresistibly delicious, they’re perfect for celebrations, brunches, or as a luxurious treat that turns ordinary moments into extraordinary memories.