Introduction
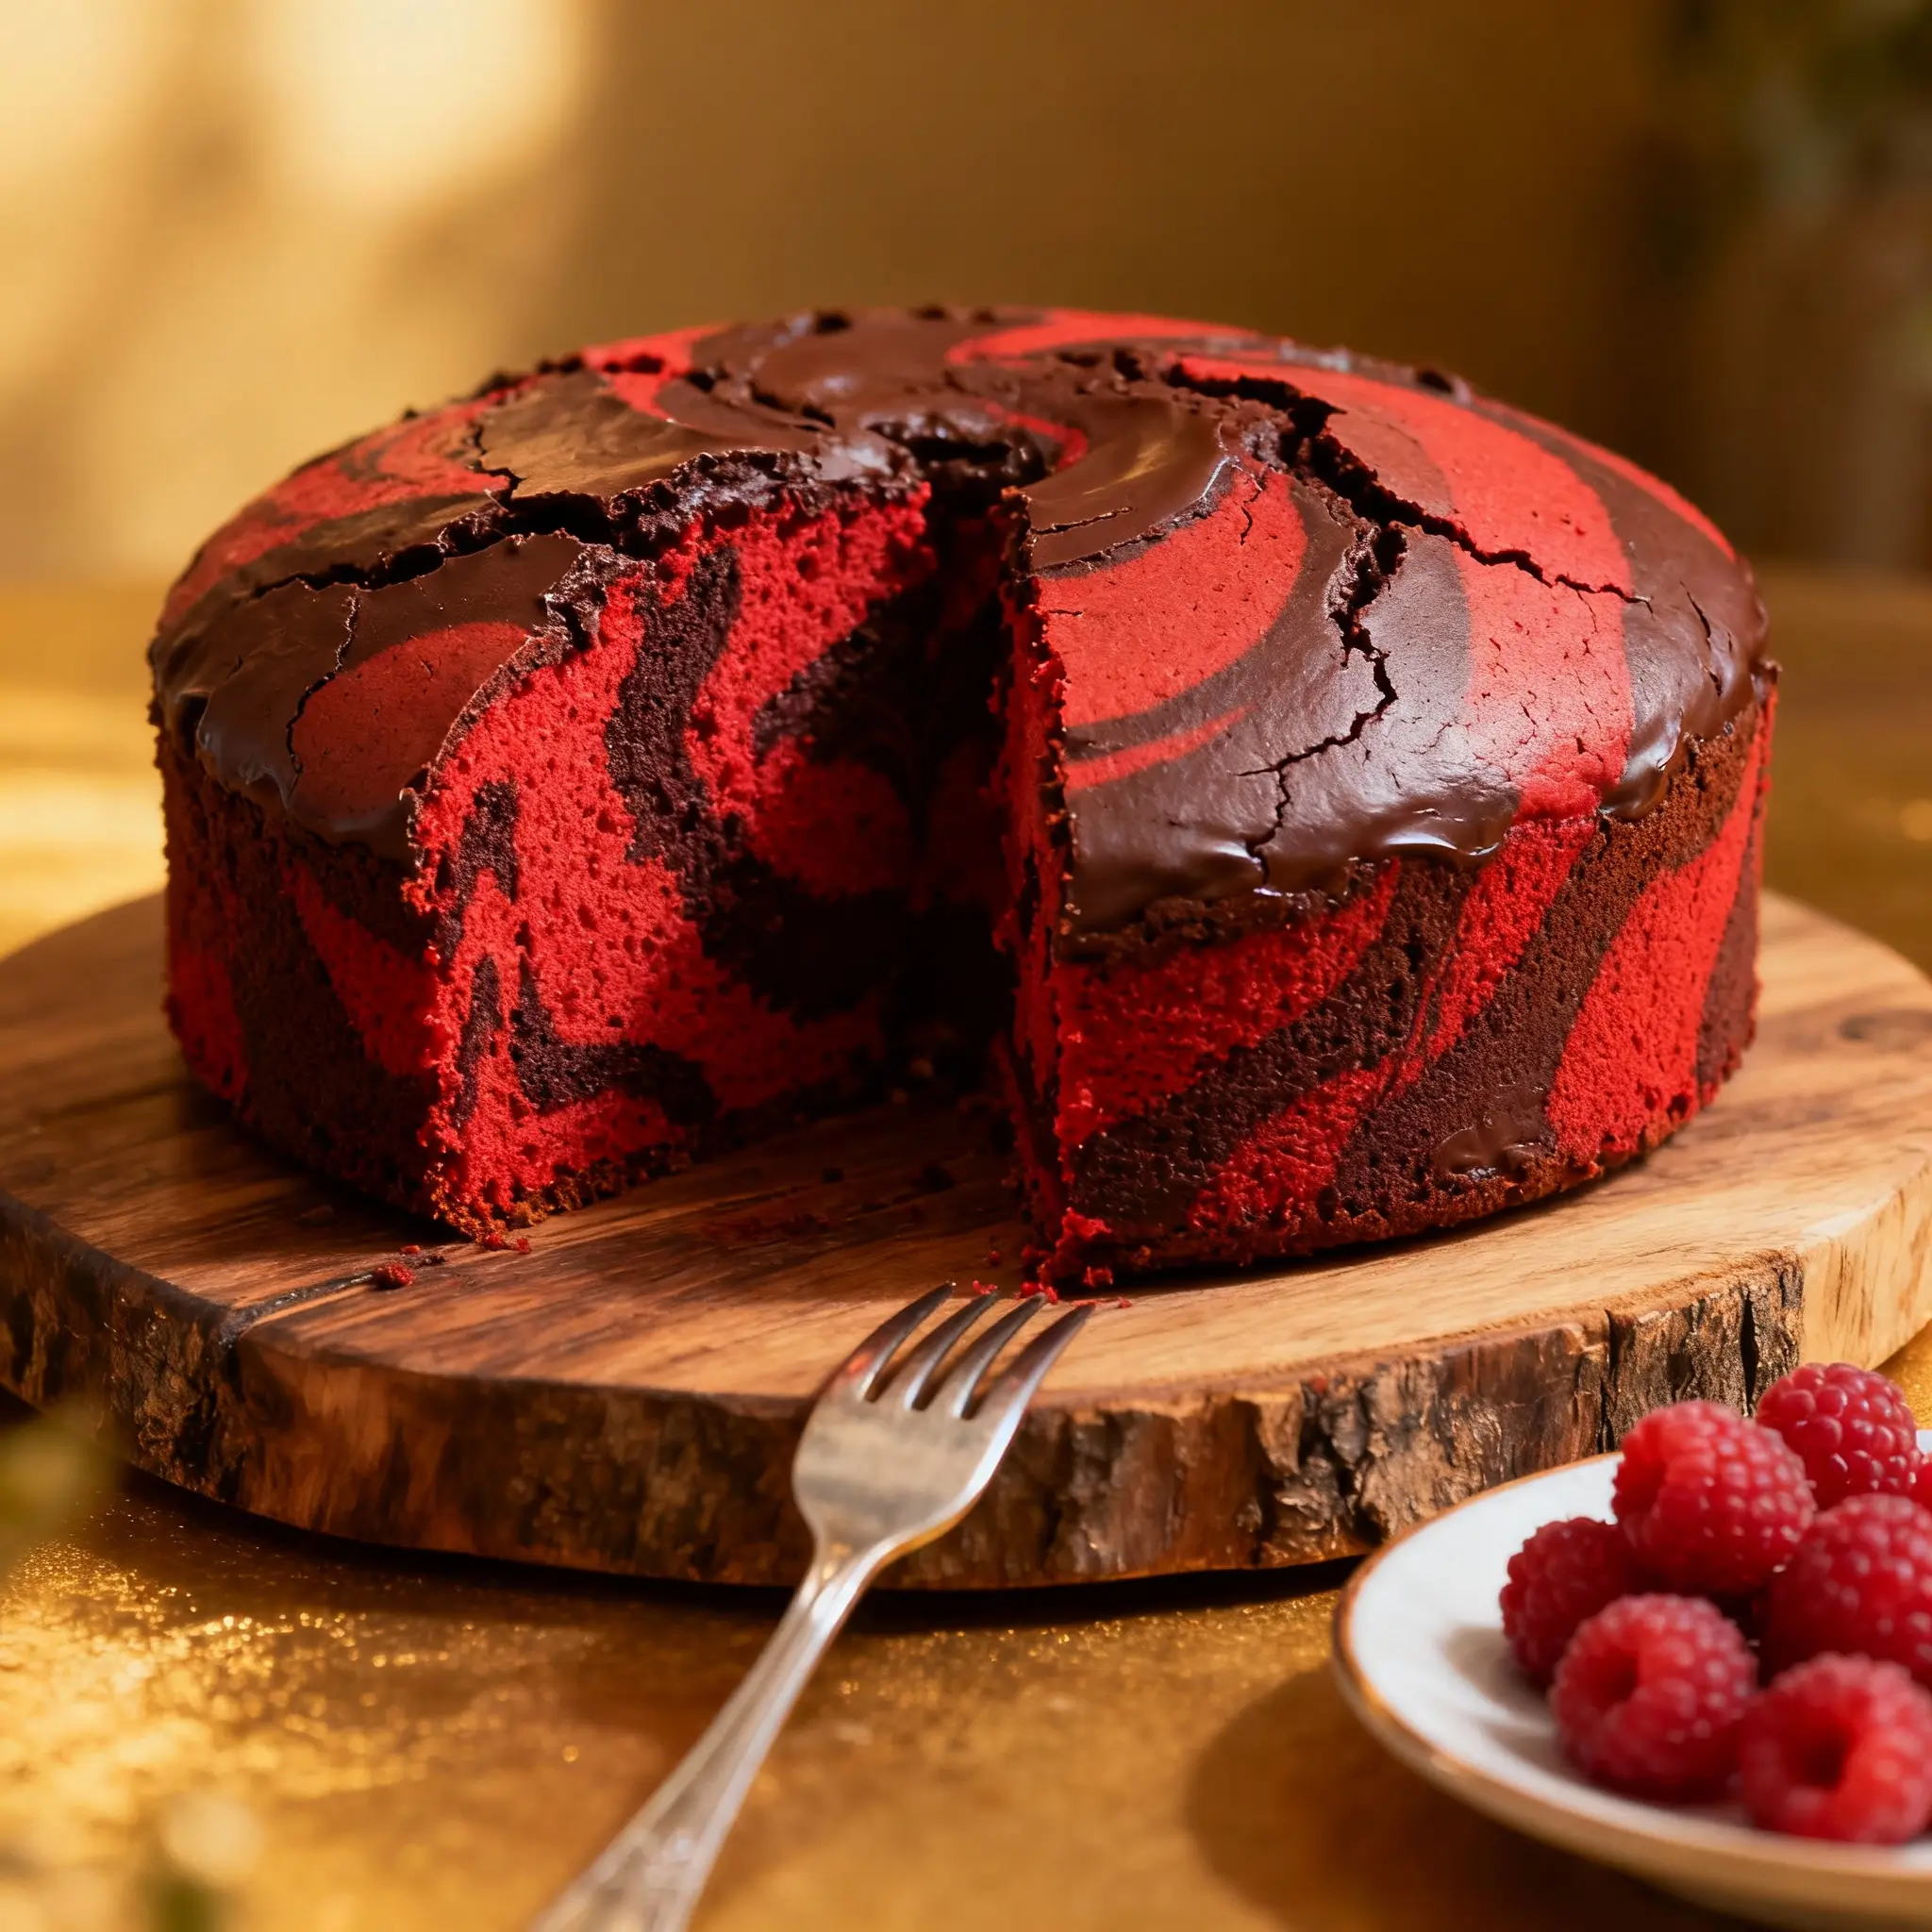
The Red Velvet Chocolate Marble Cake is a stunning fusion of two beloved classics—elegant red velvet and rich, swirled chocolate—creating a visually captivating, texturally luxurious, and flavorfully sophisticated dessert. More than just a showstopper at birthdays, weddings, holidays, or Sunday afternoon tea, this cake represents the artistry of modern baking: where vibrant color meets deep cocoa notes, tender crumb meets velvety moisture, and tradition dances with creative innovation. Its signature marbled effect isn’t merely aesthetic—it’s a deliberate choreography of batters, carefully layered and gently folded to produce organic, one-of-a-kind ribbons of crimson and mahogany that bloom as the cake bakes. Whether you’re a seasoned home baker seeking a new technical challenge or a novice eager to impress with minimal fuss, this recipe balances precision with approachability—and every slice delivers a harmonious contrast of tangy, sweet, earthy, and buttery notes wrapped in cloud-like softness.
The History
The origins of red velvet cake are steeped in both culinary evolution and cultural mythos. While its earliest documented appearances trace back to the early 20th century—most notably in the 1930s when the Waldorf Astoria Hotel in New York popularized a version served with cream cheese frosting—the true genesis lies much deeper. Before synthetic red food coloring, the “red” came naturally from the reaction between non-Dutch-processed cocoa (rich in anthocyanins) and acidic ingredients like buttermilk and vinegar—a phenomenon known as the “cocoa bloom.” This chemical reaction yielded a subtle, rust-tinged crumb that bakers soon enhanced with beet juice, pomegranate syrup, or even tomato paste for richer hue and moisture. By the 1940s, with the advent of affordable red food dye (especially after WWII), the vibrant scarlet became standard—and red velvet cemented itself as a Southern American icon, symbolizing celebration, romance, and refined indulgence. The marble variation, meanwhile, draws from the broader marble cake tradition dating to 19th-century Europe—where bakers would swirl vanilla and chocolate batters to stretch expensive cocoa and create visual elegance without requiring multiple layers. Combining these two lineages, the Red Velvet Chocolate Marble Cake emerged organically in the 2000s as social media fueled demand for photogenic, multi-dimensional desserts—evolving from bakery exclusives into a global home-baking phenomenon, celebrated in food blogs, competitive baking shows, and even artisanal patisseries from Seoul to Stockholm.
Ingredients Breakdown
Every ingredient in this Red Velvet Chocolate Marble Cake serves a precise functional and sensory role—no element is arbitrary. Let’s explore them in depth:
- All-Purpose Flour (unbleached, spooned & leveled): Provides gluten structure for lift and tenderness. Unbleached flour retains more protein and enzymatic activity, supporting better crumb development. Spooning—not scooping—prevents compaction and over-flouring, which leads to dryness.
- Granulated Sugar: Not only sweetens but also tenderizes by interfering with gluten formation, retains moisture via hygroscopic properties, and aids in caramelization and crust development during baking.
- Unsweetened Natural Cocoa Powder (non-alkalized): Critical for authentic red velvet chemistry. Its acidity reacts with vinegar and baking soda to amplify rise and deepen the red hue. Dutch-processed cocoa is too neutral and will mute both color and lift. Opt for high-quality, deeply aromatic varieties like Valrhona or Ghirardelli Natural.
- Baking Soda: Activated by acid (vinegar + buttermilk + cocoa), it produces carbon dioxide gas for leavening and contributes to the cake’s characteristic light-yet-dense texture and subtle tang.
- Salt (fine sea or kosher): Enhances all other flavors, balances sweetness, and strengthens gluten bonds just enough to improve elasticity without toughness.
- Buttermilk (full-fat, cultured, at room temperature): Adds acidity for leavening, lactic tang for complexity, and richness for moisture retention. Its thick consistency also improves batter viscosity—key for clean marbling. Substitute only with DIY buttermilk (1 cup milk + 1 tbsp white vinegar or lemon juice, rested 5–10 minutes).
- Neutral Oil (like safflower, grapeseed, or light olive oil): Ensures unparalleled moistness and shelf stability. Unlike butter, oil remains liquid at room temperature, coating flour proteins to inhibit gluten formation—yielding a finer, more delicate crumb. It also carries fat-soluble flavor compounds more effectively.
- Eggs (large, room temperature): Provide emulsification (binding water and oil), structure (via coagulated proteins), leavening (trapped air expands), and richness. Room temperature eggs incorporate more evenly and reduce batter splitting.
- Distilled White Vinegar: A dual-purpose powerhouse—boosts acidity to maximize cocoa’s color reaction and activates baking soda fully. Its sharpness cooks off entirely, leaving no residual sourness.
- Red Food Coloring (gel-based, highly concentrated): Essential for achieving the iconic, saturated crimson—not just pink or coral. Gel colors contain less water than liquid dyes, so they won’t dilute batter consistency or affect leavening. Recommended brands: Americolor Super Red, Chefmaster Ruby Red, or Wilton No-Taste Red. Avoid “natural” beet-based dyes if intense color is desired—they fade significantly during baking and impart earthy undertones.
- High-Quality Dark Chocolate (60–70% cacao, finely chopped or grated): Used exclusively in the chocolate batter portion—not just for flavor, but for mouthfeel and marbling integrity. Couverture or single-origin bars yield superior melt-in-the-mouth texture and nuanced fruitiness or spice notes. Avoid chocolate chips—they contain stabilizers that hinder smooth integration.
- Vanilla Extract (pure, Madagascar bourbon preferred): Adds aromatic depth and warmth that bridges the red velvet’s tang and chocolate’s bitterness. Imitation vanilla lacks complexity and can taste artificial under heat.
- Optional Flavor Enhancers: A pinch of instant espresso powder (½ tsp) intensifies chocolate without adding coffee taste; ¼ tsp almond extract in the red batter adds subtle marzipan nuance; a tablespoon of freeze-dried raspberry powder boosts tartness and color vibrancy.
Step-by-Step Recipe
- Prep & Preheat: Position oven rack in the center. Preheat oven to 350°F (175°C). Generously grease two 9-inch round cake pans with softened butter or baking spray with flour. Line bottoms with parchment paper rounds; lightly flour parchment and pan sides. Let all refrigerated ingredients (buttermilk, eggs) sit at room temperature for 30–45 minutes before beginning.
- Mix Dry Ingredients: In a large bowl, whisk together 2½ cups (312g) all-purpose flour, 2 cups (400g) granulated sugar, ¾ cup (65g) natural unsweetened cocoa powder, 1½ tsp baking soda, and 1 tsp fine sea salt until completely homogeneous and aerated—about 45 seconds. Sift twice if lumps persist.
- Combine Wet Ingredients (Red Batter Base): In a separate medium bowl, vigorously whisk 1 cup (240ml) full-fat buttermilk, ½ cup (120ml) neutral oil, 2 large eggs, 2 tsp pure vanilla extract, and 1 tsp distilled white vinegar until emulsified and slightly frothy (~1 minute). Add 1½ tbsp (22g) concentrated red gel food coloring and whisk until uniformly deep red—no streaks remain.
- Combine Wet Ingredients (Chocolate Batter Base): In another medium bowl, whisk 1 cup (240ml) buttermilk, ½ cup (120ml) oil, 2 eggs, 2 tsp vanilla, and 1 tsp vinegar as above. Gently fold in 4 oz (113g) finely chopped high-quality dark chocolate until evenly distributed—do not overmix; small shards are ideal for textural contrast.
- Alternate Incorporation: Pour the red batter mixture into the dry ingredients. Using a silicone spatula or stand mixer fitted with paddle attachment on low speed, mix *just until no dry pockets remain* (~20–30 seconds). Scrape bowl thoroughly. Repeat with chocolate batter—add it in one addition and mix *only until barely incorporated*, stopping while streaks are still visible. Overmixing at this stage eliminates marbling potential.
- Marbling Technique (The Key Step): Immediately divide batter evenly between the two prepared pans (use a digital scale for precision—each should weigh ~850–900g). With an offset spatula, gently spread each layer level. Now, take a large stainless steel spoon or small ladle and scoop ~3 tablespoons of the *opposite* batter (i.e., red batter into chocolate pan; chocolate into red pan) and place in 4–5 equidistant dollops. Using a thin skewer, chopstick, or butter knife tip, make slow, deliberate figure-eight motions—dragging from center outward—just 3–4 times per dollop. Do *not* swirl continuously or drag through the entire depth; shallow, sparse strokes preserve bold contrast. For dramatic effect, repeat once more with smaller dollops and lighter strokes.
- Bake with Precision: Place pans on center rack. Bake 32–38 minutes—or until a toothpick inserted 1 inch from edge comes out with *moist crumbs* (not wet batter), and centers spring back lightly when touched. Rotate pans front-to-back at 20 minutes for even baking. Avoid opening oven door before 25 minutes to prevent collapse.
- Cool Strategically: Remove pans from oven. Let cakes cool *in pans* on wire racks for exactly 15 minutes—this allows steam to release gradually and prevents soggy bottoms. Then, run a thin knife around edges, invert onto racks, peel off parchment, and flip right-side-up to cool completely (1.5–2 hours). Cakes must be fully cool before frosting—warm layers will melt buttercream and cause sliding.
- Frosting Assembly (Recommended Cream Cheese Buttercream): Beat 16 oz (454g) full-fat brick-style cream cheese (room temp) and 1 cup (227g) unsalted butter (room temp) on medium-high for 3 minutes until ultra-smooth. Gradually add 5–6 cups (600–720g) confectioners’ sugar, 1 tsp vanilla, and ¼ tsp salt. Beat 2 more minutes until fluffy. Chill 20 minutes before use for optimal spreading consistency. Crumb-coat cake, refrigerate 20 minutes, then apply final coat. Decorate with red velvet cake crumbs, white chocolate curls, or edible gold leaf.
Tips
- Color Consistency is Non-Negotiable: Use the same brand and batch of red gel each time—formulations vary widely. Test color intensity on a spoonful of batter before combining; adjust incrementally. Too little yields pale pink; too much may cause slight bitterness.
- Room Temperature is Ritual, Not Suggestion: Cold buttermilk or eggs cause batter to seize, separate, or curdle—ruining texture and marbling. Place eggs in warm water for 5 minutes if rushed; pour buttermilk into bowl and microwave at 50% power for 15-second bursts.
- Measure Like a Pro: Use a kitchen scale for flour and cocoa—volume measurements fluctuate up to 25% by technique. If using cups, fluff flour in bag, spoon into cup, and level with straight edge—never scoop.
- Don’t Fear the Swirl: Under-swirling creates muddy gray zones; over-swirling erases contrast. Aim for “bold whispers”—visible ribbons that retain identity, not uniform gray-brown.
- Oven Thermometer Required: Most built-in oven thermostats are inaccurate by ±25°F. An inexpensive oven thermometer ensures consistent bake times and prevents over-browning or under-rising.
- Altitude Adjustments: Above 3,000 ft: Reduce sugar by 1 tbsp, increase buttermilk by 1 tbsp, add ½ tsp extra baking soda, and bake at 355°F for 28–32 minutes.
- Make-Ahead Magic: Baked, unfrosted layers freeze beautifully for up to 3 months—wrap tightly in plastic + foil. Thaw overnight in fridge, then bring to room temp before frosting.
- Marbling Tool Hack: Freeze your skewer or knife for 5 minutes before swirling—cold metal prevents dragging and gives cleaner lines.
- Even Layers Matter: Weigh batter per pan *before* marbling. Uneven distribution causes doming or sinking on one side.
- Patience Pays Off: Resist slicing for at least 4 hours after frosting—ideally overnight refrigerated. This sets the structure, enhances flavor melding, and yields cleaner slices.
Variations and Customizations
This recipe is a master canvas—adaptable across dietary needs, seasonal themes, and global inspirations:
- Gluten-Free Version: Substitute flour blend (Bob’s Red Mill 1-to-1 or King Arthur Measure-for-Measure) + ½ tsp xanthan gum. Increase buttermilk by 2 tbsp and add 1 egg white for structure. Expect slightly denser crumb—marbling remains vivid.
- Vegan Adaptation: Replace eggs with flax eggs (2 tbsp ground flax + 6 tbsp water, rested 10 min), use plant-based buttermilk (1 cup soy milk + 1 tbsp apple cider vinegar), swap oil for refined coconut oil, and use vegan cream cheese frosting. Gel food coloring remains vegan.
- Black & Red Velvet Marble: Replace cocoa in chocolate batter with black cocoa (Dutch-processed, intensely dark) for gothic elegance—pair with activated charcoal-free black food gel for safety.
- White Chocolate–Red Velvet Marble: Omit cocoa from chocolate batter; substitute 4 oz melted white chocolate + 2 tbsp extra flour. Swirl with red batter for ivory-and-crimson sophistication—ideal for bridal showers.
- Spiced Chai-Marbled: Infuse buttermilk with 2 chai tea bags (steep 10 min, cool completely); add 1 tsp ground ginger, ½ tsp cardamom, and ¼ tsp black pepper to dry ingredients. Pair with maple-cream cheese frosting.
- Orange-Infused Velvet: Add 2 tsp orange zest + 1 tbsp orange liqueur (Cointreau) to red batter; replace chocolate batter with dark chocolate + orange zest. Finish with candied orange peel garnish.
- Mini Bundt or Muffin Version: Fill greased bundt pan ⅔ full or lined muffin tins ¾ full. Bake 28–32 min (bundt) or 18–22 min (muffins). Marbling works beautifully at small scale—use a piping bag with small round tip for controlled dollops.
- Layered Sheet Cake: Bake in a 13″x18″ half-sheet pan for 22–26 minutes. Ideal for large gatherings—cut into squares and serve with whipped crème fraîche.
- Boozy Upgrade: Brush cooled layers with 2–3 tbsp bourbon, rum, or Chambord simple syrup (1:1 sugar:water + 2 tbsp liqueur) before frosting for adult depth.
- Floral Elegance: Fold 1 tsp culinary-grade rose water + ½ tsp dried lavender buds (crushed) into red batter; pair with white chocolate ganache.
Health Considerations and Nutritional Value
A 1/12th slice (standard 9-inch two-layer cake, frosted) contains approximately:
- Calories: 485 kcal
- Total Fat: 24g (14g saturated, primarily from buttercream and cocoa butter)
- Carbohydrates: 63g (48g sugars, including 32g added sugars)
- Protein: 5g
- Fiber: 1.5g (naturally occurring from cocoa and flour)
- Sodium: 320mg
- Calcium: 95mg (from buttermilk and cream cheese)
- Iron: 2.4mg (enhanced by vitamin C in buttermilk aiding absorption)
Nutritional Highlights & Mitigations:
- Cocoa Benefits: Natural cocoa is rich in flavanols—potent antioxidants linked to improved endothelial function and reduced inflammation. Choose minimally processed, high-polyphenol cocoa for maximum benefit.
- Buttermilk Advantage: Contains probiotics (live cultures), calcium, potassium, and B12—supporting gut health and bone density. Opt for cultured, full-fat versions over low-fat “drinkable” substitutes.
- Sugar Awareness: While traditional, sugar content is substantial. To reduce: cut granulated sugar by ¼ cup (50g) and add 2 tbsp applesauce or mashed banana for moisture compensation; or use monk fruit–erythritol blend (1:1 ratio) for 50% reduction—note slight texture change.
- Fat Quality Matters: Neutral oils like avocado or high-oleic sunflower offer heart-healthy monounsaturated fats. Replace half the butter in frosting with mascarpone for lower sat-fat and higher protein.
- Allergen Notes: Contains dairy (buttermilk, cream cheese, butter), eggs, wheat (gluten), and soy (in most chocolate and shortenings). Gluten-free, vegan, and nut-free options exist—see Variations section.
- Glycemic Impact: Moderate-to-high due to refined carbs and sugar. Pair with Greek yogurt or berries to slow glucose absorption.
- Portion Mindfulness: Serve 2″ x 2″ squares instead of generous wedges—visually satisfying while reducing calories by ~30%.
This cake is best enjoyed as an occasional celebratory treat—not daily fare—but its whole-food foundations (real dairy, eggs, cocoa) and absence of hydrogenated oils or artificial preservatives make it a far more nourishing indulgence than many commercially produced alternatives.
Ingredients
- 2½ cups (312g) unbleached all-purpose flour, spooned & leveled
- 2 cups (400g) granulated sugar
- ¾ cup (65g) natural unsweetened cocoa powder (NOT Dutch-processed)
- 1½ tsp baking soda
- 1 tsp fine sea salt
- 1 cup (240ml) full-fat cultured buttermilk, room temperature
- ½ cup (120ml) neutral oil (safflower, grapeseed, or light olive)
- 2 large eggs, room temperature
- 2 tsp pure vanilla extract
- 1 tsp distilled white vinegar
- 1½ tbsp (22g) concentrated red gel food coloring (e.g., Americolor Super Red)
- 4 oz (113g) high-quality dark chocolate (60–70% cacao), finely chopped
Frosting Recommendation (Cream Cheese Buttercream):
- 16 oz (454g) full-fat brick cream cheese, room temperature
- 1 cup (227g) unsalted butter, room temperature
- 5–6 cups (600–720g) confectioners’ sugar, sifted
- 1 tsp pure vanilla extract
- ¼ tsp fine sea salt
Directions
- Preheat oven to 350°F (175°C). Grease and parchment-line two 9-inch round cake pans.
- In a large bowl, whisk together flour, sugar, cocoa, baking soda, and salt until fully combined and lump-free.
- In a medium bowl, whisk buttermilk, oil, eggs, vanilla, and vinegar until smooth. Divide mixture evenly into two bowls.
- To first bowl, add red gel food coloring; whisk until deep, uniform red. To second bowl, fold in chopped chocolate until dispersed.
- Pour red batter into dry ingredients; mix on low just until incorporated. Scrape bowl. Add chocolate batter; mix *only until barely blended*, leaving visible streaks.
- Divide batter equally between pans (weigh for accuracy). Dollop opposite batters across surfaces. Swirl gently 3–4 times per dollop with skewer—shallow, sparse figure-eights.
- Bake 32–38 minutes until toothpick near edge has moist crumbs and centers spring back. Rotate pans at 20 minutes.
- Cool in pans 15 minutes. Invert onto racks, peel parchment, flip right-side-up, and cool completely (1.5–2 hrs).
- Prepare cream cheese buttercream: beat cream cheese and butter 3 min until smooth. Gradually add sugar, vanilla, and salt; beat 2 more min. Chill 20 min.
- Level cooled layers if domed. Crumb-coat cake, refrigerate 20 min. Apply final coat. Decorate as desired. Refrigerate 4+ hours before slicing.
FAQ
- Why did my red velvet turn brown?
- Likely causes: using Dutch-processed cocoa (neutral pH), insufficient acid (too little vinegar/buttermilk), over-baking, or low-quality food coloring that fades. Always use natural cocoa + full acid complement + high-strength gel dye.
- Can I make this as a single-layer sheet cake?
- Absolutely. Bake in a greased 13″x18″ pan at 350°F for 22–26 minutes. Marbling technique remains identical—just spread batter evenly first, then dollop and swirl.
- My batter split! What went wrong?
- Almost always caused by cold ingredients—especially buttermilk or eggs. Ensure everything is truly room temperature (68–72°F). Also avoid over-mixing after adding wet to dry.
- Can I use liquid food coloring?
- You can—but expect paler color and possible texture issues. Liquid dyes add excess water, thinning batter and weakening structure. Use 3–4x more volume, reduce buttermilk by 1 tbsp, and anticipate longer bake time.
- How do I store leftovers?
- Unfrosted layers: wrap tightly in plastic + foil; freeze up to 3 months. Frosted cake: refrigerate uncovered for first 2 hours to set frosting, then cover loosely with cake dome or inverted bowl. Keeps 5 days refrigerated. Bring to room temp 1 hour before serving.
- Can I make it ahead for a party?
- Yes! Bake layers 1–2 days ahead; cool completely, wrap in plastic, and refrigerate. Frost day-of—or frost night-before and refrigerate. Flavors deepen overnight.
- What’s the best way to get clean slices?
- Use a long, thin serrated knife dipped in hot water and wiped dry between cuts. Saw gently—don’t press down. Chill cake 30 minutes before slicing for sharpest edges.
- Can I add nuts or fruit?
- Yes—with caution. Fold ½ cup toasted walnuts or pecans into chocolate batter only (they’ll sink in red batter). For fruit, use ½ cup finely diced dried cherries (soaked 10 min in rum) —add to chocolate batter to avoid bleeding.
- Is there a way to make it less sweet?
- Reduce granulated sugar to 1¾ cups (350g) and add 2 tbsp unsweetened applesauce. Or replace ½ cup sugar with ⅓ cup coconut sugar + 1 tbsp molasses for complex depth.
- Why does my cake dome so much?
- Over-mixing, too much leavener, or oven too hot. Ensure accurate oven temp, don’t over-beat, and consider using cake strips (damp fabric wrapped around pans) to promote even rise.
Summary
The Red Velvet Chocolate Marble Cake is a masterclass in balance—where vibrant acidity meets deep chocolate, tender crumb embraces dramatic marbling, and nostalgic tradition welcomes bold customization. Every step, from cocoa selection to swirl technique, is calibrated to deliver unforgettable visual drama and layered, sophisticated flavor.
Whether baked for a milestone celebration or quiet Sunday ritual, this cake rewards patience with profound richness, invites creativity through endless variations, and reminds us that the most memorable desserts are equal parts science, soul, and stunning beauty.