Red Velvet Cheesecake Cake: A Decadent Fusion of Two Classics
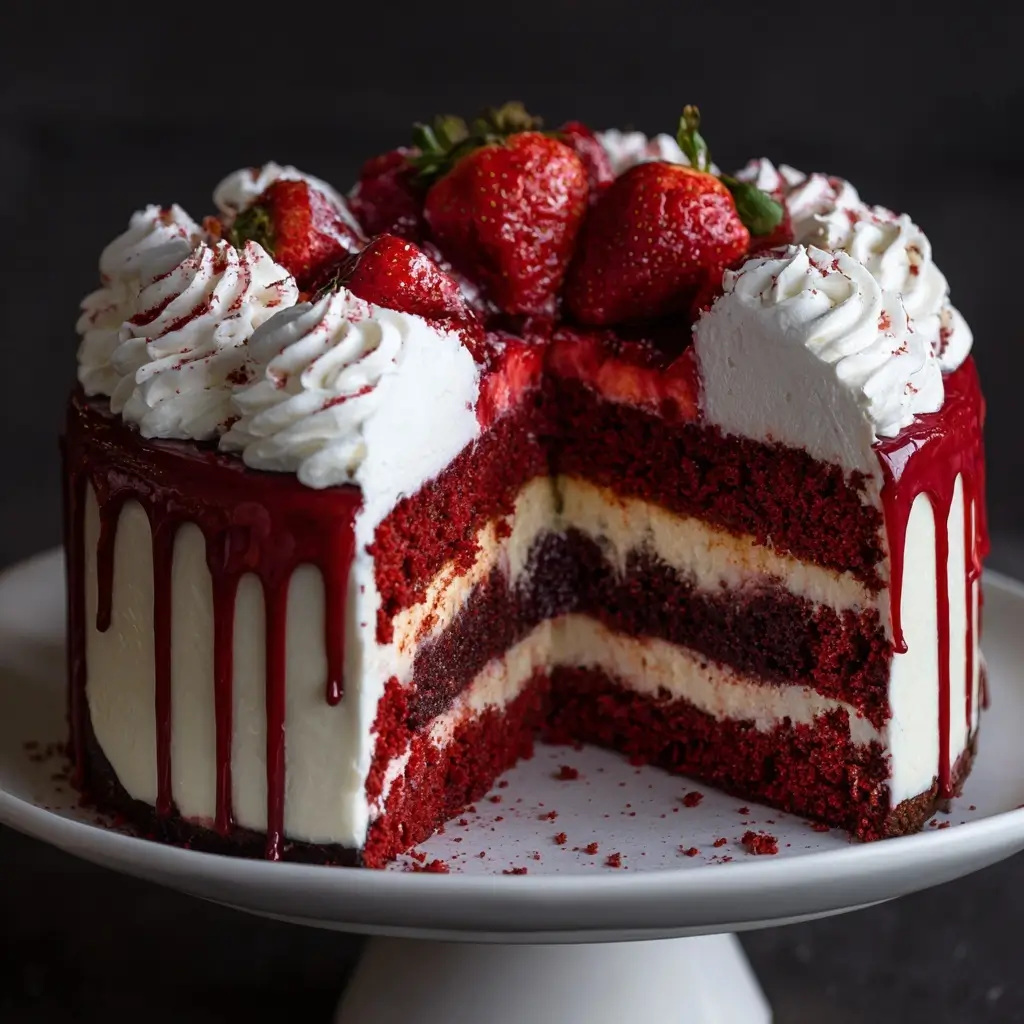
The Red Velvet Cheesecake Cake is more than just a dessert—it’s a show-stopping masterpiece that combines the rich, creamy allure of cheesecake with the velvety softness and striking crimson hue of red velvet cake. Whether you’re preparing for a birthday, holiday celebration, or simply indulging in a sweet craving, this luxurious hybrid dessert delivers an unforgettable experience with every bite. Layers of moist red velvet sponge cradle a luscious cheesecake core, all crowned with silky cream cheese frosting. In this comprehensive guide, we’ll dive deep into the history, science, techniques, and variations of this beloved confection, ensuring your baking journey is as smooth and satisfying as the cake itself.
The History Behind the Red Velvet Cheesecake Cake
The origins of the Red Velvet Cheesecake Cake are rooted in two distinct but equally iconic American desserts: red velvet cake and cheesecake. Red velvet cake traces its roots back to the early 20th century, gaining popularity through advertisements by companies like Adams Extract, which promoted the use of red food coloring to enhance the visual appeal of cakes made with cocoa. The chemical reaction between acidic ingredients (like buttermilk and vinegar) and natural cocoa powder created a subtle reddish tint—enhanced over time with food coloring for dramatic effect.
Meanwhile, cheesecake has ancient origins, dating back to Greece, but the modern American version—with its dense, creamy texture using cream cheese—was popularized in the early 1900s by companies such as Philadelphia Cream Cheese. The fusion of these two desserts likely emerged in the late 20th century as bakers sought to create richer, more complex layered desserts for special occasions. The Red Velvet Cheesecake Cake became a symbol of indulgence, combining the tangy richness of cheesecake with the elegant sweetness of red velvet—a true celebration of flavor and texture evolution.
Ingredients Breakdown: What Makes This Cake So Special?
The magic of the Red Velvet Cheesecake Cake lies in the careful balance of ingredients that contribute not only to taste but also to texture, color, and structure. Let’s break down each component:
- All-Purpose Flour: Provides structure and stability to the red velvet layers. Sifted to avoid lumps and ensure a light crumb.
- Cocoa Powder (Unsweetened, Natural): Adds depth and a hint of chocolate flavor without overpowering the cake. Natural cocoa reacts with acidic ingredients to enhance rise and color.
- Baking Soda & Baking Powder: Leavening agents that work together to give the cake its tender lift. Baking soda reacts with acid (buttermilk, vinegar), while baking powder provides additional rise.
- Salt: Enhances overall flavor and balances sweetness.
- Granulated Sugar: Sweetens the cake and helps retain moisture.
- Butter (Unsalted, Room Temperature): Adds richness and contributes to a soft, moist texture.
- Eggs (Large, Room Temperature): Bind ingredients and add structure while contributing to the cake’s tenderness.
- Buttermilk: Provides acidity that activates baking soda and tenderizes gluten, resulting in a fine, soft crumb. Its tang also complements the red velvet flavor.
- White Vinegar: Reacts with baking soda for extra leavening and enhances the red hue when combined with cocoa.
- Vanilla Extract: Adds aromatic complexity and rounds out the flavor profile.
- Red Food Coloring (Liquid or Gel): Traditionally, several drops are used to achieve the signature vibrant red. Gel coloring is preferred for intense color without altering batter consistency.
For the Cheesecake Layer:
- Cream Cheese (Full-Fat, Room Temperature): The foundation of any great cheesecake—must be softened to prevent lumps and ensure smoothness.
- Granulated Sugar: Sweetens the filling and aids in texture development.
- Egg (Large, Room Temperature): Helps bind the cheesecake and gives it structure without making it rubbery.
- Sour Cream (or Greek Yogurt): Adds tanginess and creaminess, improving mouthfeel and moisture retention.
- Vanilla Extract: Enhances flavor and complements both cheesecake and cake layers.
For the Cream Cheese Frosting:
- Butter (Unsalted, Softened): Forms the base of the frosting, adding body and richness.
- Cream Cheese (Softened): Imparts the signature tangy flavor of classic cream cheese frosting.
- Powdered Sugar (Sifted): Sweetens and thickens the frosting. Sifting prevents clumps.
- Vanilla Extract: Balances the tang with a warm, sweet note.
- Salt (Pinch): Elevates all flavors and reduces cloying sweetness.
- Heavy Cream or Milk (Optional): Adjusts consistency for easier spreading or piping.
Step-by-Step Recipe: Crafting the Ultimate Red Velvet Cheesecake Cake
Makes one 9-inch, three-layer cake | Prep Time: 45 minutes | Bake Time: 40–50 minutes | Cooling Time: 4+ hours (including chilling)
Step 1: Prepare the Pans
- Preheat oven to 350°F (175°C).
- Grease and flour two 9-inch round cake pans. Line the bottoms with parchment paper for easy release.
- Wrap the outside of one pan tightly with aluminum foil (this will hold the cheesecake layer and go into a water bath later).
Step 2: Make the Red Velvet Cake Batter
- In a medium bowl, whisk together 2 cups all-purpose flour, 1/2 cup unsweetened cocoa powder, 1 tsp baking soda, 1/2 tsp baking powder, and 1/2 tsp salt. Set aside.
- In a large mixing bowl, beat 1 cup granulated sugar and 1/2 cup softened unsalted butter on medium speed until light and fluffy (about 3–4 minutes).
- Add 2 large eggs, one at a time, mixing well after each addition. Stir in 2 tsp vanilla extract.
- Gradually alternate adding the dry ingredients and 1 cup buttermilk, beginning and ending with dry ingredients. Mix until just combined.
- In a small bowl, combine 1 tsp white vinegar with 1 oz (about 2 tbsp) red food coloring. Stir into the batter until uniformly colored.
Step 3: Bake the Red Velvet Layers
- Divide the batter evenly between the two prepared cake pans.
- Bake for 25–30 minutes, or until a toothpick inserted in the center comes out clean.
- Cool in pans for 10 minutes, then transfer to wire racks to cool completely.
Step 4: Prepare the Cheesecake Filling
- Reduce oven temperature to 325°F (160°C).
- In a large bowl, beat 24 oz (3 packages) softened cream cheese on medium speed until smooth and creamy (about 2 minutes).
- Add 1/2 cup granulated sugar and beat until fully incorporated.
- Mix in 1 large egg, 1/2 cup sour cream, and 1 tsp vanilla extract. Beat until smooth and no lumps remain. Do not overmix.
Step 5: Assemble and Bake the Cheesecake Layer
- Pour the cheesecake batter into the foil-wrapped 9-inch pan.
- Place this pan inside a larger roasting pan. Fill the outer pan with hot water until it reaches halfway up the sides of the cheesecake pan (water bath method).
- Bake for 40–50 minutes, until edges are set but the center still has a slight jiggle.
- Turn off the oven, crack the door open, and let the cheesecake cool slowly inside for 1 hour to prevent cracking.
- Remove, cool completely, then refrigerate for at least 3 hours (preferably overnight).
Step 6: Make the Cream Cheese Frosting
- Beat 1/2 cup softened unsalted butter on medium speed until creamy (2 minutes).
- Add 16 oz softened cream cheese and beat until smooth.
- Gradually add 4 cups sifted powdered sugar, 1 tsp vanilla extract, and a pinch of salt. Beat on low at first, then increase speed until fluffy.
- If too thick, add 1–2 tbsp milk or cream. If too thin, add more powdered sugar.
Step 7: Assemble the Cake
- Level the tops of the red velvet cakes if needed using a serrated knife.
- Place one red velvet layer on a serving plate or cake stand.
- Top with the chilled cheesecake layer (remove from pan carefully).
- Place the second red velvet layer on top.
- Frost the entire cake with a thin crumb coat. Chill for 20 minutes.
- Apply a final, thick layer of frosting, smoothing sides and swirling the top decoratively.
- Optional: Garnish with red velvet cake crumbs, white chocolate shavings, or fresh berries.
Tips for Baking Success
- Room Temperature Ingredients: Crucial for both cake and cheesecake. Cold ingredients lead to lumpy batter and uneven texture.
- Sift Dry Ingredients: Prevents clumping and ensures even distribution of cocoa and leaveners.
- Don’t Overmix: Once flour is added, mix only until combined. Overmixing develops gluten, leading to a dense cake.
- Use Gel Food Coloring: More concentrated than liquid, so you get vibrant color without adding excess liquid.
- Water Bath is Key: Prevents cracks and ensures even, gentle cooking of the cheesecake layer.
- Chill Before Frosting: Ensures the cheesecake is firm and won’t slide during assembly.
- Crumb Coat First: Traps loose crumbs for a clean, professional finish.
- Sharp Knife for Cutting: Dip in hot water and wipe dry between slices for clean cuts.
Variations and Customizations
The beauty of the Red Velvet Cheesecake Cake is its adaptability. Here are some creative twists to personalize your dessert:
- Mini Version: Make individual servings using mason jars or springform ramekins.
- Chocolate Swirl Cheesecake: Add melted chocolate to the cheesecake batter and swirl before baking.
- White Chocolate Red Velvet: Incorporate white chocolate chips into the cake batter or drizzle over the finished cake.
- Gluten-Free: Substitute all-purpose flour with a 1:1 gluten-free blend. Ensure cocoa and food coloring are certified GF.
- Dairy-Free: Use plant-based butter, dairy-free cream cheese, and coconut milk yogurt. Opt for almond or oat milk instead of buttermilk (add vinegar to acidify).
- Alcohol-Infused: Add 1–2 tbsp bourbon or Kahlúa to the cheesecake batter for a sophisticated twist.
- Seasonal Themes: Top with crushed peppermint in winter, edible flowers in spring, or fresh raspberries in summer.
- Naked Cake Style: Scrape off some frosting for a rustic, exposed-layer look.
- Layered Parfait: Crumble components and layer in glasses with whipped cream for a deconstructed version.
Health Considerations and Nutritional Value
While undeniably decadent, it’s important to enjoy the Red Velvet Cheesecake Cake in moderation. Here’s a general nutritional breakdown per slice (assuming 12 servings):
- Calories: ~650–750 kcal
- Total Fat: 40–50g (saturated fat: 20–25g)
- Carbohydrates: 65–75g (sugars: 50–60g)
- Protein: 8–10g
- Sodium: 400–600mg
- Cholesterol: 100–130mg
Health Notes:
- This cake is high in sugar and saturated fat, primarily from butter, cream cheese, and sugar. It should be considered an occasional treat.
- Portion control is key. Serve smaller slices, perhaps with a dollop of whipped cream or fresh fruit to stretch servings.
- For a lighter version, consider reducing sugar by 25% in both cake and cheesecake, using low-fat dairy alternatives, or incorporating applesauce or mashed banana as partial fat substitutes (though texture may change).
- Individuals with lactose intolerance or dairy allergies should explore plant-based substitutions carefully, noting that results may vary in texture and taste.
- Food dyes, especially red #40, are a concern for some. Natural alternatives like beet juice or boiled raspberry puree can be used, though they yield a more maroon shade and may alter flavor slightly.
Ingredients
Red Velvet Cake Layers:
- 2 cups all-purpose flour
- 1/2 cup unsweetened cocoa powder (natural, not Dutch-processed)
- 1 tsp baking soda
- 1/2 tsp baking powder
- 1/2 tsp salt
- 1 cup granulated sugar
- 1/2 cup unsalted butter, room temperature
- 2 large eggs, room temperature
- 1 cup buttermilk, room temperature
- 2 tsp vanilla extract
- 1 tsp white vinegar
- 1 oz red food coloring (liquid or gel)
Cheesecake Layer:
- 24 oz (3 blocks) full-fat cream cheese, softened
- 1/2 cup granulated sugar
- 1 large egg, room temperature
- 1/2 cup sour cream
- 1 tsp vanilla extract
Cream Cheese Frosting:
- 1/2 cup unsalted butter, softened
- 16 oz cream cheese, softened
- 4 cups powdered sugar, sifted
- 1 tsp vanilla extract
- Pinch of salt
- 1–2 tbsp heavy cream or milk (optional)
Directions
(Refer to detailed Step-by-Step Recipe section above for complete instructions.)
- Prepare pans and preheat oven to 350°F.
- Mix dry ingredients for red velvet cake; cream butter and sugar, then add eggs and vanilla.
- Alternate adding dry mix and buttermilk to wet ingredients; stir in vinegar and food coloring.
- Bake two red velvet layers for 25–30 minutes; cool completely.
- Lower oven to 325°F; prepare cheesecake batter and bake in water bath for 40–50 minutes.
- Cool gradually in oven, then chill for at least 3 hours.
- Make frosting by beating butter, cream cheese, powdered sugar, vanilla, and salt.
- Assemble cake: red velvet → cheesecake → red velvet; frost with crumb coat and final layer.
- Garnish and refrigerate 1–2 hours before serving.
FAQ
Can I make this cake ahead of time?
Yes! Assemble the cake up to 2 days in advance. Store covered in the refrigerator. Bring to room temperature 30–60 minutes before serving for best texture.
Why did my cheesecake crack?
Cracking is usually due to overbaking, rapid cooling, or overmixing. Using a water bath and slow cooling helps prevent this. If cracks occur, frosting will hide them beautifully.
Can I freeze the Red Velvet Cheesecake Cake?
Yes, but with caution. Freeze unfrosted layers separately. Wrap cheesecake and cake layers tightly in plastic and foil. Thaw overnight in the fridge before assembling and frosting.
Can I use boxed red velvet cake mix?
Absolutely. Follow box instructions, adding vinegar and food coloring. However, homemade yields better flavor and texture control.
Is Dutch-processed cocoa okay?
Not recommended. It’s less acidic, so it won’t react with baking soda and vinegar, affecting rise and color. Stick with natural cocoa.
How do I store leftovers?
Cover and refrigerate for up to 5 days. The cake keeps well due to its moisture content.
Can I make this into cupcakes?
Yes! Fill cupcake liners with red velvet batter, bake, then pipe in a small amount of cheesecake filling before baking. Top with frosting.
Summary
The Red Velvet Cheesecake Cake is a luxurious fusion of moist red velvet layers and creamy, tangy cheesecake, all embraced by rich cream cheese frosting. A stunning centerpiece for celebrations, it blends tradition, flavor, and artistry in every slice.