Introduction
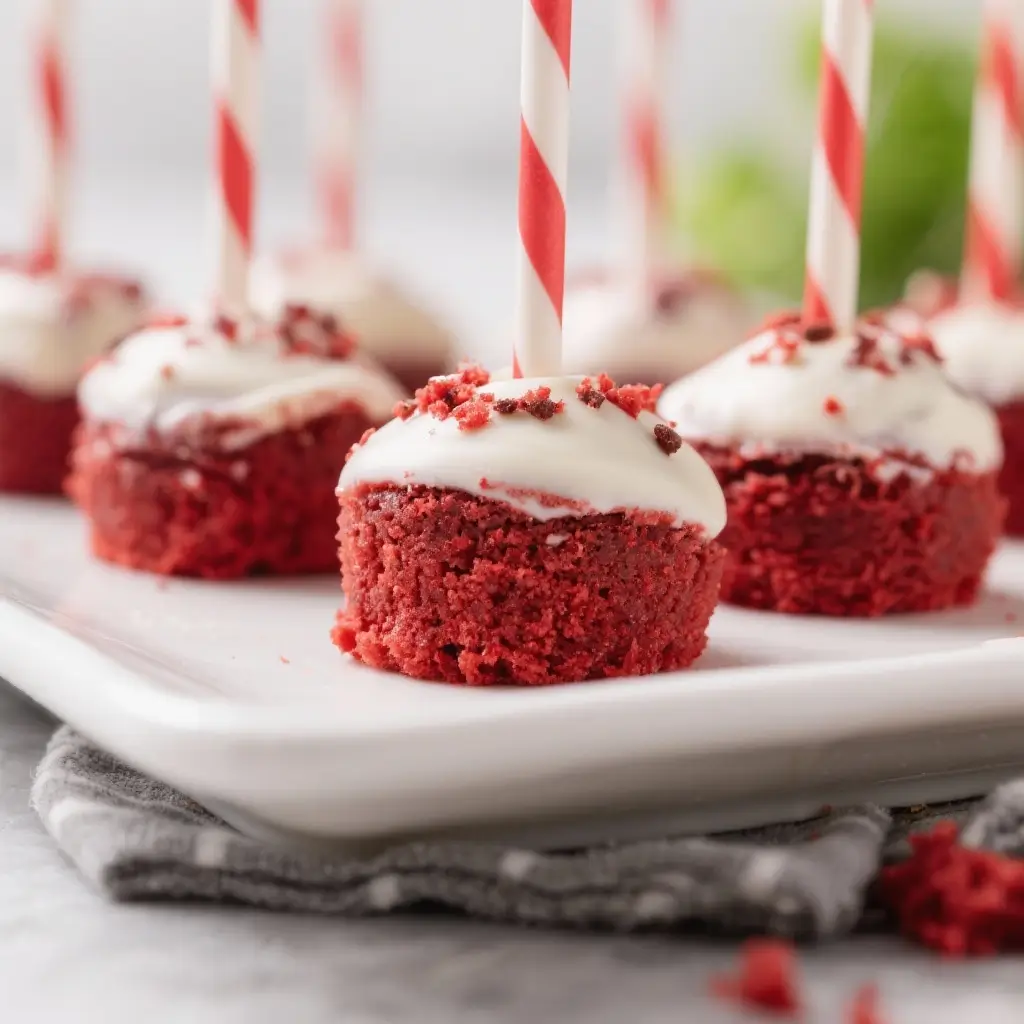
Red Velvet Cake Pops are a decadent fusion of two beloved desserts: the rich, velvety red velvet cake and the playful, bite-sized indulgence of cake pops. These luscious treats have captured the hearts of dessert lovers around the world with their vibrant crimson hue, moist crumb, and creamy frosting center. Whether served at birthday parties, weddings, baby showers, or holiday gatherings, red velvet cake pops offer an elegant yet fun way to enjoy one of America’s most iconic cakes in a handheld form. Their charming appearance, often enhanced with decorative drizzles, sprinkles, or chocolate coatings, makes them not just delicious but also a visual delight. In this comprehensive guide, we’ll take you through every step of creating perfect red velvet cake pops—from understanding their historical roots to mastering the art of shaping, coating, and decorating them like a professional baker.
The History
The story of red velvet cake pops begins with the origins of red velvet cake itself, a dessert shrouded in both mystery and legend. While its exact beginnings are debated, red velvet cake is believed to have emerged in the early 20th century, possibly as a variation of devil’s food cake. The distinctive red color originally came from a chemical reaction between natural cocoa powder (which is acidic) and baking soda, enhanced by ingredients like buttermilk and vinegar. This reaction produced a reddish tint that bakers later amplified with small amounts of beet juice or food coloring to create a more striking appearance.
The cake gained widespread popularity during the Great Depression when companies like Adams Extract & Spice began promoting recipes that used red food dye to make desserts more visually appealing during tough economic times. The famous Waldorf-Astoria Hotel in New York was often credited with popularizing red velvet cake, although this claim has been disputed over time.
Cake pops, on the other hand, were popularized much later—around 2008—by blogger Angie Dudley, known as “Bakerella,” who posted photos of adorable cake balls on sticks that quickly went viral. Her creative designs, including Minion-shaped cake pops, inspired a global trend. Combining red velvet cake with the cake pop format was a natural evolution, merging deep Southern dessert tradition with modern confectionery innovation. Today, red velvet cake pops are staples at bakeries, gourmet dessert shops, and home kitchens alike, symbolizing both nostalgia and contemporary creativity in baking.
Ingredients Breakdown
To make flawless red velvet cake pops, it’s essential to understand each ingredient’s role in creating the perfect texture, flavor, and structure. Here’s a detailed breakdown:
- All-purpose flour: Provides the foundational structure for the cake. It contains gluten-forming proteins that give the cake its soft yet stable crumb.
- Cocoa powder (unsweetened, natural): Adds subtle chocolate flavor without overpowering the delicate vanilla notes. Natural cocoa reacts with acid to enhance the red color.
- Baking soda: A leavening agent that helps the cake rise. When combined with acidic ingredients like buttermilk and vinegar, it creates carbon dioxide bubbles for a light texture.
- Salt: Enhances overall flavor and balances sweetness.
- Granulated sugar: Sweetens the cake and contributes to tenderness by weakening gluten formation.
- Butter (unsalted, softened): Adds richness and moisture. Unsalted butter allows better control over salt levels.
- Eggs: Bind the ingredients together, add structure, and contribute to the cake’s moistness.
- Buttermilk: Provides acidity that activates baking soda and enhances the red hue. Its tangy flavor complements the sweetness perfectly.
- Vinegar (white or apple cider): Boosts acidity, further reacting with baking soda and cocoa to deepen the red tone.
- Vanilla extract: Enhances aroma and adds depth to the flavor profile.
- Red food coloring (gel-based preferred): Gives the cake its signature bright red appearance. Gel colors are more concentrated than liquid, so less is needed, preventing excess moisture.
- Cream cheese frosting: Acts as the binder when turning crumbled cake into pops. Its tanginess balances the sweetness and mimics the classic red velvet pairing with cream cheese icing.
- Melting wafers (candy coating or almond bark): Used to coat the cake balls. Available in white, dark, or milk chocolate varieties, they harden smoothly and are easier to work with than real chocolate.
- Cake pop sticks: Specially designed lollipop-style sticks inserted into the chilled cake balls before dipping.
- Sprinkles, edible glitter, or dragees: Optional decorations for visual flair.
- Vegetable oil or shortening (optional): Added to melting wafers to thin the coating and prevent cracking.
Step-by-Step Recipe
- Bake the Red Velvet Cake: Preheat your oven to 350°F (175°C). Grease and flour a 9×13-inch baking pan. In a large bowl, whisk together 2 cups all-purpose flour, 2 tablespoons unsweetened cocoa powder, 1 teaspoon baking soda, ½ teaspoon salt, and 1½ cups granulated sugar. In another bowl, cream ½ cup softened unsalted butter until fluffy. Add 2 large eggs, one at a time, beating well after each addition. Mix in 1 teaspoon vanilla extract. Gradually add the dry ingredients alternately with 1 cup buttermilk, beginning and ending with the dry mix. Stir in 1 tablespoon white vinegar and 1–2 tablespoons red gel food coloring (adjust for desired intensity). Pour batter into the prepared pan and bake for 25–30 minutes, or until a toothpick comes out clean. Let cool completely.
- Crumble the Cake: Once cooled, use your hands or a pastry cutter to break the cake into fine crumbs in a large mixing bowl. Remove any overly dense or crusty edges if desired.
- Add Frosting: Begin adding cream cheese frosting—one tablespoon at a time—to the cake crumbs. Start with ½ cup and mix thoroughly. The mixture should hold together when pressed without being overly wet. You may need up to ¾ cup depending on cake moisture. Mix gently to avoid overworking.
- Shape the Balls: Scoop out rounded teaspoons of the mixture and roll between clean palms into smooth, uniform balls about 1 inch in diameter. Place them on a parchment-lined tray. If the mixture feels sticky, chill it briefly (10–15 minutes) before rolling.
- Chill the Cake Balls: Refrigerate the shaped balls for at least 1–2 hours (or freeze for 30 minutes) to firm them up. This prevents them from falling apart during dipping.
- Prepare the Coating: Melt 12 oz of white chocolate melting wafers in a deep, narrow container using a double boiler or microwave (in 20-second bursts, stirring frequently). For smoother consistency, stir in ½–1 teaspoon of vegetable oil or shortening.
- Attach the Sticks: Remove cake balls from the fridge. Dip the tip of a cake pop stick into the melted coating, then insert it about halfway into a cake ball. The hardened coating acts as “glue.” Return to the tray immediately after inserting the stick.
- Dip the Pops: One at a time, submerge each cake ball into the melted coating, swirling gently to cover entirely. Lift slowly, allowing excess coating to drip off. Use a spoon or tap lightly against the container edge to remove extra.
- Decorate: While still wet, add sprinkles, drizzle with contrasting colored melted chocolate, or dust with edible gold powder. Work quickly before the coating sets.
- Set and Store: Insert sticks into a foam block or cake pop stand to dry upright. Allow 15–20 minutes for the coating to harden completely. Store in an airtight container in the refrigerator for up to 5 days or freeze for longer preservation.
Tips
- Use gel food coloring: Liquid dyes can alter the cake’s moisture balance. Gel provides intense color with minimal volume.
- Don’t skip chilling: Firm cake balls are crucial for successful dipping. Warm or soft balls will fall off the stick or absorb too much coating.
- Avoid overheating chocolate: Melting wafers scorch easily. Heat gently and stir often. If they seize, add a tiny bit of oil to revive them.
- Work in batches: Keep unused cake balls refrigerated while dipping others to maintain consistency.
- Pre-dip the sticks: Dipping the stick tip in chocolate before inserting helps secure the cake ball.
- Use a tall, narrow cup: Makes dipping easier and reduces mess.
- Wipe excess coating: After lifting the pop, gently wipe the base against the rim of the container to prevent pooling at the bottom.
- Room temperature handling: Bring cake pops to room temp before serving for best texture and flavor release.
- Keep tools handy: Have paper towels, spoons, toothpicks, and extra sprinkles ready before starting.
- Double-coat for durability: For shipping or warm environments, consider a second thin layer of coating once the first has set.
Variations and Customizations
Red velvet cake pops are incredibly versatile and can be customized for any occasion. Here are some creative variations:
- Miniature Wedding Favors: Dip in white chocolate and decorate with edible pearls or lace-like piping for elegant wedding favors.
- Holiday-Themed Pops: Use green and red sprinkles for Christmas, pastel hues for Easter, or orange and black for Halloween.
- Gluten-Free Version: Substitute all-purpose flour with a high-quality gluten-free blend and ensure other ingredients are certified GF.
- Vegan Red Velvet Cake Pops: Use plant-based butter, flax eggs, almond milk mixed with vinegar (as buttermilk substitute), and vegan cream cheese frosting.
- Chocolate-Dipped Delight: Instead of white coating, use dark or milk chocolate for a richer taste.
- Stuffed Centers: Insert a small piece of cream cheese cube, caramel, or even a mini candy bar into the center before freezing.
- Fruity Twist: Add finely chopped dried cherries or cranberries to the cake crumb mixture for a tart contrast.
- Alcohol-Infused Pops: Brush baked cake with a simple syrup infused with bourbon or amaretto for adult-friendly versions.
- Cookie Crust Variation: Roll the outside of the cake ball in crushed Oreos or graham crackers before dipping.
- Seasonal Shapes: Mold cake balls into hearts (Valentine’s Day), pumpkins (Fall), or snowmen (Winter).
- Nutty Crunch: Roll freshly dipped pops in chopped pecans, walnuts, or coconut flakes before the coating sets.
- Marbled Effect: Drizzle multiple colors of melted coating (e.g., white and red) and swirl with a toothpick.
Health Considerations and Nutritional Value
While red velvet cake pops are undeniably delicious, they are best enjoyed in moderation due to their high sugar, fat, and calorie content. A typical red velvet cake pop (approx. 45g) contains roughly:
- Calories: 180–220 kcal
- Total Fat: 10–14g (including saturated fat from butter, chocolate, and cream cheese)
- Carbohydrates: 22–28g (mostly from sugar and refined flour)
- Sugars: 16–20g
- Protein: 2–3g
- Sodium: 80–120mg
Health Notes:
- Traditional recipes contain dairy, eggs, gluten, and nuts (if added), making them unsuitable for those with allergies unless modified.
- The artificial red dye (commonly Red #40) used in many recipes may be a concern for individuals sensitive to food coloring, especially children. Natural alternatives like beet juice or hibiscus powder can be used, though results may vary in color intensity.
- Cream cheese frosting increases saturated fat and cholesterol content. Lower-fat versions can be made with reduced-fat cream cheese and less butter, though texture may suffer slightly.
- For a healthier twist, consider using whole wheat pastry flour, reducing sugar, substituting applesauce for part of the butter, and using dark chocolate coating which contains antioxidants.
- Portion control is key—cake pops are small but energy-dense, so mindful consumption is advised, particularly for individuals managing diabetes, heart conditions, or weight.
Ingredients
- 2 cups all-purpose flour
- 2 tablespoons unsweetened natural cocoa powder
- 1½ cups granulated sugar
- 1 teaspoon baking soda
- ½ teaspoon salt
- ½ cup (1 stick) unsalted butter, softened
- 2 large eggs
- 1 teaspoon vanilla extract
- 1 cup buttermilk
- 1 tablespoon white vinegar
- 1–2 tablespoons red gel food coloring (or liquid, adjust accordingly)
- ½ to ¾ cup cream cheese frosting (homemade or store-bought)
- 12 oz white chocolate melting wafers
- ½ teaspoon vegetable oil or shortening (optional, for smoother coating)
- 20–24 cake pop sticks
- Sprinkles or decorations of choice
Directions
- Preheat oven to 350°F (175°C). Grease and flour a 9×13-inch baking pan.
- In a large bowl, whisk together flour, cocoa powder, baking soda, salt, and sugar.
- In a separate bowl, beat butter until creamy. Add eggs one at a time, mixing well. Stir in vanilla.
- Gradually add dry ingredients to wet ingredients, alternating with buttermilk, starting and ending with dry mix. Mix until just combined.
- Stir in vinegar and red food coloring until evenly distributed.
- Pour batter into prepared pan and bake for 25–30 minutes, or until a toothpick inserted comes out clean.
- Cool completely on a wire rack.
- Crumble cake into a large bowl using fingers or a fork.
- Mix in cream cheese frosting gradually until the mixture holds together when rolled.
- Roll into 1-inch balls and place on a parchment-lined tray.
- Chill for 1–2 hours in the refrigerator (or 30 minutes in the freezer).
- Melt white chocolate wafers with optional oil in a double boiler or microwave, stirring frequently.
- Dip stick tip into melted chocolate, insert into cake ball, and return to tray.
- Dip each cake ball into melted coating, tapping off excess.
- Decorate immediately with sprinkles or drizzles.
- Stand pops upright in a foam block or stand to dry completely (15–20 minutes).
- Store in an airtight container in the refrigerator for up to 5 days or freeze for up to 2 months.
FAQ
Q: Why did my cake pops crack after dipping?
A: Cracking usually occurs when the cake ball is too cold and the coating is warm, causing expansion. Let cake balls sit at room temperature for 5–10 minutes before dipping, or ensure the coating isn’t too hot.
Q: Can I use boxed red velvet cake mix?
A: Yes! Follow the box instructions, bake, and proceed with crumbling and mixing in frosting. It’s a great shortcut with consistent results.
Q: How do I transport cake pops safely?
A: Use individual plastic sleeves or a compartmentalized container. Insert sticks into foam or egg cartons to prevent movement.
Q: Can I make cake pops without cream cheese frosting?
A: Technically yes, but the flavor won’t be authentic. You can use vanilla frosting, though the tangy balance will be lost.
Q: How many cake pops does this recipe yield?
A: Approximately 20–24, depending on the size of the balls.
Q: Can I freeze cake pops?
A: Absolutely. Freeze undipped balls for up to 2 months. Thaw in the fridge before proceeding. Fully assembled pops can also be frozen—wrap individually to prevent condensation.
Q: Why are my cake pops falling off the sticks?
A: Likely causes include insufficient chilling, too much frosting (making them slippery), or not pre-dipping the stick. Ensure balls are firm and coating acts as glue.
Q: What can I use instead of melting wafers?
A: Real white chocolate works but requires tempering. Chocolate chips can be used with added oil, but may not harden as smoothly.
Summary
Red Velvet Cake Pops combine the luxurious taste of red velvet cake with the whimsical charm of cake pops, making them a show-stopping treat for any celebration. With careful preparation, quality ingredients, and creative customization, you can craft bakery-worthy desserts right in your own kitchen.