Peppermint Meringues: A Sweet, Crisp, and Refreshing Holiday Treat
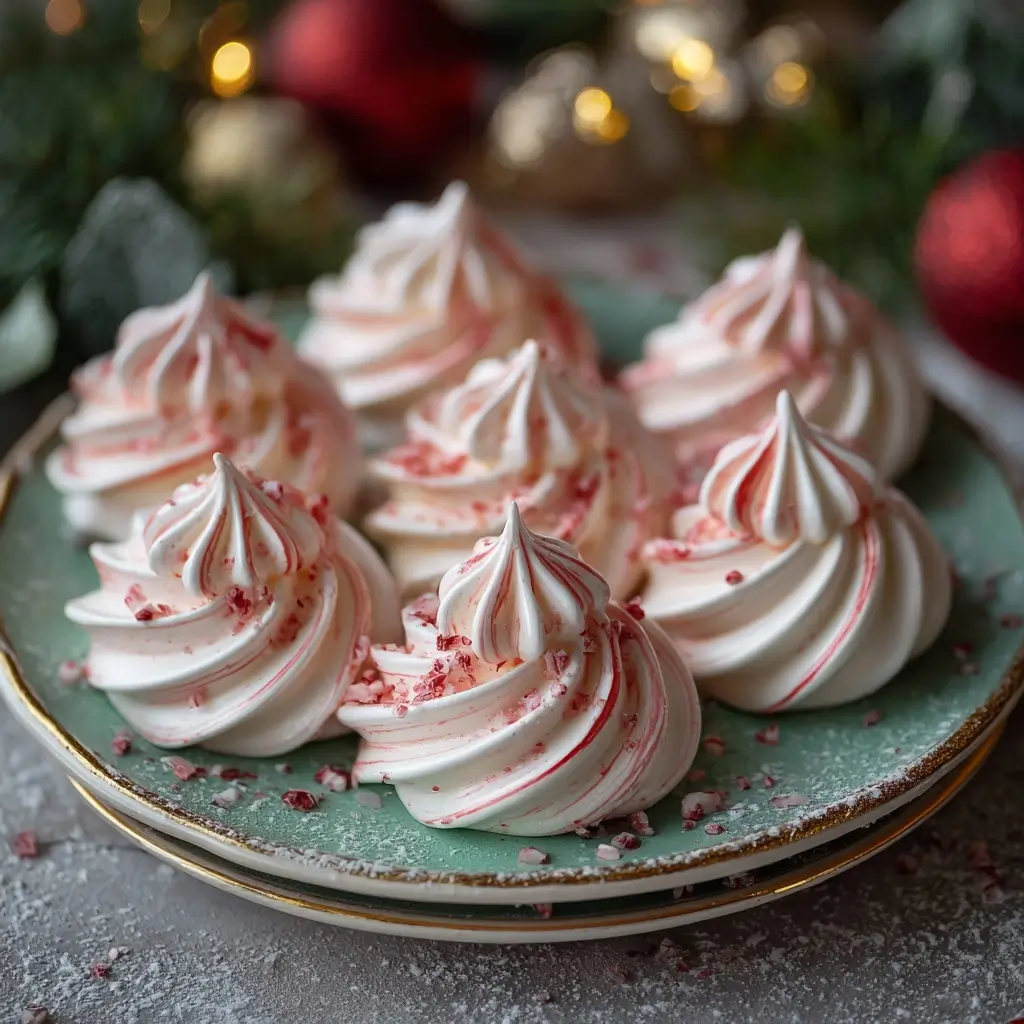
Delicate, airy, and delightfully crisp, peppermint meringues are a festive confection that brings a burst of minty freshness to any holiday dessert table. These dainty cookies are not only visually striking with their snowy white appearance and occasional speckles of red or pink from crushed candy canes, but they also offer an ethereal melt-in-your-mouth texture that makes them a favorite among dessert lovers. Whether enjoyed as a standalone treat, crumbled over ice cream, or served alongside hot cocoa, peppermint meringues embody the spirit of winter celebrations with their cool, refreshing flavor profile and elegant simplicity.
The History of Meringues and the Peppermint Twist
Meringues trace their origins back to 17th-century Europe, with Switzerland, France, and Italy all laying claim to their invention. The word “meringue” first appeared in a French cookbook in 1692, though variations existed earlier under different names. Traditionally made from just egg whites and sugar, whipped to stiff peaks and baked at low temperatures, meringues were prized for their lightness and versatility.
Over time, bakers began experimenting with flavors and colors, leading to regional varieties such as Italian meringue (cooked over a double boiler) and Swiss meringue (heated gently before whipping). The addition of peppermint flavoring—particularly during the holiday season—emerged as a popular twist in American baking culture during the 20th century. Inspired by the iconic candy cane, which itself dates back to 17th-century Germany, peppermint meringues became a natural fusion of two beloved seasonal treats. Their vibrant red-and-white swirls and invigorating mint taste made them a staple at Christmas parties, cookie exchanges, and winter weddings.
Ingredients Breakdown: What Makes Peppermint Meringues So Special?
The magic of peppermint meringues lies in their minimal yet precise ingredients. Each component plays a crucial role in achieving the perfect structure, texture, and flavor:
- Egg Whites: The foundation of any meringue, egg whites provide the protein structure necessary for whipping into stiff, glossy peaks. Fresh, room-temperature egg whites whip up faster and more evenly than cold ones.
- Granulated Sugar: Added gradually, sugar stabilizes the foam, adds sweetness, and contributes to the crisp exterior while allowing for a slightly soft interior when baked properly.
- Cream of Tartar: This acidic ingredient helps stabilize the egg whites, prevents collapsing, and ensures a smooth, shiny meringue. It also lowers the pH, which strengthens the protein network.
- Pure Peppermint Extract: Unlike mint extract, which can have a medicinal taste, pure peppermint extract delivers a clean, refreshing flavor without overpowering the delicate meringue. Avoid using artificial flavorings for best results.
- Optional – Red Food Coloring (Gel Preferred): For a festive touch, a small amount of gel food coloring can be swirled in to mimic candy cane stripes. Gel is preferred over liquid to avoid deflating the meringue.
- Crushed Candy Canes or Peppermint Pieces (for garnish): Pressed onto the surface before baking or sprinkled on top after baking, these add crunch and visual appeal.
Step-by-Step Recipe: How to Make Perfect Peppermint Meringues
Follow this detailed guide to create flawless, cloud-like peppermint meringues every time. Patience and precision are key!
- Preheat Oven & Prepare Baking Sheets: Preheat your oven to 225°F (107°C). Line two large baking sheets with parchment paper or silicone baking mats. Draw 1.5-inch circles on the parchment as guides if you want uniform shapes (optional).
- Whip Egg Whites: In a completely clean, dry, grease-free bowl (glass or stainless steel works best), add 4 large egg whites. Using a hand mixer or stand mixer fitted with the whisk attachment, beat on medium speed until foamy (about 1 minute).
- Add Cream of Tartar: Sprinkle in 1/2 teaspoon cream of tartar and continue beating on medium-high speed until soft peaks form—when the whisk is lifted, the peak should curl over gently.
- Incorporate Sugar Gradually: With the mixer running, slowly add 1 cup (200g) granulated sugar, one tablespoon at a time, waiting about 10–15 seconds between additions. Beat until all sugar is incorporated and the mixture is glossy, forming stiff, shiny peaks that hold their shape firmly.
- Flavor the Meringue: Gently fold in 1–1.5 teaspoons pure peppermint extract using a rubber spatula. Be careful not to deflate the mixture. If using food coloring, add a small drop of red gel and lightly swirl it in for a marbled effect (do not overmix).
- Pipe the Meringues: Transfer the meringue to a piping bag fitted with a large round or star tip. Pipe mounds or rosettes onto the prepared sheets following your drawn circles. Alternatively, use a spoon to shape small kisses.
- Add Crushed Candy Canes (Optional): Lightly press crushed candy canes onto the tops of each meringue immediately after piping for added texture and holiday flair.
- Bake Slowly: Bake for 1 hour and 15 minutes to 1 hour and 30 minutes. The meringues are done when they lift easily off the parchment and feel dry and crisp to the touch. The interior should be marshmallow-soft but not sticky.
- Cool Completely: Turn off the oven and crack the door open slightly. Let the meringues cool inside the oven for at least 1 hour to prevent cracking or shrinking.
- Store Properly: Once fully cooled, store in an airtight container at room temperature, separated by layers of parchment paper. They will keep for up to 2 weeks if stored correctly.
Tips for Success: Mastering the Art of Meringue
- Use Fresh Egg Whites: Older eggs separate more easily, but fresher whites create more stable foams. Pasteurized or carton egg whites are not recommended as they often contain additives that hinder whipping.
- No Yolk Allowed: Even a trace of yolk or fat can prevent egg whites from whipping properly. Separate eggs carefully and wipe the bowl with a lemon wedge or vinegar-soaked paper towel to ensure no residue remains.
- Sugar Must Dissolve Fully: Rub a bit of meringue between your fingers; if it feels gritty, keep beating until smooth. Undissolved sugar leads to weeping or collapse.
- Avoid Humidity: Meringues absorb moisture from the air, so avoid making them on rainy or humid days. If necessary, run a dehumidifier or air conditioner.
- Low and Slow Baking: Low oven temperature ensures even drying without browning. High heat causes cracks and hollow shells.
- Don’t Open the Oven: Resist the urge to peek during baking! Sudden temperature changes can cause meringues to crack or fall.
- Test for Doneness: A perfectly baked meringue should detach easily from parchment and make a light “crunch” sound when tapped.
Variations and Customizations: Make It Your Own
While classic peppermint meringues are a winter favorite, there are countless ways to personalize them for different occasions and palates:
- Chocolate-Dipped Peppermint Meringues: Melt dark, milk, or white chocolate and dip half of each cooled meringue. Sprinkle with crushed candy canes before the chocolate sets.
- Swirled Red & White Meringues: Divide the meringue in half, tint one portion with red gel, then alternately pipe both colors into swirls for a festive ribbon effect.
- Glittery Meringues: Brush finished meringues with edible luster dust or sprinkle with sparkling sugar for a magical holiday shimmer.
- S’mores Meringues: Add a hint of graham cracker crumbs to the base and top with mini marshmallows and melted chocolate.
- Lemon-Peppermint Fusion: Add 1/2 teaspoon lemon zest and a splash of lemon extract along with the peppermint for a bright, zesty twist.
- Mini Meringue Kisses: Pipe tiny dollops for bite-sized treats perfect for snacking or decorating desserts.
- Vegan Meringues: Use aquafaba (the liquid from canned chickpeas) in place of egg whites. Whip 3/4 cup aquafaba until stiff peaks form, then proceed with the recipe.
Health Considerations and Nutritional Value
Peppermint meringues are naturally gluten-free, dairy-free, and low in fat, making them suitable for many dietary restrictions. However, they are high in sugar and should be consumed in moderation, especially by individuals managing diabetes or watching their carbohydrate intake.
Nutritional Profile (per average 1.5-inch meringue):
- Calories: ~35–40
- Total Carbohydrates: 9g (mostly from sugar)
- Protein: 1g (from egg whites)
- Fat: 0g
- Sodium: 5–10mg
- Sugar: 8–9g
Considerations:
- Egg Safety: Because meringues are baked, not cooked thoroughly like custards, use pasteurized eggs if serving to pregnant women, young children, elderly individuals, or those with compromised immune systems.
- Allergies: Contains egg. Not suitable for vegans unless using aquafaba. Check candy cane ingredients for corn syrup, soy, or dairy if allergies are a concern.
- Dental Health: High sugar content may contribute to tooth decay; encourage rinsing or brushing after consumption.
- Energy Density: Despite being light and airy, meringues are calorie-dense due to sugar. Portion control is advisable.
Ingredients
- 4 large egg whites (about 120ml), room temperature
- 1 cup (200g) granulated sugar
- 1/2 teaspoon cream of tartar
- 1–1.5 teaspoons pure peppermint extract
- Red gel food coloring (optional)
- 2–3 candy canes, crushed (for topping)
Directions
- Preheat oven to 225°F (107°C). Line two baking sheets with parchment paper or silicone mats. Optionally, draw 1.5-inch circles on the parchment as piping guides.
- In a clean, grease-free bowl, beat egg whites on medium speed until foamy (about 1 minute).
- Add cream of tartar and beat on medium-high until soft peaks form.
- Gradually add sugar, one tablespoon at a time, beating well after each addition. Continue beating until stiff, glossy peaks form (about 5–7 minutes).
- Gently fold in peppermint extract. Add a drop of red gel food coloring if desired and lightly swirl for a marbled effect.
- Transfer meringue to a piping bag with a 1/2-inch round or star tip. Pipe mounds or kisses within the drawn circles.
- Immediately press crushed candy canes onto the tops of each meringue.
- Bake for 1 hour 15 minutes to 1 hour 30 minutes, until crisp and dry. Do not open the oven during baking.
- Turn off oven, crack the door open, and let meringues cool inside for at least 1 hour.
- Peel off parchment and store in an airtight container at room temperature.
FAQ (Frequently Asked Questions)
Q: Why did my meringues crack?
A: Cracking usually occurs due to too-rapid baking, over-beating, or sudden temperature changes. Always bake low and slow, and cool in the oven.
Q: Can I make meringues without cream of tartar?
A: Yes. Substitute with 1/2 teaspoon lemon juice or white vinegar. However, cream of tartar provides the best stability.
Q: How do I know when meringues are done?
A: They should be crisp, lift easily from parchment, and feel dry. Tap them—they should sound hollow.
Q: Why are my meringues chewy?
A: They may need more baking time or were exposed to humidity. Extend baking by 10–15 minutes next time.
Q: Can I freeze peppermint meringues?
A: Yes, but not ideal. They can become brittle or absorb moisture. Best stored airtight at room temperature.
Q: Can I use mint extract instead of peppermint?
A: Peppermint has a stronger, cleaner flavor. Mint extract may taste medicinal. Stick to pure peppermint extract for best results.
Q: How long do they last?
A: Up to 2 weeks in an airtight container at room temperature, away from moisture and heat.
Summary
Peppermint meringues combine the airy elegance of traditional meringue with the festive flair of holiday peppermint, creating a delightful treat that’s crisp, refreshing, and beautifully simple. Perfect for gifting, decorating desserts, or savoring with tea, these sweet clouds of minty joy capture the essence of winter cheer in every bite.