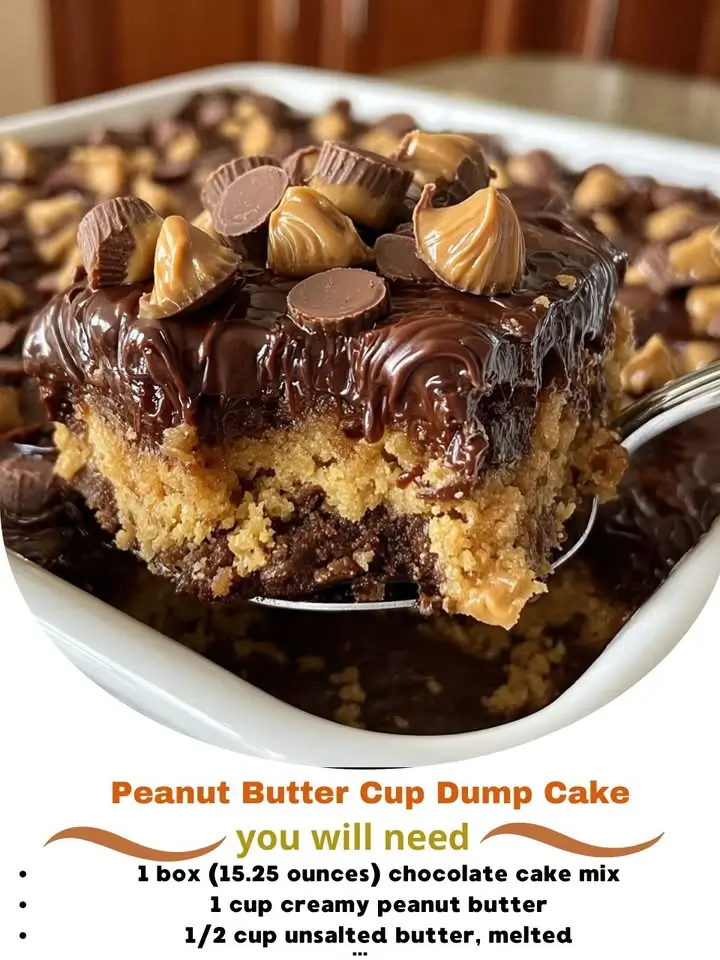
The Ultimate Peanut Butter Cup Dump Cake: A Decadent Dessert Delight
The History of the Dump Cake Phenomenon
Dump cakes have been a beloved staple in American home cooking since the mid-20th century, rising to popularity during an era when convenience and simplicity were highly prized in the kitchen. Originally emerging from the use of canned fruit pie fillings and boxed cake mixes, the “dump” method—named for the technique of literally dumping ingredients into a pan without mixing—revolutionized dessert preparation. It offered busy families and novice bakers a no-fuss way to create warm, comforting desserts with minimal effort and cleanup.
Over time, the dump cake concept evolved beyond traditional fruit-based recipes like cherry or apple crisp variations. Creative home cooks began experimenting with richer flavors, including chocolate, caramel, and peanut butter. The Peanut Butter Cup Dump Cake is a modern twist on this classic idea, combining the nostalgic ease of a dump cake with the indulgent flavors of everyone’s favorite candy: the peanut butter cup. Inspired by the iconic Reese’s candies, this version brings together gooey peanut butter, melty chocolate, and a golden, buttery crust that forms naturally during baking. Its rise in popularity over the past decade has made it a go-to dessert for potlucks, holiday gatherings, and late-night cravings alike.
Ingredients Breakdown: What Makes This Cake So Irresistible?
The beauty of the Peanut Butter Cup Dump Cake lies not only in its simplicity but also in the harmony of its ingredients. Each component plays a vital role in creating a rich, layered dessert that feels homemade yet requires almost no effort. Let’s break down the key elements:
- Yellow Cake Mix: The foundation of most dump cakes, the dry cake mix provides structure, sweetness, and a light crumb. While vanilla or white cake mix can be substituted, yellow cake adds a slightly richer flavor that complements the peanut butter.
- Peanut Butter Chips: These are essential for delivering concentrated peanut butter flavor throughout the cake. Unlike regular peanut butter, which can make the batter too wet, peanut butter chips melt slightly during baking, creating pockets of creamy richness.
- Mini Peanut Butter Cups: The star of the show! Miniature versions of the classic candy ensure even distribution and a delightful surprise in every bite. As they bake, the chocolate and peanut butter centers soften, oozing into the surrounding cake layers.
- Eggs: These bind the ingredients together and help form a custard-like layer beneath the crust. They’re crucial for achieving the right texture—moist but not soggy.
- Evaporated Milk: Thicker and creamier than regular milk, evaporated milk enhances richness and contributes to a smooth, velvety consistency. It helps create a luscious sauce that soaks into the cake as it bakes.
- Butter: Melted butter is poured over the top before baking, where it seeps through the dry mix to form a golden, crisp topping. This creates a contrast between the crunchy surface and the soft, pudding-like interior.
- Vanilla Extract (Optional): A small amount deepens the overall flavor profile, enhancing both the cake and the peanut butter notes.
- Sea Salt or Flaky Salt (Optional Garnish): A sprinkle on top after baking balances the sweetness and elevates the gourmet feel of the dessert.
Step-by-Step Recipe: How to Make the Perfect Peanut Butter Cup Dump Cake
Follow these simple steps to create a decadent, crowd-pleasing dessert in under an hour—with almost no effort required.
- Preheat Your Oven: Begin by preheating your oven to 350°F (175°C). This ensures even baking and proper rising of the cake layer.
- Prepare the Baking Dish: Grease a 9×13-inch baking dish thoroughly with non-stick spray or softened butter. For extra insurance against sticking, you can line the bottom with parchment paper.
- Add the Dry Ingredients: Pour one 15.25-ounce box of yellow cake mix evenly into the prepared pan. Do not stir or level it aggressively—just spread it gently to cover the bottom.
- Sprinkle the Goodies: Evenly distribute 1 cup of peanut butter chips and 1.5 cups of mini peanut butter cups over the cake mix. Press them lightly into the mix so they don’t float during baking.
- Whisk Wet Ingredients: In a medium bowl, whisk together 2 large eggs, one 12-ounce can of evaporated milk, and 1 teaspoon of vanilla extract (if using). Mix until smooth and well combined.
- Pour Over the Mix: Slowly pour the wet mixture over the layered dry ingredients. Allow it to naturally soak through—do not stir! This is critical for achieving the signature “dump” texture.
- Add the Butter: Melt ½ cup (1 stick) of unsalted butter and carefully pour it over the entire surface. Again, do not stir. The butter will melt down through the cake mix and create a golden crust on top.
- Bake Until Golden: Place the pan in the center of the preheated oven and bake for 40–45 minutes, or until the top is bubbly, golden brown, and a toothpick inserted near the center comes out mostly clean (a few moist crumbs are okay).
- Cool Slightly: Remove the cake from the oven and let it cool for at least 15–20 minutes before serving. This allows the internal layers to set and makes it easier to scoop.
- Serve Warm: For maximum indulgence, serve warm with a scoop of vanilla ice cream or a drizzle of melted peanut butter and chocolate syrup.
Tips for Success: Expert Advice for the Best Results
- Don’t Stir! One of the cardinal rules of dump cake: resist the urge to mix. Stirring disrupts the layering process and prevents the formation of the rich custard base and crispy top.
- Use Full-Fat Ingredients: Evaporated milk and real butter make a noticeable difference in flavor and texture compared to low-fat substitutes.
- Uniform Distribution: Spread each ingredient evenly to avoid pockets of dryness or excess moisture.
- Check Doneness Early: Ovens vary, so start checking at 38 minutes. Overbaking can lead to a dry or burnt top layer.
- Let It Rest: Allowing the cake to cool slightly helps the layers settle and improves the texture when served.
- Double the Recipe? Yes—but only if you have a large enough oven! You can double the recipe and bake in two separate 9×13 pans. Do not attempt to bake all in one oversized pan; it will cook unevenly.
- Storage Tip: Leftovers can be covered and stored at room temperature for up to 2 days or refrigerated for up to 5 days. Reheat individual portions in the microwave for 20–30 seconds for that fresh-from-the-oven experience.
Variations and Customizations: Make It Your Own
The beauty of this dump cake is its versatility. Once you’ve mastered the basic recipe, feel free to experiment with exciting twists:
- Chocolate Lovers’ Version: Add ½ cup of chocolate chips along with the peanut butter chips for an extra layer of chocolatey goodness.
- Nutella Swirl: After pouring the wet ingredients, dollop ¼ cup of Nutella across the top and use a knife to gently swirl it in before adding the butter.
- Salted Caramel Crunch: Drizzle ⅓ cup of salted caramel sauce over the cake mix before adding the other ingredients. Top with crushed pretzels after baking for a sweet-and-salty crunch.
- Gluten-Free Option: Substitute the yellow cake mix with a gluten-free alternative (ensure it contains xanthan gum or add ½ tsp separately). Use gluten-free peanut butter cups (such as Enjoy Life brand).
- Vegan Adaptation: Use a plant-based cake mix, flax eggs (2 tbsp ground flaxseed + 5 tbsp water), full-fat coconut milk (in place of evaporated milk), vegan butter, and dairy-free peanut butter cups.
- Extra Peanut Butter Boost: Swirl ½ cup of creamy peanut butter into the wet mixture before pouring, or drizzle warmed peanut butter on top after baking.
- Festive Touches: For holidays, press crushed candy pieces (like peppermint bits at Christmas or red & green M&Ms for Valentine’s Day) on top after baking.
- Layered Look: Create a trifle-style dessert by layering cooled dump cake chunks with whipped cream and chopped peanut butter cups in glasses.
Health Considerations and Nutritional Value
While undeniably delicious, the Peanut Butter Cup Dump Cake is a treat best enjoyed in moderation due to its high sugar, fat, and calorie content. Here’s a general nutritional breakdown per serving (based on 12 servings):
| Nutrient | Amount per Serving |
|---|---|
| Calories | ~420–480 |
| Total Fat | 22–26g |
| Saturated Fat | 10–13g |
| Cholesterol | 50–60mg |
| Sodium | 300–400mg |
| Total Carbohydrates | 55–60g |
| Dietary Fiber | 2–3g |
| Sugars | 40–45g |
| Protein | 6–8g |
Considerations:
- Sugar Content: High due to cake mix and candy. Those managing blood sugar levels should consume sparingly.
- Peanut Allergies: This dessert contains multiple sources of peanuts and is not safe for individuals with peanut allergies. Always label clearly when serving at gatherings.
- Portion Control: Serve in smaller squares (e.g., 2×2 inches) to manage intake while still enjoying the flavor.
- Balanced Pairing: Serve with fresh fruit or Greek yogurt instead of ice cream to add protein and reduce added sugars.
- Occasional Indulgence: There’s nothing wrong with enjoying rich desserts occasionally as part of a balanced diet. Mindful eating enhances the pleasure!
Full Ingredient List
- 1 (15.25 oz) box yellow cake mix (not sugar-free)
- 1 cup peanut butter chips
- 1.5 cups mini peanut butter cups, whole or halved
- 2 large eggs
- 1 (12 oz) can evaporated milk
- 1 teaspoon vanilla extract (optional)
- ½ cup (1 stick) unsalted butter, melted
- Flaky sea salt, for garnish (optional)
Detailed Directions
- Preheat oven to 350°F (175°C). Grease a 9×13-inch baking dish with non-stick spray or butter.
- Pour the dry yellow cake mix into the pan, spreading it evenly across the bottom without pressing down.
- Sprinkle peanut butter chips and mini peanut butter cups evenly over the cake mix.
- In a mixing bowl, whisk together eggs, evaporated milk, and vanilla extract until fully blended.
- Pour the wet mixture evenly over the layered ingredients in the pan. Allow it to seep through naturally—do not stir.
- Drizzle melted butter over the entire surface, covering as much of the dry mix as possible.
- Place in the preheated oven and bake for 40–45 minutes, or until the top is golden brown, bubbling around the edges, and a toothpick inserted near the center shows minimal moist crumbs.
- Remove from oven and let rest for 15–20 minutes to allow the custard layer to set.
- Garnish with a pinch of flaky sea salt if desired.
- Serve warm with vanilla ice cream, whipped cream, or a drizzle of melted chocolate or peanut butter.
Frequently Asked Questions (FAQ)
Q: Can I use a different type of cake mix?
A: Yes! Devil’s food, chocolate, or white cake mix can be used for different flavor profiles. Chocolate cake mix pairs especially well with peanut butter.
Q: Can I make this ahead of time?
A: Absolutely. Assemble the cake (without baking), cover tightly, and refrigerate for up to 24 hours. Bake as directed, adding 5–10 extra minutes if going straight from fridge to oven.
Q: Why is my dump cake soggy?
A: This usually happens if the cake wasn’t baked long enough or if the ingredients were stirred. Ensure you bake until the center is set and avoid mixing the layers.
Q: Can I freeze Peanut Butter Cup Dump Cake?
A: Yes. Cool completely, then wrap individual slices in plastic and store in a freezer-safe container for up to 3 months. Thaw in the refrigerator and reheat in the microwave.
Q: Can I use regular peanut butter instead of peanut butter chips?
A: Not recommended. Regular peanut butter adds too much oil and moisture, which can ruin the texture. Stick to chips for consistent results.
Q: Is there a way to make this less sweet?
A: Try using a reduced-sugar cake mix and dark chocolate-covered peanut butter cups. You can also reduce the amount of candy slightly without sacrificing flavor.
Q: Can I add nuts?
A: Yes! Chopped peanuts or pecans can be sprinkled over the top before baking for added crunch and nuttiness.
Q: Can I use a glass pan?
A: Yes, but monitor baking closely—glass conducts heat differently and may require reducing the oven temperature by 25°F to prevent over-browning.
Summary
The Peanut Butter Cup Dump Cake is a rich, effortless dessert that combines the nostalgic ease of a classic dump cake with the irresistible flavors of chocolate and peanut butter. With minimal prep and maximum flavor, it’s the perfect treat for satisfying sweet cravings and impressing guests without spending hours in the kitchen.