Peanut Butter Cookie Lasagna
Introduction
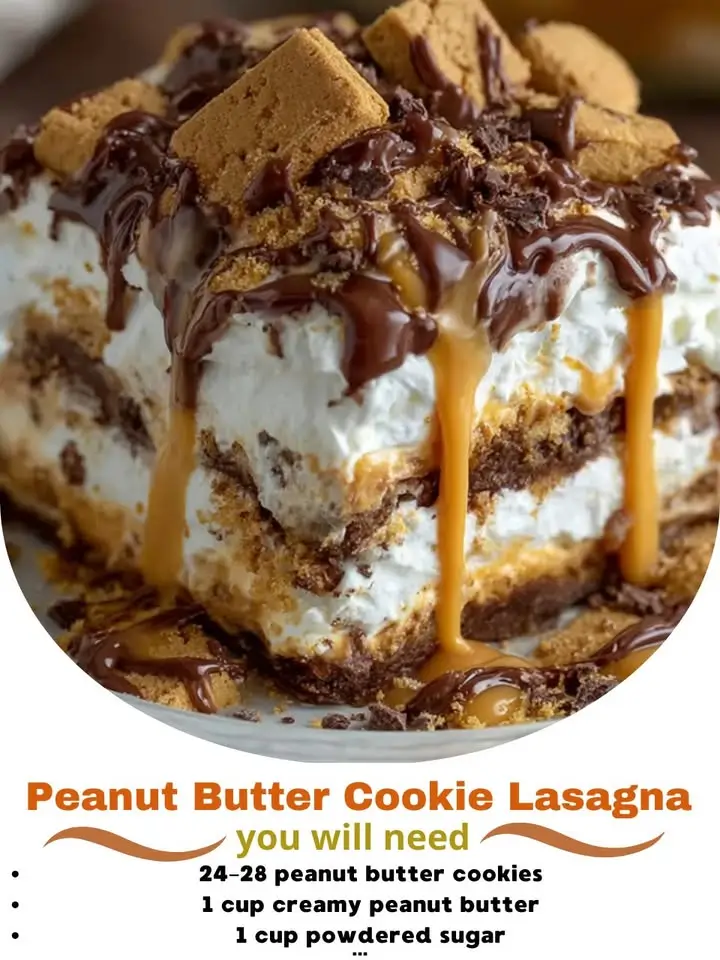
If you’re a fan of rich, creamy desserts with layers of flavor and texture, then Peanut Butter Cookie Lasagna is the ultimate treat for your taste buds. This no-bake dessert combines the beloved taste of peanut butter with the indulgence of cookies, whipped cream, and chocolate to create a layered masterpiece that’s as easy to make as it is delicious. Perfect for parties, family gatherings, or just satisfying your sweet tooth, this decadent lasagna-style dessert brings together all the comforting elements of classic peanut butter treats in a stunning, sliceable form.
The History
The concept of “dessert lasagnas” emerged in American home cooking during the late 20th century as creative bakers began experimenting with layering sweet ingredients in the same way traditional lasagna layers pasta, cheese, and sauce. These desserts typically use graham crackers, cookies, or sponge cake as the “noodle” component, with fillings made from cream cheese, pudding, or whipped toppings. Peanut Butter Cookie Lasagna evolved from this trend, drawing inspiration from Southern U.S. dessert traditions and the widespread popularity of peanut butter-flavored sweets like Reese’s Peanut Butter Cups and Nutter Butters.
Originally shared through community cookbooks, church potlucks, and regional recipe swaps, variations of this dessert gained national attention through food blogs and social media in the 2010s. Its simplicity, crowd-pleasing appeal, and nostalgic flavor profile have cemented its status as a modern classic. While not rooted in Italian cuisine despite the name, Peanut Butter Cookie Lasagna proudly claims its place in the pantheon of American comfort desserts.
Ingredients Breakdown
To understand what makes this dessert so irresistibly creamy and crunchy, let’s break down each ingredient and its role:
- Chocolate Sandwich Cookies (e.g., Oreos): These form the base layer, providing a crisp, chocolatey foundation that mimics the “noodles” in traditional lasagna. The filling adds sweetness and helps bind the crust when mixed with butter.
- Unsalted Butter (melted): Acts as a binding agent for the cookie crust, helping it hold together after chilling. Using unsalted butter allows better control over the overall salt content.
- Cream Cheese (softened): The star of the middle layer, cream cheese delivers a rich, tangy base that balances the sweetness and gives structure to the filling.
- Peanut Butter: Use smooth, natural, or conventional peanut butter (avoid oily or freshly ground unless stabilized). It infuses the entire dessert with nutty depth and creaminess.
- Powdered Sugar: Adds sweetness and helps thicken the cream cheese mixture while contributing to a smooth, silky texture.
- Heavy Whipping Cream: When whipped, it creates a light, airy layer that contrasts beautifully with the dense bottom crust. It also prevents the middle layer from being too heavy.
- Vanilla Extract: Enhances the overall flavor profile, adding warmth and complexity to the creamy layers.
- Mini Chocolate Chips: Scattered between layers or folded into the filling, they add bursts of chocolate and extra texture.
- Chopped Peanuts (optional): For added crunch and visual appeal, especially on top.
- Sprinkles or Crushed Peanut Butter Cups (garnish): Optional but recommended for festive presentation and enhanced flavor.
Step-by-Step Recipe
- Prepare the Crust: In a large bowl, crush about 24–30 chocolate sandwich cookies into fine crumbs using a food processor or rolling pin. Mix in 6 tablespoons of melted unsalted butter until the crumbs are evenly coated and resemble wet sand. Press the mixture firmly into the bottom of a 9×9-inch or 9×13-inch baking dish lined with parchment paper or plastic wrap. Use the bottom of a glass or measuring cup to compact it evenly. Chill in the refrigerator for at least 20 minutes to set.
- Make the Peanut Butter Layer: In a large mixing bowl, beat 8 oz of softened cream cheese with 1 cup of creamy peanut butter until smooth and well combined. Gradually add 1 cup of powdered sugar and 1 teaspoon of vanilla extract, beating on medium speed until fluffy and uniform in texture.
- Whip the Cream: In a separate chilled bowl, pour 1 ½ cups of cold heavy whipping cream. Using a hand mixer or stand mixer, whip on high speed until stiff peaks form—this means the cream holds its shape when the beaters are lifted. Be careful not to over-whip, or it may turn grainy.
- Combine Filling Layers: Gently fold the whipped cream into the peanut butter-cream cheese mixture in two additions, using a spatula. Fold gently to maintain airiness. Avoid stirring vigorously, which can deflate the mixture. Stir in ½ cup of mini chocolate chips if desired.
- Layer the Dessert: Spread the peanut butter mixture evenly over the chilled crust, using an offset spatula or the back of a spoon to create a smooth surface. Tap the pan lightly on the counter to remove air bubbles.
- Add Final Touches: Sprinkle the top with additional mini chocolate chips, chopped peanuts, or crushed peanut butter cups. For extra elegance, drizzle with melted chocolate or caramel.
- Chill Thoroughly: Cover the dish with plastic wrap and refrigerate for at least 4 hours, preferably overnight. This step is crucial—it allows the layers to firm up and makes slicing clean and neat.
- Serve: Remove from the fridge 10–15 minutes before serving for easier cutting. Use a sharp knife dipped in hot water and wiped dry between slices for perfect portions.
Tips
- Room Temperature Ingredients: Ensure cream cheese is fully softened (about 30–60 minutes at room temperature) to avoid lumps in the filling.
- Chill Mixing Bowls: For best results when whipping cream, chill the bowl and beaters in the freezer for 10–15 minutes beforehand.
- Cookie Substitutions: Try using chocolate graham crackers, chocolate wafers, or even peanut butter cookies for the crust depending on your preference.
- Slicing Tips: For clean cuts, wipe the knife with a damp cloth between each slice. Warming the blade slightly under hot water helps glide through the layers.
- Avoid Weeping: Do not use low-fat or whipped cream cheese, and avoid overmixing once the whipped cream is added to prevent separation.
- Storage Tip: Line the pan with parchment overhang to easily lift the entire dessert out for slicing without scratching the dish.
Variations and Customizations
Peanut Butter Cookie Lasagna is highly adaptable. Here are some popular twists:
- Nut-Free Version: Substitute sunflower seed butter or soy nut butter for peanut butter. Use dairy-free chocolate cookies if needed.
- Gluten-Free Option: Use gluten-free chocolate sandwich cookies or a blend of gluten-free graham crackers and almonds for the crust.
- Dairy-Free/Lactose-Free: Replace cream cheese with vegan cream cheese alternative, and use coconut cream instead of heavy cream (chill the can overnight and whip only the solid portion).
- Chocolate Lover’s Edition: Add a thin layer of melted and cooled dark chocolate between the crust and filling, or mix cocoa powder into the cream layer.
- Banana Split Twist: Add a layer of sliced bananas or banana pudding between the crust and peanut butter layer—pair with chopped peanuts and cherries on top.
- S’mores Style: Use a graham cracker crust, add marshmallow fluff into the middle layer, and sprinkle with chocolate and toasted marshmallows.
- Reese’s Copycat: Layer chopped Reese’s Peanut Butter Cups throughout and on top for a candy-inspired version.
- Low-Sugar/Keto-Friendly: Use sugar-free cookies, monk fruit-sweetened peanut butter, erythritol-based powdered sugar substitute, and keto-compliant chocolate chips.
- Boozy Variation: Add 1–2 tablespoons of bourbon or rum to the peanut butter layer for an adult twist (ensure full chilling time to mellow the alcohol).
Health Considerations and Nutritional Value
While undeniably indulgent, it’s helpful to understand the nutritional aspects of Peanut Butter Cookie Lasagna:
- Calories: A typical serving (1/12 of a 9×13 pan) ranges from 300–400 calories, depending on ingredients used.
- Fats: Contains both saturated and unsaturated fats from peanut butter, butter, and cream. Opt for natural peanut butter with no added sugar or hydrogenated oils to improve fat quality.
- Protein: Provides moderate protein (around 5–7g per serving) thanks to peanut butter and dairy components.
- Sugars: High in added sugars from cookies, powdered sugar, and chocolate. Consider reducing powdered sugar slightly or using alternatives for lower glycemic impact.
- Allergens: Contains peanuts, milk, wheat (gluten), and eggs (in some cookie brands). Always label accordingly when serving to groups.
- Moderation Advice: Best enjoyed occasionally as part of a balanced diet. Pair with fresh fruit or a green salad if serving at a meal.
- Portion Control: Cut small squares—this dessert is rich, so a little goes a long way!
Ingredients
- 24–30 chocolate sandwich cookies (like Oreos), finely crushed (about 2 cups crumbs)
- 6 tablespoons unsalted butter, melted
- 8 oz cream cheese, softened
- 1 cup creamy peanut butter (not natural/oily style unless stabilized)
- 1 cup powdered sugar
- 1 ½ cups heavy whipping cream, cold
- 1 teaspoon pure vanilla extract
- ½ cup mini chocolate chips (plus extra for topping)
- ¼ cup chopped peanuts (optional, for crunch and garnish)
- Peanut butter cups, crushed (optional garnish)
Directions
- In a medium bowl, combine crushed chocolate sandwich cookies and melted butter. Press firmly into the bottom of a 9×13-inch baking dish. Chill for 20 minutes.
- In a large bowl, beat cream cheese and peanut butter together until smooth. Add powdered sugar and vanilla; beat until creamy and well blended.
- In another bowl, whip cold heavy cream until stiff peaks form.
- Gently fold the whipped cream into the peanut butter mixture until fully incorporated. Stir in ½ cup mini chocolate chips.
- Spread the mixture evenly over the chilled crust. Smooth the top with a spatula.
- Sprinkle additional chocolate chips, chopped peanuts, or crushed peanut butter cups over the top.
- Cover and refrigerate for at least 4 hours, or overnight.
- Before serving, allow to sit at room temperature for 10–15 minutes. Slice with a warm, clean knife for best results.
FAQ
Can I make Peanut Butter Cookie Lasagna ahead of time?
Yes! This dessert actually improves with time. Make it 1–2 days in advance and store covered in the refrigerator.
Can I freeze it?
Absolutely. Wrap tightly in plastic and foil, then freeze for up to 2 months. Thaw in the refrigerator overnight before serving.
Why is my filling runny?
This usually happens if the cream wasn’t whipped enough, the cream cheese was too soft, or the peanut butter was oily. Always use stable peanut butter and ensure proper whipping technique.
Can I use whipped topping instead of heavy cream?
Yes, 16 oz of thawed frozen whipped topping (like Cool Whip) can replace the whipped cream for a lighter, more convenient option. However, homemade whipped cream tastes richer and holds its shape better.
How long does it last in the fridge?
Up to 5 days when stored in an airtight container or covered dish.
Is this safe for kids?
Yes, all ingredients are shelf-stable and cooked-free, but ensure no nut allergies are present due to the peanut butter.
Can I make individual servings?
Definitely! Assemble in mason jars, parfait glasses, or cupcake liners for portable treats.
Summary
Peanut Butter Cookie Lasagna is a no-bake, crowd-pleasing dessert featuring layers of chocolatey crust, creamy peanut butter filling, and fluffy whipped goodness—all chilled to perfection. Easy to customize and impossible to resist, it’s the ultimate sweet celebration in every bite.