No-Churn Chocolate Ice Cream: A Decadent Homemade Delight
There’s something undeniably magical about ice cream—especially when it’s rich, creamy, and made entirely at home with no fancy equipment required. No-churn chocolate ice cream is a dream come true for dessert lovers who crave the velvety texture of premium gelato without the need for an ice cream maker. This easy-to-make frozen treat combines simple pantry ingredients into a luxurious dessert that rivals any store-bought brand. Whether you’re hosting a summer barbecue, treating yourself after a long day, or simply indulging in a moment of sweet nostalgia, this no-churn chocolate ice cream will satisfy every chocolate craving.
The History of No-Churn Ice Cream
The concept of no-churn ice cream emerged during the mid-20th century as homemakers sought convenient ways to recreate frozen desserts without specialized machinery. The breakthrough came with the discovery that combining sweetened condensed milk with whipped cream could produce a smooth, creamy base that freezes beautifully—without the need for constant churning to prevent ice crystals. This technique was popularized in cookbooks and women’s magazines throughout the 1950s and 60s, especially in regions where access to electric ice cream makers was limited.
Originally developed as a wartime or ration-friendly alternative, no-churn ice cream gained widespread popularity due to its simplicity and reliability. Over time, bakers and food enthusiasts began experimenting with flavors, leading to modern variations like mint chip, strawberry swirl, and, of course, rich chocolate. Today, no-churn recipes are celebrated not only for their accessibility but also for their adaptability, making them a staple in home kitchens around the world.
Ingredients Breakdown: What Makes It So Creamy?
The magic behind no-churn ice cream lies in its clever use of ingredients that naturally resist freezing into icy chunks. Let’s break down each component and understand why they’re essential:
- Sweetened Condensed Milk: This thick, sugary dairy product is the foundation of no-churn ice cream. Its high sugar content lowers the freezing point, helping maintain a soft texture even when frozen. It also adds richness and body without needing eggs or custard.
- Heavy Whipping Cream: When whipped to stiff peaks, heavy cream incorporates air, giving the ice cream its light, fluffy structure. As it freezes, the fat in the cream helps stabilize the mixture and enhances mouthfeel.
- Cocoa Powder (or Melted Chocolate): For deep chocolate flavor, unsweetened cocoa powder is often used because it dissolves easily and doesn’t introduce extra fat that might affect texture. Alternatively, melted dark or semi-sweet chocolate can be folded in for a more intense, glossy finish.
- Vanilla Extract: A touch of vanilla enhances the chocolate flavor and rounds out the sweetness, adding complexity to the overall taste profile.
- Salt: Just a pinch! Salt amplifies the other flavors and balances the sweetness, preventing the ice cream from tasting one-dimensional.
- Optional Add-ins: Chocolate chips, chopped nuts, cookie pieces, espresso powder, liqueurs, or flavored extracts can elevate your ice cream to gourmet status.
Step-by-Step Recipe: How to Make No-Churn Chocolate Ice Cream at Home
Follow these detailed steps to create a luscious batch of homemade no-churn chocolate ice cream that’s smooth, rich, and utterly irresistible.
- Gather Your Tools and Ingredients: Before beginning, ensure all ingredients are measured and ready. You’ll need a large mixing bowl, an electric hand mixer or stand mixer, a rubber spatula, and a loaf pan or freezer-safe container (preferably lined with parchment paper for easy removal).
- Whip the Heavy Cream: Pour 2 cups (480 ml) of cold heavy whipping cream into a large bowl. Using a hand mixer or stand mixer fitted with a whisk attachment, beat on medium-high speed until stiff peaks form—about 5 to 7 minutes. Be careful not to over-whip, as this can lead to butter-like clumps. Set aside.
- Prepare the Chocolate Base: In a separate bowl, combine 1 can (14 oz / 397 g) of sweetened condensed milk, ½ cup (50 g) of unsweetened cocoa powder (preferably Dutch-processed for richer flavor), 1 teaspoon of pure vanilla extract, and a pinch of fine sea salt. Whisk vigorously until completely smooth and uniformly dark brown. If desired, add 1–2 tablespoons of strong brewed coffee or espresso to deepen the chocolate notes.
- Fold in the Whipped Cream: Gently fold one-third of the whipped cream into the chocolate mixture using a spatula to lighten it. Then, carefully fold in the remaining whipped cream in two additions, rotating the bowl and scraping the bottom to fully incorporate without deflating the mixture. The goal is a fluffy, mousse-like consistency.
- Add Optional Mix-ins: At this stage, stir in up to ½ cup of extras such as mini chocolate chips, crushed Oreos, toasted hazelnuts, or marshmallows. Fold gently to distribute evenly.
- Transfer to Container: Pour the mixture into a 9×5 inch loaf pan or similar freezer-safe dish. Use the spatula to smooth the top and eliminate air pockets. For extra presentation, sprinkle a few chocolate shavings or cocoa powder on top.
- Freeze Thoroughly: Cover the pan tightly with plastic wrap or aluminum foil, ensuring it touches the surface of the ice cream to prevent ice crystals. Freeze for at least 6 hours, preferably overnight, for optimal firmness and flavor development.
- Scoop and Serve: Once fully frozen, remove the ice cream from the freezer and let it sit at room temperature for 5–10 minutes before scooping. Use a warm ice cream scoop for clean, smooth servings.
Tips for Perfect No-Churn Chocolate Ice Cream Every Time
- Chill Your Bowl and Whisk: For best results when whipping cream, place your mixing bowl and beaters in the freezer for 10–15 minutes beforehand. Cold tools help the cream whip faster and hold its shape better.
- Avoid Overmixing: When folding in the whipped cream, use gentle motions and stop once the batter is uniform. Overmixing can collapse the air bubbles, resulting in dense ice cream.
- Use High-Quality Cocoa: Opt for premium unsweetened cocoa powder like Ghirardelli, Valrhona, or Droste for a deeper, less acidic chocolate flavor. Dutch-processed cocoa is ideal for its smoothness and solubility.
- Prevent Ice Crystals: Press plastic wrap directly onto the surface of the ice cream before freezing. This minimizes exposure to air, which causes freezer burn and graininess.
- Don’t Rush Freezing: Allow at least 6–8 hours for the ice cream to set. Rushing this step may result in a soft, slushy texture.
- Label and Date: Store leftovers in an airtight container with a label. Homemade no-churn ice cream keeps well for up to 2 weeks, though it rarely lasts that long!
Variations and Customizations: Make It Your Own
One of the greatest advantages of no-churn ice cream is its versatility. Here are some delicious twists on the classic chocolate base:
- Double Chocolate Chunk: Stir in ¾ cup of semi-sweet chocolate chips or chopped dark chocolate bars for melty bursts in every bite.
- Mocha Chocolate: Add 1–2 teaspoons of instant espresso powder to the chocolate mixture or replace 2 tablespoons of milk with cooled espresso for a caffeinated kick.
- Chocolate Peanut Butter Swirl: After pouring into the pan, drizzle ⅓ cup of warmed peanut butter (or almond butter) over the top and use a knife to swirl it through. Don’t mix too much—just enough for marbling.
- Cookie Dough Chocolate: Fold in small pieces of edible chocolate chip cookie dough (egg-free version recommended for safety) for a decadent combo.
- Peppermint Chocolate: Replace vanilla extract with ½ teaspoon peppermint extract and fold in crushed candy canes or Andes mints for a festive twist.
- Gluten-Free & Vegan Option: Use gluten-free mix-ins and substitute regular condensed milk with coconut milk-based sweetened condensed milk and full-fat coconut cream instead of dairy cream.
- Boozy Chocolate: Add 1–2 tablespoons of Kahlúa, Baileys, Grand Marnier, or bourbon for an adult-only version. Alcohol lowers the freezing point slightly, so expect a softer texture.
Health Considerations and Nutritional Value
While no-churn chocolate ice cream is undeniably indulgent, understanding its nutritional content can help you enjoy it mindfully. A typical serving (½ cup) contains approximately:
- Calories: 280–320
- Total Fat: 18–22g (mostly from saturated fats in cream and condensed milk)
- Carbohydrates: 28–32g (primarily sugars from condensed milk and cocoa)
- Protein: 4–6g
- Sodium: 60–80mg
- Calcium & Phosphorus: Present due to dairy content
Considerations:
- This recipe is high in sugar and fat, so those managing diabetes, heart conditions, or weight should consume in moderation.
- Lactose-intolerant individuals may experience discomfort; consider lactose-free alternatives if available.
- To reduce sugar, explore sugar-free condensed milk substitutes, though texture and freezing behavior may vary.
- For a lighter version, try replacing part of the heavy cream with Greek yogurt, though this may alter creaminess.
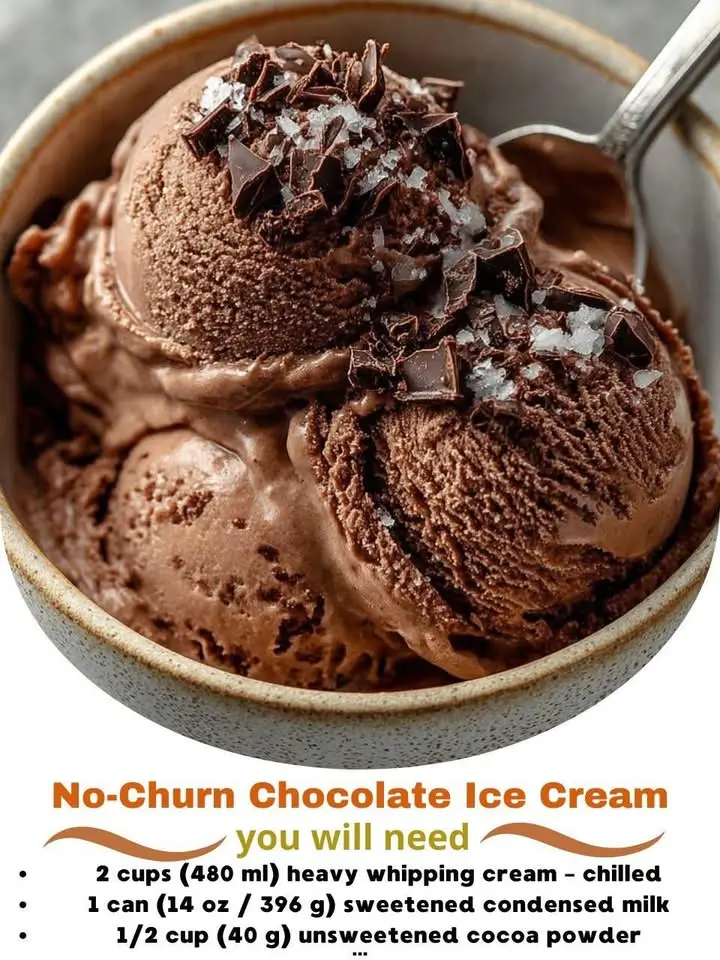
Ingredients
- 2 cups (480 ml) cold heavy whipping cream
- 1 can (14 oz / 397 g) sweetened condensed milk
- ½ cup (50 g) unsweetened cocoa powder (Dutch-process preferred)
- 1 teaspoon pure vanilla extract
- Pinch of sea salt
- Optional: ½ cup chocolate chips, nuts, cookies, or swirls
Directions
- In a chilled bowl, whip the heavy cream using an electric mixer until stiff peaks form. Set aside.
- In another bowl, whisk together sweetened condensed milk, cocoa powder, vanilla extract, and salt until smooth and fully combined.
- Gently fold one-third of the whipped cream into the chocolate mixture to lighten it. Then, fold in the remaining whipped cream until no white streaks remain.
- If using, stir in optional mix-ins like chocolate chips or nuts.
- Pour the mixture into a parchment-lined loaf pan. Smooth the top with a spatula.
- Cover with plastic wrap touching the surface of the ice cream. Freeze for at least 6 hours or overnight.
- Allow to sit at room temperature for 5–10 minutes before scooping. Serve and enjoy!
FAQ
Can I make this ice cream without sweetened condensed milk?
While possible, it’s challenging. Sweetened condensed milk provides both sweetness and texture. Substitutes like honey or maple syrup won’t offer the same thickness or anti-freeze properties. Sugar-free versions exist but require recipe adjustments.
Why is my ice cream icy or grainy?
This usually happens if the cream wasn’t whipped enough, the mixture was overmixed, or it wasn’t sealed properly during freezing. Ensure stiff peaks and direct contact with plastic wrap to prevent crystallization.
Can I use powdered sugar instead of condensed milk?
No—powdered sugar lacks the liquid and protein content needed for proper texture. The recipe relies on the unique composition of condensed milk.
How long does it last in the freezer?
Up to 2 weeks in an airtight container. Beyond that, quality declines due to moisture loss and odor absorption.
Can I double the recipe?
Yes! Simply double all ingredients and use two loaf pans or a larger freezer-safe container. Avoid making batches much larger than quadruple unless you have a commercial mixer.
Is it safe to eat raw egg-free?
Absolutely. One major advantage of no-churn ice cream is that it contains no raw eggs, making it safer than traditional custard-based recipes.
Summary
No-churn chocolate ice cream is a foolproof, creamy dessert that brings gourmet flavor into your kitchen with minimal effort. With just a few simple ingredients and no special equipment, you can create a rich, velvety treat that delights chocolate lovers of all ages.