No-Bake Oreo Chocolate Cake: A Decadent Dessert Delight
Introduction
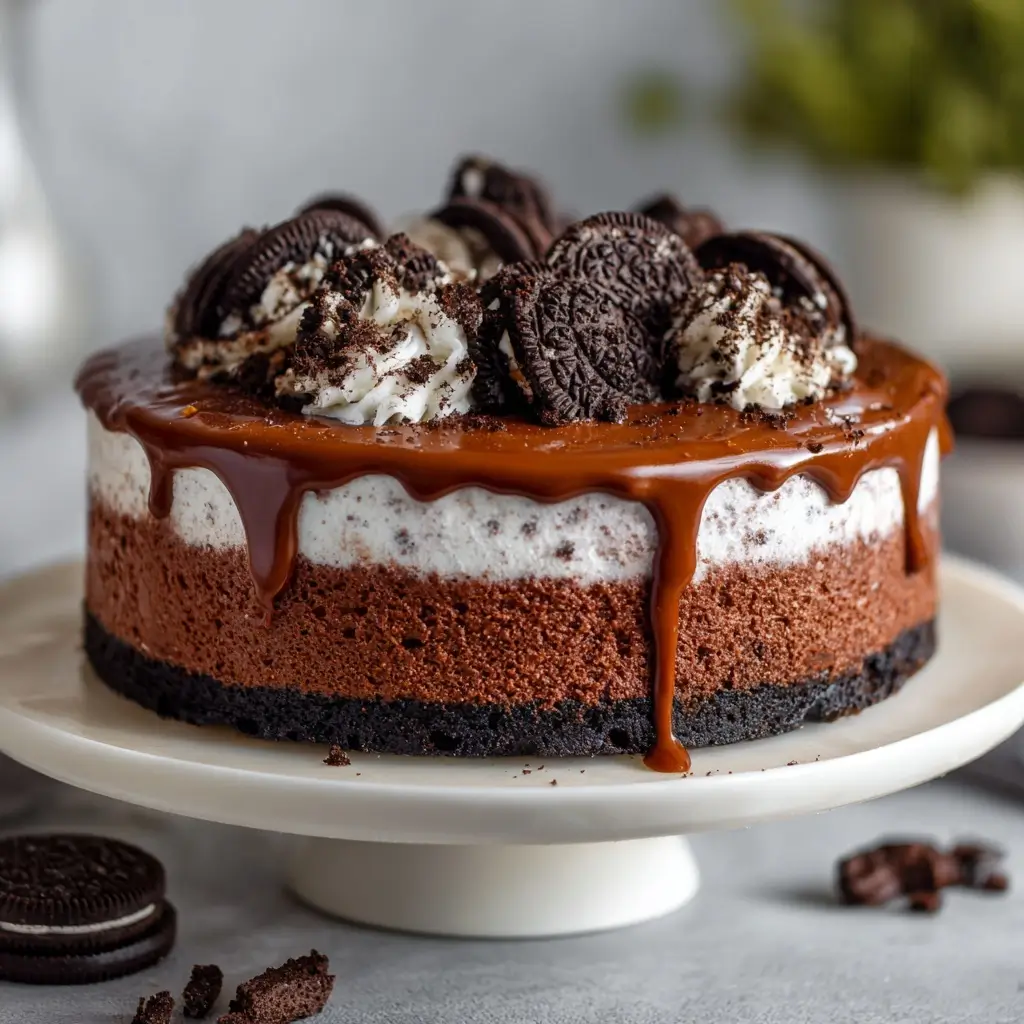
If you’re craving a rich, creamy, and utterly indulgent dessert that requires no oven time and minimal effort, the No-Bake Oreo Chocolate Cake is your ultimate go-to treat. This luscious dessert combines the deep flavor of chocolate with the crunchy, sweet bite of Oreo cookies to create a show-stopping cake that’s perfect for parties, family gatherings, or simply satisfying a late-night sweet tooth. With its silky texture, striking appearance, and no need for baking, this cake has become a favorite across homes worldwide. Whether you’re a beginner in the kitchen or an experienced baker looking for a quick yet impressive dessert, this No-Bake Oreo Chocolate Cake delivers on every level—flavor, ease, and presentation.
The History
The origins of no-bake desserts can be traced back to mid-20th century American home cooking, where convenience and creativity went hand in hand. As refrigeration became more common and processed ingredients like cream cheese, whipped topping, and packaged cookies gained popularity, home cooks began experimenting with desserts that didn’t require an oven. The Oreo cookie, first introduced by Nabisco in 1912, quickly became a staple in American pantries. By the 1970s and 80s, recipes combining Oreos with cream cheese, butter, and chocolate began appearing in community cookbooks and women’s magazines.
The No-Bake Oreo Chocolate Cake evolved from these early no-bake cheesecake-style recipes. Its modern version—layered, chilled, and often featuring a mousse-like filling—gained widespread popularity through social media platforms, food blogs, and viral recipe shares. Today, it stands as a beloved classic in the realm of no-bake desserts, admired for its simplicity, crowd-pleasing taste, and versatility. While not rooted in any single cultural tradition, it embodies the spirit of modern comfort food: easy, decadent, and endlessly customizable.
Ingredients Breakdown
Understanding each ingredient in the No-Bake Oreo Chocolate Cake helps you appreciate how they come together to form a harmonious, texturally rich dessert. Here’s a detailed look at what goes into this delightful treat:
- Oreo Cookies: The star of the show. Used both in the crust and layered throughout the filling, Oreos provide a sweet, slightly minty cocoa flavor and a satisfying crunch. You can use regular, double-stuffed, or even flavored varieties depending on your preference.
- Butter (unsalted): Melted and mixed with crushed Oreos to form the base crust. Butter binds the crumbs together and adds richness, helping the crust set firmly when chilled.
- Cream Cheese: Provides body, tanginess, and creaminess to the filling. It’s essential for creating a thick, velvety layer that holds its shape when sliced.
- Heavy Whipping Cream: When whipped to stiff peaks, it adds lightness and airiness to the filling, giving the cake a mousse-like texture.
- Powdered Sugar: Sweetens the filling without adding graininess. It also helps stabilize the whipped mixture slightly and enhances smoothness.
- Vanilla Extract: Enhances the overall flavor profile, balancing the sweetness and bringing warmth to the dessert.
- Dark Chocolate or Semi-Sweet Chocolate Chips: Melted and folded into the filling to deliver deep chocolate flavor. Using high-quality chocolate makes a noticeable difference in taste.
- Whipped Topping (optional): Some recipes include a tub of frozen whipped topping (like Cool Whip) for added volume and ease, though homemade whipped cream is preferred for better flavor and texture control.
- Salt (a pinch): Often overlooked, but a small pinch enhances all the other flavors and prevents the dessert from tasting flat.
Step-by-Step Recipe
Follow these detailed steps to create a flawless No-Bake Oreo Chocolate Cake that’s as beautiful as it is delicious.
- Prepare the Pan: Lightly grease a 9-inch springform pan with non-stick spray or softened butter. This ensures easy removal once the cake is set.
- Make the Crust: In a food processor or sealed plastic bag, crush about 24 Oreo cookies (remove the filling if desired, though most keep it). Combine the crushed Oreos with 5 tablespoons of melted unsalted butter until the mixture resembles wet sand.
- Press the Crust: Transfer the mixture to the prepared springform pan. Press it evenly into the bottom using the back of a spoon or a flat-bottomed glass. Chill in the refrigerator for at least 20 minutes to firm up.
- Melt the Chocolate: Place 1 cup of semi-sweet or dark chocolate chips in a heatproof bowl. Melt using a double boiler or microwave in 30-second intervals, stirring frequently until smooth. Let cool slightly.
- Beat the Cream Cheese: In a large mixing bowl, beat 16 oz (2 packages) of softened cream cheese with 1 cup of powdered sugar until smooth and creamy. Add 1 teaspoon of vanilla extract and a pinch of salt; mix well.
- Fold in the Chocolate: Gradually add the melted chocolate into the cream cheese mixture, beating on low speed until fully incorporated and uniform in color.
- Whip the Cream: In a separate bowl, whip 2 cups of cold heavy whipping cream until stiff peaks form. Be careful not to over-whip.
- Combine Fillings: Gently fold the whipped cream into the chocolate-cream cheese mixture in two additions, using a spatula. Mix just until no white streaks remain. This keeps the filling light and airy.
- Add Crushed Oreos: Crush another 12–16 Oreo cookies and gently fold them into the filling for texture and bursts of cookie flavor.
- Assemble the Cake: Pour the filling over the chilled crust. Spread evenly with a spatula. Tap the pan gently on the counter to remove air bubbles.
- Chill: Cover the pan with plastic wrap and refrigerate for at least 6 hours, preferably overnight, to allow the cake to set completely.
- Garnish and Serve: Before serving, remove the sides of the springform pan. Decorate the top with whole Oreos, shaved chocolate, whipped cream rosettes, or crushed cookie crumbs.
Tips
- Use Room Temperature Cream Cheese: Cold cream cheese won’t blend smoothly and may result in lumps. Take it out of the fridge 1–2 hours before starting.
- Don’t Overmix After Adding Whipped Cream: Over-folding can deflate the air and make the filling dense. Fold gently until just combined.
- Chill Your Mixing Bowl and Whisk: For best results when whipping cream, place your bowl and beaters in the freezer for 10–15 minutes beforehand.
- Be Patient with Chilling: Rushing the setting process can lead to a soft, messy slice. Overnight chilling yields the cleanest cuts.
- Line the Pan for Easier Removal: For extra security, line the sides of the springform pan with parchment paper before adding the crust.
- Use Fresh Oreos: Stale cookies can affect texture and flavor. Ensure your Oreos are fresh for maximum taste impact.
- Wipe the Spatula Clean Between Layers: For a polished finish, smooth the top and clean the edges carefully before chilling.
Variations and Customizations
The beauty of the No-Bake Oreo Chocolate Cake lies in its adaptability. Here are some creative twists to personalize your dessert:
- Peanut Butter Lover’s Version: Swirl in ½ cup of melted peanut butter or add chopped Reese’s cups into the filling. Top with peanut butter cups for extra flair.
- White Chocolate Dream: Replace dark chocolate with white chocolate for a sweeter, creamier flavor. Pair with lemon zest for a refreshing contrast.
- Cookie Monster Edition: Mix in different cookies like chocolate chip, Nutter Butters, or Milano cookies along with the Oreos.
- Mint Chocolate Chip: Use mint Oreos and add a few drops of peppermint extract to the filling. Garnish with green-tinted whipped cream.
- Gluten-Free Option: Substitute regular Oreos with gluten-free chocolate sandwich cookies. Ensure all other ingredients are certified gluten-free.
- Dairy-Free/Vegan Version: Use vegan cream cheese, coconut cream instead of heavy cream, and dairy-free chocolate chips. Choose plant-based butter and cookies.
- Layered Look: Create alternating layers of plain whipped cream, chocolate filling, and crushed cookies for a striped effect.
- Boozy Twist: Add 1–2 tablespoons of Kahlua, Baileys, or bourbon to the filling for an adult-only dessert.
- Fruit Fusion: Layer in fresh raspberries or strawberries between the filling and crust for a tart contrast.
- Mini Jars or Cups: Skip the cake format and layer ingredients in mason jars or dessert cups for individual servings.
Health Considerations and Nutritional Value
While undeniably delicious, the No-Bake Oreo Chocolate Cake is a high-calorie, sugar-rich dessert best enjoyed in moderation. Here’s a nutritional overview per average slice (based on 12 slices):
- Calories: ~450–550 kcal
- Total Fat: 30–35g (including saturated fat from cream, butter, and chocolate)
- Carbohydrates: 45–55g (mostly from sugar and refined flour in cookies)
- Sugars: 30–40g
- Protein: 4–6g (from cream cheese and dairy)
- Sodium: 250–350mg
Considerations:
- High in Saturated Fat: Due to butter, cream, and cream cheese, this cake may not be ideal for those monitoring heart health.
- Sugar Content: The combination of Oreos, powdered sugar, and chocolate contributes significant added sugars. Diabetics should consume sparingly or consider sugar substitutes.
- Low in Fiber and Nutrients: Lacks substantial vitamins, minerals, or fiber unless modified with healthier alternatives.
- Allergens: Contains dairy, wheat (gluten), and soy (in most commercial Oreos). Always check labels if serving individuals with allergies.
To make a lighter version, consider using reduced-fat cream cheese, coconut milk-based whipped cream, low-sugar cookies, and natural sweeteners like erythritol or monk fruit. However, note that substitutions may alter texture and taste.
Ingredients
- 24 Oreo cookies, plus 12–16 more for filling and garnish
- 5 tablespoons unsalted butter, melted
- 16 oz (2 packages) cream cheese, softened
- 1 cup powdered sugar
- 1 cup semi-sweet or dark chocolate chips
- 2 cups heavy whipping cream, cold
- 1 teaspoon pure vanilla extract
- Pinch of salt
Directions
- Grease a 9-inch springform pan and set aside.
- Crush 24 Oreo cookies into fine crumbs (filling included). Mix with melted butter until well combined.
- Press the mixture firmly into the bottom of the pan. Chill for 20 minutes.
- Melt chocolate chips using a double boiler or microwave. Stir until smooth and let cool slightly.
- In a large bowl, beat cream cheese, powdered sugar, vanilla, and salt until creamy.
- Add melted chocolate and mix until fully blended.
- In a separate bowl, whip cold heavy cream to stiff peaks.
- Gently fold half of the whipped cream into the chocolate mixture, then add the rest, folding until smooth.
- Crush 12–16 additional Oreos and fold into the mixture.
- Pour filling over the chilled crust. Smooth the top with a spatula.
- Cover and refrigerate for at least 6 hours or overnight.
- Remove side of pan before serving. Garnish with whole Oreos, chocolate shavings, or whipped cream.
FAQ
Q: Can I make this cake ahead of time?
A: Absolutely! This cake actually improves with time. Make it 1–2 days in advance and store covered in the fridge.
Q: How long does it last in the refrigerator?
A: Properly stored, it will stay fresh for up to 5 days. Cover loosely with plastic wrap to prevent drying.
Q: Can I freeze No-Bake Oreo Chocolate Cake?
A: Yes. Wrap tightly in plastic and foil, then freeze for up to 2 months. Thaw in the refrigerator for 4–6 hours before serving.
Q: Why is my filling runny?
A: Likely causes include warm ingredients, under-whipped cream, or insufficient chilling. Ensure cream is cold and whipped properly, and allow ample chilling time.
Q: Can I use Cool Whip instead of heavy cream?
A: Yes, one 8-ounce tub of thawed whipped topping can replace the whipped cream. The texture will be lighter and slightly less rich.
Q: Is it safe to leave this cake out at room temperature?
A: No. Due to the dairy content (cream cheese and whipped cream), it should not sit out for more than 2 hours. Always refrigerate.
Q: Can I use milk chocolate instead of dark?
A: Yes, but milk chocolate is sweeter and softer. The cake will be sweeter and may set slightly softer.
Q: How do I get clean slices?
A: Use a sharp knife dipped in hot water and wiped dry between cuts for neat, professional-looking slices.
Summary
The No-Bake Oreo Chocolate Cake is a rich, creamy, and effortlessly elegant dessert that combines the iconic flavor of Oreos with a luxuriously smooth chocolate filling—no oven required. Simple to make, endlessly customizable, and guaranteed to impress, it’s the perfect treat for any occasion.