Introduction
Welcome to the world of effortless elegance—where rich, velvety cheesecake meets the bright, jubilant burst of cherries—without a single trip to the oven! The No-Bake Cherry Cheesecake is more than just a dessert; it’s a celebration of simplicity, sophistication, and seasonal joy. Whether you’re hosting a summer soirée, preparing a stress-free holiday treat, or simply craving something luxuriously creamy with a vibrant fruity finish, this no-bake marvel delivers every time. Its luscious texture, stunning ruby-red topping, and buttery graham cracker base come together in under 30 minutes of active prep—followed by a gentle chill that transforms it into pure magic. No water baths, no cracked surfaces, no last-minute panic—just dreamy, creamy decadence, perfectly set and ready to impress.
The History
The origins of cheesecake stretch back over two millennia—to ancient Greece, where early versions made with fresh cheese, honey, and wheat were served to athletes at the first Olympic Games in 776 BCE as a source of energy and stamina. Roman adaptations added eggs and crushed cheese, while medieval Europe evolved regional variations using ricotta, cottage cheese, or quark. However, the modern American-style baked cheesecake—with its dense, smooth, cream cheese–based filling—gained prominence in the late 19th century, popularized by New York baker Arnold Reuben in the 1920s and later perfected by cream cheese pioneer William Lawrence (of Philadelphia Cream Cheese fame).
Enter the no-bake revolution: emerging in earnest during the mid-20th century alongside refrigeration accessibility, convenience culture, and the rise of packaged gelatin and stabilized dairy products, no-bake desserts became household staples. Early versions relied heavily on whipped cream, marshmallow fluff, or Knox gelatin to achieve structure without heat. By the 1970s and ’80s, home cooks began experimenting with cream cheese–based no-bake fillings set with unflavored gelatin or condensed milk—and the cherry-topped iteration soon followed, capitalizing on the natural tart-sweet harmony between cherries and cream cheese. Today’s No-Bake Cherry Cheesecake honors this legacy: a refined fusion of ancient tradition, mid-century ingenuity, and contemporary culinary mindfulness—preserving authenticity while embracing accessibility, flexibility, and visual flair.
Ingredients Breakdown
Every exceptional no-bake cheesecake begins not with technique alone—but with intention behind each ingredient. Here’s why each component matters—and how it contributes to the final symphony of flavor, texture, and stability:
- Graham Cracker Crumbs (1 ½ cups): Provides a sturdy, slightly sweet, and subtly spiced foundation. The fine crumbs bind seamlessly with melted butter, forming a compact, crisp-yet-giving base that contrasts beautifully with the airy filling. Gluten-free graham alternatives or digestive biscuits work flawlessly for dietary adaptations.
- Unsalted Butter (6 tbsp, melted): Acts as both binder and flavor enhancer. Melted butter coats each crumb, enabling compaction and imparting richness and subtle nuttiness. Clarified butter may be used for higher heat tolerance (e.g., if briefly warming filling), but standard unsalted butter ensures optimal flavor balance.
- Cream Cheese (24 oz / 680 g, full-fat, room temperature): The soul of the filling. Full-fat, brick-style cream cheese (not spreadable or low-fat) guarantees density, tang, and proper emulsification. Room temperature is non-negotiable—it prevents lumps, ensures silky incorporation, and avoids destabilizing the whipped elements.
- Powdered Sugar (1 cup / 120 g): Offers fine, lump-free sweetness that dissolves instantly—unlike granulated sugar, which can grit the texture. Its cornstarch content also aids in stabilization and contributes to a smoother mouthfeel.
- Heavy Whipping Cream (1 ¼ cups / 300 ml, cold): Adds luxurious body, airiness, and fat-based stability. Chilled cream whips to stiff peaks more reliably, lending volume and resilience to the filling—critical for sliceability and clean presentation.
- Vanilla Extract (2 tsp, pure): Deepens complexity with warm, floral notes that bridge the tang of cream cheese and the brightness of cherries. Avoid imitation vanilla—it lacks nuance and can taste artificial when paired with delicate fruit.
- Unflavored Gelatin (2 ¼ tsp / 7 g, or one standard 0.25-oz packet): The invisible architect of structure. When properly bloomed and dissolved, gelatin forms a delicate protein network that sets the filling firmly—without rubberiness—allowing clean slices even after hours in the fridge. Optional but highly recommended for stability, especially in warm climates or for make-ahead service.
- Cold Water (3 tbsp): Used exclusively to “bloom” the gelatin—rehydrating the granules before gentle heating. This prevents graininess and ensures full dissolution.
- Cherry Topping Ingredients:
- Fresh Pitted Cherries (2 cups, sweet or tart): Offer peak vibrancy, juicy texture, and natural pectin. Bing, Rainier, or Montmorency cherries each bring distinct personality—sweet cherries yield lushness; tart ones add zing and balance.
- Granulated Sugar (⅓–½ cup, to taste): Draws out juices and balances acidity. Adjust based on cherry variety and personal preference—tart cherries may need more sugar; ripe sweet ones less.
- Lemon Juice (1 tbsp, freshly squeezed): Brightens flavor, enhances cherry aroma, and helps preserve color. Its acidity also supports gelatin stability in the topping layer.
- Cornstarch (1 tbsp): Thickens the cherry syrup gently without cloudiness or chalkiness—ideal for glossy, clingy coverage. Arrowroot or tapioca starch are excellent 1:1 substitutes for corn-free needs.
- Water or Cherry Juice (¼ cup): Provides liquid medium for simmering and thickening—cherry juice (reserved from pitting) intensifies flavor and deepens color.
- Optional Luxe Additions: A splash of kirsch (cherry brandy) in the filling or topping adds aromatic depth; a pinch of almond extract (⅛ tsp) complements cherry’s natural marzipan notes; edible rose petals or micro mint garnish elevate visual poetry.
Step-by-Step Recipe
Follow this meticulously tested, chef-refined sequence for guaranteed success—every time.
- Prepare the Crust: In a food processor or zip-top bag with a rolling pin, finely crush graham crackers until uniformly sandy (no large shards). Transfer to a bowl, add melted butter, and stir vigorously with a spatula or fork until all crumbs are evenly moistened and resemble wet sand. Press firmly and evenly into the bottom—and 1 inch up the sides—of a 9-inch springform pan using the back of a measuring cup or flat-bottomed glass. Refrigerate for at least 30 minutes (or freeze for 15) to fully set. This step prevents crumbling during slicing and creates a clean separation between crust and filling.
- Bloom the Gelatin: In a small heatproof bowl, combine cold water and unflavored gelatin. Let sit undisturbed for 5 minutes until opaque, spongy, and fully absorbed—this is essential for smooth integration later.
- Whip the Cream: Using chilled beaters and a chilled bowl, whip cold heavy cream on medium-high speed until soft peaks form (about 2–3 minutes). Increase speed to high and continue whipping just until stiff, glossy peaks hold their shape—do not overbeat into butter. Immediately transfer to a separate bowl and refrigerate while preparing the filling (keeps it cool and stable).
- Beat the Cream Cheese Base: In a large mixing bowl, beat room-temperature cream cheese on medium speed for 1–2 minutes until completely smooth, creamy, and free of lumps. Scrape down sides thoroughly. Gradually add powdered sugar in two additions, beating on low until incorporated, then increase to medium for 30 seconds to aerate and dissolve any trace granules. Add vanilla and mix just until combined.
- Incorporate the Gelatin: Gently reheat the bloomed gelatin over low heat (microwave in 5-second bursts or use a double boiler) until fully liquefied—do not boil. Let cool 1 minute. With mixer running on low, slowly drizzle warm gelatin into cream cheese mixture. Beat for 15–20 seconds until fully homogenized—no streaks, no separation.
- Fold in the Whipped Cream: Using a large silicone spatula, add one-third of the whipped cream to the cream cheese mixture and fold gently but thoroughly to lighten the base. Then, add remaining whipped cream in two batches, folding with broad, slow strokes from bottom to top—rotating the bowl as you go. Stop as soon as no white streaks remain. Overmixing deflates air and compromises lightness.
- Fill & Level: Pour filling into the chilled crust. Smooth the top with an offset spatula or the back of a spoon dipped in hot water for a glassy finish. Tap pan sharply on counter 2–3 times to release air bubbles. Cover loosely with plastic wrap (avoid touching surface) and refrigerate for minimum 8 hours—or ideally, overnight (12+ hours) for optimal firmness, clean cuts, and flavor melding.
- Prepare the Cherry Topping: While cheesecake chills, pit fresh cherries (reserve juice if possible). In a medium saucepan, combine cherries, sugar, lemon juice, cornstarch, and water (or reserved cherry juice). Stir over medium-low heat until sugar dissolves, then increase to medium. Bring to a gentle simmer, stirring constantly. Cook 5–7 minutes until thickened, glossy, and bubbling steadily—cherries should be tender but still hold shape. Remove from heat and cool completely (at least 1 hour) to prevent melting the filling. For ultra-smooth texture, press through a fine-mesh sieve to remove skins/seeds (optional but elegant).
- Assemble & Garnish: Once cheesecake is fully set, carefully run a thin knife around inner edge of springform pan to loosen. Release clasp and gently lift off outer ring. Spoon cooled cherry topping evenly over surface, spreading with an offset spatula to cover completely. Let rest 15 minutes in fridge to set topping. Garnish with whole cherries, mint leaves, toasted almond slivers, or a dusting of freeze-dried cherry powder for professional polish.
Tips
- Temperature Is Everything: All dairy ingredients—cream cheese, heavy cream, even the bowl and beaters—must be cold (for cream) or room temperature (for cream cheese). Skipping this causes splitting, graininess, or poor aeration.
- Patience with Bloom & Dissolve: Never skip blooming gelatin—or rush dissolving it. Under-bloomed gelatin won’t hydrate fully; overheated gelatin loses setting power. Use a thermometer if unsure—ideal dissolution temp is 140–160°F (60–71°C).
- Crust Compaction Is Key: Press crust with firm, even pressure—not just fingertips, but the flat base of a cup. Uneven pressure = uneven bake (well, chill!) and potential sliding layers.
- Chill Time Cannot Be Rushed: While 6 hours may *technically* set it, 12+ hours yields dramatically cleaner slices, better texture contrast, and intensified flavor harmony. Overnight chilling is the secret weapon of pros.
- Knife Technique for Flawless Slices: Dip a sharp, thin-bladed knife in hot water, wipe dry, slice, then repeat before each cut. This prevents dragging, smearing, or cracking—and preserves the pristine cherry surface.
- Prevent Weeping: If condensation appears on the surface after removal from fridge, gently pat dry with a paper towel—never wipe. Excess moisture often stems from incomplete cooling of cherry topping before application.
- Springform Pan Wisdom: Always use a high-quality, leak-proof 9-inch springform pan. Line the *outside* bottom with aluminum foil before wrapping in plastic to guard against accidental water seepage during chilling (especially if storing in a humid drawer).
- Storage Savvy: Keep covered tightly in fridge for up to 5 days. Do not freeze the assembled dessert—the cherry layer may weep and texture may degrade. However, unbaked crust and plain filling (without topping) freeze well for up to 2 months—thaw overnight in fridge before topping and serving.
Variations and Customizations
This recipe is a canvas—not a cage. Embrace creativity while honoring structural integrity:
- Dietary Adaptations:
- Vegan: Swap cream cheese for blended silken tofu + coconut cream + lemon juice + nutritional yeast; use coconut oil–based graham crust; thicken topping with agar-agar instead of cornstarch.
- Gluten-Free: Use certified GF graham crackers or almond flour + oats crust; verify cornstarch is GF (most are, but check labels).
- Low-Sugar/Keto: Replace powdered sugar with erythritol-based confectioner’s blend (1:1); use keto-approved graham alternative (almond/coconut flour + psyllium); top with macerated fresh cherries + stevia-sweetened reduction.
- Flavor Twists:
- Chocolate-Dipped Crust: Drizzle melted dark chocolate over chilled crust before filling—adds bittersweet contrast.
- Bourbon-Cherry Swirl: Fold 2 tbsp bourbon-infused cherry compote into filling before chilling for marbled elegance.
- Lavender-Cherry: Infuse cherry syrup with ½ tsp culinary lavender buds (strain before cooling); add ⅛ tsp lavender extract to filling.
- White Chocolate Cherry: Melt and cool 4 oz white chocolate; fold into cream cheese base before adding whipped cream.
- Texture & Presentation Upgrades:
- Crunch Layer: Add ½ cup toasted chopped pistachios or candied pecans between crust and filling.
- Layered Elegance: Create a three-tier effect—crust, thin layer of filling, cherry compote, second filling layer, final cherry blanket.
- Individual Jars: Serve in 8-oz mason jars—crust on bottom, filling, then cherry topping—perfect for picnics or portion control.
- Deconstructed Style: Serve components separately—mini crust “cookies,” quenelles of cheesecake mousse, and a pool of cherry coulis—with mint and edible flowers.
- Seasonal Rotations:
- Summer Berry Medley: Swap cherries for mixed raspberries, blackberries, and strawberries.
- Fall Spiced Pear: Use poached spiced pears + cinnamon graham crust + cardamom in filling.
- Winter Cranberry-Orange: Tart cranberry-orange compote + orange zest in filling + candied orange peel garnish.
- Spring Rhubarb-Strawberry: Roasted rhubarb-strawberry jam topping + ginger snap crust.
Health Considerations and Nutritional Value
While undeniably indulgent, this No-Bake Cherry Cheesecake offers surprising nutritional nuance—especially when thoughtfully prepared. Per standard slice (1/12 of recipe, approx. 240g), estimates are as follows:
- Calories: ~385 kcal — moderate for a dessert, especially given satiating fats and protein.
- Total Fat: 26 g (16 g saturated) — primarily from cream cheese and heavy cream. Opting for reduced-fat cream cheese lowers sat fat by ~30%, though texture may soften slightly.
- Carbohydrates: 32 g (24 g sugars) — largely from added sugars in crust, filling, and topping. Using monk fruit–sweetened graham crackers and reducing topping sugar by 25% cuts net carbs meaningfully.
- Protein: 6 g — contributed by cream cheese (a dairy protein source) and modest amounts from graham crumbs.
- Fiber: 1 g — naturally low, but boosted significantly with whole-grain graham crust or addition of chia/flax seeds to crust (1 tbsp adds ~3g fiber).
- Vitamins & Minerals: Contains calcium (from dairy), vitamin A (retinol in cream), small amounts of B12 and K2 (fermented dairy compounds), plus antioxidants from cherries—especially anthocyanins (anti-inflammatory, neuroprotective), vitamin C, and potassium.
Health-Conscious Notes:
- Cherries Are Functional Superstars: Tart cherries have been studied for supporting muscle recovery, sleep regulation (natural melatonin), and reducing oxidative stress. Fresh or frozen (unsweetened) retain maximum phytonutrient value.
- Gelatin Is Gut-Friendly: As a collagen-derived protein, gelatin supports gut lining integrity and joint health—making this dessert unexpectedly aligned with wellness-forward eating patterns.
- Portion Mindfulness: Serving in smaller 3-inch mini springforms or layered parfaits encourages mindful enjoyment without excess.
- Allergen Awareness: Naturally nut-free (unless garnished), but contains dairy and gluten (unless substituted). Always disclose ingredients for guests with sensitivities.
Ingredients
Makes one 9-inch cheesecake (12 servings)
For the Crust:
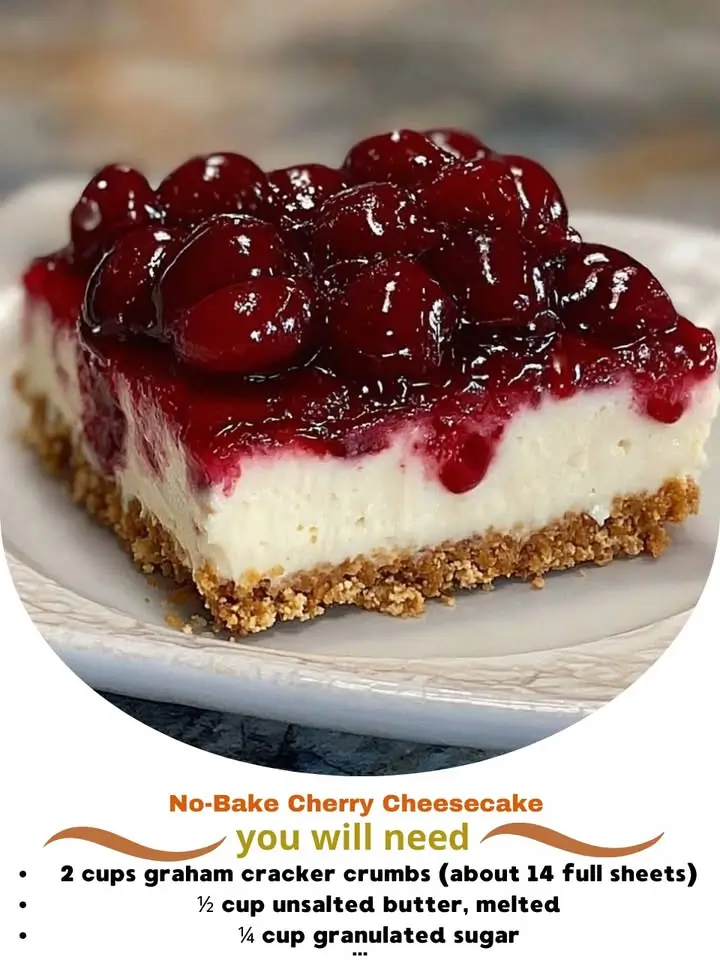
- 1 ½ cups (150 g) graham cracker crumbs (about 12 full sheets)
- 6 tablespoons (85 g) unsalted butter, melted
- ¼ teaspoon fine sea salt (optional, enhances flavor)
For the Filling:
- 24 oz (680 g) full-fat brick-style cream cheese, at room temperature
- 1 cup (120 g) powdered sugar, sifted
- 2 teaspoons pure vanilla extract
- 2 ¼ teaspoons (7 g) unflavored gelatin powder (1 standard packet)
- 3 tablespoons cold water
- 1 ¼ cups (300 ml) cold heavy whipping cream (minimum 36% fat)
For the Cherry Topping:
- 2 cups (300 g) fresh pitted sweet or tart cherries (Bing, Montmorency, or Rainier)
- ⅓–½ cup (65–100 g) granulated sugar (adjust to taste and cherry tartness)
- 1 tablespoon fresh lemon juice
- 1 tablespoon cornstarch
- ¼ cup (60 ml) water or reserved cherry juice
- Optional: 1 teaspoon kirsch or almond extract
For Garnish (optional):
- Fresh cherries, mint leaves, toasted sliced almonds, edible flowers, or freeze-dried cherry powder
Directions
- Make the Crust: Preheat oven to 350°F (175°C) only if using a pre-baked crust variation (not required for classic no-bake). Otherwise, proceed directly to crushing. Pulse graham crackers in a food processor until fine crumbs form, about 15–20 seconds. Alternatively, place crackers in a zip-top bag and crush with a rolling pin. Transfer crumbs to a medium bowl. Add melted butter and salt; stir with a fork until mixture resembles wet sand and holds together when pinched. Press firmly and evenly into bottom and 1 inch up sides of a 9-inch springform pan. Refrigerate uncovered for at least 30 minutes (or freeze 15 minutes) until firm.
- Bloom the Gelatin: In a small microwave-safe bowl, whisk together cold water and gelatin. Let stand 5 minutes until thickened and sponge-like.
- Whip the Cream: In a large chilled bowl, using chilled beaters, whip cold heavy cream on medium-high until soft peaks form (~2 minutes). Increase speed to high and whip just until stiff, glossy peaks hold their shape (another 30–60 seconds). Do not overwhip. Transfer to a separate bowl and refrigerate immediately.
- Prepare Cream Cheese Base: In a large mixing bowl, beat cream cheese with electric mixer on medium speed for 1–2 minutes until completely smooth and creamy. Scrape down sides and bottom of bowl. Add powdered sugar in two additions, beating on low until combined, then medium for 30 seconds. Add vanilla and beat 10 seconds more.
- Dissolve Gelatin: Microwave bloomed gelatin in 5-second intervals, stirring between each, until fully liquefied (about 15–25 seconds total). Let cool 1 minute. With mixer on low, slowly drizzle warm gelatin into cream cheese mixture. Beat 15–20 seconds until fully incorporated and smooth.
- Fold in Whipped Cream: Add one-third of whipped cream to cream cheese mixture; fold gently with a silicone spatula until mostly combined. Add remaining whipped cream in two additions, folding slowly and deliberately until no white streaks remain—about 45–60 seconds total. Do not overmix.
- Assemble & Chill: Pour filling into chilled crust. Smooth top with an offset spatula or damp spoon. Tap pan sharply on counter 3 times to release air bubbles. Cover loosely with plastic wrap (not touching surface) and refrigerate for minimum 8 hours—or preferably 12–24 hours—for best texture and sliceability.
- Prepare Cherry Topping: Pit cherries, reserving any juice. In a medium saucepan, combine cherries, sugar, lemon juice, cornstarch, water (or cherry juice), and optional kirsch/almond extract. Stir over medium-low heat until sugar dissolves (~2 minutes). Increase heat to medium and bring to a gentle simmer. Cook, stirring constantly, until thickened, glossy, and bubbling steadily—about 5–7 minutes. Cherries should be tender but intact. Remove from heat and cool completely (1 hour minimum) to room temperature, then refrigerate until cold (~30 minutes more). For silky texture, press through a fine-mesh sieve.
- Finish & Serve: Run a thin knife around inner edge of pan. Carefully remove outer ring. Spoon cherry topping evenly over chilled cheesecake. Spread gently to cover. Refrigerate 15 minutes to set topping. Garnish as desired. Slice with hot, dry knife between cuts. Serve chilled.
FAQ
- Can I make this ahead of time?
- Absolutely—and highly recommended! This cheesecake tastes even better after 24–48 hours of chilling, as flavors deepen and textures harmonize. Fully assembled, it keeps beautifully in the refrigerator for up to 5 days, tightly covered.
- Why does my filling look grainy or lumpy?
- Almost always due to cold cream cheese. Ensure it’s truly at room temperature (soft to the touch, no resistance when pressed with finger)—and avoid microwaving to “speed it up,” which causes partial cooking and separation.
- Can I omit the gelatin?
- You can—but with caveats. Without gelatin, rely entirely on whipped cream and thorough chilling. It will be softer, more mousse-like, and less sliceable—best served with a spoon from the pan. For stability without gelatin, substitute ¼ cup cold full-fat Greek yogurt or 2 tbsp instant clearjel.
- My cherry topping is too runny—or too thick. What went wrong?
- Runny topping usually means undercooking or insufficient cornstarch activation (needs 2+ minutes of steady simmer). Too-thick? Likely overcooked or excess cornstarch—next time, reduce to 2 tsp cornstarch and monitor closely. Always cool topping fully before applying—it thickens further as it chills.
- Can I use frozen cherries?
- Yes! Thaw completely and drain well in a fine-mesh strainer, pressing gently to remove excess liquid. Reserve ¼ cup of the juice for the sauce—it adds incredible depth. Frozen cherries work especially well for off-season preparations.
- Is there a dairy-free version?
- Yes—with careful substitutions: Use cultured coconut cream cheese (e.g., Kite Hill or Miyoko’s), full-fat coconut cream (chilled overnight, solid part only) instead of heavy cream, and agar-agar (1 tsp agar powder boiled in ¼ cup water for 2 mins) instead of gelatin. Chill at least 10 hours for firm set.
- Why does my crust stick to the pan?
- Ensure the pan is impeccably clean and dry before pressing crust. Lightly greasing the pan *before* adding crumbs is unnecessary—and can cause slippage. More likely: insufficient chilling time before filling, or removing the ring too soon. Always chill crust 30+ minutes, and wait until cheesecake is fully set before releasing.
- Can I freeze this cheesecake?