Lemon Bars: A Zesty Delight for Every Occasion
Lemon bars are one of the most beloved desserts in American baking culture—tangy, sweet, buttery, and utterly irresistible. With their bright citrus flavor and smooth, custard-like filling set atop a shortbread crust, they strike the perfect balance between tart and sweet. Whether served at picnics, potlucks, or as an elegant finish to a dinner party, lemon bars consistently win over hearts with their refreshing taste and simple elegance. This comprehensive guide will walk you through everything you need to know about making perfect lemon bars—from their history and ingredients to detailed instructions, variations, health considerations, and frequently asked questions.
The History of Lemon Bars
The exact origin of lemon bars is difficult to trace, but their roots lie in early 20th-century American home baking traditions. Shortbread-based bar desserts became increasingly popular during the 1920s and 1930s, especially with the rise of accessible citrus fruits and the introduction of modern ovens that allowed for consistent baking results. The combination of a rich, buttery crust with a vibrant lemon curd topping likely evolved from British lemon tarts and meringue pies, adapted into a more convenient, sliceable bar format.
Lemon bars gained widespread popularity in the United States during the 1970s and 1980s, appearing in community cookbooks, church fundraisers, and culinary magazines. Their simplicity, affordability, and crowd-pleasing flavor made them staples at gatherings across the country. Today, variations of lemon bars can be found in bakeries nationwide, often elevated with gourmet touches like lavender-infused zest, thyme garnishes, or even vegan and gluten-free adaptations.
Ingredients Breakdown: What Makes Lemon Bars So Delicious?
The magic of lemon bars lies in the harmony of just a few high-quality ingredients. Each component plays a crucial role in achieving the perfect texture and flavor profile:
- All-Purpose Flour: Provides structure to the shortbread crust. Sifted flour ensures a tender, crumbly base without toughness.
- Butter (Unsalted): High-fat content gives the crust its melt-in-your-mouth richness. Room-temperature butter blends smoothly with sugar and flour for a cohesive dough.
- Powdered Sugar: Adds sweetness while contributing to a fine, delicate crumb in the crust. It also helps create a slightly crisp surface when baked.
- Eggs: Act as a binding agent and provide body to the lemon filling. They help form a silky custard that sets firmly after baking.
- Granulated Sugar: Sweetens the tart lemon juice and balances acidity. The ratio of sugar to lemon juice is key to achieving balanced flavor.
- Fresh Lemon Juice: The star ingredient. Freshly squeezed juice delivers a bright, clean tanginess that bottled juice cannot match. Two to three large lemons typically yield enough juice.
- Lemon Zest: Adds intense citrus aroma and enhances the overall lemon flavor without extra liquid. Use only the yellow part of the peel to avoid bitterness.
- Salt: Enhances all other flavors and prevents the dessert from tasting flat.
- Confectioners’ Sugar (for dusting): Applied generously on top before serving, it adds visual appeal and a subtle sweetness that contrasts the tart center.
Optional additions include a pinch of vanilla extract for depth, or a small amount of cornstarch to stabilize the filling in humid climates.
Step-by-Step Recipe: How to Make Perfect Lemon Bars
Follow these detailed steps to create bakery-quality lemon bars at home. Precision and timing are essential for achieving a firm yet creamy filling and a perfectly golden crust.
Ingredients
- 1 cup (2 sticks / 226g) unsalted butter, softened
- 1/2 cup (60g) powdered sugar
- 2 cups (250g) all-purpose flour
- 1/4 teaspoon salt
- 4 large eggs
- 1 1/2 cups (300g) granulated sugar
- 1/4 cup (30g) all-purpose flour
- 2/3 cup (160ml) freshly squeezed lemon juice (about 3–4 medium lemons)
- 1 tablespoon finely grated lemon zest
- Confectioners’ sugar, for dusting
Directions
- Preheat Oven & Prepare Pan: Preheat your oven to 350°F (175°C). Line a 9×13-inch baking pan with parchment paper, leaving overhang on two sides for easy removal. Lightly grease any exposed pan areas.
- Make the Crust: In a large bowl, beat the softened butter and powdered sugar together until light and fluffy (about 2–3 minutes). Gradually add the 2 cups of flour and salt, mixing on low speed until the dough comes together into a soft, crumbly mass. Press the mixture evenly into the bottom of the prepared pan using your fingers or the back of a spoon. Smooth the surface completely.
- Bake the Crust: Bake for 20–25 minutes, or until the edges are lightly golden and the center looks dry. Remove from the oven but keep the oven running. Let the crust cool slightly while you prepare the filling.
- Prepare the Filling: In a medium bowl, whisk the eggs until fully beaten. Add the granulated sugar and whisk vigorously for 1–2 minutes until slightly thickened. Stir in the 1/4 cup flour, lemon juice, lemon zest, and salt. Mix until fully combined and smooth. For extra silkiness, strain the mixture through a fine-mesh sieve to remove any pulp or zest chunks.
- Add Filling to Crust: Pour the lemon filling over the warm crust, spreading it evenly with a spatula. Return the pan to the oven.
- Bake Until Set: Bake for 25–30 minutes, or until the filling is set around the edges and only slightly jiggles in the center when gently shaken. Avoid overbaking, which can cause cracking or a rubbery texture.
- Cool Completely: Transfer the pan to a wire rack and allow the bars to cool to room temperature (about 1 hour). Then refrigerate for at least 2 hours—or ideally overnight—to ensure the filling firms up properly for clean slicing.
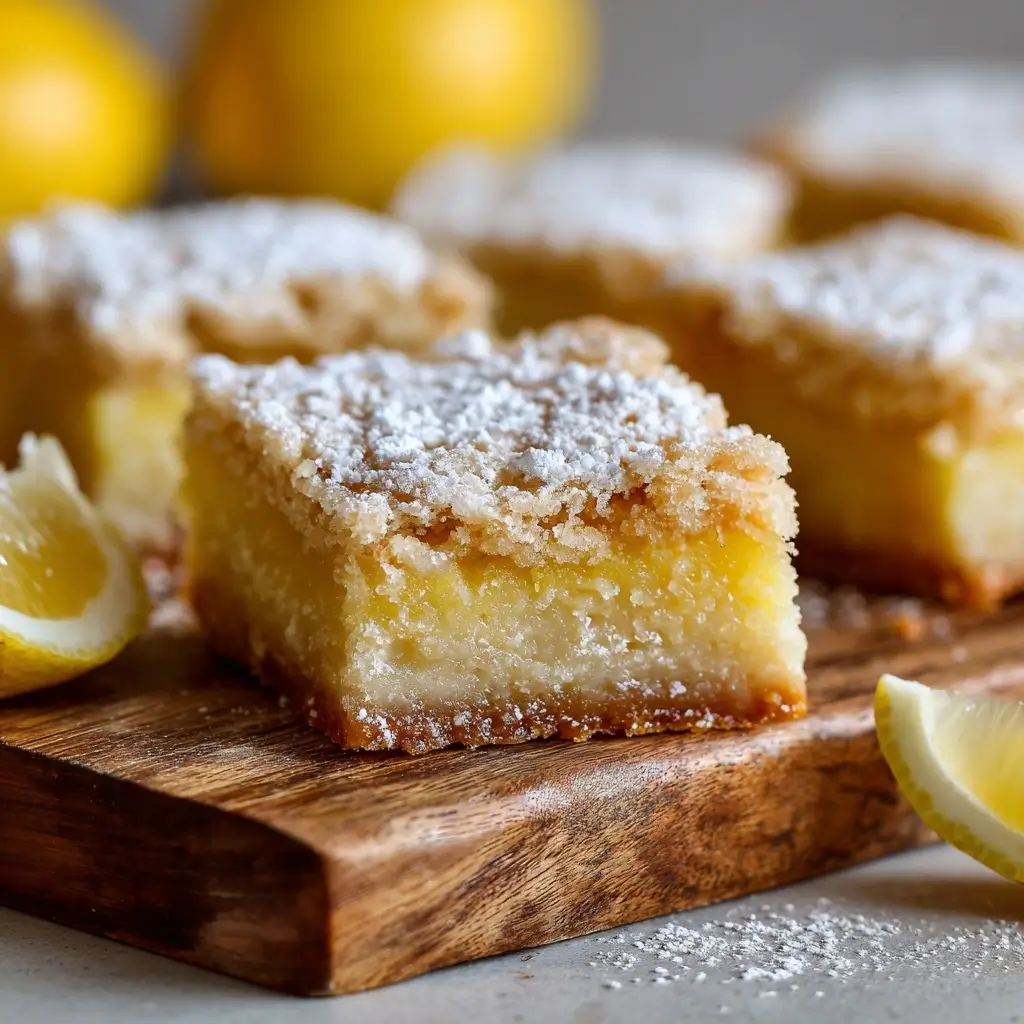
- Cut and Serve: Using the parchment overhang, lift the entire slab out of the pan. Place on a cutting board. Dust generously with confectioners’ sugar. Use a sharp knife dipped in hot water and wiped dry between cuts to slice into 24 squares (or rectangles). Wipe the blade clean after each cut for neat edges.
- Final Touch: Dust with additional confectioners’ sugar just before serving for maximum visual impact.
Tips for Success: Expert Advice for Flawless Lemon Bars
- Use Fresh Lemons: Never substitute bottled lemon juice—it lacks brightness and contains preservatives that dull flavor.
- Zest First: Grate the lemon zest before juicing; it’s easier when the fruit is whole and firm.
- Avoid Overmixing the Crust: Overworking the dough can develop gluten, leading to a tough base. Mix only until the dough forms.
- Don’t Skip Chilling: Refrigeration is non-negotiable. It allows the filling to set fully and makes cutting effortless.
- Sharp Knife Technique: Warm the knife under hot water, wipe it dry, and use a gentle sawing motion. Clean between cuts.
- Prevent Browning: If the crust browns too quickly during pre-bake, tent loosely with foil.
- Room Temperature Eggs: Cold eggs can cause the filling to take longer to set and may affect texture.
- Sieve the Filling: Straining removes fibrous bits and ensures a velvety-smooth consistency.
- Uniform Thickness: Press the crust evenly—thinner spots may burn, thicker ones won’t cook through.
- Storage Tip: Keep bars covered in the fridge; they last up to 5 days. Freeze for up to 3 months (wrap individually).
Variations and Customizations: Make It Your Own
While classic lemon bars are timeless, there’s plenty of room for creativity. Try these delicious twists:
- Lime or Orange Bars: Substitute lemon juice and zest with lime or orange for a tropical flair. Grapefruit works too, though it’s more bitter.
- Berry Swirl: Add a layer of raspberry or strawberry jam over the crust before pouring in the filling, then swirl gently.
- Herb-Infused: Add a pinch of chopped fresh thyme, rosemary, or basil to the filling for an aromatic twist.
- Ginger-Lemon: Mix 1/2 teaspoon ground ginger or 1 tablespoon minced crystallized ginger into the filling for warmth and spice.
- Coconut Crust: Replace 1/2 cup of flour in the crust with finely shredded coconut for a tropical touch.
- Almond Shortbread: Add 1/4 cup almond flour to the crust for nutty depth and enhanced tenderness.
- Vegan Lemon Bars: Use plant-based butter, flax eggs (1 tbsp ground flax + 3 tbsp water per egg), and cornstarch instead of flour in the filling. Opt for refined coconut oil if needed.
- Gluten-Free Version: Substitute all-purpose flour with a 1:1 gluten-free baking blend containing xanthan gum.
- Mini Bars: Bake in a muffin tin for individual portions—use liners for easy removal.
- White Chocolate Drizzle: Melt white chocolate and drizzle over cooled bars for added sweetness and elegance.
Health Considerations and Nutritional Value
Lemon bars are undeniably indulgent, but understanding their nutritional makeup can help you enjoy them mindfully.
Nutrition Facts (Per Serving – 1 of 24 bars):
- Calories: ~160–180
- Total Fat: 8–10g (mostly from butter)
- Saturated Fat: 5g
- Cholesterol: 35–40mg
- Sodium: 40–60mg
- Total Carbohydrates: 22–25g
- Sugars: 15–17g (natural and added)
- Protein: 2g
- Vitamin C: ~6–8mg (from lemon juice, supports immune function)
- Calcium & Iron: Small amounts from eggs and flour
Health Notes:
- High in Sugar: Due to both granulated and powdered sugars, moderation is key, especially for diabetics or those monitoring blood sugar.
- Dairy Content: Contains butter and sometimes milk derivatives—check labels if sensitive.
- Egg Allergies: Not suitable for individuals with egg allergies unless modified with safe substitutes.
- Portion Control: Cutting smaller bars allows for enjoyment without excess calorie intake.
- Balanced Pairing: Serve with Greek yogurt or a green salad to offset richness.
- Lemons Offer Benefits: Rich in vitamin C, antioxidants, and flavonoids that support skin health and reduce inflammation.
Frequently Asked Questions (FAQ)
Q: Why did my lemon bars turn out runny?
A: Underbaking is the most common cause. Ensure the center jiggles only slightly when shaken. Humid environments may require a few extra minutes. Also, skipping the chilling step can result in soft bars.
Q: Can I make lemon bars ahead of time?
A: Absolutely! They keep well in the refrigerator for up to 5 days. In fact, chilling improves texture. Dust with powdered sugar just before serving to prevent dissolving.
Q: Can I freeze lemon bars?
A: Yes! Wrap tightly in plastic wrap and place in an airtight container. Freeze for up to 3 months. Thaw in the fridge for 2–3 hours before serving. Dust with sugar after thawing.
Q: My bars cracked on top—what went wrong?
A: Cracking usually happens due to overbaking or rapid cooling. Avoid placing hot bars near drafts or cold surfaces. Slight cracks are normal and get covered by powdered sugar anyway.
Q: Can I use lime or orange instead of lemon?
A: Yes! Limes offer a sharper tang; oranges are sweeter. Adjust sugar accordingly—limes may need less, oranges might need a bit more to balance mild acidity.
Q: Is there a way to reduce the sugar?
A: You can reduce granulated sugar by 1/4 cup, but don’t eliminate it entirely—it’s necessary for texture and balancing acidity. Taste the filling before pouring.
Q: Can I use a different pan size?
A: Yes, but baking times will vary. An 8×8-inch pan will yield thicker bars requiring longer bake time (~35–40 mins total). A jelly roll pan makes thinner, crispier bars.
Q: Do lemon bars need to be refrigerated?
A: Yes, due to the egg-based filling, they must be stored in the refrigerator. They last 4–5 days when covered.
Q: Can I double the recipe?
A: Yes, but use a larger sheet pan (10×15-inch) or double the batch and bake in two separate 9×13 pans. Do not overcrowd.
Q: Can I make them dairy-free?
A: Yes—use a high-quality plant-based butter alternative like Miyoko’s or Earth Balance. Results are nearly identical when chilled properly.
Summary
Lemon bars are a timeless dessert combining a buttery shortbread crust with a luscious, tangy lemon filling, creating a perfect balance of sweet and sour in every bite. Easy to make, endlessly customizable, and always a crowd-pleaser, they’re a must-have in any baker’s repertoire.