Homestyle Chicken and Gravy: A Hearty, Comforting Classic
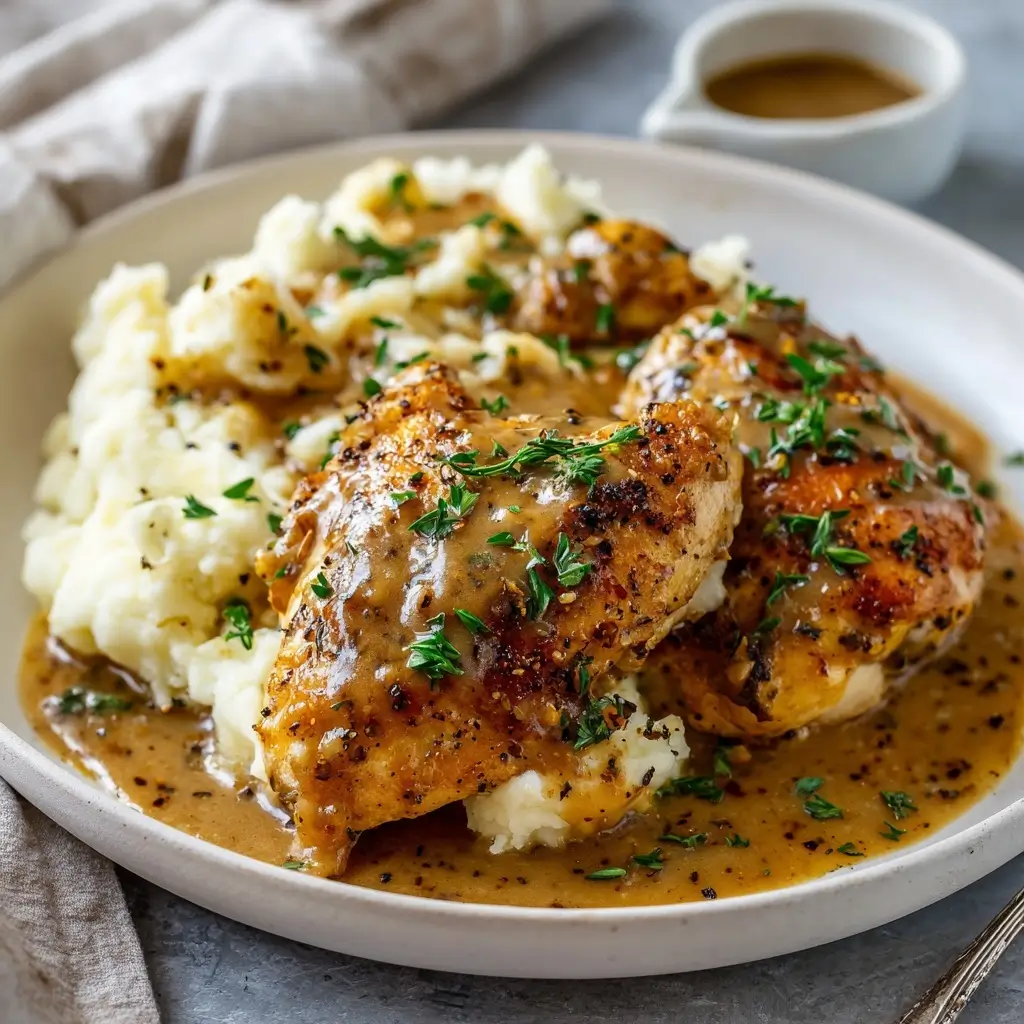
There’s something deeply comforting about a warm plate of homestyle chicken and gravy. This timeless dish evokes memories of Sunday dinners, family gatherings, and the unmistakable aroma wafting from a country kitchen. Tender pieces of chicken smothered in a rich, velvety gravy, often served over fluffy mashed potatoes or buttered biscuits, make this meal a beloved staple across American households. Whether you’re cooking for your family after a long day or preparing a cozy weekend dinner, homestyle chicken and gravy delivers warmth, flavor, and nourishment with every bite.
The History of Homestyle Chicken and Gravy
The roots of homestyle chicken and gravy run deep through American culinary tradition, particularly in Southern and Midwestern home cooking. In rural communities and farm kitchens throughout the 19th and early 20th centuries, resourcefulness was key. Families raised their own chickens and used every part of the bird, often pan-frying or stewing it to create hearty meals. The accompanying gravy was born out of necessity—using the flavorful drippings left behind in the skillet after browning the chicken, cooks would thicken the liquid with flour and milk (or water) to make a simple yet satisfying sauce.
This method of making gravy directly from meat drippings is known as “pan gravy,” and it became a hallmark of down-home comfort food. Over time, regional variations emerged, incorporating buttermilk marinades, cast-iron frying techniques, or slow-simmered stews. The dish evolved not just as a way to feed a family affordably, but as a symbol of hospitality and care. Even today, homestyle chicken and gravy remains a centerpiece of soul food menus, church suppers, and family holiday tables, cherished for its rustic simplicity and emotional resonance.
Ingredients Breakdown: What Makes It So Delicious?
The magic of homestyle chicken and gravy lies in its humble ingredients and how they come together to create layers of flavor. Let’s take a closer look at each component:
- Chicken: Traditionally, bone-in, skin-on pieces like thighs, drumsticks, and breasts are used because they retain moisture during cooking and add richness to the gravy. However, boneless cuts can work for quicker versions.
- Salt and Pepper: Essential seasonings that enhance the natural taste of the chicken and balance the gravy.
- Flour: Used both to dredge the chicken before frying (creating a golden crust) and to thicken the gravy. All-purpose flour is standard, but some cooks use cornstarch or a mix for a smoother texture.
- Fat (Butter, Lard, or Oil): Butter adds a creamy richness to the gravy; lard gives a traditional, slightly nutty depth; vegetable oil ensures crispiness when frying. Many recipes combine fats for optimal flavor and performance.
- Milk or Buttermilk (optional): Often used in marinades to tenderize the chicken and infuse tanginess. Buttermilk is especially popular in Southern-style fried chicken variations.
- Broth or Water: Added to the gravy base to adjust consistency and deepen flavor. Chicken broth enhances savoriness, while water keeps it simpler.
- Garlic Powder, Onion Powder, Paprika: These pantry staples elevate the seasoning profile without requiring fresh prep, though fresh garlic and onions are excellent upgrades.
Each ingredient plays a role in building the final harmony of crispy, juicy chicken and silky, savory gravy that defines the dish.
Step-by-Step Recipe: How to Make Perfect Homestyle Chicken and Gravy
Follow this detailed guide to recreate a classic, foolproof version of homestyle chicken and gravy that will impress even seasoned home cooks.
Ingredients
- 3–4 pounds bone-in, skin-on chicken pieces (thighs, drumsticks, breasts)
- Salt and freshly ground black pepper (to taste)
- 1 tablespoon garlic powder
- 1 tablespoon onion powder
- 1 teaspoon paprika (optional, for color and warmth)
- 1½ cups all-purpose flour
- ¾ cup buttermilk (optional, for marinating)
- ½ cup unsalted butter (or ¼ cup lard + ¼ cup butter)
- 2 cups whole milk (or chicken broth for dairy-free option)
- 1 teaspoon dried thyme (optional)
- 1 bay leaf (optional)
Directions
- Prepare the Chicken: Pat the chicken pieces dry with paper towels—this ensures better browning. Season generously with salt, pepper, garlic powder, onion powder, and paprika. If using buttermilk, place chicken in a bowl, cover with buttermilk, and refrigerate for 1–4 hours. This step tenderizes the meat and helps the flour coating adhere better.
- Dredge the Chicken: Place flour in a shallow dish or paper bag. Remove chicken from buttermilk (if using), letting excess drip off, then coat thoroughly in flour. Shake off any excess. For extra-crispy results, double-dip: flour → buttermilk → flour again.
- Preheat Skillet and Fat: Heat a large cast-iron or heavy-bottomed skillet over medium-high heat. Add butter (or lard/butter mix) until melted and shimmering. The fat should coat the bottom of the pan evenly.
- Fry the Chicken: Carefully place chicken pieces in the hot skillet, skin-side down. Do not overcrowd—work in batches if necessary. Fry for 6–8 minutes per side, depending on size, until golden brown and internal temperature reaches 165°F (74°C). Reduce heat if browning too quickly. Once cooked, transfer to a wire rack or plate lined with paper towels. Set aside but keep warm.
- Make the Gravy Base: With about 3–4 tablespoons of fat remaining in the skillet, sprinkle in ¼ cup of the same flour used for dredging. Whisk constantly over medium heat for 2–3 minutes to form a roux. Cook until golden blonde (for white gravy) or light brown (for deeper flavor). Be careful not to burn.
- Gradually Add Liquid: Slowly pour in milk or broth while whisking continuously to prevent lumps. Start with a small amount and gradually increase, ensuring smooth incorporation. Continue stirring as the mixture thickens.
- Season and Simmer: Add thyme, bay leaf (if using), and additional salt and pepper to taste. Bring to a gentle simmer and cook for 5–8 minutes, stirring occasionally, until the gravy coats the back of a spoon. Remove bay leaf before serving.
- Serve: Return the chicken pieces to the skillet to warm through in the gravy, or serve the gravy generously ladled over each piece on individual plates. Best enjoyed immediately.
Tips for the Best Homestyle Chicken and Gravy
- Don’t skip drying the chicken: Moisture prevents proper browning. Dry skin = crispier results.
- Use a meat thermometer: Ensures chicken is fully cooked without guesswork. Target 165°F in the thickest part.
- Control the heat: Too high, and the flour burns; too low, and the chicken steams instead of fries. Medium to medium-high is ideal.
- Whisk constantly when making gravy: Prevents lumps and ensures a smooth, velvety texture.
- Add drippings wisely: After removing chicken, reserve flavorful browned bits (fond) in the pan—they’re flavor gold!
- Adjust thickness: If gravy is too thick, add more milk or broth. If too thin, simmer longer or mix a teaspoon of cornstarch with cold water and stir in.
- Rest the chicken: Letting it sit for a few minutes after frying keeps juices inside.
Variations and Customizations
One of the joys of homestyle chicken and gravy is its adaptability. Here are several ways to customize the recipe to suit dietary needs, flavor preferences, or regional styles:
- Southern Fried Style: Use buttermilk marinade, add cayenne pepper or hot sauce to the flour, and fry in peanut oil for extra crunch.
- Country-Style White Gravy: Skip the chicken browning step and make sausage gravy instead, then top baked chicken pieces with it for a hybrid dish.
- Baked Version: For a lighter twist, bake floured chicken at 375°F for 40–45 minutes, then make gravy separately on the stove.
- Slow Cooker Method: Brown chicken first, then transfer to a slow cooker with a little broth. Cook on low for 6–8 hours. Make gravy on the stovetop afterward using the cooking liquid.
- Dairy-Free Gravy: Substitute milk with unsweetened almond milk, oat milk, or full-fat coconut milk. Use olive oil or avocado oil instead of butter.
- Gluten-Free Option: Replace all-purpose flour with a gluten-free blend (ensure it contains a thickener like xanthan gum) or use rice flour for dredging and thickening.
- Herb-Infused Gravy: Add rosemary, sage, or tarragon during the simmering stage for aromatic complexity.
- Creamy Mushroom Gravy: Sauté sliced mushrooms in the skillet before making the roux, then proceed with the recipe for an earthy twist.
Health Considerations and Nutritional Value
While homestyle chicken and gravy is undeniably delicious, it’s important to consider its nutritional content, especially if you’re mindful of calorie, fat, or sodium intake.
A typical serving (one thigh with ½ cup gravy) may contain approximately:
- Calories: 450–600 kcal
- Protein: 25–35g (excellent source from chicken)
- Fat: 25–35g (varies based on skin, fat type, and gravy richness)
- Saturated Fat: 10–15g
- Carbohydrates: 20–30g (mainly from flour)
- Sodium: 600–1000mg (can be reduced by using low-sodium broth and limiting added salt)
Health Tips:
- Skinless Chicken: Removing the skin before eating reduces fat and calories significantly.
- Leaner Cuts: Use skinless chicken breasts or remove excess fat from thighs.
- Whole Grain Flour: Substitute half the all-purpose flour with whole wheat or oat flour for added fiber.
- Lower-Fat Dairy: Use low-fat or skim milk in the gravy to cut saturated fat.
- Portion Control: Serve smaller amounts of gravy and pair with steamed vegetables or salad for balance.
- Oven-Baking: Baking instead of frying reduces added fat and creates a healthier alternative without sacrificing too much flavor.
With mindful adjustments, homestyle chicken and gravy can still be part of a balanced diet—especially when enjoyed occasionally and paired with nutrient-rich sides.
Frequently Asked Questions (FAQ)
Q: Can I use boneless chicken?
A: Yes! Boneless thighs or breasts work well, but reduce cooking time as they cook faster than bone-in cuts. Watch closely to avoid drying out.
Q: Why is my gravy lumpy?
A: Lumps usually form from adding liquid too quickly or not whisking enough. To fix, strain the gravy or blend briefly with an immersion blender.
Q: Can I make this ahead of time?
A: Yes. Cook the chicken and store it separately from the gravy. Reheat gently on the stove, adding a splash of milk to refresh the gravy.
Q: How do I reheat leftovers?
A: Warm in a skillet over low heat with a bit of milk or broth to loosen the gravy. Avoid microwaving for long periods, which can toughen chicken.
Q: Can I freeze homestyle chicken and gravy?
A: Absolutely. Store in airtight containers for up to 3 months. Thaw overnight in the fridge and reheat slowly to maintain texture.
Q: What sides go well with chicken and gravy?
A: Classic pairings include mashed potatoes, mac and cheese, green beans, cornbread, buttered noodles, or collard greens.
Q: Is this the same as chicken-fried steak?
A: The cooking technique is similar (dredged, fried, topped with gravy), but chicken-fried steak uses beef cube steak. The flavors are nearly identical, making them cousins in comfort food.
Summary
Homestyle chicken and gravy is a soul-warming dish that combines crispy, juicy chicken with a rich, creamy gravy made from pan drippings—perfect for comforting family meals. Rooted in tradition and endlessly customizable, it’s a timeless recipe that brings love and flavor to every table.