Glazed Donuts – Best Homemade Recipe
Introduction
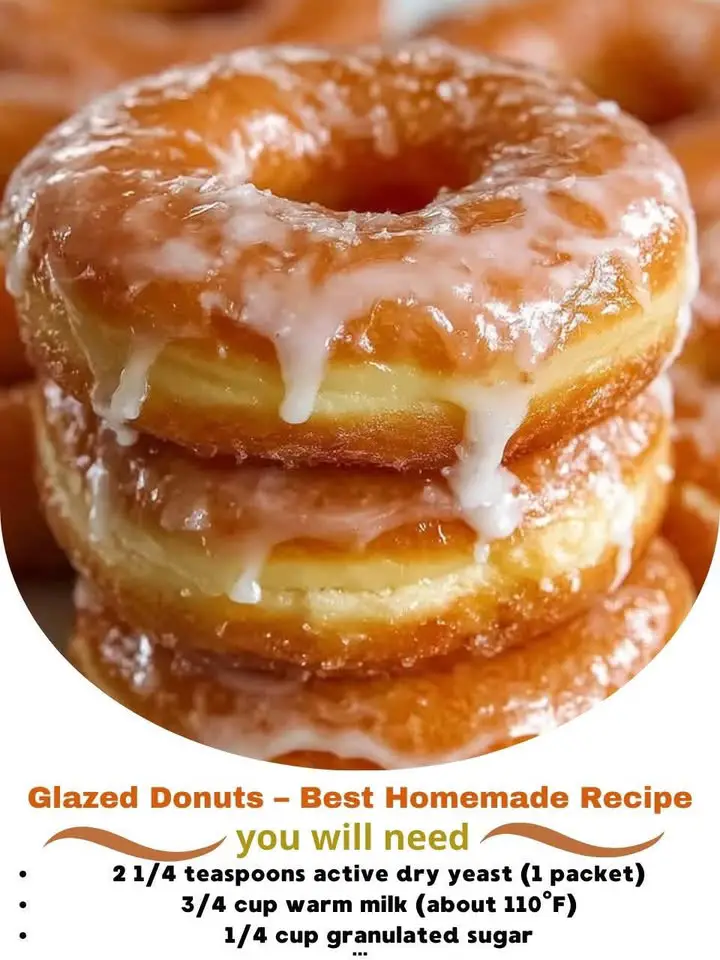
There’s something undeniably magical about a freshly made glazed donut—soft, pillowy, subtly sweet, and crowned with a glossy, melt-in-your-mouth sugar coating that shimmers like edible silk. Unlike mass-produced versions laden with stabilizers and artificial flavors, homemade glazed donuts offer warmth, authenticity, and the unmistakable aroma of yeast-risen dough baking to golden perfection. This recipe isn’t just about replicating a classic—it’s about mastering technique, understanding fermentation, and embracing the joy of baking from scratch. Whether you’re a seasoned home baker or embarking on your first yeasted pastry project, this guide delivers foolproof methods, science-backed tips, and thoughtful adaptations so every batch turns out tender, airy, and irresistibly glazed.
The History
The glazed donut traces its roots to 19th-century America, evolving from Dutch “olykoeks” (oily cakes) brought by early settlers to New Amsterdam. These fried dough treats were traditionally enriched with eggs, butter, and spices—and often filled with fruit or nuts. The breakthrough came in the early 1900s when Adolph Levitt, a Brooklyn bakery owner, invented the first automated donut machine in 1920, dramatically increasing consistency and production speed. Around the same time, the iconic “glaze”—a simple confectioners’ sugar–milk–vanilla mixture—emerged as a popular finishing touch, prized for its clean sweetness and luminous sheen. By the 1930s, glazed donuts had become synonymous with American comfort food, fueled by roadside diners, wartime rationing ingenuity (substituting scarce ingredients), and post-war suburban baking culture. Today, artisanal bakers worldwide honor this legacy while innovating with heirloom flours, cultured dairy, and natural flavor infusions—all while keeping the soul of the original intact: simplicity, texture, and celebration in every bite.
Ingredients Breakdown
Every ingredient plays a precise functional role—not just for flavor, but for structure, rise, tenderness, and shelf life:
- Whole Milk (1 cup, warmed to 105–110°F): Provides lactose for yeast nutrition, proteins for gluten development, and fat for richness. Using whole milk (not skim or ultra-pasteurized) ensures optimal fermentation and browning.
- Granulated Sugar (¼ cup): Feeds yeast during proofing and contributes to crust caramelization. Too little delays rise; too much can inhibit yeast activity.
- Active Dry Yeast (2¼ tsp / one ¼-oz packet): The leavening engine. Always verify freshness by “blooming” in warm milk + sugar for 5–10 minutes until foamy. Instant yeast may be substituted 1:1 but doesn’t require blooming.
- Eggs (2 large, room temperature): Add moisture, emulsify fats, strengthen gluten network, and enrich crumb. Room-temp eggs incorporate more evenly and prevent dough chilling.
- Salted Butter (⅓ cup, unsalted preferred, melted & cooled): Tenderizes gluten, adds flavor and mouthfeel, and improves shelf life via fat coating of starch granules. Must be cooled to avoid killing yeast.
- All-Purpose Flour (4 to 4½ cups, unbleached, measured by weight if possible): Provides gluten-forming proteins. Start with 4 cups and add gradually—the ideal dough is soft, slightly tacky, and pulls cleanly from bowl sides. Bread flour may be used for chewier texture (reduce by 1–2 tbsp liquid).
- Fine Sea Salt (1½ tsp): Controls yeast activity, enhances flavor complexity, and strengthens gluten elasticity. Never omit—even small amounts are critical for balance.
- Frying Oil (vegetable, canola, or peanut oil, 1–2 inches deep in heavy pot): Neutral smoke point (>400°F) prevents off-flavors. Avoid olive or coconut oil unless refined (unrefined versions burn easily).
- For the Glaze: Confectioners’ sugar (2½ cups, sifted), whole milk (⅓ cup, cold), pure vanilla extract (1½ tsp), and a pinch of salt. Optional: 1 tbsp light corn syrup for extra shine and resistance to cracking.
Step-by-Step Recipe
- Activate the Yeast: In a small saucepan or microwave-safe bowl, gently warm milk to 105–110°F (use an instant-read thermometer). Stir in granulated sugar until dissolved. Sprinkle yeast over surface, stir lightly, and let stand 5–10 minutes until thick, frothy, and doubled in volume. If no foam forms, discard and start over with fresh yeast.
- Mix Wet Ingredients: In a large mixing bowl or stand mixer bowl, whisk together eggs and melted, cooled butter. Pour in activated yeast mixture and stir until uniform.
- Incorporate Dry Ingredients: Whisk 4 cups of flour and salt in a separate bowl. Gradually add to wet mixture on low speed (or by hand with a wooden spoon), mixing just until a shaggy dough forms. Scrape down bowl and hook.
- Knead to Develop Gluten: Switch to dough hook (stand mixer) or turn dough onto lightly floured surface. Knead by machine for 6–8 minutes on medium-low, or by hand for 10–12 minutes, until dough is smooth, elastic, and passes the “windowpane test”: stretch a small piece thinly enough to see light through without tearing. It should feel soft, supple, and only slightly sticky.
- First Rise (Bulk Fermentation): Place dough in a lightly oiled bowl, turning once to coat. Cover tightly with plastic wrap or a damp linen cloth. Let rise at warm room temperature (72–78°F) for 1 hour 30 minutes to 2 hours—or until doubled in size. For deeper flavor, refrigerate overnight (8–12 hours); bring to room temp 30 minutes before shaping.
- Shape the Dough: Gently punch down dough to release gas. Turn onto a lightly floured surface. Roll to ½-inch thickness using a floured rolling pin. Chill dough sheet for 15 minutes—this firms butter and prevents spreading during cutting. Cut with a 3-inch round cutter (dip in flour between cuts), then use a ¾-inch cutter for the center hole. Re-roll scraps once only (overworking yields tough donuts).
- Second Rise (Proofing): Place cut donuts and holes on parchment-lined baking sheets, spaced 2 inches apart. Cover loosely with oiled plastic wrap or reusable proofing covers. Proof at 75–80°F for 30–45 minutes until puffed, jiggly, and nearly doubled. They should leave a slight indentation when gently pressed with fingertip—and bounce back slowly.
- Heat the Oil: Fill a heavy-bottomed Dutch oven or deep fryer with 1½ inches oil. Heat to 350–360°F using a candy/deep-fry thermometer. Maintain temperature within ±5°F—too cool = greasy; too hot = burnt exterior, raw center.
- Fry to Golden Perfection: Carefully slide 2–3 donuts into oil using a slotted spatula or spider strainer (do not overcrowd). Fry 45–60 seconds per side, flipping once with chopsticks or tongs when golden-brown and puffed. Adjust heat as needed to hold temp. Transfer to wire rack set over paper towels to drain excess oil.
- Glaze While Warm: Prepare glaze by whisking sifted confectioners’ sugar, cold milk, vanilla, and salt until smooth and pourable (add 1 tsp milk at a time if too thick; 1 tsp sugar if too thin). Dip each warm (not hot) donut top-down into glaze, lift straight up, and allow excess to drip off for 5–8 seconds. Place on wire rack to set—glaze will firm in 15–20 minutes at room temperature.
Tips
- Temperature Is Everything: Yeast dies above 130°F and stalls below 70°F. Use a digital thermometer for milk, oil, and ambient proofing space. A proofing box, oven with light on (no heat), or microwave with a mug of hot water are reliable low-cost options.
- Flour Measurement Matters: Scooping directly from the bag compacts flour—leading to dry, dense donuts. Instead, fluff flour in bag, spoon into measuring cup, and level with a knife—or better yet, weigh: 1 cup AP flour = 120–125 g.
- Don’t Skip the Chill: Chilling rolled dough prevents excessive spreading and improves hole definition. It also relaxes gluten, making cutting cleaner and frying more consistent.
- Oil Management: Strain and store cooled frying oil in an airtight container for up to 3 reuses. Discard if dark, smoky, or smells rancid. Keep a fire extinguisher nearby—and never leave hot oil unattended.
- Glaze Timing & Texture: Glaze only when donuts are warm (about 90–100°F)—too hot melts glaze; too cool causes poor adhesion. For matte finish, use all milk. For high-gloss, add 1 tbsp corn syrup or ½ tsp light agave. Stir glaze constantly while dipping to maintain homogeneity.
- Yeast Substitutions: If using instant yeast, mix directly with dry ingredients—no blooming required. Reduce total liquid by 1 tbsp to compensate for lack of activation step.
- Altitude Adjustment: Above 3,000 ft? Reduce yeast by ¼ tsp, increase liquid by 1–2 tsp, and shorten both rises by ~20%. Monitor closely—dough rises faster in thinner air.
Variations and Customizations
Flavor Infusions: Add 1 tsp orange or lemon zest to dough for citrus brightness; swirl 2 tbsp dulce de leche into glaze; steep 1 cinnamon stick or 3 cardamom pods in warm milk before blooming yeast for aromatic depth.
Textural Twists: Fold in ½ cup toasted walnuts, chopped pecans, or freeze-dried raspberry pieces after first rise. Or press a single roasted almond into each donut pre-fry for elegant crunch.
Dietary Adaptations:
- Gluten-Free: Substitute certified GF all-purpose blend (with xanthan gum) + 1 tsp additional xanthan gum. Increase milk by 1–2 tbsp and add 1 extra egg yolk for binding. Expect slightly denser crumb—best served same-day.
- Dairy-Free: Replace milk with full-fat canned coconut milk (well-stirred), butter with refined coconut oil or vegan butter, and glaze with almond or oat milk. Note: Coconut milk imparts subtle sweetness—reduce sugar in dough by 1 tbsp.
- Lower-Sugar: Reduce granulated sugar to 2 tbsp and glaze sugar to 1¾ cups. Boost flavor with ½ tsp almond extract + 1 tsp maple extract in glaze.
- Protein-Boosted: Replace ¼ cup flour with unflavored whey or pea protein isolate. Add 1 extra egg white to dough and reduce milk by 1 tbsp.
Seasonal & Artisan Styles:
- Pumpkin Spice: Replace ¼ cup milk with pumpkin purée; add 1½ tsp pumpkin pie spice to dry ingredients; top with maple-cinnamon glaze (½ tsp cinnamon + 1 tbsp maple syrup in glaze).
- Berries & Cream: Fill with stabilized vanilla pastry cream; dip in white chocolate–raspberry glaze (melt ½ cup white chocolate, whisk in 2 tbsp seedless raspberry jam + 1 tsp lemon juice).
- Matcha-Lavender: Whisk 1½ tsp culinary-grade matcha + ½ tsp dried lavender buds into dry ingredients; glaze with honey-lavender glaze (replace 1 tbsp milk with local honey; infuse 1 tsp lavender in warm milk 10 min, then strain).
- Everything Bagel Donut: After glazing, immediately sprinkle with everything seasoning (sesame, poppy, dried garlic, dried onion, coarse salt) before glaze sets.
Health Considerations and Nutritional Value
While glazed donuts are inherently indulgent, mindful preparation can enhance their nutritional profile without sacrificing enjoyment. A standard homemade glazed donut (3.5″ diameter, ~75g) contains approximately:
- Calories: 280–320 kcal
- Total Fat: 12–14 g (7–8 g saturated, primarily from butter)
- Carbohydrates: 42–46 g (28–32 g added sugars from glaze + dough)
- Protein: 4–5 g
- Fiber: 0.8–1.2 g (increases to 2–3 g with whole wheat or oat flour substitutions)
- Sodium: 220–260 mg
Nutrition Enhancements:
- Whole Grain Option: Substitute up to 50% of AP flour with white whole wheat flour—adds B vitamins, magnesium, and 2x the fiber without overwhelming flavor or density.
- Healthy Fats: Replace half the butter with avocado oil or high-oleic sunflower oil for monounsaturated fat boost and neutral taste.
- Reduced Glycemic Impact: Use coconut sugar (lower GI) in dough—but note it won’t activate yeast as effectively; pair with full yeast quantity and extend rise by 15–20 minutes.
- Functional Add-Ins: Stir 1 tbsp ground flaxseed or chia seeds into dough for omega-3s and soluble fiber. Soak seeds in 2 tsp water first to prevent grittiness.
Mindful Enjoyment Tips:
- Serve as part of a balanced breakfast: pair with Greek yogurt, seasonal fruit, and herbal tea.
- Freeze unfrosted donuts for up to 3 months—thaw at room temp and glaze fresh for best texture.
- Avoid daily consumption—reserve for special occasions or weekend treats to support long-term metabolic health.
- For children: cut into smaller “donut bites” to control portion size and encourage slower eating.
Ingredients
Makes 14–16 donuts + 14–16 holes
Dough:
- 1 cup (240 ml) whole milk, warmed to 105–110°F
- ¼ cup (50 g) granulated sugar
- 2¼ tsp (7 g / one ¼-oz packet) active dry yeast
- 2 large eggs, room temperature
- ⅓ cup (75 g) unsalted butter, melted and cooled to 100°F
- 4 to 4½ cups (480–540 g) unbleached all-purpose flour, plus more for dusting
- 1½ tsp (9 g) fine sea salt
Frying Oil:
- Vegetable, canola, or peanut oil (enough to fill pot 1½ inches deep)
Classic Vanilla Glaze:
- 2½ cups (300 g) sifted confectioners’ sugar
- ⅓ cup (80 ml) cold whole milk
- 1½ tsp pure vanilla extract
- Pinch of fine sea salt
- (Optional) 1 tbsp light corn syrup for enhanced shine and stability
Directions
- Activate the yeast: In a small heatproof bowl or saucepan, combine warm milk and granulated sugar. Stir until sugar dissolves. Sprinkle yeast evenly over surface. Let sit undisturbed for 5–10 minutes until creamy, foamy, and fragrant—like warm brioche batter. If inactive, discard and begin again with fresh yeast.
- Mix wet base: In the bowl of a stand mixer fitted with paddle attachment (or large mixing bowl), whisk eggs and melted, cooled butter until emulsified. Pour in activated yeast mixture and whisk vigorously for 30 seconds until uniform.
- Add dry ingredients: In a separate bowl, whisk together 4 cups flour and salt. With mixer on low, gradually add flour mixture to wet ingredients in 3 additions, mixing just until incorporated after each. Dough will be shaggy and sticky.
- Knead the dough: Switch to dough hook. Knead on medium-low for 6–8 minutes until smooth, supple, and elastic. Alternatively, knead by hand on floured surface for 10–12 minutes. Test windowpane: stretch small piece thinly—if translucent without tearing, gluten is fully developed.
- First rise: Lightly oil a large bowl. Place dough inside, turning to coat. Cover tightly with plastic wrap or damp linen. Let rise in warm, draft-free spot for 1 hour 30 minutes to 2 hours—or until visibly doubled. For overnight method: refrigerate covered for 8–12 hours. Bring to room temperature 30 minutes before shaping.
- Roll & cut: Punch down risen dough gently. Turn onto lightly floured surface. Roll to even ½-inch thickness. Transfer to parchment-lined baking sheet and refrigerate 15 minutes. Using floured 3-inch round cutter, cut donuts. Use floured ¾-inch cutter for centers. Place on parchment-lined sheets, 2 inches apart. Cover loosely with oiled plastic. Let rise 30–45 minutes until puffed and jiggly.
- Heat oil: Pour oil into heavy-bottomed Dutch oven to 1½-inch depth. Heat over medium heat to 350–360°F. Maintain with thermometer—adjust burner as needed.
- Fry: Carefully lower 2–3 donuts into oil with slotted spatula. Fry 45–60 seconds per side, flipping once, until deep golden brown and puffed. Drain on wire rack over paper towels. Repeat, allowing oil to reheat between batches.
- Glaze: While donuts cool slightly (to ~95°F), prepare glaze: sift sugar into bowl; whisk in cold milk, vanilla, salt, and optional corn syrup until smooth and glossy (no lumps). Adjust consistency—add milk 1 tsp at a time if too thick; sugar 1 tbsp at a time if too thin.
- Finish: Holding donut by edge, dip top-side straight down into glaze. Lift vertically, letting excess drip for 5–8 seconds. Place on wire rack. Glaze will set in 15–20 minutes. Serve same-day for optimal texture.
FAQ
- Can I make these donuts without a stand mixer?
- Absolutely. Hand-kneading yields excellent results—just ensure thorough gluten development. Use the “slap and fold” method: lift dough, slap firmly onto counter, fold in half, rotate 90°, repeat for 8–10 minutes until smooth and elastic.
- Why did my donuts absorb too much oil?
- Most commonly due to oil temperature being too low (<340°F), under-proofed dough (dense interior traps oil), or overcrowding the fryer. Always verify temp with thermometer—not visual cues—and fry in small batches.
- Can I bake instead of fry?
- Yes—but they’ll be “donut muffins,” not true yeast-raised donuts. For baked version: scoop ¼-cup portions into greased donut pans; proof 30 minutes; bake at 350°F for 10–12 minutes. Texture will be cakier and less airy.
- How do I store leftover donuts?
- Un-glazed donuts freeze beautifully for up to 3 months—wrap individually in parchment + foil. Thaw at room temp, then glaze fresh. Glazed donuts are best eaten within 12 hours; after that, refrigerate in airtight container for up to 2 days (glaze may soften).
- Can I prepare dough ahead?
- Yes! After first rise, punch down, shape into ball, cover, and refrigerate for up to 24 hours. Next day, let rest at room temp 30 minutes, then roll, cut, and proceed with second rise. Flavor deepens beautifully with cold fermentation.
- My glaze cracked or became dull—is that fixable?
- Crazing occurs when glaze dries too fast (low humidity, warm donuts) or contains too much sugar relative to liquid. Prevent by glazing warm—not hot—donuts in moderate humidity. For shine: add corn syrup or replace 1 tbsp milk with heavy cream. If already cracked, gently rewarm glaze and re-dip.
- Can I use a sourdough starter instead of yeast?
- Yes—replace ¾ cup warm milk + yeast with 1 cup active, bubbly 100% hydration sourdough starter. Reduce flour by ½ cup and sugar by 1 tbsp. Extend first rise to 4–6 hours at room temp or 12–16 hours refrigerated for complex tang.
- What’s the best way to reheat donuts?
- Air fryer at 320°F for 1.5–2 minutes restores crispness without drying. Avoid microwave—it makes them rubbery. Never re-fry.
Summary
This ultimate homemade glazed donut recipe delivers bakery-quality results through meticulous attention to temperature, timing, technique, and ingredient integrity—yielding tender, airy rings with a luminous, delicately sweet glaze that sets to a perfect satin finish.
Backed by historical context, nutritional insight, dozens of creative variations, and real-world troubleshooting, it empowers bakers of all levels to master the craft—not just follow instructions—and transform a humble treat into a joyful, memorable, and deeply satisfying experience.