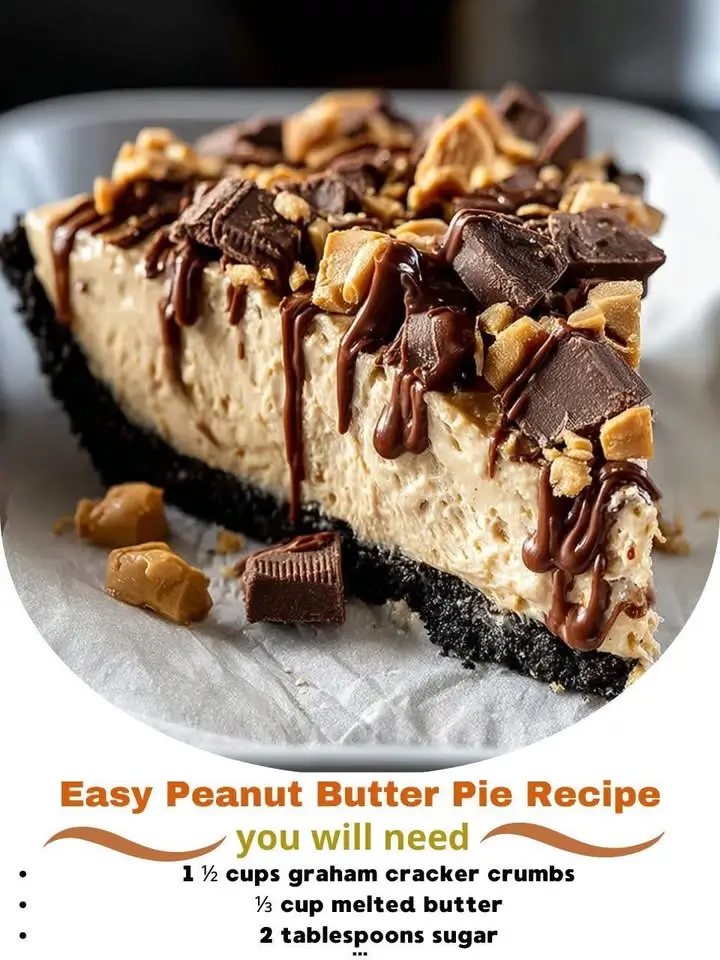
Easy Peanut Butter Pie Recipe
If you’re a fan of rich, creamy, and indulgent desserts, this Easy Peanut Butter Pie is your new go-to treat. With its velvety filling, buttery crust, and minimal prep time, it’s the perfect dessert for family dinners, potlucks, holidays, or just satisfying a sweet tooth craving. Whether you’re an experienced baker or a beginner in the kitchen, this no-bake peanut butter pie is simple, foolproof, and incredibly delicious. In this comprehensive guide, we’ll walk you through everything you need to know—from the history of peanut butter pie to ingredient details, step-by-step instructions, helpful tips, variations, nutritional insights, and frequently asked questions.
The History of Peanut Butter Pie
Peanut butter pie has roots that trace back to American culinary traditions, particularly from the mid-20th century when peanut butter became a household staple. Originally popularized as a Southern dessert, it emerged alongside other comfort classics like banana pudding and chess pie. The rise in popularity of creamy peanut butter during the 1940s and 1950s made it a natural candidate for inclusion in sweet recipes.
The earliest versions were likely adaptations of cream pies, where custard was replaced with a mixture of peanut butter, sugar, and dairy ingredients. Over time, the recipe evolved with the availability of pre-made graham cracker crusts and whipped toppings, making it even easier for home cooks to prepare. Today, peanut butter pie is celebrated not only for its nostalgic flavor but also for its versatility—serving as a base for countless creative twists, including chocolate swirls, banana layers, and even vegan versions.
Ingredients Breakdown
To make the perfect Easy Peanut Butter Pie, it’s important to understand each ingredient and its role in creating the final texture and flavor profile. Here’s a detailed look at what goes into this decadent dessert:
- Graham Cracker Crumbs (1 ½ cups): Form the base of the crust, providing a slightly sweet, crunchy texture. You can use honey graham crackers for extra flavor or gluten-free alternatives if needed.
- Unsalted Butter (6 tablespoons, melted): Binds the crumbs together and adds richness to the crust. Melted butter helps create a firm yet tender base once chilled.
- Brown Sugar (2 tablespoons): Enhances the caramel-like depth in the crust, balancing sweetness and adding complexity.
- Creamy Peanut Butter (1 cup): The star ingredient! Use natural or regular creamy peanut butter—avoid extra chunky unless you want texture variation. Opt for brands without added sugars or oils for a cleaner taste.
- Powdered Sugar (¾ cup): Sweetens the filling while contributing to a smooth, silky consistency. Sift it to prevent lumps.
- Cold Heavy Cream (1 ¼ cups): Whipped to soft peaks, this gives the pie its airy, cloud-like texture. Cold cream whips better and holds shape longer.
- Cream Cheese (8 oz, softened): Adds tanginess and structure to the filling, preventing it from being overly sweet or runny.
- Vanilla Extract (1 teaspoon): Balances flavors and enhances overall aroma. Pure extract is recommended over imitation.
- Salt (¼ teaspoon): A small amount brings out the nuttiness of the peanut butter and rounds out the sweetness.
- Chocolate Chips or Shavings (optional garnish): For contrast, many people sprinkle mini chocolate chips or drizzle melted chocolate on top before serving.
- Chopped Peanuts (optional topping): Adds crunch and visual appeal, especially when toasted lightly.
All ingredients should be at room temperature (except the heavy cream, which should stay cold) to ensure proper blending and stability in the final product.
Step-by-Step Recipe
Follow these detailed steps to create a flawless Easy Peanut Butter Pie that’s creamy, flavorful, and picture-perfect every time.
- Prepare the Crust: In a medium bowl, combine graham cracker crumbs, melted butter, and brown sugar. Mix until the crumbs are evenly moistened and resemble wet sand. Press the mixture firmly into the bottom and up the sides of a 9-inch pie dish using the back of a spoon or a flat-bottomed glass. Chill in the refrigerator for at least 15 minutes to set.
- Beat the Cream Cheese: In a large mixing bowl, beat the softened cream cheese with an electric mixer on medium speed until smooth and creamy, about 1–2 minutes. Scrape down the sides of the bowl to ensure even mixing.
- Add Peanut Butter and Sweeteners: Add the creamy peanut butter, powdered sugar, vanilla extract, and salt. Beat on low speed until combined, then increase to medium and mix until completely smooth and fluffy, about 2–3 minutes. Stop and scrape the bowl as needed.
- Whip the Heavy Cream: In a separate clean bowl, pour the cold heavy cream. Using chilled beaters or a whisk attachment, whip the cream on high speed until soft peaks form—this usually takes 3–4 minutes. Be careful not to over-whip, or it may turn into butter.
- Fold in Whipped Cream: Gently fold one-third of the whipped cream into the peanut butter mixture using a spatula to lighten it. Then add the remaining whipped cream and continue folding gently until fully incorporated and no white streaks remain. This preserves the airiness of the whipped cream.
- Assemble the Pie: Remove the chilled crust from the fridge. Pour the peanut butter filling into the crust and spread evenly with the spatula. Smooth the top for a polished appearance.
- Chill the Pie: Cover loosely with plastic wrap or aluminum foil and refrigerate for at least 4 hours, preferably overnight, to allow the filling to set properly.
- Garnish and Serve: Before serving, garnish with optional toppings such as chopped peanuts, mini chocolate chips, a drizzle of melted chocolate, or a dollop of whipped cream. Slice with a sharp knife dipped in warm water for clean cuts.
Tips for the Best Peanut Butter Pie
- Use Full-Fat Ingredients: For the creamiest texture, always use full-fat cream cheese and heavy cream. Low-fat versions may result in a watery or grainy filling.
- Don’t Skip Chilling the Crust: Allowing the crust to chill before filling prevents sogginess and ensures a crisp bite.
- Room Temperature Cream Cheese: Soften the cream cheese ahead of time—leaving it out for 30–60 minutes—to avoid lumps in the filling.
- Avoid Overmixing: Once you add the whipped cream, fold gently. Overmixing deflates the air and results in a denser pie.
- Refrigeration Time Is Key: Don’t rush the chilling process. At least 4 hours is essential; 6–8 hours or overnight yields the best sliceability.
- Freeze for Firmer Texture: If you prefer a more ice cream-like consistency, freeze the pie for 1–2 hours before serving.
- Prevent Weeping: To avoid condensation or moisture on the surface, cover the pie with parchment paper before wrapping tightly in plastic.
- Toast Your Nuts: Lightly toasting chopped peanuts before sprinkling them on top enhances their flavor and crunch.
Variations and Customizations
This Easy Peanut Butter Pie is highly adaptable. Try these fun twists to suit different tastes and dietary needs:
- Chocolate Peanut Butter Pie: Swirl melted chocolate into the filling or layer chocolate ganache at the bottom of the crust before adding the peanut butter mixture.
- Double-Crust Version: Make a second batch of crust and crumble it on top for added texture.
- Banana Peanut Butter Pie: Add a layer of sliced bananas between the crust and filling, or blend ripe banana into the peanut butter mixture for a PB&B twist.
- Oreo Crust: Replace graham crackers with crushed Oreo cookies for a cookies-and-cream style crust.
- Nutella Swirl: Drizzle Nutella over the top and use a toothpick to create a marbled effect.
- Vegan Option: Use dairy-free margarine, vegan cream cheese, coconut cream instead of heavy cream, and a plant-based chocolate crust. Choose natural peanut butter with no honey.
- Gluten-Free Version: Use certified gluten-free graham crackers or a gluten-free cookie crust alternative.
- Keto-Friendly Adaptation: Substitute powdered erythritol or monk fruit sweetener for powdered sugar, use a low-carb crust (like almond flour and butter), and ensure sugar-free peanut butter.
- Mini Pies: Prepare the filling in individual graham cracker crusts or mason jars for portable servings.
- Boozy Twist: Add 1–2 tablespoons of bourbon or rum to the filling for an adult version—pairs beautifully with peanut butter!
Health Considerations and Nutritional Value
While undeniably delicious, it’s worth considering the nutritional content of this dessert, especially if you’re watching calories, fat, or sugar intake.
Nutritional Breakdown (per serving, based on 8 slices):
- Calories: ~450–500 kcal
- Total Fat: 32–36g (including 12–15g saturated fat)
- Carbohydrates: 38–42g (including 28–32g sugar)
- Protein: 8–10g
- Dietary Fiber: 2–3g
- Sodium: ~250–300mg
Health Notes:
- Peanut butter provides healthy monounsaturated fats, protein, and essential vitamins like vitamin E and niacin.
- Cream cheese and heavy cream contribute saturated fats, so moderation is advised, especially for those managing cholesterol.
- The high sugar content comes primarily from powdered and brown sugars—consider reducing quantities slightly or using sugar substitutes for lower-sugar versions.
- For heart-healthy benefits, choose natural peanut butter with no added hydrogenated oils or excess sodium.
- This pie contains dairy and gluten (unless modified), so it may not be suitable for individuals with lactose intolerance, milk allergies, or celiac disease unless adapted accordingly.
Enjoy this pie occasionally as part of a balanced diet. Pairing it with fresh fruit like strawberries or apple slices can help balance the meal.
Full Ingredient List
- 1 ½ cups graham cracker crumbs (about 10–12 full sheets)
- 6 tablespoons unsalted butter, melted
- 2 tablespoons brown sugar
- 1 cup creamy peanut butter (not natural oil-separated type unless stirred well)
- ¾ cup powdered sugar, sifted
- 8 oz cream cheese, softened to room temperature
- 1 ¼ cups cold heavy whipping cream
- 1 teaspoon pure vanilla extract
- ¼ teaspoon salt
- Optional toppings: chopped peanuts, chocolate shavings, whipped cream, banana slices
Detailed Directions
- Make the Crust: Preheat oven to 350°F (175°C) if you prefer a baked crust (optional). Otherwise, proceed with a no-bake version. Combine graham cracker crumbs, melted butter, and brown sugar in a bowl. Stir until uniformly damp. Transfer to a 9-inch pie dish and press firmly into the bottom and up the sides. Bake for 8–10 minutes if desired for a firmer crust, then cool completely. Alternatively, refrigerate unbaked crust for 15 minutes to set.
- Cream Cheese Base: In a stand mixer or large bowl with hand mixer, beat softened cream cheese on medium speed until creamy and lump-free (approx. 1–2 min).
- Incorporate Peanut Butter Mixture: Reduce speed to low. Add peanut butter, powdered sugar, vanilla, and salt. Mix until blended. Increase to medium and beat until smooth and fluffy (~2–3 min). Scrape bowl thoroughly.
- Whip the Cream: In a separate chilled bowl, whip cold heavy cream until soft peaks form (tips curl when beaters are lifted). Do not over-whip to stiff peaks or beyond.
- Combine Fillings: Add ⅓ of whipped cream to peanut butter mixture and stir gently to lighten. Fold in remaining whipped cream with a silicone spatula in two additions, using gentle figure-eight motions to maintain volume.
- Fill the Pie: Pour filling into prepared crust. Spread evenly with offset spatula or back of spoon. Tap dish lightly on counter to release air bubbles.
- Chill Thoroughly: Cover with plastic wrap (place directly on surface to prevent condensation) and refrigerate for minimum 4 hours, ideally 6–8 or overnight.
- Serve: Remove from fridge 10–15 minutes before slicing for cleaner cuts. Garnish as desired. Wipe knife between slices for neat presentation.
- Store: Keep refrigerated in an airtight container or covered pie plate. Consume within 4–5 days. Can be frozen (wrap tightly) for up to 2 months—thaw in fridge before serving.
Frequently Asked Questions (FAQ)
Can I make this pie ahead of time?
Yes! This pie actually improves with time. Make it 1–2 days in advance for optimal flavor and texture.
Why is my filling too runny?
Common causes include warm cream cheese, under-whipped cream, or insufficient chilling. Always use cold cream and fully whip it to soft peaks.
Can I use natural peanut butter?
Yes, but ensure it’s well-stirred and not overly oily. Some natural varieties have higher oil content, which can affect consistency. You may need to reduce added butter or chill longer.
Is this pie gluten-free?
Only if you use gluten-free graham crackers or a GF crust alternative. Standard graham crackers contain wheat.
Can I freeze peanut butter pie?
Absolutely. Freeze uncovered for 1 hour, then wrap tightly in plastic and foil. Thaw in the refrigerator overnight before serving.
Can I use whipped topping instead of heavy cream?
Yes—substitute 1 ½ cups of thawed frozen whipped topping (like Cool Whip) for the whipped cream. This simplifies the process but reduces richness.
How do I prevent cracks in the pie?
Avoid overmixing after adding whipped cream, and don’t let the pie sit in direct airflow (like near an open freezer). Covering the surface with plastic wrap helps.
Can I add chocolate to the filling?
Yes! Melt ½ cup chocolate chips and swirl into the filling before chilling, or melt and drizzle on top after setting.
What’s the difference between this and peanut butter cheesecake?
This pie is lighter due to the whipped cream, while cheesecakes typically rely on eggs and baking. This version is no-bake and fluffier.
Can kids help make this?
Definitely! Measuring ingredients, crushing graham crackers, stirring the crust, and folding in whipped cream are great kid-friendly tasks.
Summary
This Easy Peanut Butter Pie is a no-bake, crowd-pleasing dessert that combines a buttery graham cracker crust with a luxuriously creamy peanut butter filling—ready in minutes with only a few simple ingredients.
Perfect for any occasion, endlessly customizable, and guaranteed to become a family favorite, this classic pie delivers big flavor with minimal effort.