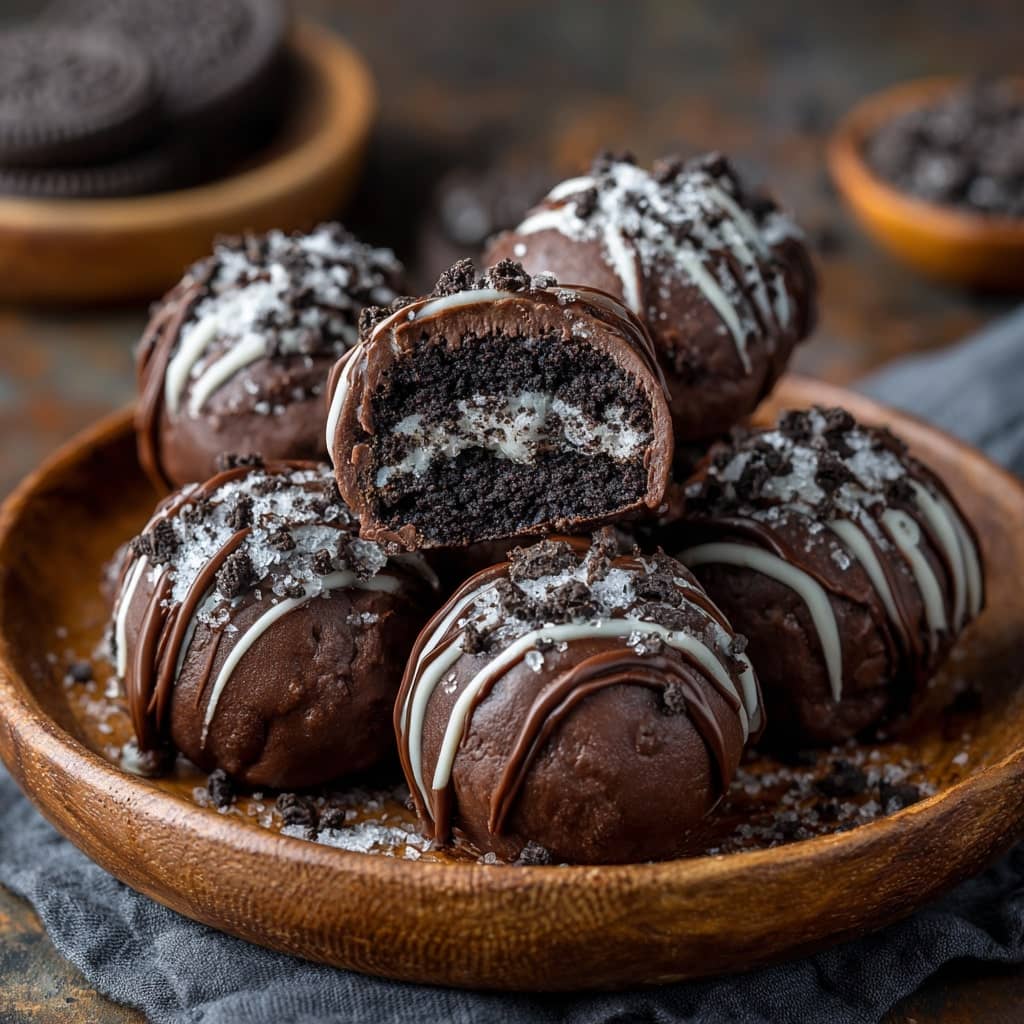
No-bake Oreo cookie bites are the ultimate quick and indulgent treat—decadent, bite-sized, and dangerously easy to make. Requiring only a few ingredients and no oven, these treats are perfect for satisfying sweet cravings in a flash or impressing guests at parties, holidays, or casual gatherings. Their creamy, chocolatey centers wrapped in a smooth coating make them irresistible to kids and adults alike. With minimal prep time and no baking involved, this recipe is ideal for beginner bakers, busy schedules, or warm-weather days when turning on the oven isn’t an option. Whether you’re looking for a sweet gift, a party tray staple, or just a fun weekend project, these no-bake Oreo cookie bites deliver on taste, simplicity, and presentation. Let’s dive into the rich and satisfying world of this beloved treat.
The History of Oreo Cookie Bites
While the Oreo cookie itself dates back to 1912—when it was first introduced by the National Biscuit Company (now Nabisco)—the concept of Oreo cookie bites is a much more recent invention, born from the DIY dessert movement in the early 2000s. Home bakers began experimenting with crushed Oreos, cream cheese, and chocolate coatings, inspired by the ease of truffle recipes and cake balls. The viral rise of dessert videos on platforms like YouTube, Pinterest, and TikTok helped catapult Oreo bites into the mainstream. These no-bake confections appealed to both novice and experienced bakers because they required no special equipment and relied on widely available ingredients. Over time, the recipe has been customized endlessly with different coatings, toppings, and fillings, but the original three-ingredient combination remains a staple of no-fuss dessert making. These cookie bites are now a go-to for holiday platters, potlucks, birthdays, and just-because snacking.
Ingredients Breakdown
Every element in this simple recipe serves a specific role in delivering the creamy-crunchy texture and bold flavor that make Oreo cookie bites so addictive. The primary ingredient is Oreo cookies—a classic chocolate wafer sandwich cookie with a sweet vanilla cream filling. Most recipes use a standard 14.3 oz package, which contains about 36 Oreos. These are crushed into fine crumbs and provide both flavor and structure. Cream cheese is the binding agent—softened to room temperature, it blends with the crushed cookies to create a rich, fudgy dough that holds its shape when rolled. Use full-fat cream cheese for the best consistency and flavor. Lastly, chocolate for coating adds that final polished finish. You can use semisweet, milk, dark, or white chocolate, depending on your preference. Melting wafers or almond bark provide a smooth, easy-to-handle finish, while chopped chocolate or chocolate chips work too when melted with a bit of shortening or coconut oil for shine and workability. Optional add-ins include sprinkles, crushed nuts, or a drizzle of contrasting chocolate for decoration.
Step-by-Step Recipe
Step 1: Start by preparing your ingredients. Place one standard package of Oreo cookies (about 36) into a food processor and pulse until they form fine, uniform crumbs. If you don’t have a food processor, place the cookies in a large zip-top bag and crush them with a rolling pin. Step 2: Transfer the crumbs to a mixing bowl and add 8 ounces (226g) of softened cream cheese. Using a handheld mixer, a spatula, or clean hands, mix until the ingredients are fully combined into a smooth, slightly sticky dough. Step 3: Scoop out small amounts of dough—about 1 tablespoon each—and roll into balls using your hands. Place the formed balls on a parchment-lined baking sheet or tray. Step 4: Chill the balls in the refrigerator for at least 30 minutes or in the freezer for about 15 minutes. This helps them firm up so they’re easier to coat in chocolate. Step 5: While the bites are chilling, melt your choice of chocolate in a microwave-safe bowl in 30-second intervals, stirring in between, until fully smooth. If desired, add 1 teaspoon of coconut oil or shortening to improve consistency. Step 6: Dip each chilled Oreo ball into the melted chocolate using a fork or dipping tool, tapping off any excess chocolate, and return to the parchment-lined sheet. Step 7: Decorate immediately with sprinkles, crushed Oreos, or a drizzle of contrasting chocolate if desired. Step 8: Refrigerate the coated Oreo bites for 15–20 minutes, or until the chocolate is fully set. Serve chilled or at room temperature. Store leftovers in an airtight container in the fridge for up to 1 week, or freeze for longer storage.
Tips for the Perfect Oreo Cookie Bites
Use regular Oreos, not Double Stuf, for best results—too much filling can make the mixture overly soft. Make sure the cream cheese is completely softened to room temperature before mixing to ensure smooth blending. If the mixture feels too soft to roll, chill it briefly before shaping into balls. Use a cookie scoop to keep the size consistent. When melting chocolate, avoid overheating; chocolate can seize if it gets too hot—microwave in short intervals and stir well. Add a teaspoon of coconut oil or vegetable shortening to melted chocolate for a thinner, shinier coating. Let the Oreo balls chill thoroughly before dipping to avoid them falling apart in the chocolate. Decorate quickly after dipping while the chocolate is still wet so toppings stick. If drizzling additional chocolate, let the base coating harden first. To avoid chocolate pooling under the bites as they set, place dipped truffles on a wire rack or gently wipe the bottoms before placing them on parchment paper.
Variations and Customizations
There are countless ways to customize Oreo cookie bites to suit your taste or the occasion. For a colorful twist, use Golden Oreos or seasonal Oreo flavors like peppermint, red velvet, or birthday cake. Swap the cream cheese for flavored spreads like Nutella, peanut butter, or cookie butter to create unique flavor profiles. For a boozy adult version, mix in a splash of Kahlua, Baileys, or Amaretto with the cream cheese. Use white chocolate or colored candy melts for a festive appearance, especially during holidays. Decorate with themed sprinkles, crushed peppermint, mini chocolate chips, or cookie crumbs for added texture and fun. For a crunchier version, add chopped nuts or crispy rice cereal to the dough. You can even insert a surprise inside each bite, like a mini marshmallow, nut, or caramel piece. Want to make them vegan? Use vegan cream cheese and dairy-free chocolate, and double-check that your Oreos are the vegan-friendly variety. Gluten-free? Use a gluten-free chocolate sandwich cookie alternative. The possibilities are endless, making this a recipe that never gets old.
Health Considerations and Nutritional Value
Oreo cookie bites are a treat, and while they’re deliciously satisfying, they are best enjoyed in moderation. A typical Oreo bite contains roughly 100–150 calories depending on the size and type of chocolate used. They’re high in sugar and contain saturated fats, mostly from the cookies, cream cheese, and chocolate coating. That said, you can make small adjustments to improve the nutritional profile slightly. Use reduced-fat cream cheese and a smaller portion of chocolate to cut back on fat and calories. If you’re trying to reduce sugar, opt for sugar-free chocolate or dark chocolate with a higher cocoa percentage, which contains less sugar and more antioxidants. Some brands also offer lower-sugar sandwich cookies, which you can use in place of Oreos. For those with dietary restrictions, be mindful of dairy content, as both cream cheese and chocolate typically contain milk. Vegan substitutions are possible with plant-based ingredients. Though not a health food, these bites can be included in a balanced lifestyle as an occasional indulgence—especially when made with care and portioned reasonably.
FAQ
Can I make Oreo cookie bites in advance? Yes, they’re great for prepping ahead. Make and refrigerate for up to 1 week, or freeze for up to 2 months. Thaw in the fridge before serving. Can I use flavored Oreos? Absolutely—experimenting with seasonal or flavored Oreos is one of the easiest ways to customize your bites. Just be mindful that some varieties are sweeter or softer than others. What if I don’t have a food processor? No problem—use a rolling pin and zip-top bag to crush the cookies. It just takes a bit more time and muscle. Why is my mixture too soft to roll? It could be from overmixing or using Double Stuf Oreos. Chill the mixture for 15–30 minutes, then try again. How do I prevent the chocolate from cracking? Make sure the truffles aren’t too cold when dipped—extreme temperature differences can cause cracking. Let them warm slightly before coating. Can I use white chocolate? Yes! White chocolate gives a great contrast and festive look. Candy melts work well too. How do I store them? Store in an airtight container in the fridge to maintain freshness and texture. If stacking, place parchment between layers to prevent sticking. Are these gluten-free? Not by default, but you can use gluten-free sandwich cookies and verify that your chocolate and cream cheese are gluten-free.

Easy No-Bake Oreo Cookie Bites
Ingredients
- 36 regular Oreo cookies not Double Stuf
- 1 package 8 ounces / 226 grams brick-style cream cheese, softened to room temperature
- 16 ounces 452 grams of chocolate — semi-sweet, milk, or white chocolate all work well for coating
Instructions
- Place the Oreo cookies in a food processor or blender and pulse until they become fine, even crumbs. Transfer the crumbs to a large mixing bowl, reserving 1 to 2 tablespoons to use later as a topping if desired.
- Add the softened cream cheese to the bowl with the Oreo crumbs. Using a handheld mixer, blend the mixture until it’s fully combined and smooth, scraping down the sides of the bowl as needed to ensure even mixing.
- Scoop out the mixture using a tablespoon, then roll it between your hands to form smooth balls. Place each ball onto the prepared baking sheet. Once all the balls are formed, transfer the baking sheet to the freezer and chill for at least 20 minutes until the balls are firm.
- Meanwhile, chop the chocolate and place it in a microwave-safe bowl. Melt the chocolate in the microwave in 20 to 30 second intervals, stirring well after each round, until fully melted and smooth.
- Once the Oreo balls are firm, dip each one into the melted chocolate, making sure it’s fully coated. Carefully place each coated ball back onto the baking sheet. While the chocolate is still wet, sprinkle the reserved Oreo crumbs on top for garnish, if using.
- After all the Oreo balls have been coated and decorated, place the baking sheet in the refrigerator for at least 20 minutes, or until the chocolate has completely set.
- Serve chilled or at room temperature, and enjoy your delicious no-bake Oreo cookie bites!