Introduction
There’s a universal truth beloved by bakers and cookie enthusiasts alike: the perfect chocolate chip cookie isn’t just one thing—it’s a masterful duality. Crispy and chewy chocolate chip cookies represent the pinnacle of textural harmony: golden, lacy edges that shatter delicately with a satisfying crunch, giving way to a tender, moist, slightly gooey center that yields with gentle resistance and melts luxuriously on the tongue. This isn’t accidental magic—it’s the result of precise ingredient ratios, strategic technique, and deep respect for how science and sensation intersect in every bite. Whether you’re reviving childhood memories baked into buttery nostalgia or crafting an elevated dessert for a dinner party, this recipe delivers not just flavor, but *feeling*: warmth, comfort, indulgence, and quiet triumph—all in a single, perfectly balanced disc of dough transformed by heat.
The History
The origin story of the chocolate chip cookie is as iconic—and deliciously contested—as its texture. Widely credited to Ruth Wakefield, a savvy innkeeper and trained dietitian, the “Toll House Chocolate Crunch Cookie” was born in 1930 at the Toll House Inn in Whitman, Massachusetts. Legend has it that Wakefield, seeking to add a chocolate twist to her popular butterscotch nut cookies, substituted broken pieces of Nestlé’s semi-sweet chocolate bar—expecting them to melt fully and create a uniform chocolate swirl. Instead, the morsels held their shape, creating pockets of rich, molten chocolate within a soft, cake-like cookie. The result was an instant sensation. Nestlé struck a marketing goldmine, striking a deal with Wakefield to print her recipe on their chocolate bar wrappers—and thus, the first commercially sold chocolate chips were born. But the evolution toward *crispy and chewy* wasn’t immediate. Early versions leaned softer, almost cakelike. It wasn’t until mid-century home baking culture embraced brown sugar’s moisture-retaining properties, clarified the role of chilling in gluten development, and began experimenting with higher oven temperatures and precise bake times that the now-coveted contrast emerged. Today, the crispy-chewy ideal reflects decades of collective kitchen wisdom—passed down through handwritten index cards, dog-eared cookbooks, viral TikTok tutorials, and generations of grandmothers who knew exactly when to pull the sheet from the oven “just before they look done.”
Ingredients Breakdown
Every ingredient in this recipe plays a deliberate, non-negotiable role—not just in flavor, but in structure, moisture, spread, browning, and mouthfeel. Understanding *why* each is included transforms you from a follower of instructions into a confident cookie architect.
- Unsalted Butter (1 cup / 2 sticks / 227g): The foundation of richness, tenderness, and crisp edge formation. Unsalted ensures precise control over sodium levels. Its water content turns to steam during baking, contributing to lift and spread; its fat coats flour proteins, inhibiting gluten formation (keeping cookies tender), while also carrying flavor and promoting caramelization at the edges. For optimal crispiness, butter should be softened to 65–68°F—cool enough to hold a fingerprint but warm enough to cream smoothly.
- Granulated Sugar (¾ cup / 150g): Provides sweetness, but more crucially, it promotes spreading and crispness. Its fine crystals dissolve easily, contribute to surface drying, and encourage rapid caramelization at high heat—creating those signature lacy, brittle edges. It also draws moisture out of the dough during baking, intensifying crunch.
- Packed Brown Sugar (¾ cup / 165g, light or dark): The secret weapon for chewiness. Its molasses content adds moisture, acidity (which tenderizes gluten), and deep caramel notes. Light brown sugar yields a milder flavor and slightly lighter color; dark brown imparts a richer, more robust molasses tang and deeper hue. Both retain more moisture than granulated sugar, slowing down drying in the center and preserving that coveted soft, supple chew.
- Large Eggs (2, room temperature): Act as binders and emulsifiers, holding the dough together while adding structure and moisture. Room temperature eggs incorporate more evenly into the creamed butter-sugar mixture, creating a stable, airy emulsion critical for lift and even texture. The yolks contribute fat and richness; the whites add structure and slight chew.
- Pure Vanilla Extract (2 tsp): Not just flavor—it enhances the perception of sweetness and rounds out the chocolate’s bitterness. Use real vanilla, not imitation, for depth and complexity.
- All-Purpose Flour (2¼ cups / 280g, spooned & leveled): Provides the essential gluten framework. Too much = tough, cakey cookies; too little = excessive spread and greasiness. Spooning and leveling prevents compaction and over-measuring. The protein content (typically 10–12%) strikes the ideal balance: enough for structure to support chew, but not so much that it creates toughness.
- Baking Soda (1 tsp): A fast-acting leavener that reacts immediately with the acidic molasses in brown sugar. This reaction produces carbon dioxide bubbles *during mixing and early baking*, creating lift, promoting spread, and contributing to the open, slightly airy crumb that allows for both crisp edges and a tender center. It also accelerates Maillard browning for deeper color and flavor.
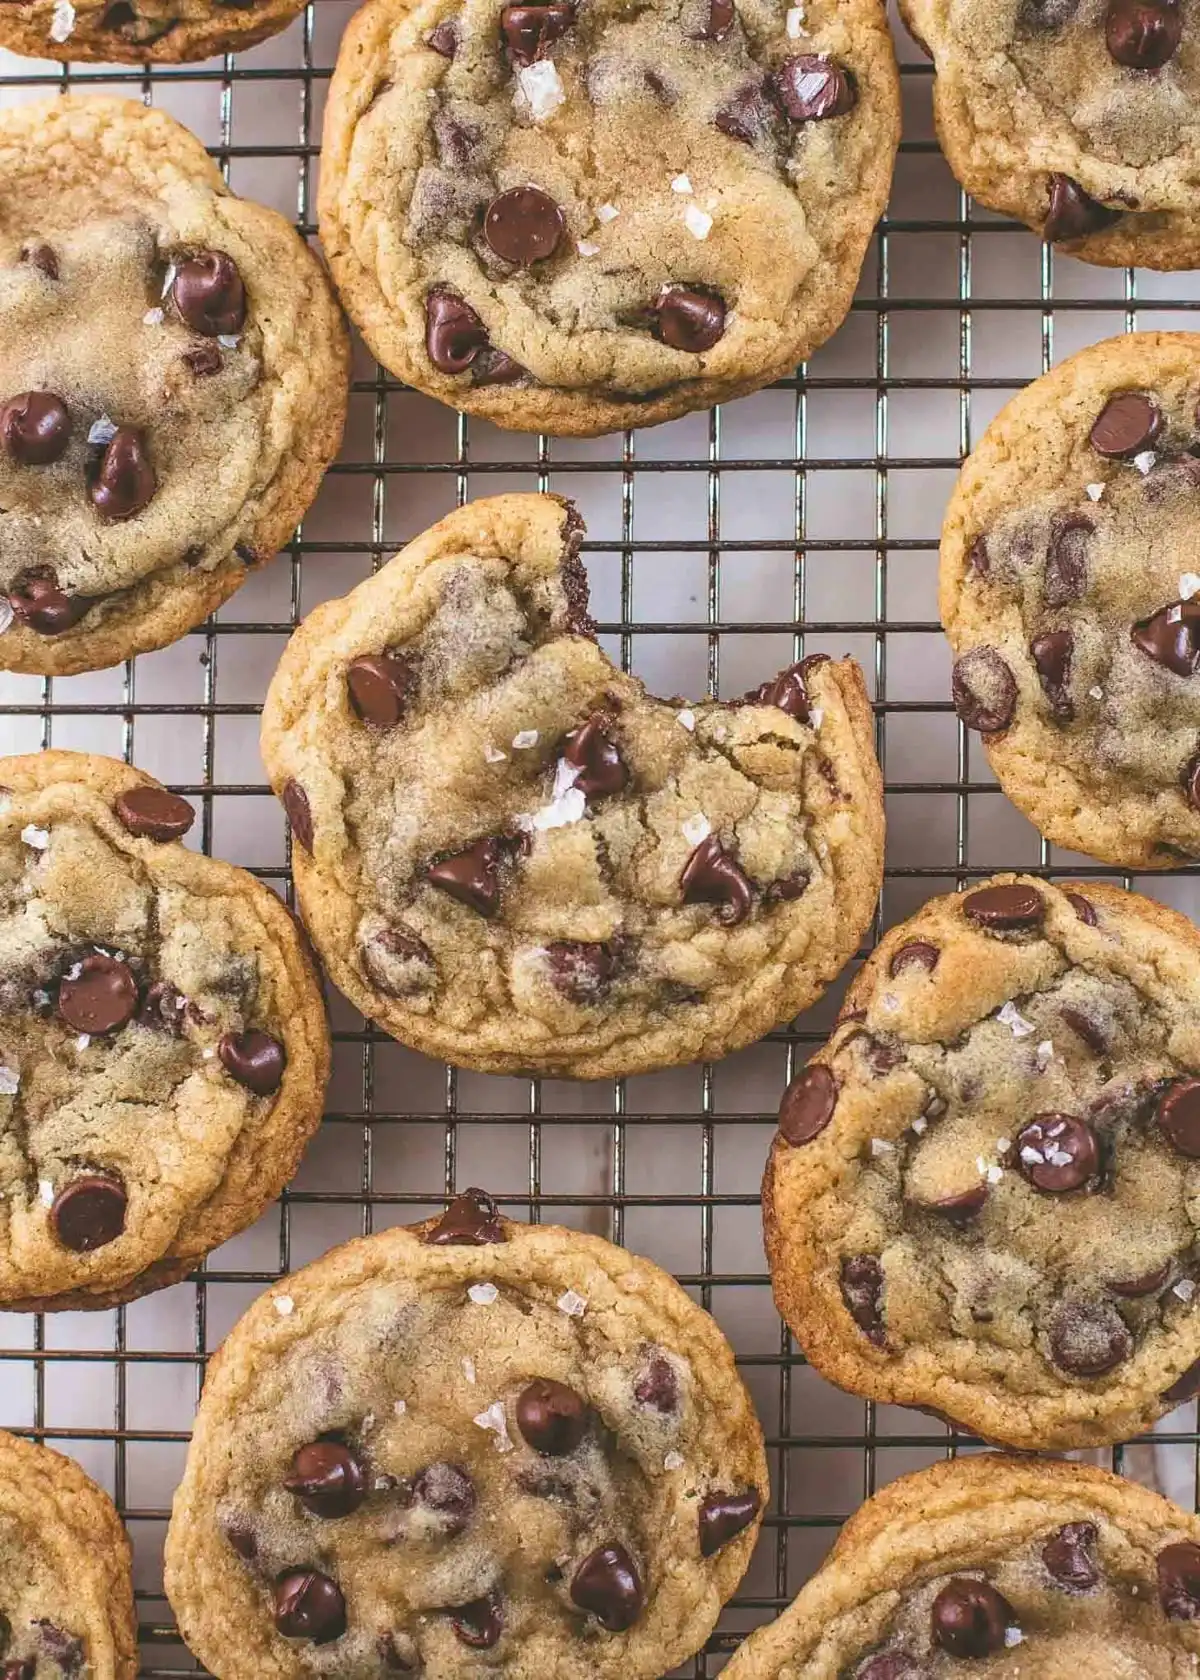
- Coarse Sea Salt (1 tsp, plus flaky sea salt for finishing): Essential for flavor balancing—cutting sweetness, enhancing chocolate’s complexity, and amplifying all other tastes. Coarse salt dissolves slowly, ensuring even distribution without making the dough overly salty. A pinch of flaky sea salt sprinkled on top *immediately after baking* provides a delightful, contrasting burst of salinity and crunch that elevates every bite.
- High-Quality Semi-Sweet Chocolate Chips or Chopped Chocolate (2 cups / 340g): The star. Opt for chocolate with 55–62% cocoa solids for the best balance of sweetness and bitterness. Chips hold their shape better; chopped bars (like Ghirardelli, Guittard, or Valrhona) offer irregular sizes and superior flavor/melt. Avoid “baking chips” with added stabilizers—they resist melting and lack nuance. The chocolate’s fat content directly influences chewiness and mouth-coating richness.
Step-by-Step Recipe
- Cream Butter & Sugars (5–7 minutes): In a large bowl using a stand mixer fitted with the paddle attachment (or a hand mixer), beat softened unsalted butter, granulated sugar, and packed brown sugar on medium-high speed until the mixture is very pale, fluffy, and noticeably increased in volume—about 5–7 minutes. Scrape down the bowl thoroughly halfway through. This step incorporates air, which is vital for lift and contributes to the delicate crispness of the edges. Don’t rush it—the texture should resemble wet sand that holds its shape briefly when pinched.
- Add Eggs & Vanilla (2 minutes): Add eggs one at a time, beating on medium speed for 1 full minute after each addition until fully incorporated and the mixture is smooth and glossy. Add vanilla and beat for another 30 seconds. Overmixing here can lead to excess gluten development, so stop as soon as combined.
- Whisk Dry Ingredients (1 minute): In a separate medium bowl, whisk together flour, baking soda, and coarse sea salt until completely homogeneous and aerated. Whisking ensures even distribution of leavener and salt, preventing bitter or salty pockets.
- Combine Wet & Dry (Just until combined): Reduce mixer speed to low. Gradually add the dry ingredients to the wet mixture in three additions, mixing only until *no streaks of flour remain*. Overmixing at this stage develops gluten, leading to tough, dense, or cakey cookies instead of tender-chewy ones. The dough will be thick, slightly shaggy, and cohesive.
- Fold in Chocolate (Gentle & Thorough): Using a sturdy silicone spatula, gently fold in the chocolate chips or chopped chocolate until evenly distributed. Be careful not to smash the chocolate pieces.
- Chill Dough (Non-Negotiable – Minimum 24 hours, ideally 48–72): Cover the bowl tightly with plastic wrap and refrigerate for *at least 24 hours*, and preferably 48–72 hours. This is the single most crucial step for achieving the crispy-chewy dichotomy. Chilling solidifies the butter, preventing premature spread. More importantly, it allows the flour to fully hydrate (reducing raw flour taste), the sugars to dissolve completely (enhancing caramelization), and the flavors to meld and deepen dramatically. It also concentrates the dough, resulting in thicker, more substantial cookies with defined edges and a fudgy center. Do not skip or shorten this step—even 2 hours is insufficient for the full effect.
- Preheat & Prep (20 minutes before baking): Position oven racks in the upper and lower thirds. Preheat oven to 375°F (190°C). Line two large, heavy-duty baking sheets with parchment paper (not wax paper or silicone mats—parchment allows optimal bottom browning and crispness). Ensure sheets are cool before loading dough.
- Scoop & Space (Precision Matters): Using a 3-tablespoon (45g) cookie scoop or a standard ice cream scoop, portion chilled dough into rounded mounds. Place them at least 3 inches apart on the prepared sheets—cookies will spread significantly. Gently press down the very tops of each mound with your fingers or the bottom of a glass to create a slight disc shape (this encourages even baking and prevents doming).
- Bake (Watch Closely – 10–12 minutes): Bake for 10–12 minutes, rotating the sheets top-to-bottom and front-to-back halfway through for even baking. Cookies are done when the edges are deeply golden brown, lacy, and set, while the centers still appear soft, puffy, and slightly underdone—*they should look like they need 1–2 more minutes*. This visual cue is paramount: overbaking eliminates chewiness. The residual heat will finish cooking the centers as they cool.
- Cool (Patience Rewarded): Immediately upon removing from the oven, sprinkle each cookie generously with flaky sea salt. Let cookies cool on the baking sheets for exactly 5 minutes—this allows the structure to set and the centers to firm up slightly while retaining chew. Then, carefully transfer them to a wire rack to cool completely (another 20–30 minutes). Resist eating them hot—they’ll be too soft and messy; cooling completes the textural transformation.
Tips
- Butter Temperature is Everything: Too cold? Won’t cream properly. Too warm? Dough spreads uncontrollably. Test by pressing your finger gently into the stick—it should leave a clean, distinct impression without sliding in or crumbling. If unsure, cut butter into tablespoons and let sit at room temp for 20–30 minutes.
- Weigh Your Ingredients: Flour especially varies wildly by measuring method. A kitchen scale (grams) is the single best investment for consistent, professional results. Volume measurements (cups) are inherently imprecise.
- Chill in Portions: For ultimate convenience and even baking, divide the chilled dough into 4 equal portions, roll each into a log, wrap tightly in parchment or plastic, and freeze. Slice off 1-inch discs straight from frozen and bake—add 1–2 minutes to bake time. Perfect for spontaneous cookie cravings!
- Rotate & Swap Racks: Home ovens have hot spots. Rotating sheets halfway ensures even browning. Swapping top and bottom racks guarantees both sheets bake identically.
- Don’t Overcrowd the Sheet: Crowding traps steam, preventing crisp edges and causing uneven baking. Use two sheets and bake in batches if needed.
- Use Heavy-Duty Baking Sheets: Thin, flimsy sheets warp and conduct heat poorly, leading to burnt bottoms and pale tops. Invest in commercial-grade aluminum half-sheet pans (13″x18″).
- Underbake Relentlessly: Err on the side of underdone. The center should jiggle slightly and look moist. They will firm up perfectly during cooling. This is the golden rule for chew.
- Salting Strategy: The coarse salt in the dough seasons throughout; the flaky salt on top delivers a bright, textural pop. Don’t omit either.
- Cooling Surface Matters: Cooling on the hot sheet for 5 minutes sets the base. Transferring to a wire rack prevents steaming the bottom, preserving crispness.
- Room Temperature Eggs Are Non-Negotiable: Cold eggs can cause the creamed butter-sugar mixture to seize or curdle, ruining the emulsion and texture.
Variations and Customizations
While the classic crispy-chewy chocolate chip cookie is perfection itself, these thoughtful variations honor its spirit while offering exciting new dimensions—always maintaining that essential textural contrast.
- Dark Chocolate & Sea Salt: Swap semi-sweet chips for 70% dark chocolate chunks and increase finishing flaky salt by 50%. Intensifies bitterness and salinity, creating a sophisticated, grown-up profile.
- Oatmeal Chocolate Chip: Replace ½ cup of flour with 1 cup old-fashioned rolled oats (not quick oats). Adds hearty chew, nutty flavor, and fiber. Reduce bake time by 1 minute.
- Peanut Butter Swirl: After scooping dough, drop ½ tsp natural peanut butter (no added sugar/oil) onto each mound and gently swirl with a toothpick. Adds savory-sweet depth and creamy contrast.
- Espresso-Infused: Dissolve 1 tbsp instant espresso powder in the vanilla extract before adding to the batter. Deepens chocolate flavor without adding coffee taste—like umami for cookies.
- Double Chocolate: Add ¼ cup unsweetened cocoa powder to the dry ingredients and reduce flour by ¼ cup. Use dark chocolate chips. Rich, intense, and decadent.
- White Chocolate & Macadamia Nut: Replace semi-sweet chips with high-quality white chocolate chunks and add 1 cup toasted macadamia nuts. Creamy, buttery, and luxurious—chewiness comes from the nuts and white chocolate’s higher fat content.
- Spiced Ginger-Chocolate: Add 1 tsp ground ginger, ½ tsp ground cinnamon, and ¼ tsp ground cloves to the dry ingredients. Pairs beautifully with dark chocolate and adds warmth.
- Gluten-Free: Substitute a 1:1 certified gluten-free all-purpose flour blend (like King Arthur or Bob’s Red Mill) *with xanthan gum included*. Chill dough for 48+ hours for best texture. Expect slightly more spread.
- Vegan: Use vegan butter (Miyoko’s or Earth Balance), flax eggs (2 tbsp ground flax + 5 tbsp water, rested 10 mins), and dairy-free chocolate. Chill for 72 hours. Texture leans slightly more cakey but remains delicious.
- Mini Cookies: Scoop 1-tbsp portions. Bake at 375°F for 8–9 minutes. Perfect for parties, lunchboxes, or portion control—same crispy-chewy magic in bite-sized form.
Health Considerations and Nutritional Value
While undeniably indulgent, understanding the nutritional landscape of these cookies empowers mindful enjoyment. A standard 3-tablespoon cookie (approx. 45g) made with the base recipe contains roughly:
- Calories: 220–240 kcal
- Total Fat: 12–14g (7–8g saturated)
- Carbohydrates: 27–30g (20–22g sugars)
- Protein: 2–3g
- Fiber: <1g (can be increased significantly with oat or whole wheat variations)
Key Considerations:
- Sugar Content: The combination of granulated and brown sugar is essential for texture but contributes significantly to total sugars. There is no low-sugar version that maintains the crispy-chewy integrity—reducing sugar compromises spread, browning, and moisture balance. However, using naturally sweet, high-cocoa chocolate (70%+) reduces added sugar dependence.
- Butter & Saturated Fat: Provides richness and structure but is high in saturated fat. While recent research nuances the impact of dietary saturated fat on heart health for most individuals, moderation remains key. Substituting part of the butter with mashed banana or applesauce sacrifices texture and flavor and is not recommended for this specific style.
- Portion Control is Paramount: The recipe’s yield (approx. 24–28 cookies) and the chilling/portioning steps inherently encourage mindful serving. Enjoying 1–2 cookies mindfully is far more satisfying—and sustainable—than eating several hastily.
- Nutrient Density Opportunities: Boost micronutrients by adding 2 tbsp ground flaxseed or chia seeds (adds omega-3s and fiber), using dark chocolate (rich in flavonoids and antioxidants), or incorporating toasted nuts (healthy fats, vitamin E, magnesium). Oat variations add soluble fiber.
- Allergen Awareness: Contains dairy (butter, chocolate), eggs, and wheat (gluten). Always check chocolate labels for shared facility warnings if severe allergies exist.
- Not a Health Food, But a Joyful Ritual: These cookies are a celebration of craft, connection, and sensory pleasure. Their value lies in nourishment of the spirit and the shared experience—not just macronutrients. Savoring them slowly, appreciating the contrast of textures and depth of flavor, is the healthiest way to enjoy them.
Ingredients
- 1 cup (2 sticks / 227g) unsalted butter, softened to 65–68°F
- ¾ cup (150g) granulated sugar
- ¾ cup (165g) packed light or dark brown sugar
- 2 large eggs, room temperature
- 2 teaspoons pure vanilla extract
- 2¼ cups (280g) all-purpose flour, spooned and leveled
- 1 teaspoon baking soda
- 1 teaspoon coarse sea salt (e.g., Maldon or Diamond Crystal)
- 2 cups (340g) high-quality semi-sweet chocolate chips or finely chopped chocolate (55–62% cocoa)
- Flaky sea salt (e.g., Maldon), for finishing
Directions
- In the bowl of a stand mixer fitted with the paddle attachment, beat softened butter, granulated sugar, and brown sugar on medium-high speed for 5–7 minutes, scraping down the bowl halfway, until very pale, fluffy, and voluminous.
- Add eggs one at a time, beating on medium speed for 1 full minute after each addition until fully incorporated and glossy. Add vanilla and beat for 30 seconds.
- In a separate bowl, whisk together flour, baking soda, and coarse sea salt until fully combined.
- Reduce mixer speed to low. Gradually add dry ingredients in three additions, mixing only until no dry streaks remain—do not overmix.
- Using a silicone spatula, gently fold in chocolate chips until evenly distributed.
- Cover bowl tightly with plastic wrap and refrigerate for a minimum of 24 hours, and ideally 48–72 hours.
- Preheat oven to 375°F (190°C) with racks in upper and lower thirds. Line two heavy-duty baking sheets with parchment paper.
- Scoop 3-tablespoon portions of chilled dough onto sheets, spaced at least 3 inches apart. Gently flatten tops slightly.
- Bake for 10–12 minutes, rotating and swapping sheets halfway, until edges are deep golden and lacy and centers look soft and slightly underdone.
- Immediately sprinkle with flaky sea salt. Cool on sheets for 5 minutes, then transfer to a wire rack to cool completely.
FAQ
- Why do I have to chill the dough for so long? Can’t I just chill it for 2 hours?
- Chilling for less than 24 hours doesn’t allow sufficient time for the flour to fully hydrate, the sugars to dissolve and concentrate, or the flavors to mature. The dramatic improvement in texture (thicker cookies, defined edges, fudgy centers) and flavor depth (caramelized, complex, less raw-sugar taste) is only achieved with extended chilling. Two hours is merely for firming—insufficient for transformation.
- My cookies spread too much and turned out flat and greasy. What went wrong?
- Most likely causes: 1) Butter was too warm or melted when creaming, 2) Dough wasn’t chilled long enough (or was chilled but then scooped and baked while still too warm), 3) Using a thin or warped baking sheet, 4) Oven temperature is inaccurate (use an oven thermometer!), 5) Measuring flour by scooping (leads to too little flour). Double-check butter temp and chilling time first.
- Can I freeze the dough?
- Absolutely! Portion dough into scoops, place on a parchment-lined tray, freeze until solid (1–2 hours), then transfer to a freezer bag. Bake straight from frozen—add 1–2 minutes to bake time. Dough logs (wrapped in parchment/plastic) also freeze beautifully for up to 3 months.
- Why use both granulated and brown sugar? Can I use all one type?
- Granulated sugar promotes spread and crisp edges; brown sugar provides moisture, chew, and flavor. Using all granulated yields thin, very crisp, brittle cookies. Using all brown sugar yields thick, extremely chewy, almost fudgy cookies with minimal crispness. The 1:1 ratio is scientifically calibrated for the perfect duality.
- My cookies are too cakey or puffy. How do I fix that?
- This usually points to overmixing the dry ingredients into the wet (developing too much gluten) or using too much flour (scooping instead of spooning). Ensure you mix *only until no flour streaks remain* and measure flour correctly. Also, verify your baking soda is fresh—expired soda won’t provide the lift that contributes to the airy crumb.
- What’s the best chocolate to use?
- High-quality chocolate bars chopped into uneven pieces (like Valrhona, Callebaut, or Guittard) offer superior flavor, texture, and melt compared to standard chips. If using chips, choose ones with simple ingredients (cocoa, sugar, cocoa butter, vanilla, lecithin)—avoid “chocolatey chips” with palm oil or artificial flavors.
- Can I make these dairy-free or gluten-free?
- Yes, with caveats. For dairy-free: Use a high-fat vegan butter (like Miyoko’s) and dairy-free chocolate. Expect slightly more spread and a different chew. For gluten-free: Use a reputable 1:1 GF blend *with xanthan gum*. Chill for 72 hours for best results. Neither variation replicates the original texture perfectly, but both are delicious in their own right.
- How do I store them to keep them crispy AND chewy?
- Store cooled cookies in an airtight container at room temperature for up to 5 days. To maintain crisp edges, place a slice of bread in the container—the cookies will absorb excess moisture from the bread, keeping their centers soft while preserving edge integrity. Replace the bread slice every 2 days.
Summary
The ultimate crispy and chewy chocolate chip cookie is born from scientific precision—extended chilling, balanced sugars, proper butter temperature, and vigilant underbaking—united with timeless tradition and joyful indulgence.
It delivers an unforgettable sensory journey: shatteringly crisp, caramelized edges yielding to a tender, moist, deeply flavorful center, studded with pockets of molten, high-quality chocolate—a perfect, harmonious bite that satisfies both the craving for crunch and the soul’s need for comfort.