Classic Red Velvet Cake: A Timeless Southern Delight
The Classic Red Velvet Cake is one of the most iconic desserts in American baking history—a luscious, tender cake with a subtle cocoa flavor and a striking crimson hue, crowned with a rich, creamy frosting. Loved for its elegant appearance and delicate balance of flavors, this cake has become a staple at celebrations ranging from birthdays to weddings. In this comprehensive guide, we’ll explore every aspect of the red velvet cake, from its mysterious origins to detailed instructions for baking the perfect version at home. Whether you’re a seasoned baker or trying your hand at red velvet for the first time, this article will serve as your ultimate resource.
The History of Red Velvet Cake
The origins of the red velvet cake are steeped in mystery, legend, and a touch of culinary alchemy. While its exact beginnings are debated, many food historians trace its roots back to early 20th-century America, particularly the Southern United States. The cake gained popularity during the Great Depression, when bakers began using ingredients like buttermilk, vinegar, and cocoa powder—common pantry staples—to create soft, moist cakes with minimal expense.
The “red” in red velvet originally came not from artificial coloring, but from a chemical reaction between natural cocoa powder (which is acidic) and baking soda in the presence of an acid like buttermilk or vinegar. This reaction produced a reddish tint in the crumb, giving rise to the name “velvet” due to the cake’s fine, velvety texture and “red” from its faint crimson hue. However, it wasn’t until the early 20th century that food coloring was introduced to intensify the color.
One popular theory credits the Waldorf-Astoria Hotel in New York City with popularizing the modern red velvet cake. Legend has it that a guest fell in love with the hotel’s signature dessert and requested the recipe. After receiving it, she was shocked to find a large bill for the recipe—leading to rumors that the hotel used the recipe as a marketing tool. Though likely apocryphal, the story helped cement red velvet cake’s status as a luxurious treat.
In the 1920s, the Adams Extract company began promoting red food coloring by distributing red velvet cake recipes featuring their product, helping standardize the vibrant red look we associate with the cake today. Over the decades, the cake evolved into a cultural symbol—especially around holidays like Valentine’s Day and Christmas—and remains a beloved classic across the U.S. and beyond.
Ingredients Breakdown: What Makes Red Velvet Unique?
The magic of red velvet cake lies in the careful balance of its ingredients, each playing a crucial role in flavor, texture, and appearance. Let’s take a deep dive into what goes into a traditional red velvet cake and why each component matters.
- All-Purpose Flour: Provides the structural base of the cake. It gives the cake its soft yet stable crumb without being too dense.
- Cocoa Powder (Unsweetened): Used in small amounts to add a subtle chocolate undertone without overpowering the cake. Natural cocoa (not Dutch-processed) is preferred because it’s acidic and reacts with baking soda to enhance leavening and color.
- Baking Soda & Baking Powder: These leavening agents work together to give the cake its light, airy texture. Baking soda reacts with acidic ingredients (buttermilk, vinegar, cocoa), while baking powder provides additional lift.
- Salt: Enhances all the flavors and balances the sweetness.
- Butter (Unsalted): Adds richness and moisture. Room-temperature butter creams well with sugar to incorporate air, contributing to a fluffy texture.
- Granulated Sugar: Sweetens the cake and helps retain moisture. It also aids in creaming with butter for a smooth batter.
- Eggs: Bind the ingredients together and contribute to structure and richness. Large eggs at room temperature blend more evenly into the batter.
- Buttermilk: A key ingredient that adds tanginess and tenderness. Its acidity activates the baking soda and reacts with cocoa to deepen the red color.
- Vinegar (White or Apple Cider): Boosts acidity, further enhancing the chemical reaction that creates the red tint and tenderizes the gluten in flour.
- Vanilla Extract: Adds a warm, aromatic depth to the flavor profile.
- Red Food Coloring: Traditionally, liquid red food coloring was used. Today, gel-based food coloring is preferred for its intense color without altering the liquid ratio. Most recipes use 1–2 tablespoons to achieve the signature bold red.
- Vegetable Oil (Optional in Some Recipes): Some modern versions include oil for extra moisture, though traditional recipes rely solely on butter.
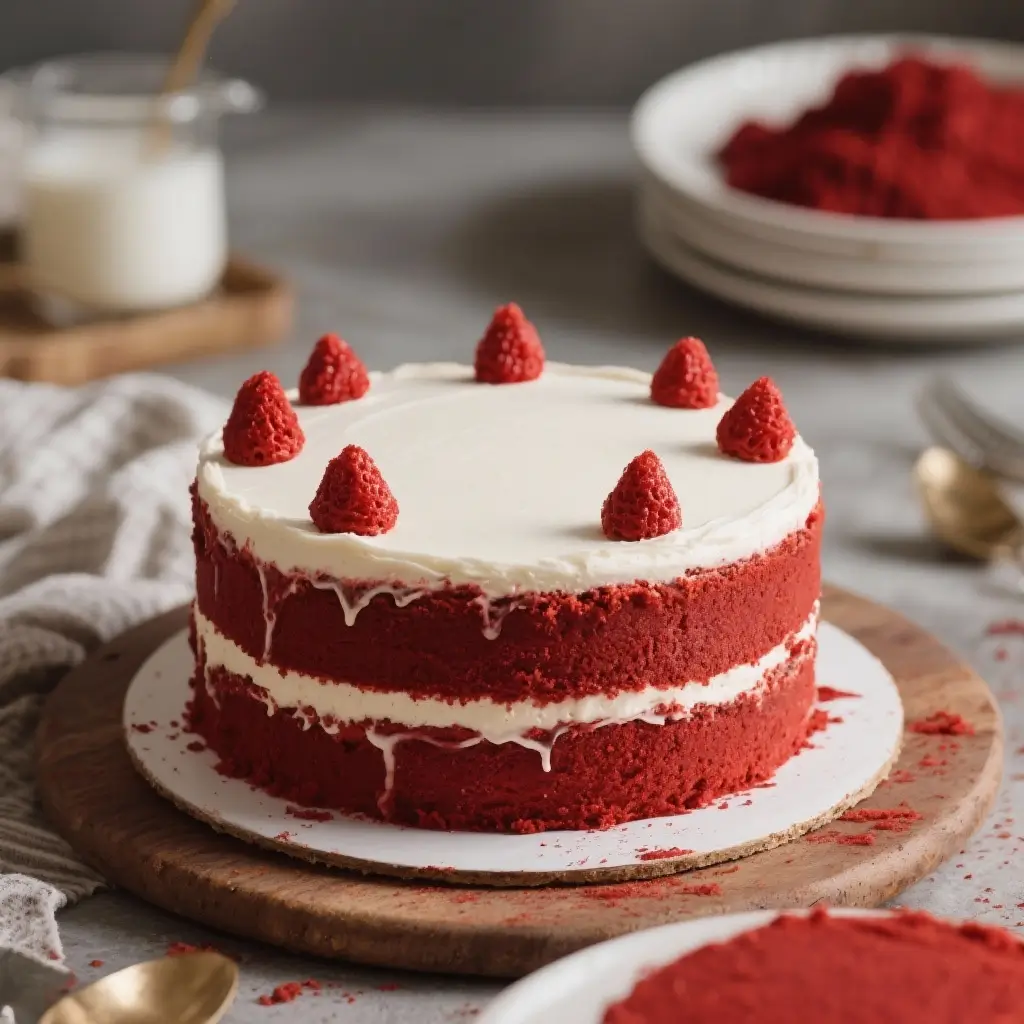
The frosting—typically cream cheese frosting—is equally important. Made from cream cheese, butter, powdered sugar, vanilla, and a pinch of salt, it offers a tangy contrast that perfectly complements the sweet, slightly acidic cake.
Step-by-Step Recipe: How to Bake the Perfect Classic Red Velvet Cake
Follow this detailed recipe to create a moist, flavorful, and visually stunning red velvet cake that will impress any crowd.
Ingredients
For the Cake:
- 2 ½ cups (315g) all-purpose flour
- 1 ½ cups (300g) granulated sugar
- 1 tsp baking soda
- 1 tsp salt
- 1 tbsp (8g) unsweetened natural cocoa powder (not Dutch-processed)
- 1 ½ cups (360ml) buttermilk, at room temperature
- 2 large eggs, at room temperature
- 1 ½ tsp vanilla extract
- 2 tbsp (30ml) vegetable oil
- 1 tsp white vinegar
- 2–3 tbsp (30–45ml) liquid red food coloring (or 1–2 tsp red gel coloring)
- ½ cup (113g) unsalted butter, softened to room temperature
For the Cream Cheese Frosting:
- 16 oz (450g) full-fat cream cheese, softened
- ½ cup (113g) unsalted butter, softened
- 4 cups (480g) powdered sugar, sifted
- 1 ½ tsp vanilla extract
- Pinch of salt
Directions
- Preheat and Prepare: Preheat your oven to 350°F (175°C). Grease and flour two 9-inch round cake pans, then line the bottoms with parchment paper for easy release.
- Mix Dry Ingredients: In a medium bowl, whisk together the flour, sugar, baking soda, salt, and cocoa powder until well combined and no lumps remain.
- Combine Wet Ingredients: In a large mixing bowl or stand mixer fitted with the paddle attachment, combine the buttermilk, eggs, vanilla extract, vegetable oil, vinegar, and red food coloring. Mix on low speed until blended.
- Cream Butter and Sugar: Add the softened butter to the wet mixture. Beat on medium speed for 2–3 minutes until the mixture is pale and creamy.
- Incorporate Dry Ingredients: Gradually add the dry ingredients to the wet mixture in three parts, mixing on low speed after each addition just until combined. Do not overmix—this can lead to a tough cake.
- Divide and Pour: Divide the batter evenly between the prepared pans. Use a spatula to smooth the tops.
- Bake: Place the pans in the center of the preheated oven. Bake for 25–30 minutes, or until a toothpick inserted into the center comes out clean or with a few moist crumbs.
- Cool: Allow the cakes to cool in the pans for 10 minutes, then run a knife around the edges and invert them onto wire racks. Remove parchment paper and let cool completely before frosting.
- Make the Frosting: In a large bowl, beat the softened cream cheese and butter together on medium speed until smooth and creamy (about 2 minutes). Gradually add the sifted powdered sugar, one cup at a time, mixing well after each addition. Stir in the vanilla and salt. Beat for another minute until fluffy.
- Frost the Cake: Once the cakes are completely cool, place one layer on a serving plate. Spread a generous amount of frosting on top. Place the second layer on top and frost the top and sides of the entire cake. Use a bench scraper or offset spatula for a smooth finish. Decorate as desired—some people add red velvet cake crumbs, white chocolate shavings, or fresh berries.
- Chill (Optional): For cleaner slices, refrigerate the cake for 30 minutes before serving.
Tips for Success
- Room Temperature Ingredients: Ensure your eggs, buttermilk, butter, and cream cheese are at room temperature. This helps create a smooth, emulsified batter and frosting.
- Use Natural Cocoa: Dutch-processed cocoa is neutral in pH and won’t react with baking soda. Stick to natural unsweetened cocoa for the proper chemical reaction and flavor.
- Don’t Overmix: Overmixing develops gluten, which can make the cake dense. Mix only until ingredients are incorporated.
- Color Intensity: For a deeper red, use gel food coloring. Liquid coloring may require more volume, which can affect texture.
- Even Layers: Weigh the batter or use a measuring cup to divide it equally for uniform layers.
- Cool Completely: Never frost a warm cake—it will melt the frosting and slide off.
- Storage: Store the cake covered in the refrigerator for up to 5 days. Bring to room temperature before serving for best texture and flavor.
Variations and Customizations
While the classic version is timeless, red velvet cake lends itself beautifully to creative twists. Here are some popular variations:
- Red Velvet Cupcakes: Bake the same batter in muffin tins for 18–22 minutes. Top with swirls of cream cheese frosting and a sprinkle of red sanding sugar.
- Mini Red Velvet Cake Pops: Crumble leftover cake, mix with frosting, roll into balls, dip in candy melts, and decorate.
- Gluten-Free Red Velvet: Substitute all-purpose flour with a high-quality gluten-free flour blend. Add ½ tsp xanthan gum if not included in the blend.
- Vegan Red Velvet: Replace eggs with flax eggs (2 tbsp ground flaxseed + 6 tbsp water), use vegan butter and cream cheese, and substitute buttermilk with plant-based milk + 1 tbsp vinegar.
- Carrot Red Velvet Swirl: Combine half red velvet batter with half spiced carrot cake batter and swirl together in the pan for a festive hybrid.
- Chocolate-Dipped Red Velvet: Dip cupcakes or cake slices in tempered dark chocolate for a decadent finish.
- Almond or Coconut Flavor: Add ½ tsp almond extract or 1 tsp coconut extract to the batter for a unique twist.
- Layered with Fruit: Add a layer of fresh raspberries or strawberries between the cake and frosting for a refreshing contrast.
Health Considerations and Nutritional Value
While red velvet cake is undeniably delicious, it’s important to enjoy it in moderation due to its high sugar and fat content. Here’s a general nutritional breakdown per slice (assuming an 8-slice cake):
- Calories: ~450–550 kcal
- Total Fat: 20–25g (including saturated fat from butter and cream cheese)
- Carbohydrates: 60–70g (mostly from sugar and flour)
- Protein: 5–7g
- Sodium: 400–600mg (from butter, salt, and baking soda)
- Sugars: 45–55g
Considerations:
- Sugar Content: High in added sugars. Diabetics or those monitoring blood sugar should consume sparingly.
- Dairy: Contains milk, butter, cream cheese, and buttermilk—avoid if lactose intolerant or allergic.
- Food Coloring: Some artificial dyes (like Red #40) have been controversial. Opt for natural beet-based coloring if preferred, though the color will be less vibrant.
- Gluten: Contains wheat flour. Use certified gluten-free flour for those with celiac disease.
- Healthy Substitutions: You can reduce sugar by 25%, use whole wheat pastry flour, or replace some butter with applesauce—but these changes alter texture and flavor.
Frequently Asked Questions (FAQ)
Q: Why is my red velvet cake not red enough?
A: Natural cocoa and buttermilk create only a faint red tint. To achieve the bright red color, you need red food coloring. Use gel coloring for a more concentrated hue without adding excess liquid.
Q: Can I make red velvet cake without buttermilk?
A: Yes! Make a substitute by adding 1 ½ tbsp lemon juice or vinegar to 1 ½ cups of regular milk and letting it sit for 5–10 minutes until slightly curdled.
Q: Why did my cake turn out dry?
A: Overbaking, overmixing, or inaccurate measuring can cause dryness. Use a kitchen scale for flour, avoid overbaking, and don’t exceed mixing times.
Q: Can I freeze red velvet cake?
A: Absolutely! Wrap unfrosted layers tightly in plastic wrap and foil, then freeze for up to 3 months. Thaw in the fridge overnight before frosting.
Q: Can I use a boxed mix?
A: Yes, but homemade versions offer superior flavor and texture. If using a box, enhance it with real buttermilk, extra egg, and extra vanilla.
Q: Is red velvet just chocolate cake with food coloring?
A: No. While both contain cocoa, red velvet uses much less cocoa and includes buttermilk and vinegar, resulting in a milder flavor and unique chemical reaction that affects texture and color.
Q: How do I transport a frosted red velvet cake?
A: Use a cake carrier or a large box. Chill the cake first to set the frosting, and place it on a non-slip surface. Avoid stacking unless supports are used.
Summary
The Classic Red Velvet Cake is a harmonious blend of subtle cocoa, tangy buttermilk, and vibrant color, crowned with luscious cream cheese frosting. With its rich history and irresistible taste, it remains a beloved dessert across generations.