Introduction
There’s something undeniably magical about a classic chocolate chip cookie. Warm from the oven, with its golden edges, soft center, and melty pockets of chocolate, it’s the quintessential American treat that has captured hearts across generations and continents. Whether enjoyed with a glass of cold milk, crumbled into ice cream, or shared during a coffee break, this beloved dessert is more than just a confection—it’s comfort in edible form. The simplicity of ingredients belies the depth of flavor and nostalgia these cookies evoke. From school bake sales to holiday gift tins, the classic chocolate chip cookie remains a staple in homes worldwide. In this comprehensive guide, we’ll explore every facet of making the perfect batch—from the history behind their creation to ingredient insights, detailed preparation methods, expert tips, variations, nutritional facts, and frequently asked questions—so you can bake cookies that are not only delicious but consistently perfect.
The History
The origin story of the chocolate chip cookie is as sweet as the treat itself. It all began in the 1930s at the Toll House Inn in Whitman, Massachusetts, run by Ruth Wakefield and her husband Kenneth. Ruth was known for her delicious desserts, particularly her butter drop cookies. One fateful day in 1938, while preparing a batch, she found herself without baker’s chocolate. Resourceful and inventive, she chopped up a bar of semi-sweet chocolate from Nestlé, expecting it to melt evenly into the dough. To her surprise, the chocolate held its shape, creating delightful pockets throughout the cookies. These “Toll House Chocolate Crunch Cookies” quickly became a sensation among guests.
Ruth published the recipe in her cookbook, Toll House Tried and True Recipes, and soon after struck a deal with Nestlé: they would print her recipe on their chocolate bars in exchange for a steady supply of chocolate. This partnership gave rise to one of the most iconic food collaborations in history. By 1941, the recipe had gained national fame through newspaper syndication, and today, it’s estimated that over seven billion chocolate chip cookies are made annually in the United States alone. The cookie even earned official recognition when Massachusetts declared it the state cookie in 1997. What began as a happy accident has become a timeless symbol of American ingenuity and culinary delight.
Ingredients Breakdown
Understanding each ingredient in a classic chocolate chip cookie is essential to mastering the perfect texture and flavor profile. Here’s a detailed look at what goes into this iconic treat:
- All-Purpose Flour: Provides the structural foundation of the cookie. It contains gluten-forming proteins that give the cookie its shape and chewiness. For best results, spoon and level the flour rather than scooping directly from the bag to avoid dense cookies.
- Unsalted Butter: Adds richness and contributes to both tenderness and browning. Using unsalted butter allows control over the salt content. Room-temperature butter (around 65°F) creams well with sugar, creating air pockets that result in a lighter texture.
- Granulated Sugar: Aids in spreading and caramelization, contributing to crisp edges. It also helps create a slightly crunchy exterior while balancing sweetness.
- Brown Sugar (light or dark): The star for moisture and chewiness due to its molasses content. Dark brown sugar adds a deeper, more caramel-like flavor, while light brown offers a milder taste. Both help retain moisture, keeping cookies soft longer.
- Eggs: Act as a binder and add structure, moisture, and richness. One large egg is standard; room temperature ensures even mixing.
- Vanilla Extract: Enhances overall flavor with its warm, aromatic notes. Pure vanilla extract is preferred over imitation for superior depth of flavor.
- Baking Soda: The leavening agent responsible for lift and spread. It reacts with acidic components (like brown sugar) to produce carbon dioxide, helping the cookies puff slightly before setting.
- Salt: Balances sweetness and intensifies other flavors. Even though unsalted butter is used, added salt is crucial for complexity.
- Semi-Sweet Chocolate Chips: The heart of the cookie. High-quality chips with real cocoa butter provide better melt and richer flavor. Chopped chocolate bars can be used for irregular, melty pockets.
- (Optional) Sea Salt Flakes: Sprinkled on top before baking for a gourmet finish that enhances the sweet-salty contrast.
Each component plays a vital role—altering ratios can dramatically change texture, from cakey to chewy to crispy.
Step-by-Step Recipe
Follow this tried-and-true method to create perfectly balanced classic chocolate chip cookies every time:
- Preheat Oven: Set your oven to 375°F (190°C). Line two large baking sheets with parchment paper or silicone baking mats for easy removal and even browning.
- Mix Dry Ingredients: In a medium bowl, whisk together 2 ¼ cups (280g) all-purpose flour, ½ teaspoon baking soda, and ½ teaspoon fine sea salt. Set aside.
- Cream Butter and Sugars: In a large mixing bowl, beat 1 cup (2 sticks or 226g) softened unsalted butter with ¾ cup (150g) granulated sugar and ¾ cup (165g) packed light brown sugar until light, fluffy, and pale in color—about 3–4 minutes using an electric mixer on medium speed.
- Add Wet Ingredients: Beat in 1 large egg and 1 tablespoon pure vanilla extract until fully incorporated, scraping down the sides of the bowl as needed.
- Combine Wet and Dry: Gradually add the dry ingredients to the wet mixture, mixing on low speed just until the flour disappears. Do not overmix, as this can lead to tough cookies.
- Fold in Chocolate Chips: Stir in 2 cups (340g) semi-sweet chocolate chips (or chunks) using a spatula or wooden spoon until evenly distributed.
- Portion Dough: Use a cookie scoop or tablespoon to portion rounded balls of dough (about 1.5 tablespoons each). Roll them gently between your palms and place them 2 inches apart on the prepared baking sheets for proper spreading.
- Bake: Bake one sheet at a time in the center rack for 9–11 minutes, or until the edges are golden brown and the centers still look slightly underdone. Rotate the pan halfway through for even baking if your oven runs hot on one side.
- Cool: Remove from the oven and let the cookies rest on the baking sheet for 5 minutes to set. Then transfer them to a wire rack to cool completely, or enjoy warm for that gooey, bakery-style experience.
- Store: Once cooled, store in an airtight container at room temperature for up to 5 days. Dough can be refrigerated for up to 72 hours or frozen for up to 3 months before baking.
This recipe yields approximately 24–30 cookies, depending on size.
Tips
- Butter Temperature Matters: Use butter that’s soft but not melted. It should yield slightly when pressed but hold its shape. Too warm? Cookies will spread too much. Too cold? They won’t spread enough.
- Creaming is Key: Take time to cream butter and sugars thoroughly. This incorporates air, leading to a tender crumb and slight lift.
- Don’t Overbake: Pull cookies out when the edges are set and golden, but the center looks soft and puffy. They continue cooking on the hot tray.
- Use Parchment Paper: Prevents sticking and burning, promotes even browning, and makes cleanup effortless.
- Chill the Dough (Optional): For thicker, chewier cookies, chill the dough for 30 minutes to 2 hours. This slows spread and deepens flavor as ingredients meld.
- Weigh Your Flour: For accuracy, use a kitchen scale. Too much flour leads to dry, cakey cookies.
- Rotate the Pan: Midway through baking, rotate the baking sheet 180 degrees for uniform color and texture.
- Invest in Quality Chocolate: Choose brands with high cocoa content and real ingredients. Avoid waxy or overly sweet chips.
- Uniform Sizing: Use a cookie scoop for consistent size and even baking.
- Double Batch? You can double the recipe, but don’t triple unless you have a commercial mixer—overloading can affect mixing efficiency.
Variations and Customizations
While the classic version is timeless, there’s endless room for creativity. Here are some popular twists to personalize your cookies:
- Oatmeal Chocolate Chip: Add 1 cup old-fashioned oats for a heartier texture and nutty flavor.
- Nut Lovers: Fold in 1 cup chopped walnuts, pecans, or almonds for crunch and depth.
- Peanut Butter Swirl: Mix ½ cup creamy peanut butter into the dough or swirl dollops on top before baking.
- White Chocolate & Macadamia: Swap semi-sweet chips for white chocolate and macadamia nuts—a tropical twist.
- Double Chocolate: Replace ¼ cup of flour with unsweetened cocoa powder for a rich chocolate base.
- Gluten-Free: Substitute all-purpose flour with a 1:1 gluten-free baking blend. Ensure other ingredients are certified GF.
- Vegan Version: Use plant-based butter, flax eggs (1 tbsp ground flax + 3 tbsp water per egg), and dairy-free chocolate chips.
- Espresso Kick: Add 1–2 teaspoons instant espresso powder to enhance chocolate flavor without making it coffee-forward.
- Salted Caramel Stuffed: Place a small piece of soft caramel in the center of each dough ball before baking.
- Holiday Edition: Add dried cranberries, chopped cherries, or festive sprinkles for seasonal flair.
- Gourmet Touch: Sprinkle flaky sea salt on top right after baking for a sophisticated sweet-salty finish.
- Cookie Sandwiches: Pair two cookies with vanilla ice cream or frosting for a decadent sandwich.
These variations allow bakers to tailor the recipe to dietary needs, flavor preferences, or special occasions.
Health Considerations and Nutritional Value
While chocolate chip cookies are undeniably indulgent, understanding their nutritional profile helps in enjoying them mindfully:
- Calories: One average-sized cookie (30g) contains roughly 140–160 calories, primarily from carbohydrates and fats.
- Fat Content: Around 7–9g per cookie, mostly from butter. Saturated fat accounts for about 4–5g. Opting for reduced-fat substitutes may alter texture negatively.
- Sugar: Approximately 10–12g per cookie, combining granulated and brown sugar. Excessive sugar intake is linked to various health concerns, so moderation is key.
- Carbohydrates: ~18–20g, including simple sugars and complex carbs from flour.
- Protein: Only 1–2g per cookie, mainly from egg and small amounts in flour.
- Dietary Fiber: Minimal unless whole wheat flour or oats are added.
- Gluten: Present due to all-purpose flour. Those with celiac disease or sensitivity should use certified gluten-free alternatives.
- Dairy: Contains butter and often milk solids in chocolate. Vegan versions eliminate this concern.
- Healthy Swaps: Consider using coconut oil (in moderation), applesauce (partial replacement for butter), or monk fruit sweetener blends. However, substitutions often affect texture and flavor balance.
- Portion Control: Enjoy one or two cookies as part of a balanced diet rather than consuming an entire batch in one sitting.
- Kid-Friendly: A favorite among children, but monitor sugar intake. Consider smaller sizes for snacks.
Homemade cookies allow full control over ingredients—avoiding preservatives, artificial flavors, and excess additives found in store-bought versions.
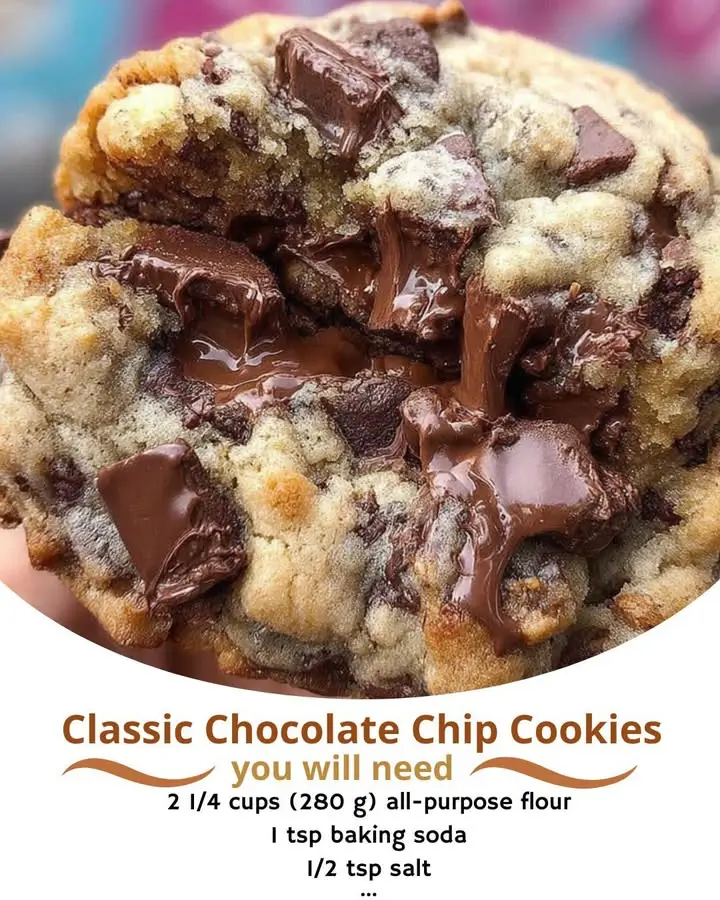
Ingredients
- 2 ¼ cups (280g) all-purpose flour
- ½ teaspoon baking soda
- ½ teaspoon fine sea salt
- 1 cup (226g / 2 sticks) unsalted butter, softened
- ¾ cup (150g) granulated sugar
- ¾ cup (165g) packed light brown sugar
- 1 large egg, room temperature
- 1 tablespoon pure vanilla extract
- 2 cups (340g) semi-sweet chocolate chips (or chopped chocolate)
- (Optional) Flaky sea salt for topping
Directions
- Preheat oven to 375°F (190°C). Line baking sheets with parchment paper.
- In a medium bowl, whisk together flour, baking soda, and salt. Set aside.
- In a large bowl, cream softened butter, granulated sugar, and brown sugar until light and fluffy (3–4 minutes).
- Beat in egg and vanilla extract until smooth.
- Gradually mix in dry ingredients on low speed until just combined.
- Fold in chocolate chips by hand until evenly dispersed.
- Roll dough into 1.5-tablespoon balls and place 2 inches apart on baking sheets.
- Bake for 9–11 minutes, or until edges are golden and centers are soft.
- Cool on baking sheet for 5 minutes, then transfer to wire racks.
- Sprinkle with flaky sea salt if desired. Store in airtight container.
FAQ
Q: Why did my cookies turn out flat?
A: Likely causes include melted butter, overcreaming, expired baking soda, or hot baking sheets. Chill the dough and ensure accurate ingredient temperatures.
Q: Can I freeze the cookie dough?
Yes! Portion the dough into balls, freeze on a tray, then transfer to a freezer bag. Bake straight from frozen, adding 1–2 extra minutes.
Q: Can I make these without brown sugar?
You can substitute with all granulated sugar, but the cookies will be crispier and less chewy due to lack of molasses.
Q: How do I make thicker, softer cookies?
Chill the dough for at least 1 hour, increase brown sugar slightly, and slightly underbake.
Q: Why use both baking soda and no baking powder?
Baking soda reacts with the acid in brown sugar to leaven the cookies. No baking powder is needed for this traditional recipe.
Q: Can I use salted butter?
Yes, but reduce added salt to ¼ teaspoon to avoid oversalting.
Q: My cookies spread too much—what went wrong?
Possible reasons: butter too soft, too little flour, warm dough, or greased pans (use parchment instead).
Q: Are chocolate chip cookies safe for dogs?
No! Chocolate contains theobromine, which is toxic to dogs. Keep cookies out of reach.
Q: Can I add M&Ms or other candies?
Absolutely! Just ensure they’re heat-stable. M&Ms work great for colorful, kid-friendly batches.
Q: How long do baked cookies last?
Up to 5 days at room temperature in an airtight container. Reheat briefly in microwave for fresh-from-the-oven texture.
Summary (in two lines)
The classic chocolate chip cookie is a timeless dessert born from a happy accident, combining simple ingredients into a universally loved treat. With its crisp edges, soft center, and melty chocolate, it remains the gold standard of home baking.