Chocolate Lava Mug Cake for One: A Decadent Single-Serving Delight
There’s something undeniably magical about a warm, gooey chocolate dessert that you can whip up in minutes—all in a single mug. The Chocolate Lava Mug Cake is not just a treat; it’s a culinary experience designed for one, perfect for those moments when your sweet tooth demands satisfaction without the fuss of baking an entire cake. Whether you’re indulging after a long day, surprising yourself with a midnight snack, or simply craving something rich and comforting, this single-serving dessert delivers on every level. With its molten chocolate center, soft crumb, and minimal cleanup, it’s no wonder this recipe has taken kitchens by storm.
The History of the Mug Cake
The concept of the mug cake emerged in the early 2000s as home cooks began experimenting with microwave-friendly desserts. Initially shared on blogs and cooking forums, these quick treats gained popularity due to their convenience, especially among college students, busy professionals, and anyone lacking access to a full kitchen. The idea was simple: mix ingredients directly in a mug and microwave for a few minutes to create a warm, cake-like dessert.
The chocolate lava variation evolved from the classic French fondant au chocolat, a rich, dense chocolate cake with a liquid center traditionally baked in an oven. Chefs and home bakers alike sought ways to recreate that luxurious molten core in less time. Enter the chocolate lava mug cake—a fusion of French elegance and American ingenuity. By adjusting ingredient ratios and leveraging the microwave’s rapid heating, bakers discovered they could achieve that same luscious, flowing center in under three minutes.
Over time, the mug cake became a viral sensation, particularly through social media platforms like Pinterest and Instagram, where visually appealing cross-sections of molten chocolate pouring out of a steaming mug captivated millions. Today, the chocolate lava mug cake stands as a symbol of accessible luxury—proof that decadence doesn’t require hours in the kitchen or a crowd to serve.
Ingredients Breakdown: Why Each One Matters
Every ingredient in this Chocolate Lava Mug Cake plays a critical role in achieving the perfect balance of structure, moisture, richness, and that signature lava flow. Let’s dive into each component:
- All-Purpose Flour: Provides the base structure of the cake. Too much, and the cake becomes dense; too little, and it won’t hold together. Just one tablespoon gives enough lift without overpowering the delicate texture.
- Granulated Sugar: Adds sweetness and contributes to the cake’s tender crumb. It also helps with browning and moisture retention during microwaving.
- Unsweetened Cocoa Powder: The heart of the chocolate flavor. Using high-quality Dutch-processed cocoa powder deepens the richness and creates a smoother, more complex taste compared to natural cocoa.
- Baking Powder: A small amount (just 1/8 teaspoon) provides a gentle rise, ensuring the cake puffs slightly without drying out or losing its dense, fudgy interior.
- Salt: A pinch enhances all the other flavors, balancing sweetness and intensifying the chocolate notes.
- Butter (Salted or Unsalted): Adds richness, moisture, and flavor. Melted butter integrates smoothly and helps create a velvety texture. For a deeper taste, consider using European-style butter with higher fat content.
- Milk: Thinly hydrates the dry ingredients and activates the leavening agent. Whole milk yields a creamier result, but any milk substitute (like almond, oat, or soy) works well for dietary preferences.
- Vanilla Extract: Adds aromatic warmth and complexity, rounding out the chocolate profile without overpowering it.
- Large Egg Yolk: This is the secret to the cake’s custard-like texture. The yolk adds fat and emulsifiers that enhance richness and help form the molten center. Skipping it results in a drier, less decadent cake.
- Semi-Sweet Chocolate Chips or Chopped Chocolate: The star of the lava effect. When placed in the center, these melt during microwaving, creating the iconic flowing core. Use high-cacao chocolate (60–70%) for a balanced bitter-sweet contrast.
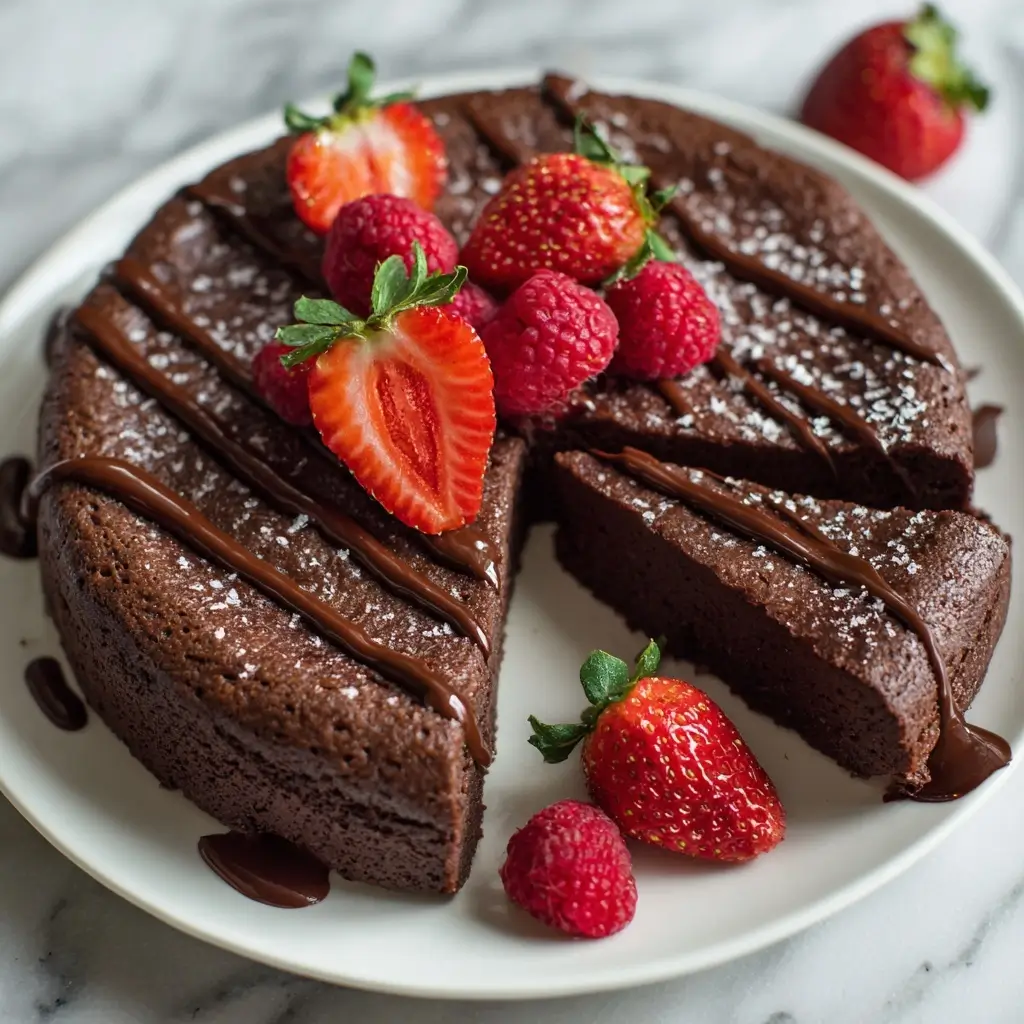
- Optional Toppings: Whipped cream, vanilla ice cream, powdered sugar, fresh berries, chocolate shavings, or a drizzle of caramel elevate the experience from simple to sublime.
Step-by-Step Recipe: How to Make the Perfect Chocolate Lava Mug Cake
Follow these detailed instructions to create a restaurant-quality dessert in your own kitchen—no special tools required, just a microwave-safe mug and basic utensils.
- Gather Your Equipment: Choose a large microwave-safe mug or ramekin (at least 12 oz capacity). Smaller mugs may overflow. You’ll also need a small whisk or fork, measuring spoons, and a knife for testing doneness.
- Preheat (Indirectly): While microwaves don’t preheat like ovens, ensure your mug is at room temperature. Avoid using cold mugs straight from the cupboard, as thermal shock can cause cracking.
- Mix Dry Ingredients: In the mug, combine 1 tablespoon all-purpose flour, 2 tablespoons granulated sugar, 2 tablespoons unsweetened cocoa powder, 1/8 teaspoon baking powder, and a pinch of salt. Whisk thoroughly until no lumps remain and the mixture is uniformly dark brown.
- Add Wet Ingredients: Pour in 2 tablespoons of melted butter, 2 tablespoons of milk, 1/4 teaspoon of vanilla extract, and 1 large egg yolk. Stir vigorously for 20–30 seconds until the batter is smooth, glossy, and free of streaks. Scrape the sides of the mug to ensure even mixing.
- Check Consistency: The batter should resemble thick pancake mix—pourable but not runny. If too thick, add an extra teaspoon of milk. If too thin, sprinkle in a bit more flour.
- Insert the Chocolate Core: Push 1 tablespoon of semi-sweet chocolate chips or chunks gently into the center of the batter. Do not stir them in—they must remain concentrated in the middle to create the lava effect.
- Optional Flavor Boost: For a gourmet twist, sprinkle a pinch of espresso powder or a dash of cinnamon into the batter before adding the chocolate. Both enhance chocolate depth without being detectable on their own.
- Microwave Carefully: Place the mug in the center of the microwave. Cook on high power for 75 to 90 seconds. Start with 75 seconds, as microwave wattages vary. The cake is done when the top looks set and dry, but the center remains slightly soft. It will continue to cook from residual heat.
- Wait Before Serving: Let the mug cake rest for 1–2 minutes after microwaving. This allows the molten center to stabilize and prevents burns from overheated chocolate.
- Finish and Serve: Top with whipped cream, a scoop of vanilla ice cream, or a dusting of powdered sugar. Insert a spoon and break open the top to reveal the flowing chocolate inside. Serve immediately while warm.
Pro Tips for Success Every Time
- Use a Large Mug: Opt for a 12–16 oz mug to prevent overflow. The cake will rise significantly during cooking.
- Don’t Overcook: This is the most common mistake. Over-microwaving turns the lava center into a fully baked cake. Aim for a slightly underdone look—the cake finishes cooking as it sits.
- Know Your Microwave: A 1000-watt microwave typically needs 80 seconds. Lower wattage? Try 90–100 seconds. Higher wattage? Start at 60 seconds and check frequently.
- Whisk Thoroughly: Eliminate all dry pockets, especially around the edges of the mug, to ensure even cooking.
- Room Temperature Ingredients: Cold milk or butter can affect how the batter mixes and cooks. Let ingredients sit out for 15 minutes if possible.
- Avoid Stirring the Chocolate: Keep the chocolate intact in the center. Stirring distributes it and ruins the lava effect.
- Double for Two?: While tempting, do not double the recipe in one mug. Instead, use two mugs and microwave them side by side (if space allows), rotating halfway for even heating.
- Handle with Care: The mug gets extremely hot. Use a towel or oven mitt when removing it from the microwave.
Variations and Customizations: Make It Your Own
One of the greatest joys of the chocolate lava mug cake is its adaptability. Here are creative ways to personalize your dessert:
- Peanut Butter Swirl: Add 1 teaspoon of peanut butter on top of the batter before microwaving, then insert the chocolate. Creates a Reese’s-inspired delight.
- White Chocolate & Raspberry: Replace semi-sweet chocolate with white chocolate chips and add 3–4 fresh raspberries on top before cooking.
- Spiced Mexican Chocolate: Mix in a pinch of cayenne pepper, cinnamon, and nutmeg for a warm, spicy kick.
- Mint Chocolate: Add 1/8 teaspoon of peppermint extract to the batter and use mint chocolate chips for a refreshing twist.
- Gluten-Free Version: Substitute all-purpose flour with a 1:1 gluten-free baking blend. Ensure cocoa powder and chocolate are certified gluten-free.
- Dairy-Free/Vegan Option: Use coconut oil instead of butter, almond or oat milk, flax egg (1 tbsp ground flax + 3 tbsp water, let sit 5 mins), and dairy-free chocolate. Results may be slightly less rich but still delicious.
- Alcohol Infusion: Stir in 1 teaspoon of Baileys, Kahlúa, or Grand Marnier for an adult version. Enhances depth and pairs beautifully with chocolate.
- Nutty Crunch: Sprinkle chopped toasted walnuts, pecans, or hazelnuts on top before or after cooking.
- Salted Caramel Core: Replace chocolate chips with a caramel-filled chocolate or drop a spoonful of thick salted caramel sauce in the center.
- S’mores Style: Add a piece of milk chocolate, a few mini marshmallows, and crushed graham cracker crumbs on top before microwaving.
Health Considerations and Nutritional Value
While undeniably indulgent, understanding the nutritional profile of your Chocolate Lava Mug Cake can help you enjoy it mindfully.
Nutrition Facts (Approximate, per serving):
Calories: 380
Total Fat: 20g (Saturated Fat: 12g)
Cholesterol: 120mg
Sodium: 200mg
Carbohydrates: 48g (Dietary Fiber: 3g, Sugars: 32g)
Protein: 6g
Iron: 15% DV, Calcium: 8% DV
Health Notes:
- This dessert is high in sugar and saturated fat, primarily from chocolate, butter, and egg yolk. Enjoy occasionally as part of a balanced diet.
- The inclusion of egg yolk provides healthy fats, choline, and essential nutrients, but increases cholesterol content.
- To reduce calories: Use sugar substitute (like erythritol), replace half the butter with applesauce, omit the ice cream topping, or use dark chocolate with higher cacao and less sugar.
- Cocoa powder contains antioxidants like flavonoids, which may support heart health in moderation.
- For portion control, this single-serving format naturally limits intake compared to slicing a full cake.
- Those with dietary restrictions (vegan, gluten-free, lactose intolerant) can adapt the recipe using alternative ingredients, though texture and flavor may vary.
Ingredients
- 1 tablespoon all-purpose flour (or gluten-free 1:1 blend)
- 2 tablespoons granulated sugar (or coconut sugar for a natural option)
- 2 tablespoons unsweetened cocoa powder (preferably Dutch-processed)
- 1/8 teaspoon baking powder
- Pinch of salt
- 2 tablespoons unsalted butter, melted (or coconut oil for dairy-free)
- 2 tablespoons milk (whole, 2%, or plant-based)
- 1/4 teaspoon pure vanilla extract
- 1 large egg yolk (save the white for scrambling or a smoothie!)
- 1 tablespoon semi-sweet chocolate chips or chopped chocolate bar
- Optional: whipped cream, ice cream, powdered sugar, berries
Directions
- In a microwave-safe mug (12 oz or larger), whisk together flour, sugar, cocoa powder, baking powder, and salt until well combined.
- Add melted butter, milk, vanilla extract, and egg yolk. Stir vigorously with a fork or small whisk until smooth and uniform, about 20–30 seconds.
- Ensure there are no dry spots, especially along the bottom and sides of the mug.
- Gently press the chocolate chips into the center of the batter. Do not stir.
- Microwave on high for 75 to 90 seconds, depending on your microwave’s power. The cake should rise and appear set on top, but still soft in the center.
- Allow to rest for 1–2 minutes. The internal temperature will remain high, so resting prevents burns and improves texture.
- Top with whipped cream, a scoop of ice cream, or a dusting of cocoa powder. Serve immediately with a spoon for maximum lava effect.
Frequently Asked Questions (FAQ)
Can I make this without a microwave?
Yes! Preheat your oven or toaster oven to 350°F (175°C). Use an oven-safe ramekin, follow the same steps, and bake for 10–12 minutes until the edges are set but the center is soft.
Why didn’t my cake have a lava center?
Most likely, it was overcooked. Try reducing the time by 10–15 seconds next time. Also, ensure you’re using enough chocolate in the center and not stirring it in.
Can I prepare the batter ahead of time?
Yes, but only briefly. You can mix dry and wet ingredients separately and store them for up to 24 hours, but combining them starts the leavening process. For best results, mix and cook immediately.
What kind of mug should I use?
A ceramic or stoneware mug labeled “microwave-safe.” Avoid metal-trimmed or cracked mugs. Glass mugs work too, but may cook unevenly.
Can I double the recipe?
Not in the same mug. Doubling causes uneven cooking and overflow. Instead, make two separate mug cakes, microwaving them side by side if possible.
Is it safe to eat with raw egg yolk?
The egg yolk cooks during microwaving and reaches a safe temperature. However, if you’re pregnant, immunocompromised, or concerned, use pasteurized eggs or skip the yolk (though texture will suffer).
How can I make it fluffier?
Add another 1/8 teaspoon of baking powder or lightly beat the egg yolk before adding. Be cautious—too much leavening can collapse the structure.
Can I freeze leftovers?
This cake is best eaten fresh. Reheating ruins the lava effect. However, you can store uncooked batter in a sealed container for up to 24 hours.
Summary
The Chocolate Lava Mug Cake for One is a rich, quick, and satisfying dessert that brings gourmet indulgence into your kitchen in under five minutes. With its molten chocolate center and tender crumb, it’s the ultimate solo treat for chocolate lovers.