Introduction
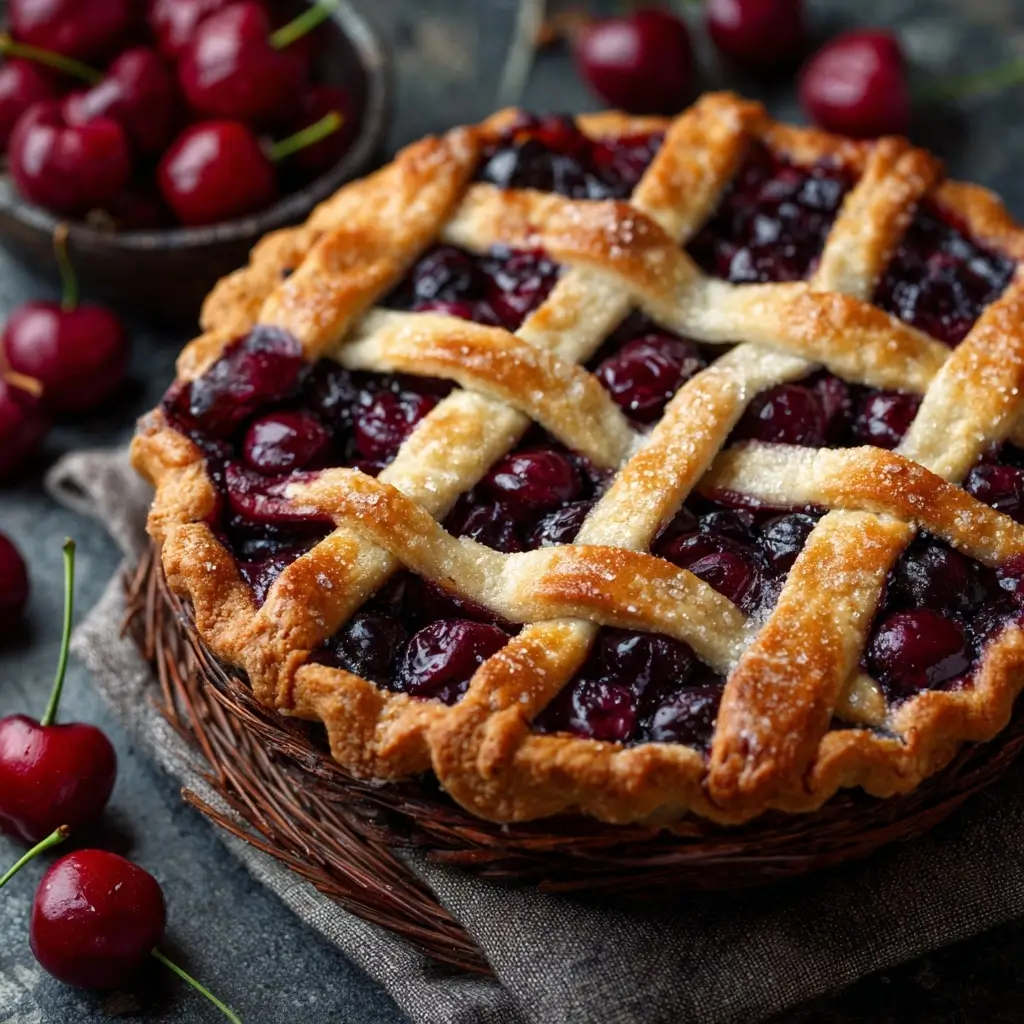
Cherry pie is one of the most beloved American desserts, known for its vibrant red filling, flaky golden crust, and sweet-tart flavor that dances on the palate. Whether served warm with a scoop of vanilla ice cream or enjoyed cold with a cup of coffee, this classic dessert evokes nostalgia and comfort in every bite. Cherries have long been a symbol of summer’s bounty, and transforming them into a pie celebrates both their natural sweetness and tanginess in a way that few other desserts can match. From backyard barbecues to Thanksgiving tables, cherry pie holds a cherished place in culinary tradition.
The History
The origins of cherry pie trace back centuries and span continents, reflecting a rich tapestry of cultural evolution. While cherries themselves are believed to have originated in Anatolia (modern-day Turkey) and were brought to Europe by Roman legions, the concept of fruit-filled pies began gaining popularity during the Middle Ages in England. Early English cookbooks from the 14th century mention “cherye pyes,” often made with dried cherries due to seasonal limitations. These early versions were more akin to savory dishes, as sugar was a rare luxury and spices like pepper and cinnamon were commonly added.
As trade routes expanded and sugar became more accessible, fruit pies evolved into sweeter confections. By the 17th century, cherry pie had become a staple in British households, especially during cherry season. The recipe crossed the Atlantic with European settlers, particularly the English and Dutch, who brought their baking traditions to colonial America. In the United States, cherry pie flourished thanks to the abundance of wild cherry trees and the development of orchards across regions like Michigan and Oregon.
By the 19th and early 20th centuries, cherry pie had become emblematic of American home cooking. It was celebrated not only for its taste but also for its symbolism—representing simplicity, hard work, and family values. The phrase “as American as apple pie” might be more common, but cherry pie has an equally strong claim to national pride, especially in states where cherries are a major crop. Today, it remains a favorite at fairs, holidays, and family gatherings, preserving its legacy as a timeless classic.
Ingredients Breakdown
Creating the perfect cherry pie begins with understanding each ingredient’s role in building flavor, texture, and structure. Let’s take a detailed look at what goes into both the filling and the crust:
- Fresh or Frozen Cherries: The star of the show. Tart red cherries like Montmorency are ideal because they balance sweetness with acidity. Sweet varieties like Bing can be used but may require less added sugar. Fresh cherries offer peak flavor when in season (late spring to early summer), while frozen cherries are convenient and retain quality year-round.
- Sugar: Enhances sweetness and helps draw out juices from the cherries. Granulated white sugar is standard, but some bakers use brown sugar or a mix for deeper flavor. Adjust amounts based on cherry tartness.
- Cornstarch or Tapioca Starch: Acts as a thickening agent to prevent a runny filling. Cornstarch gives a clear, glossy finish; tapioca starch offers a slightly chewier texture and holds up better under prolonged heat.
- Lemon Juice: Adds brightness, enhances cherry flavor, and prevents oxidation (browning). Its acidity also balances the sugar and improves shelf life.
- Almond Extract (optional): A small amount complements the cherry flavor beautifully, echoing the natural compounds found in cherry pits. Use sparingly—a little goes a long way.
- Butter (for dotting): Small pieces placed atop the filling before baking add richness and help create a luxurious mouthfeel.
- Salt: A pinch heightens all flavors without making the pie taste salty.
- Pie Crust (Double Crust): Typically made from all-purpose flour, cold unsalted butter or shortening, ice water, and a touch of salt. Some recipes include a bit of sugar for browning and flavor. The bottom crust should be sturdy enough to hold the juicy filling, while the top crust can be solid, lattice, or vented for steam release.
Step-by-Step Recipe
Making a homemade cherry pie from scratch is a rewarding experience. Follow these steps carefully to achieve a pie with a crisp crust and luscious, non-runny filling.
- Prepare the Pie Crust: In a large bowl, combine 2 ½ cups all-purpose flour and 1 teaspoon salt. Cut in 1 cup (2 sticks) cold unsalted butter, cubed, using a pastry cutter or fork until the mixture resembles coarse crumbs. Gradually add 6–8 tablespoons ice water, one tablespoon at a time, mixing just until the dough comes together. Divide into two equal balls, flatten into discs, wrap in plastic, and refrigerate for at least 1 hour.
- Preheat Oven: Set your oven to 375°F (190°C). Position a rack in the lower third and place a baking sheet on it to catch any drips.
- Prepare Cherries: Pit 4 cups of fresh or thawed frozen cherries. You can use a cherry pitter or a paperclip method if needed. Measure accurately after pitting.
- Make the Filling: In a large bowl, gently toss the cherries with ¾ to 1 cup granulated sugar (adjust to taste), 3 tablespoons cornstarch, 1 tablespoon lemon juice, ¼ teaspoon salt, ½ teaspoon almond extract (if using), and optionally ½ teaspoon ground cinnamon. Mix until evenly coated.
- Roll Out the Bottom Crust: On a lightly floured surface, roll one disc of dough into a 12-inch circle. Carefully transfer it to a 9-inch pie dish. Trim excess dough hanging over the edge, leaving about a ½-inch overhang. Gently press into the dish without stretching.
- Add the Filling: Pour the cherry mixture into the crust. Dot the top with 1 tablespoon of cold butter, cut into small pieces.
- Top the Pie: Roll out the second dough disc. You can place it whole over the pie (with slits cut for steam), weave a lattice, or use decorative cutouts. Moisten the edge of the bottom crust with water, then lay the top crust over. Crimp the edges firmly with a fork or fingers to seal.
- Optional Egg Wash: For a golden, shiny crust, brush the top with a beaten egg mixed with 1 tablespoon milk or cream. Sprinkle with coarse sugar for extra crunch and sparkle.
- Bake: Place the pie on the preheated baking sheet. Bake for 50 to 60 minutes, or until the crust is deep golden brown and the filling is bubbling through the vents. If the edges brown too quickly, cover them with foil or a silicone crust shield.
- Cool Completely: Allow the pie to cool on a wire rack for at least 3–4 hours. This cooling time is crucial—it allows the filling to set properly. Cutting too soon will result in a soupy mess.
Tips
- Use Cold Ingredients for Crust: Keeping butter and water icy ensures a flaky texture. Warm ingredients melt the fat too soon, leading to a tough crust.
- Don’t Skip the Chill Time: Allowing the dough to rest relaxes the gluten and prevents shrinkage during baking.
- Thicken Properly: Too little thickener = runny pie; too much = gummy texture. Always measure starch precisely. If using tapioca, let the filling sit for 15 minutes before filling the pie to allow absorption.
- Prevent Soggy Bottoms: Bake the pie on a preheated baking sheet to deliver immediate heat to the base, helping it crisp up faster.
- Ventilation is Key: Ensure adequate steam escape holes or a lattice top to avoid a soggy crust and pressure buildup.
- Cool Before Slicing: Patience pays off. Wait at least three hours so the filling fully sets.
- Freeze for Later: Assemble the unbaked pie, wrap tightly in plastic and foil, and freeze. Bake from frozen, adding 15–20 minutes to the baking time.
Variations and Customizations
While traditional cherry pie is delicious on its own, there are many creative ways to customize it to suit different tastes and occasions:
- Combination Pies: Mix cherries with other fruits like blueberries, raspberries, or blackberries for a berry-cherry fusion. Apples or pears can add texture and complexity.
- Spiced Cherry Pie: Add warming spices such as cinnamon, nutmeg, cardamom, or even a pinch of clove or star anise for a cozy twist.
- Lattice vs. Solid Top: A lattice crust not only looks stunning but allows more evaporation, resulting in a thicker filling. Try braided edges or leaf cutouts for elegance.
- Galette Style: For a rustic, free-form version, skip the pie dish. Place the filling on one half of the rolled dough, fold over, and crimp the edges. Bakes beautifully and requires no special equipment.
- Gluten-Free Cherry Pie: Use a gluten-free flour blend for the crust (ensure it contains xanthan gum or add it separately). Many store-bought GF pie shells work well too.
- Vegan Cherry Pie: Substitute butter in the crust with vegan shortening or coconut oil, and use maple syrup or agave instead of honey-based washes.
- Mini Cherry Hand Pies: Make individual portions using round cutters and seal with a fork. Perfect for parties or freezing.
- Brandy or Kirsch Infusion: Add 1–2 tablespoons of brandy or kirsch (cherry liqueur) to the filling for a sophisticated depth of flavor.
Health Considerations and Nutritional Value
While cherry pie is undeniably indulgent, understanding its nutritional profile can help you enjoy it mindfully. A typical slice (1/8th of a 9-inch pie) contains approximately:
- Calories: 350–450 kcal
- Total Fat: 15–20g (mostly from butter in crust)
- Saturated Fat: 8–10g
- Carbohydrates: 50–60g
- Sugars: 25–35g (naturally occurring and added)
- Protein: 3–5g
- Fiber: 2–3g (from cherries and whole grain flour if used)
- Vitamin C: Cherries provide a good source (~15% DV per serving)
- Potassium and Antioxidants: Cherries are rich in anthocyanins, which have anti-inflammatory properties.
To make a healthier version:
- Reduce sugar by 25–30%, relying on the natural sweetness of ripe cherries.
- Use whole wheat or spelt flour in part of the crust for added fiber.
- Replace half the butter with heart-healthy oils like olive or avocado (though texture may vary).
- Opt for natural thickeners like chia seeds or arrowroot powder.
- Serve smaller slices paired with Greek yogurt instead of ice cream.
Note: Those with diabetes or insulin sensitivity should monitor portion sizes due to high carbohydrate and sugar content. Tart cherries have a lower glycemic index than sweet ones, making them a slightly better option.
Ingredients
For the Double Pie Crust:
- 2 ½ cups (315g) all-purpose flour
- 1 teaspoon salt
- 1 cup (2 sticks / 226g) unsalted butter, cold and cubed
- 6–8 tablespoons ice water
For the Cherry Filling:
- 4 cups (about 680g) pitted tart red cherries (fresh or frozen, thawed)
- ¾ to 1 cup (150–200g) granulated sugar (adjust to taste)
- 3 tablespoons (24g) cornstarch (or tapioca starch)
- 1 tablespoon lemon juice
- ½ teaspoon almond extract (optional)
- ¼ teaspoon salt
- 1 tablespoon cold butter, diced
For Finishing (Optional):
- 1 egg + 1 tablespoon milk (for egg wash)
- Coarse sugar for sprinkling
Directions
- In a food processor or large bowl, mix flour and salt. Add cold cubed butter and pulse or cut in until mixture resembles coarse meal with pea-sized bits of butter.
- Gradually add ice water, 1 tablespoon at a time, mixing just until dough begins to clump. Do not overwork.
- Divide dough into two equal portions, shape into discs, wrap in plastic, and refrigerate for at least 1 hour (or up to 2 days).
- While dough chills, prepare filling: In a large bowl, combine pitted cherries, sugar, cornstarch, lemon juice, almond extract, salt, and optional spices. Gently toss to coat. Let sit for 10–15 minutes.
- Preheat oven to 375°F (190°C). Place a baking sheet on the center rack to preheat.
- On a floured surface, roll out one disc into a 12-inch circle. Transfer to a 9-inch pie dish. Trim edges, leaving a ½-inch overhang.
- Pour cherry filling into the crust. Dot with small pieces of butter.
- Roll out the second disc. Place over filling or weave into a lattice. Seal and crimp edges. Cut slits if using a full top crust.
- Brush top with egg wash and sprinkle with coarse sugar.
- Bake on preheated baking sheet for 50–60 minutes, until crust is golden and filling is bubbling.
- Remove from oven and cool on a wire rack for 3–4 hours before slicing.
- Serve plain, with whipped cream, or à la mode with vanilla ice cream.
FAQ
Can I use canned cherries?
Yes, but drain them thoroughly and reduce added liquid. Canned cherries are often softer and packed in syrup, so you may need to increase thickener slightly and reduce sugar.
Why is my cherry pie runny?
Common causes: insufficient thickener, cutting the pie too soon, or underbaking. Always allow proper cooling time—this lets the starch set the filling.
Can I make cherry pie ahead of time?
Absolutely. Bake it 1–2 days in advance and store covered at room temperature. Reheat gently in a 300°F oven for 10–15 minutes before serving.
How do I freeze cherry pie?
Freeze baked or unbaked. Wrap tightly in plastic and foil. Baked pies keep 4–6 months; unbaked ones up to 3 months. Thaw in fridge or bake from frozen with extra time.
What kind of cherries are best?
Tart red cherries (like Montmorency) are ideal for balance. Sweet cherries (Bing, Rainier) work but may require more lemon juice and less sugar.
Do I need to peel cherries?
No. The skin contributes color, texture, and nutrients. Just ensure they’re well-washed and pitted.
Can I make a no-sugar-added cherry pie?
Yes, using low-calorie sweeteners like erythritol or stevia designed for baking. Choose a compatible thickener (some artificial sweeteners affect gel formation).
Summary
Cherry pie is a timeless American classic that combines a buttery, flaky crust with a vibrant, sweet-tart cherry filling for a dessert that’s both comforting and celebratory. With careful attention to ingredients, technique, and cooling time, you can create a show-stopping pie that delights at any occasion.