Introduction
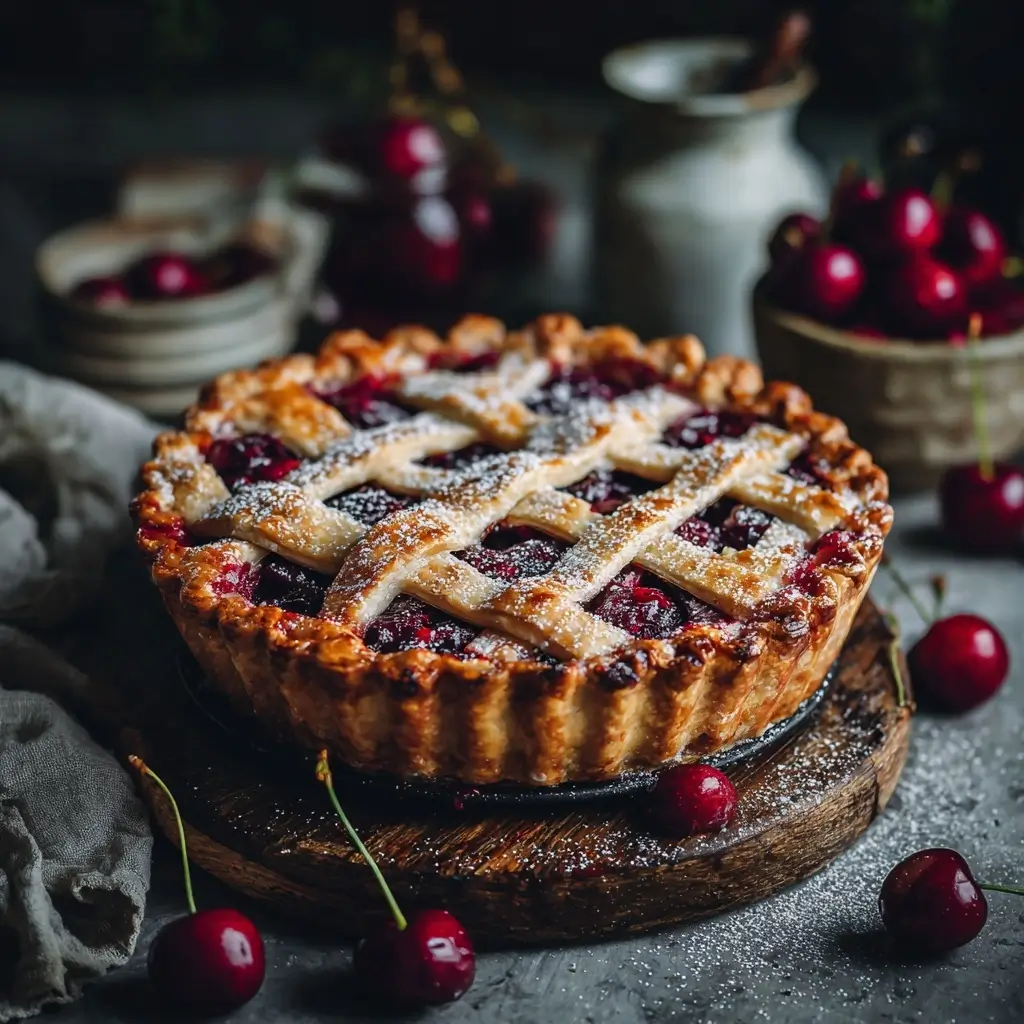
Cherry pie is a beloved classic in American baking, cherished for its vibrant red filling, flaky golden crust, and the irresistible aroma of sweet cherries mingling with warm spices that wafts through the kitchen during baking. Whether served warm with a scoop of vanilla ice cream or enjoyed cold for breakfast, this dessert holds a special place in holiday traditions, family gatherings, and summer picnics. With roots stretching back to early American settlers and evolving through generations, cherry pie has become more than just a treat—it’s a symbol of comfort, nostalgia, and home-baked goodness.
The History
The origins of cherry pie trace back centuries, long before it became an American staple. Cherries themselves were first cultivated in ancient Greece and spread throughout Europe via Roman expansion. By the Middle Ages, cherry-filled pastries had gained popularity across England and France, often made with preserved fruit and enclosed in tough pastry shells known as “coffyns.” These early pies were not only desserts but also practical ways to preserve fruit and transport food.
When European settlers arrived in North America, they brought their culinary traditions with them, including pie-making. Wild black cherries grew abundantly in parts of the United States, particularly in regions like Michigan and the Pacific Northwest, where ideal growing conditions allowed for large-scale cultivation. As orchards flourished, so did the popularity of cherry pie. By the 18th and 19th centuries, cherry pie was a common feature on farmhouse tables, especially during harvest season.
In modern times, cherry pie has cemented its status as an all-American dessert. It was famously referenced in songs like “American Pie” by Don McLean, where “the day the music died” is followed by “I sang the song that made me wonder why I’d ever sing,” culminating in the line, “And while Lenin read a book on Marx, the quartet practiced in the park, and we sang dirges in the dark—the day the music died… This’ll be the day that I die…”—though the mention of cherry pie there is more symbolic than literal. Regardless, the image of cherry pie as a quintessential part of American culture remains strong. Today, both homemade and commercial versions are celebrated nationwide, from county fair contests to gourmet bakery offerings.
Ingredients Breakdown
Creating the perfect cherry pie starts with understanding each ingredient’s role in achieving balance between flavor, texture, and structure. Here’s a detailed breakdown:
- Fresh or Frozen Cherries: The star of the show. Sweet varieties like Bing or Lambert work best for dessert pies, while tart cherries like Montmorency add a bright zing and are traditionally used in canned pie fillings. Fresh cherries offer superior texture and flavor, but frozen unsweetened cherries are a great alternative when out of season.
- Sugar: Balances the natural tartness of cherries. Granulated white sugar is standard, though some bakers prefer turbinado or brown sugar for added depth. Adjust amounts based on cherry sweetness and personal taste.
- Cornstarch (or Tapioca Starch/Flour): Acts as a thickener to prevent a runny filling. Cornstarch gives a glossy finish and sets firmly when cooled. Tapioca flour offers a clearer gel and better freeze-thaw stability, making it ideal for freezing pies.
- Lemon Juice: Adds brightness and acidity, enhancing the cherry flavor and balancing sweetness. It also helps preserve color during baking.
- Almond Extract: A small amount deepens the cherry flavor due to the shared aromatic compounds between cherries and almonds. Use sparingly—one-quarter to one-half teaspoon is enough.
- Cinnamon and Nutmeg (optional): Warm spices that complement cherry beautifully. While not traditional in all recipes, a pinch can elevate complexity without overpowering.
- Salt: A pinch enhances all other flavors and rounds out the sweetness.
- Butter (diced): Added atop the filling before covering with the top crust, small bits of butter melt into the pie, enriching the juices and adding a velvety mouthfeel.
- Pie Crust (double-crust): Made from flour, fat (butter, shortening, or lard), ice water, and salt. A successful crust should be flaky, tender, and golden brown. Many bakers use a combination of butter (for flavor) and shortening (for tenderness).
- Egg Wash or Cream (for brushing): Applied to the top crust before baking to promote browning and give a beautiful sheen. An egg yolk mixed with a tablespoon of milk works well.
- Sanding Sugar (optional): Sprinkled on after egg wash for a sparkling, sweet crunch on the crust.
Step-by-Step Recipe
- Prepare the Pie Crust: Start by making or thawing your favorite double pie crust. If preparing from scratch, mix 2 ½ cups all-purpose flour with 1 teaspoon salt. Cut in 1 cup (2 sticks) cold unsalted butter and ⅓ cup vegetable shortening until pea-sized crumbs form. Gradually add 6–8 tablespoons ice water, mixing just until dough comes together. Divide into two discs, wrap in plastic, and chill for at least 1 hour.
- Preheat Oven: Set oven to 375°F (190°C). Position rack in the lower third to ensure even bottom crust baking.
- Prepare Cherries: Pit 4 cups fresh or frozen cherries (do not thaw if frozen). Place in a large bowl. Add ¾ to 1 cup granulated sugar (adjust based on cherry sweetness), ¼ cup cornstarch, 1 tablespoon lemon juice, ½ teaspoon almond extract, ¼ teaspoon cinnamon (optional), ⅛ teaspoon nutmeg (optional), and a pinch of salt. Gently toss until evenly coated.
- Roll Out Bottom Crust: On a lightly floured surface, roll one dough disc into a 12-inch circle. Carefully transfer to a 9-inch pie dish. Trim excess dough hanging over the edge, leaving about a half-inch overhang. Refrigerate while preparing the top crust.
- Add Filling: Pour cherry mixture into the prepared crust. Dot the top with 1 tablespoon cold unsalted butter, cut into small pieces.
- Roll and Apply Top Crust: Roll the second dough disc into another 12-inch circle. You may create a full solid crust, a lattice design, or use decorative cutouts. For a full crust, place over filling, seal edges by crimping with a fork or fingers, and cut several slits to allow steam to escape. For a lattice, weave strips over the filling and crimp edges.
- Finish the Edges: Crimp the perimeter using your fingers or a fork. Brush the top with egg wash (1 egg yolk + 1 tbsp milk) and sprinkle with sanding sugar for shine and crunch.
- Bake the Pie: Place pie on a baking sheet (to catch drips) and bake for 50 to 60 minutes, or until crust is deep golden brown and filling is bubbling through the vents. If edges brown too quickly, cover with foil or a silicone pie shield.
- Cool Completely: Let the pie cool on a wire rack for at least 3–4 hours. This allows the filling to set properly. Cutting too soon will result in a runny mess.
- Serve: Slice with a sharp knife and serve plain or with whipped cream or vanilla ice cream.
Tips
- Always Chill Your Dough: Cold ingredients and rested dough prevent gluten development and melting fat too soon, leading to a flakier crust.
- Use a Pie Shield or Foil: Protect the crust edges from over-browning by covering them halfway through baking.
- Thicken Properly: Too little thickener leads to soupy pie; too much creates a gloopy texture. Measure carefully. For very juicy cherries, increase cornstarch slightly or use tapioca for a clearer gel.
- Ventilation is Key: Ensure your top crust has adequate steam vents to avoid sogginess and bursting.
- Bake on a Preheated Baking Sheet: Placing the pie on a hot tray helps crisp the bottom crust and prevents undercooking.
- Don’t Rush Cooling: Patience pays off. The pectin and starches need time to re-solidify as the pie cools.
- Test Ripeness: Bubbling filling indicates internal temperature has reached the point where thickener activates—wait for consistent bubbles in the center, not just the edges.
- Freeze for Later: Assemble unbaked pie, wrap tightly, and freeze. Bake straight from freezer, adding 15–20 minutes to baking time.
Variations and Customizations
While classic cherry pie is timeless, creative adaptations can suit different tastes, seasons, and dietary needs:
- Mixed Berry-Cherry Pie: Combine cherries with blueberries, raspberries, or blackberries for a fruity twist and enhanced color.
- Chocolate Cherry Pie: Add chocolate chips or chunks to the filling, or drizzle melted chocolate over slices before serving.
- Bourbon-Cherry Pie: Stir 1–2 tablespoons of bourbon into the filling for a rich, adult-friendly depth of flavor.
- Gluten-Free Cherry Pie: Use a gluten-free flour blend for the crust and ensure cornstarch or tapioca is certified GF. Many store-bought GF pie crusts work well too.
- Vegan Cherry Pie: Substitute butter with coconut oil or vegan shortening, use ice water, and replace egg wash with plant-based milk or maple syrup glaze.
- No-Sugar-Added Version: Use erythritol or monk fruit sweetener instead of sugar, and opt for naturally sweet cherries. Note: some artificial sweeteners don’t caramelize or thicken the same way.
- Mini Hand Pies: Make individual servings using round cutters and sealing edges with a fork. Great for parties or freezing.
- Deep-Dish Cherry Pie: Use a deeper pie plate and increase filling by 50%, adjusting thickener accordingly. Ideal for extra-generous portions.
- Cherry Crumble Pie: Skip the top crust and add a crumb topping made of oats, flour, brown sugar, and cold butter for a hybrid pie-crisp experience.
- Double Almond Cherry Pie: Use almond flour in the crust and increase almond extract slightly for a marzipan-like richness.
Health Considerations and Nutritional Value
Cherry pie, while delicious, is a high-calorie dessert best enjoyed in moderation. However, cherries themselves offer notable health benefits:
- Rich in Antioxidants: Cherries contain anthocyanins and quercetin, which have anti-inflammatory and heart-protective properties.
- Natural Melatonin Source: Tart cherries, in particular, may help regulate sleep cycles and improve sleep quality.
- Vitamin C and Potassium: Cherries provide moderate levels of immune-supporting vitamin C and electrolyte-balancing potassium.
- Fiber Content: Whole cherries contribute dietary fiber, aiding digestion—though pitting removes some skin-based fiber.
That said, traditional cherry pie can be high in sugar and saturated fat, primarily from the crust and added sweeteners. A typical slice (1/8 of a 9-inch pie) contains approximately:
- Calories: 350–450
- Total Fat: 15–20g (mostly from butter/shortening)
- Saturated Fat: 7–10g
- Carbohydrates: 50–60g
- Sugars: 30–40g (including natural and added)
- Protein: 3–4g
- Sodium: 200–300mg
To make a healthier version, consider:
- Reducing sugar by 25% and relying on ripe cherries for sweetness.
- Using whole wheat or spelt flour in the crust for added fiber.
- Substituting part of the fat with applesauce or Greek yogurt (in moderation, as too much alters texture).
- Serving smaller slices with a side of Greek yogurt instead of ice cream.
- Opting for a single-crust pie with a crumb topping to reduce overall fat and calories.
Ingredients
For the Double Pie Crust:
- 2 ½ cups (315g) all-purpose flour
- 1 teaspoon salt
- 1 cup (2 sticks / 226g) unsalted butter, cold and cubed
- ⅓ cup (75g) vegetable shortening, cold
- 6–8 tablespoons ice water
For the Cherry Filling:
- 4 cups (about 600g) pitted fresh or frozen cherries (sweet or tart)
- ¾ to 1 cup (150–200g) granulated sugar (adjust to taste)
- ¼ cup (30g) cornstarch (or tapioca starch)
- 1 tablespoon fresh lemon juice
- ½ teaspoon almond extract
- ¼ teaspoon ground cinnamon (optional)
- ⅛ teaspoon ground nutmeg (optional)
- Pinch of salt
- 1 tablespoon (14g) cold unsalted butter, diced
For Finishing:
- 1 egg yolk + 1 tablespoon milk (for egg wash)
- Sanding sugar or coarse sugar (optional, for sprinkling)
Directions
- Make the Dough: In a large bowl, whisk flour and salt. Cut in cold butter and shortening using a pastry cutter or two knives until mixture resembles coarse crumbs with pea-sized pieces. Gradually add ice water, one tablespoon at a time, mixing gently with a fork until dough begins to clump. Form into two equal discs, wrap in plastic, and refrigerate for at least 1 hour (or up to 2 days).
- Preheat Oven: Place oven rack in lower third. Heat oven to 375°F (190°C). Place a baking sheet on the rack to preheat (this helps crisp the bottom crust).
- Prepare Filling: In a large bowl, combine cherries, sugar, cornstarch, lemon juice, almond extract, cinnamon, nutmeg, and salt. Gently stir until evenly mixed. Let sit 15 minutes to draw out juices.
- Roll Bottom Crust: On a floured surface, roll one dough disc into a 12-inch circle. Transfer to a 9-inch pie dish. Trim edges to leave a ½-inch overhang. Refrigerate.
- Add Filling: Pour cherry mixture into crust. Scatter diced butter over the top.
- Top Crust: Roll second disc into a 12-inch circle. Drape over filling. Trim excess, leaving ½ inch overhang. Fold edges under and crimp with fingers or fork. Cut 4–5 slits in the top for ventilation.
- Glaze: Whisk egg yolk and milk. Brush over top crust. Sprinkle with sanding sugar.
- Bake: Place pie on preheated baking sheet. Bake 50–60 minutes, until crust is golden and filling is bubbling steadily in the center. Cover edges with foil if browning too fast.
- Cool: Let pie cool completely on a wire rack for 3–4 hours to allow filling to set.
- Serve: Slice with a sharp knife and enjoy with whipped cream or ice cream if desired.
FAQ
Can I use canned cherries?
Yes, but they’re often packed in syrup and may result in an overly sweet, soggy pie. Drain thoroughly and reduce added sugar. Fresh or frozen unsweetened cherries are preferred.
Do I need to pre-cook the filling?
No, the filling cooks perfectly in the oven. Pre-cooking can lead to mushy cherries and over-thickened sauce.
Why is my cherry pie runny?
Possible reasons: insufficient thickener, underbaking, or cutting too soon. Always let the pie cool fully—this allows the starch to re-gel.
Can I freeze cherry pie?
Yes! Freeze unbaked pie wrapped tightly in plastic and foil for up to 3 months. Bake from frozen, adding 15–20 minutes to baking time.
How long does cherry pie last?
Stored covered at room temperature, it lasts 2 days. In the refrigerator, up to 5 days. Reheat slices in the oven for best texture.
Can I make a lattice crust easily?
Yes! Roll out top crust and cut into 1-inch strips. Weave over filling by alternating over and under. Press ends into bottom crust and crimp.
Are tart cherries better than sweet cherries?
Tart cherries (like Montmorency) are traditional and balance sweetness well. Sweet cherries (like Bing) make a richer, dessert-style pie. Some bakers blend both for complexity.
Can I use arrowroot instead of cornstarch?
Yes, but arrowroot can break down with prolonged baking and may turn cloudy if mixed with acidic ingredients. Use 1:1 ratio, but know results may vary.
Summary
Cherry pie is a timeless American dessert that combines sweet-tart cherries with a flaky, buttery crust for a comforting treat perfect year-round. With careful attention to ingredients, technique, and cooling time, you can create a show-stopping pie that delights family and guests alike.