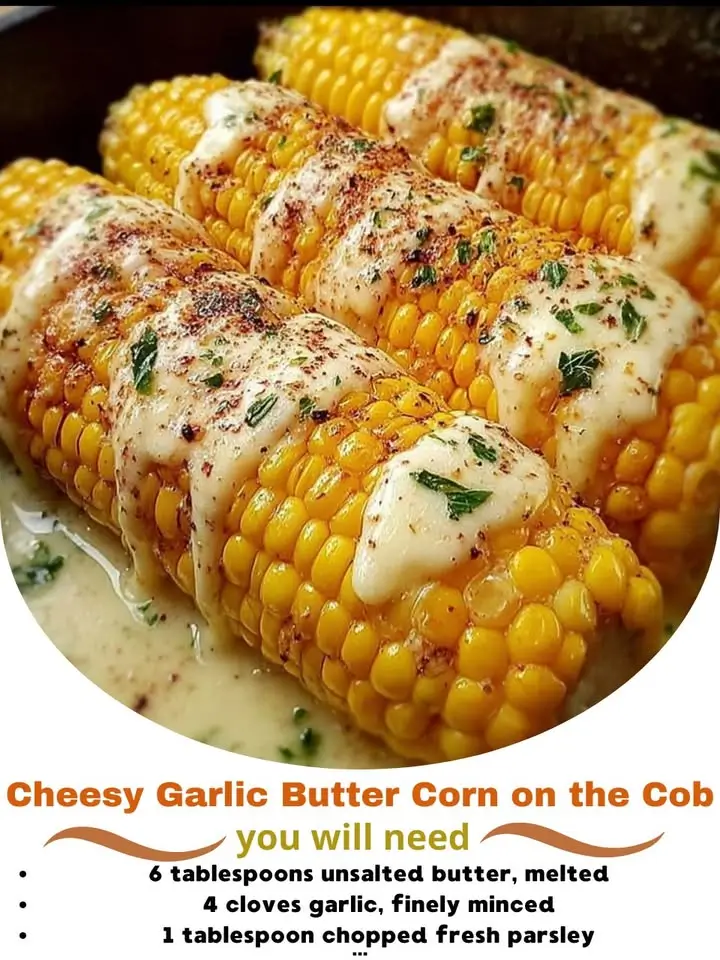
Cheesy Garlic Butter Corn on the Cob
There’s something undeniably comforting about a warm ear of corn slathered in rich, creamy butter, fragrant garlic, and a generous layer of melted cheese. Cheesy Garlic Butter Corn on the Cob is more than just a side dish—it’s a celebration of flavor, texture, and nostalgia. Whether you’re enjoying it at a backyard barbecue, a family dinner, or as part of a festive holiday spread, this golden, buttery delight never fails to impress. With its crispy edges, tender kernels, and savory-sweet aroma, this upgraded version of classic corn on the cob brings together the best of simplicity and indulgence. Let’s dive into everything you need to know to make the most delicious cheesy garlic butter corn right in your own kitchen.
The History of Corn on the Cob
Corn on the cob has deep roots in Native American cuisine, where maize was one of the first cultivated crops thousands of years ago. Indigenous peoples of North and Central America revered corn not only as a dietary staple but also as a sacred symbol of life and sustenance. When European settlers arrived in the Americas, they quickly adopted corn into their diets, learning from Native communities how to grow, harvest, and prepare it.
Boiled or roasted corn on the cob became a popular method of preparation, especially during summer harvests. Over time, as culinary traditions blended, additions like butter, salt, and herbs became common. The modern twist—adding garlic and cheese—emerged in the 20th century, influenced by global flavors and the growing popularity of bold, rich ingredients in American cooking. Today, Cheesy Garlic Butter Corn on the Cob represents a fusion of tradition and innovation, combining ancient grain with contemporary tastes.
Ingredients Breakdown
The magic of this dish lies in its simple yet flavorful components. Each ingredient plays a vital role in creating that irresistible harmony of taste and texture:
- Fresh Corn on the Cob: The star of the show. Fresh, in-season corn provides the sweet, juicy base. Look for bright green husks and plump kernels.
- Unsalted Butter: Provides richness and helps carry the garlic and cheese flavors. Using unsalted butter allows you to control the salt level.
- Fresh Garlic: Minced or pressed, fresh garlic gives a pungent, aromatic kick that mellows when cooked.
- Grated Parmesan Cheese: Adds a salty, nutty depth. It melts beautifully over hot corn.
- Shredded Mozzarella or Cheddar: For gooey, melty cheesiness. Cheddar adds color and sharpness; mozzarella brings stretch.
- Fresh Parsley (optional): A pop of color and freshness to balance the richness.
- Salt and Black Pepper: Essential seasonings to enhance all the other flavors.
- Smoked Paprika or Cayenne (optional): For a hint of warmth and complexity.
- Lemon Zest (optional): Brightens the overall flavor profile with a citrusy lift.
Step-by-Step Recipe
- Prepare the Corn: Remove the husks and silk from 4–6 ears of fresh corn. Rinse under cold water to ensure all silk is removed.
- Boil the Corn: Bring a large pot of salted water to a boil. Add the corn and cook for 5–7 minutes until tender and bright yellow. Alternatively, you can grill or roast the corn for a smokier flavor.
- Make the Garlic Butter: While the corn cooks, melt ½ cup (1 stick) of unsalted butter in a small saucepan over medium heat. Add 4–5 cloves of minced garlic and sauté for 1–2 minutes until fragrant but not browned. Remove from heat.
- Combine Cheeses: In a small bowl, mix ½ cup grated Parmesan and ¾ cup shredded cheddar or mozzarella.
- Drain and Dry Corn: Once cooked, remove corn from boiling water and let it drain on a clean towel or rack for a minute to prevent excess moisture.
- Brush with Garlic Butter: Using a pastry brush, generously coat each ear of corn with the warm garlic butter.
- Sprinkle with Cheese: Immediately sprinkle the cheese mixture over the hot corn so it begins to melt from the residual heat.
- Broil (Optional): For a golden, bubbly finish, place the coated corn on a baking sheet and broil in the oven for 2–3 minutes until cheese is melted and slightly caramelized. Watch closely to avoid burning.
- Garnish and Serve: Sprinkle with chopped parsley, a pinch of smoked paprika, freshly cracked black pepper, and optional lemon zest. Serve immediately while hot and melty.
Tips for Perfect Cheesy Garlic Butter Corn on the Cob
- Use Fresh, In-Season Corn: Peak-season corn (late spring through early fall) is naturally sweeter and juicier. If fresh corn isn’t available, frozen or even canned (drained) can work in a pinch, though texture may vary.
- Don’t Overcook the Garlic: Burnt garlic turns bitter. Sauté just until fragrant—about 1 minute—to preserve its sweet, savory essence.
- Apply Butter While Corn is Hot: Warm corn absorbs the butter better, allowing maximum flavor penetration.
- Add Cheese Immediately: The heat from the corn will start melting the cheese, giving it a luscious texture without needing the oven.
- Double the Garlic Butter: Leftover garlic butter is fantastic on bread, potatoes, or grilled meats—so consider making extra!
- Use a Corn Holder: Wooden or metal corn skewers make eating easier and more elegant, especially at gatherings.
- Grill for Extra Flavor: After boiling, grill the corn for 5–7 minutes, turning often, to add a smoky char before applying butter and cheese.
- Layer the Cheese: Apply half the cheese after buttering, then broil, and add the remaining cheese on top for a two-layered, gooey effect.
Variations and Customizations
This recipe is highly adaptable to different tastes, dietary needs, and occasions. Here are some creative twists to try:
- Mexican Street Corn (Elote) Style: Skip the mozzarella/cheddar blend and use cotija cheese, chili powder, lime juice, and a drizzle of mayo or crema for an authentic elote experience.
- Herb-Infused Butter: Add chopped rosemary, thyme, or chives to the garlic butter for an aromatic boost.
- Dairy-Free Version: Use plant-based butter and vegan cheese shreds made from cashew or coconut for a lactose-free alternative.
- Spicy Kick: Mix in a teaspoon of sriracha, chipotle paste, or red pepper flakes into the butter for heat lovers.
- Truffle Upgrade: Drizzle with truffle oil after adding cheese for a gourmet touch.
- Crunchy Topping:
- Honey-Garlic-Sweet Version: Stir a tablespoon of honey into the garlic butter for a sweet-and-savory profile that complements the corn’s natural sugars.
- Loaded Corn on the Cob: After cheese, top with crumbled bacon, diced jalapeños, green onions, and sour cream for a decadent “loaded” version.
- Gluten-Free Friendly: This recipe is naturally gluten-free—just verify labels on cheese and butter if needed.
- Mini Corn Version: Use baby corn or petite ears for appetizer-sized portions at parties.
Add crushed buttery crackers, breadcrumbs, or panko toasted in garlic butter for texture contrast.
Health Considerations and Nutritional Value
While Cheesy Garlic Butter Corn on the Cob is undeniably indulgent, it can still be enjoyed as part of a balanced diet—with mindful modifications.
Nutritional Highlights:
- Corn: A good source of fiber, antioxidants (like lutein and zeaxanthin for eye health), B vitamins, and complex carbohydrates. One medium ear has about 90–100 calories.
- Butter: High in saturated fat and calories, but also provides vitamin A and supports absorption of fat-soluble nutrients. Moderation is key.
- Garlic: Known for its immune-boosting, anti-inflammatory, and heart-healthy properties due to allicin content.
- Cheese: Offers protein, calcium, and phosphorus, but also contains saturated fat and sodium. Opt for lower-fat versions if desired.
Healthier Swaps:
- Use light butter or olive oil instead of full-fat butter.
- Choose reduced-fat cheese or increase Parmesan (which has strong flavor, so less is needed).
- Add more herbs and spices to reduce reliance on salt and fat for flavor.
- Serve alongside a fresh green salad or grilled vegetables to balance the meal.
Portion Control Tip: Stick to 1 ear per person as a side dish, and savor slowly. The rich flavors mean you won’t need much to feel satisfied.
Ingredients
- 6 ears of fresh corn, husked and cleaned
- ½ cup (1 stick) unsalted butter
- 5 cloves garlic, finely minced
- ½ cup grated Parmesan cheese
- ¾ cup shredded cheddar or mozzarella cheese
- 2 tablespoons chopped fresh parsley (optional)
- ½ teaspoon smoked paprika (optional)
- Salt and freshly ground black pepper, to taste
- 1 teaspoon lemon zest (optional)
Directions
- Bring a large pot of salted water to a rolling boil. Add the husked corn and cook for 5–7 minutes until tender. Remove and drain well.
- In a small saucepan, melt the butter over medium heat. Add the minced garlic and cook for 1–2 minutes, stirring frequently, until fragrant. Do not let it brown. Remove from heat.
- Preheat the broiler on high and position a rack 6 inches from the heat source. Line a baking sheet with foil or parchment.
- Place the drained corn on the baking sheet. Brush each ear generously with the garlic butter.
- Sprinkle the Parmesan and shredded cheese evenly over the corn, rotating to coat all sides.
- Bake under the broiler for 2–3 minutes, turning once, until the cheese is melted and lightly golden. Watch carefully to avoid burning.
- Remove from oven and sprinkle with parsley, smoked paprika, black pepper, and lemon zest if using.
- Serve immediately with extra garlic butter on the side for dipping.
FAQ
Can I make this ahead of time?
It’s best served fresh, but you can prep the garlic butter and shred the cheese in advance. Assemble and broil just before serving for optimal texture.
Can I use frozen corn?
Yes. Thaw and pat dry, then either boil briefly or roast to remove moisture before applying butter and cheese.
How do I store leftovers?
Leftovers can be refrigerated in an airtight container for up to 2 days. Reheat in the oven or toaster oven to restore crispness—microwaving may make it soggy.
Is this recipe kid-friendly?
Absolutely! Kids love the sweet corn and cheesy flavor. You can reduce garlic or spice levels if needed.
Can I grill the corn instead?
Definitely! Grill over medium heat for 10–12 minutes, turning occasionally, until charred in spots. Then apply butter and cheese and broil or return to grill until cheese melts.
What kind of cheese works best?
A blend of Parmesan for flavor and cheddar/mozzarella for meltiness works perfectly. Feel free to experiment with gouda, pepper jack, or fontina.
Can I make this dairy-free?
Yes. Substitute vegan butter and dairy-free cheese alternatives. Nutritional yeast can add a cheesy flavor boost.
Summary
Cheesy Garlic Butter Corn on the Cob is a mouthwatering twist on a classic favorite, combining sweet, juicy corn with aromatic garlic butter and a luxurious blanket of melted cheese. Easy to make and endlessly customizable, it’s the ultimate comfort side dish that brings joy to every bite.