Introduction
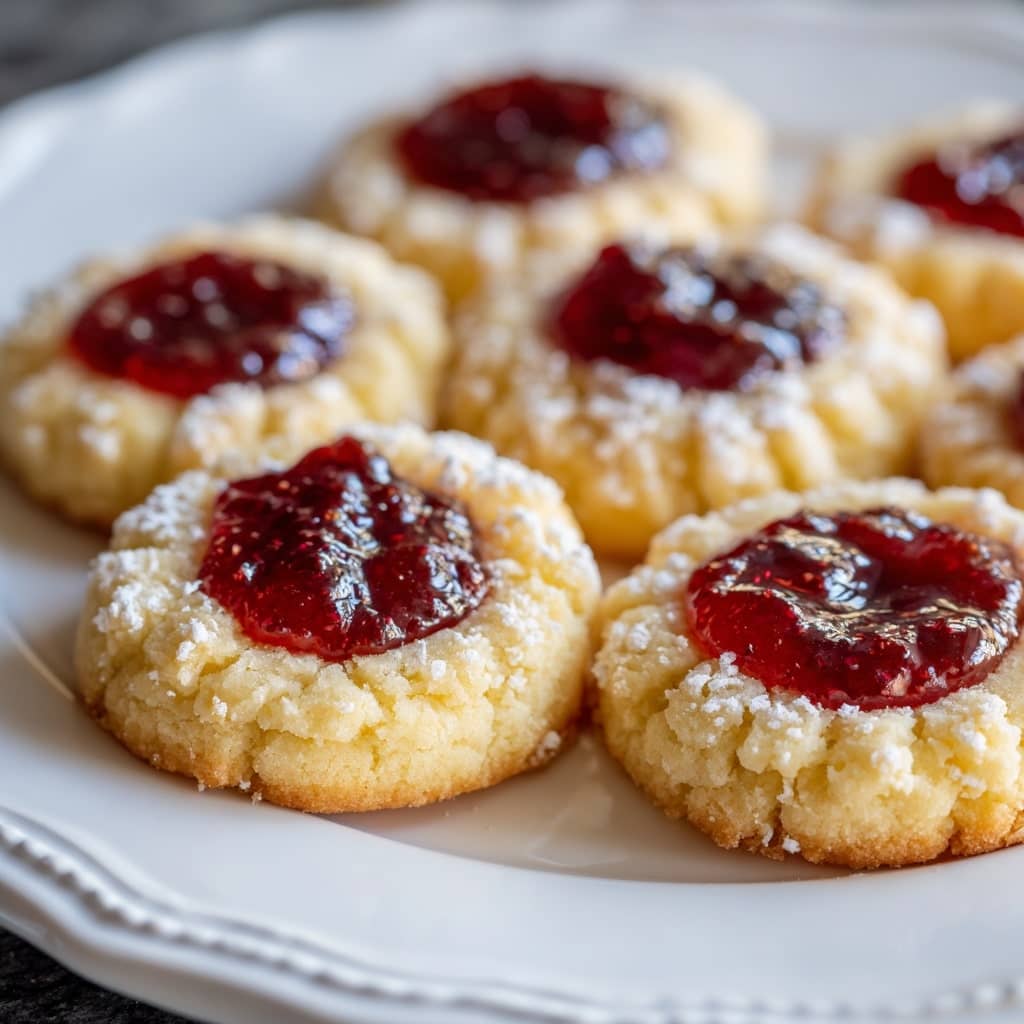
Buttery Jam Thumbprint Cookies are delicate, melt-in-your-mouth treats with a tender, shortbread-like base and a sweet center of vibrant fruit jam. These cookies are as beautiful as they are delicious, with their charming, rustic appearance making them a standout on holiday trays, dessert tables, or as homemade gifts. The simplicity of the ingredients is balanced by the richness of the buttery dough and the bright, fruity flavor of the jam, offering a satisfying bite that is both nostalgic and timeless. Whether served with a warm cup of tea or presented on a festive cookie platter, these cookies evoke warmth, tradition, and joy. Their name comes from the thumbprint indentation made in the center of each cookie, which holds a small spoonful of jam that glistens like a gem when baked. Beloved by both kids and adults, these cookies are easy to make, endlessly customizable, and always a crowd-pleaser.
The History of Thumbprint Cookies
Thumbprint cookies have a long and somewhat debated history, with origins often traced back to either Eastern Europe or Scandinavia. In Sweden, they are known as “Hallongrotta,” meaning “raspberry cave,” a nod to the small crater in the center filled with raspberry jam. The American version likely evolved from these European roots and gained popularity in the United States during the mid-20th century, especially around the holidays. Their ease of preparation and adaptability to different fillings made them a staple in family cookbooks and baking traditions. Over the years, bakers began to use a variety of jams, jellies, and preserves—along with chocolate, caramel, or nut fillings—making the thumbprint cookie a versatile classic. The act of pressing one’s thumb into soft dough to form the indentation also adds a hands-on charm to their preparation, tying them to the kind of baking that’s done with love and passed down through generations.
Ingredients Breakdown
- All-purpose flour: Provides the structure of the cookie, forming a tender crumb when combined with butter.
- Unsalted butter: The key to the cookies’ rich, melt-in-your-mouth texture; using high-quality butter makes a noticeable difference.
- Granulated sugar: Sweetens the dough and contributes to the cookie’s delicate crispness.
- Egg yolks: Add richness and help bind the dough while keeping the texture soft.
- Vanilla extract: Enhances the overall flavor and gives warmth to the buttery base.
- Salt: Balances the sweetness and amplifies the butter and vanilla flavors.
- Jam or preserves: The star of the show—choose from raspberry, apricot, strawberry, blackberry, or any jam of your choice. Seedless options are preferred for a smoother finish.
- Optional powdered sugar: For dusting after baking, adding a beautiful and festive touch.
Step-by-Step Recipe
- Preheat the oven to 350°F (175°C). Line baking sheets with parchment paper and set aside.
- Cream the butter and sugar in a stand mixer or with a hand mixer on medium speed for 2–3 minutes, until the mixture is light and fluffy.
- Add the egg yolks and vanilla extract, mixing until well combined and smooth.
- In a separate bowl, whisk together the flour and salt. Gradually add the dry ingredients to the wet ingredients, mixing on low speed until a soft dough forms.
- Roll the dough into 1-inch balls, about a tablespoon each, and place them on the prepared baking sheets, spacing them about 2 inches apart.
- Make the indentation: Using your thumb, knuckle, or the back of a teaspoon, gently press into the center of each dough ball to create a well. If the dough cracks slightly around the edges, you can smooth it out with your fingers.
- Fill each indentation with jam, about ½ teaspoon per cookie. Be careful not to overfill, as the jam can bubble over during baking.
- Bake for 12–15 minutes, or until the edges of the cookies are just turning golden and the jam is bubbling slightly.
- Cool the cookies on the baking sheet for 5 minutes before transferring to a wire rack to cool completely.
- Optional: Once completely cool, dust with powdered sugar for an elegant finish.
Tips for the Perfect Cookie
Use room temperature butter for even creaming and to avoid a greasy dough. For the jam, choose thick, high-quality preserves—thin or runny jams can spread too much during baking. If the jam is too thick, you can warm it slightly to make it easier to spoon into the cookies. Chilling the dough for 30 minutes before rolling into balls can help the cookies retain their shape during baking. To avoid cracks, roll the dough until very smooth and press gently when making the indentation. Don’t overfill the center with jam—just enough to fill the well, leaving space at the edges. For a festive look, use multiple jam varieties in one batch for a colorful cookie tray. Store the cookies in a single layer or with parchment between layers to prevent the jam centers from sticking.
Variations and Customizations
These cookies are incredibly adaptable. Instead of jam, fill the centers with chocolate ganache, dulce de leche, lemon curd, or nut butters for a creative twist. Add finely chopped nuts like almonds, pecans, or pistachios to the dough or roll the dough balls in nuts before baking for extra texture. Mix citrus zest (lemon, orange, or lime) into the dough for a subtle flavor boost. For a holiday twist, add a touch of cinnamon or nutmeg to the dough. Make them gluten-free by using a 1:1 gluten-free flour blend. For vegan cookies, use plant-based butter and an egg yolk substitute like aquafaba or a commercial vegan binder. Dip the bottoms in melted chocolate or drizzle chocolate over the tops for an elegant upgrade. You can also make savory versions by omitting the sugar and using a savory jam like tomato or onion jam in the center.
Health Considerations and Nutritional Value
Buttery Jam Thumbprint Cookies are a treat meant to be enjoyed in moderation, as they are relatively high in fat and sugar due to the butter and jam. A typical cookie contains approximately 90–120 calories, with most coming from saturated fat and carbohydrates. To lighten them up, you can reduce the sugar slightly or substitute some of the butter with unsweetened applesauce or a butter substitute. Choose low-sugar or fruit-only jams to reduce refined sugar content. For added nutrients, use whole wheat pastry flour in place of all-purpose flour, which increases fiber content without compromising tenderness. Making them smaller is another way to control portion size while still enjoying their flavor. If you’re avoiding eggs, the yolk can be swapped with plant-based alternatives for an allergen-friendly version. While not a health food, these cookies can be part of a balanced lifestyle when enjoyed thoughtfully.
FAQ
Can I make the dough ahead of time? Yes, the dough can be refrigerated for up to 3 days or frozen for up to 2 months. If chilled, let it sit at room temperature for about 20 minutes before rolling into balls.
What kind of jam works best? Thick, high-quality jams or preserves are ideal. Raspberry, apricot, and strawberry are classic favorites. Avoid jelly, which is often too runny.
Why did my cookies spread too much? This can happen if the dough is too soft. Try chilling the dough before baking and make sure your butter isn’t overly warm.
Can I use salted butter? Yes, but reduce or omit the added salt in the recipe to avoid overly salty cookies.
How do I store these cookies? Store in an airtight container at room temperature for up to 5 days. If stacking, place parchment paper between layers to prevent the jam centers from sticking.
Can I freeze them? Yes, they freeze well. Let them cool completely, then freeze in a single layer before transferring to a freezer-safe container. Thaw at room temperature.
How do I prevent the jam from over-bubbling or leaking? Avoid overfilling and use thicker jams. Press a deep enough well so the jam sits securely in the center.

Buttery Jam Thumbprint Cookies
Ingredients
- 1 cup unsalted butter sliced and slightly softened
- ½ to 1 cup powdered sugar adjust to taste; see notes
- 1 teaspoon pure vanilla extract
- 1 teaspoon almond extract optional; see notes
- ½ teaspoon salt
- 2 cups all-purpose flour
- ½ cup high-quality fruit preserves or jam such as raspberry, strawberry, or apricot
Instructions
- In the bowl of a stand mixer fitted with the paddle attachment, beat the butter and powdered sugar on low speed for about 10 seconds, just until lightly combined. Increase to high speed and continue beating for 2 to 3 minutes, until the mixture is creamy, smooth, and light in texture—don’t rush this step, as it’s key to achieving the perfect cookie crumb.
- Add the vanilla extract, almond extract (if using), and salt, and mix on medium-low speed for about 10 seconds, scraping down the sides of the bowl as needed to ensure everything is fully incorporated.
- Gradually add the flour, mixing on low speed just until the dough comes together, about 1 minute. The dough will be soft and slightly sticky. Use a rubber spatula to scrape down the bowl, gather the dough into a ball, cover, and chill in the refrigerator for 30 to 60 minutes to firm it up for easier handling.
- Preheat the oven to 325°F (165°C) and position the rack in the center of the oven. Line a baking sheet with parchment paper or a silicone baking mat.
- Roll the chilled dough into 1-inch balls (about 1 tablespoon each) and place them evenly on the prepared baking sheet. Using the round end of a wooden spoon handle, or your thumb, press a deep but narrow well into the center of each dough ball. It’s helpful to hold the dough ball in the palm of your hand to prevent it from cracking while forming the indentation.
- Fill each well with about ½ teaspoon of fruit preserves. For neater, more precise filling, use a piping bag or a ¼-teaspoon measuring spoon. Place the baking sheet in the refrigerator for 5 minutes to re-chill the dough before baking—this helps the cookies hold their shape.
- Bake the cookies for 20 to 23 minutes, or until the edges are lightly golden and the cookies appear puffed. Remove from the oven and let them cool on the baking sheet for 5 minutes, then carefully transfer them to a wire rack to cool completely.
- Once fully cooled, dust the tops with powdered sugar for a classic finish.
Storage:
- Store cookies in an airtight container at room temperature for up to 4–5 days. They can also be frozen for longer storage.