Introduction
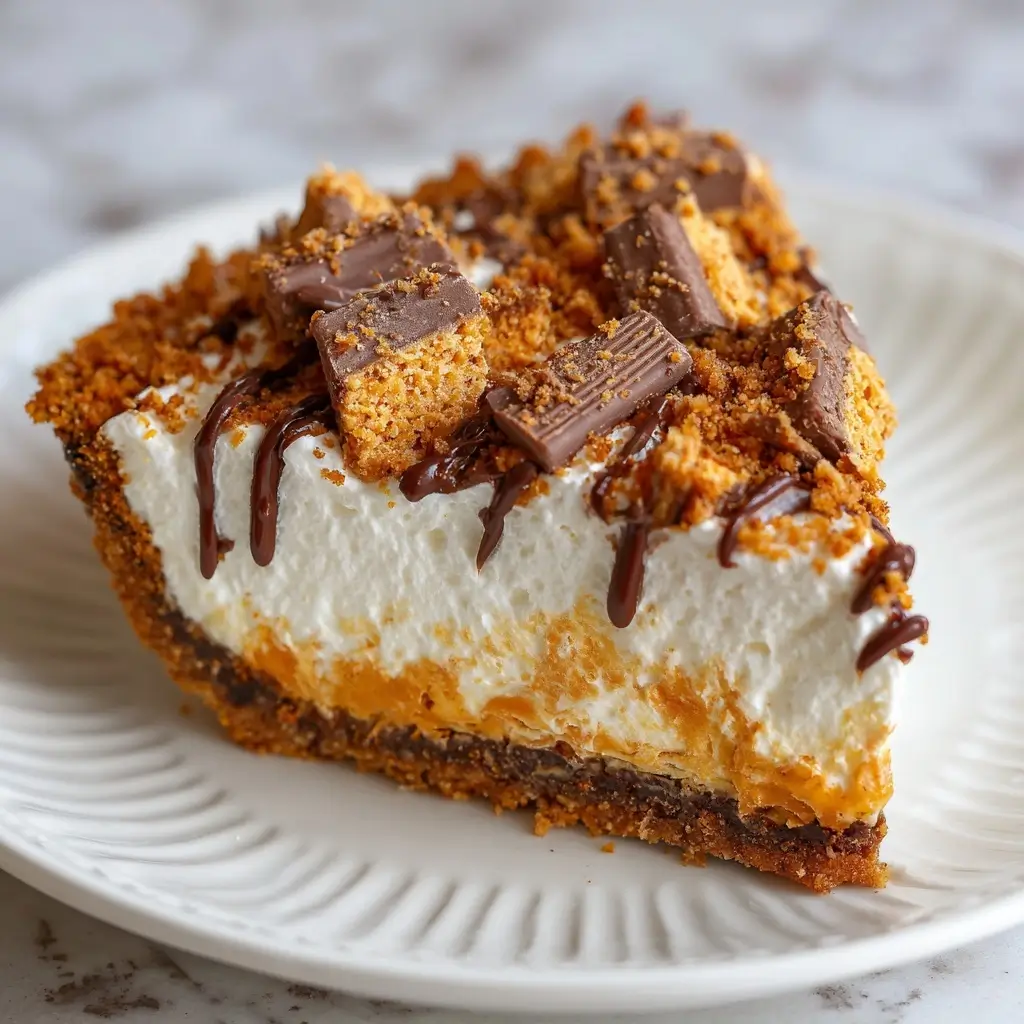
Butterfinger Pie is a no-bake dessert that has captured the hearts—and taste buds—of chocolate and peanut butter lovers across North America. With its creamy, rich filling, flaky crust, and crunchy Butterfinger candy pieces, this pie is the perfect blend of texture and flavor. It’s ideal for holiday gatherings, potlucks, or simply as a decadent treat to satisfy a sweet craving. Easy to make and requiring no oven time, Butterfinger Pie is a go-to recipe for both novice bakers and seasoned dessert enthusiasts alike.
The History
The origins of Butterfinger Pie can be traced back to American home cooking traditions in the mid-20th century, when no-bake pies began gaining popularity due to their convenience and use of readily available ingredients. The pie likely emerged as a creative way to incorporate Butterfinger candy bars—a favorite since their introduction by the Curtiss Candy Company in 1923—into desserts beyond simple snacking. Over the decades, variations of this pie have circulated through community cookbooks, family recipes, and online forums, solidifying its status as a nostalgic classic. Its rise in popularity was further fueled by the accessibility of pre-made graham cracker crusts and instant pudding mixes, making it an effortless yet indulgent option for busy households.
Ingredients Breakdown
Understanding each ingredient in Butterfinger Pie helps elevate the final result, ensuring balance between sweetness, creaminess, and crunch:
- Graham Cracker Crust: Provides a slightly sweet, nutty base with a satisfying crunch. Can be store-bought or homemade using crushed graham crackers, sugar, and melted butter.
- Cream Cheese: Offers a tangy richness that balances the sweetness and adds body to the filling.
- Peanut Butter: Adds depth of flavor and a smooth, velvety texture. Opt for natural or creamy unsweetened varieties to avoid oil separation.
- Vanilla Pudding Mix (instant): Thickens the filling and enhances creaminess. When combined with milk, it creates a custard-like consistency.
- Whipped Topping (e.g., Cool Whip): Lightens the mixture and gives the pie a fluffy, airy texture. Can be substituted with homemade whipped cream for a more natural alternative.
- Heavy Whipping Cream: Used to stabilize and enhance volume, especially if substituting whipped topping with fresh whipped cream.
- Butterfinger Candy Bars: The star ingredient! Crushed into small chunks, they provide a signature crispy, honeycomb-like texture and a bold peanut-buttery-chocolate flavor.
- Chocolate Syrup or Melted Chocolate (optional): Drizzled on top or layered within for added chocolate intensity.
- Salt (pinch): Enhances overall flavor and cuts through sweetness.
Step-by-Step Recipe
- Prepare the Crust: If not using a pre-made graham cracker crust, mix 1½ cups crushed graham crackers, ⅓ cup granulated sugar, and 6 tablespoons melted unsalted butter until well combined. Press firmly into a 9-inch pie dish, covering the bottom and sides evenly. Chill in the refrigerator for at least 30 minutes to set.
- Softening Cream Cheese: Remove 8 oz of cream cheese from the refrigerator 30 minutes ahead to soften. This ensures smooth blending without lumps.
- Mix Cream Cheese and Peanut Butter: In a large mixing bowl, beat the softened cream cheese and ½ cup creamy peanut butter together using a hand mixer or stand mixer until smooth and fully incorporated.
- Add Pudding Mix: Prepare one package (3.4 oz) of vanilla instant pudding mix according to package instructions—typically whisked with 2 cups cold milk for 2 minutes. Allow it to thicken slightly for 5 minutes.
- Combine Filling Components: Gently fold the pudding mixture into the cream cheese-peanut butter blend until uniform. Avoid overmixing to maintain lightness.
- Incorporate Whipped Topping: Add 1 cup of whipped topping (like Cool Whip) or freshly whipped cream (sweetened lightly with powdered sugar) to the mixture. Fold gently until completely blended and smooth.
- Add Butterfinger Pieces: Finely crush 2–3 full-size Butterfinger bars (about 1 cup). Reserve a few larger chunks for garnish. Fold the crushed candy into the filling mixture.
- Assemble the Pie: Pour the filling into the chilled crust. Use a spatula to smooth the top evenly.
- Chill Thoroughly: Refrigerate the pie for at least 4 hours, preferably overnight, to allow the filling to set and flavors to meld.
- Garnish and Serve: Before serving, drizzle with chocolate syrup and sprinkle reserved Butterfinger pieces on top for visual appeal and extra crunch.
Tips
- Use Full-Fat Ingredients: For the creamiest texture, choose full-fat cream cheese, whole milk for pudding, and real whipped cream instead of low-fat substitutes.
- Avoid Lumps: Ensure cream cheese is at room temperature before mixing. Cold cream cheese leads to a lumpy filling.
- Don’t Overmix: Once you add the whipped topping, fold gently to preserve airiness. Overmixing can deflate the mixture and result in a dense pie.
- Crush Candy Just Before Use: To prevent melting or clumping, crush Butterfingers right before folding them in.
- Freeze for Firmer Slice: For clean, neat slices, freeze the pie for 30–45 minutes before cutting. Wipe the knife clean between cuts.
- Make Ahead Friendly: This pie keeps well in the refrigerator for up to 5 days, making it perfect for preparing in advance.
Variations and Customizations
While traditional Butterfinger Pie is delicious on its own, there are numerous ways to customize it for different tastes and occasions:
- Chocolate Lover’s Version: Add a layer of melted chocolate or chocolate ganache at the bottom of the crust before adding the filling. Alternatively, mix chocolate pudding instead of vanilla for a deeper cocoa flavor.
- Reese’s Twist: Combine Butterfinger with chopped Reese’s Peanut Butter Cups for a double peanut butter punch.
- Gluten-Free Option: Use a gluten-free graham cracker crust and verify that all other ingredients (especially candy bars) are certified gluten-free.
- Dairy-Free Adaptation: Substitute dairy-free cream cheese, almond or oat milk in the pudding, and vegan whipped topping. Use dairy-free chocolate-covered Butterfinger alternatives if available.
- Low-Sugar Version: Use sugar-free pudding mix, reduced-sugar peanut butter, and a sugar-free crust. Sweeten with stevia or erythritol if needed.
- Mini Pies: Make individual servings using muffin tins lined with mini crusts or parfait glasses for elegant presentation.
- Alcohol-Infused: Add 1–2 tablespoons of bourbon, Baileys, or Kahlúa to the filling for an adult twist.
- Frozen Version: Freeze the assembled pie for 2–3 hours for a firmer, ice cream-like texture—perfect for hot summer days.
Health Considerations and Nutritional Value
While undeniably delicious, Butterfinger Pie is a high-calorie, sugar-dense dessert best enjoyed in moderation. Here’s a general nutritional breakdown per slice (assuming an 8-slice pie):
- Calories: ~380–450 kcal
- Total Fat: 25–30g (saturated fat: 10–14g)
- Carbohydrates: 40–50g (sugars: 30–35g)
- Protein: 6–8g
- Sodium: 300–400mg
Considerations:
- This dessert is high in added sugars and saturated fats, primarily from the candy, crust, and processed ingredients.
- It contains dairy and peanuts, making it unsuitable for those with allergies or intolerances unless modified.
- For heart health, consider reducing butter in the crust and using natural peanut butter without hydrogenated oils.
- To boost nutrition, serve with fresh strawberries or bananas on the side for added fiber and vitamins.
Ingredients
- 1 (9-inch) graham cracker pie crust (store-bought or homemade)
- 8 oz cream cheese, softened
- ½ cup creamy peanut butter (unsweetened preferred)
- 1 package (3.4 oz) instant vanilla pudding mix
- 2 cups cold whole milk
- 1 cup frozen whipped topping (e.g., Cool Whip), thawed, OR 1 cup homemade whipped cream
- 2–3 Butterfinger candy bars, crushed (about 1 cup)
- Chocolate syrup, for drizzling (optional)
- Pinch of salt
Directions
- Chill the graham cracker crust in the refrigerator while preparing the filling.
- In a medium bowl, beat softened cream cheese and peanut butter together until smooth and creamy.
- In a separate bowl, whisk the instant pudding mix with cold milk for 2 minutes. Let sit for 5 minutes to thicken.
- Gently fold the pudding mixture into the cream cheese mixture until fully combined.
- Add the whipped topping and a pinch of salt. Fold until smooth and fluffy.
- Stir in the crushed Butterfinger bars, reserving some for topping.
- Pour the filling into the prepared crust and smooth the top with a spatula.
- Cover and refrigerate for at least 4 hours, or overnight.
- Before serving, drizzle with chocolate syrup and sprinkle with remaining Butterfinger pieces.
- Slice with a warm knife for clean edges and enjoy chilled.
FAQ
Can I make Butterfinger Pie without a pre-made crust?
Yes! Mix 1½ cups graham cracker crumbs, ⅓ cup sugar, and 6 tbsp melted butter. Press into a pie dish and bake at 375°F for 8 minutes, then cool completely.
Can I use fresh whipped cream instead of Cool Whip?
Absolutely. Whip 1 cup heavy cream with 1–2 tbsp powdered sugar and ½ tsp vanilla until stiff peaks form. Fold in gently.
How long does Butterfinger Pie last in the fridge?
Up to 5 days when stored covered in plastic wrap or under a pie dome.
Can I freeze Butterfinger Pie?
Yes. Wrap tightly and freeze for up to 2 months. Thaw in the refrigerator before serving for best texture.
Are there any candy substitutes for Butterfinger?
Crushed Crunch bars, PayDay pieces, or even homemade peanut butter crunch clusters can work in a pinch.
Why is my pie too soft?
Likely not chilled long enough. Ensure at least 4 hours of refrigeration. Using low-fat dairy or skipping the cream cheese can also affect firmness.
Can I make this pie ahead of time?
Yes! It’s an excellent make-ahead dessert. Prepare up to 2 days in advance for optimal flavor and texture.
Summary
Butterfinger Pie is a rich, no-bake delight combining creamy peanut butter filling, tangy cream cheese, and crunchy Butterfinger candy in a buttery graham cracker crust. Effortless to prepare and universally loved, it’s the ultimate comfort dessert for any occasion.