Introduction
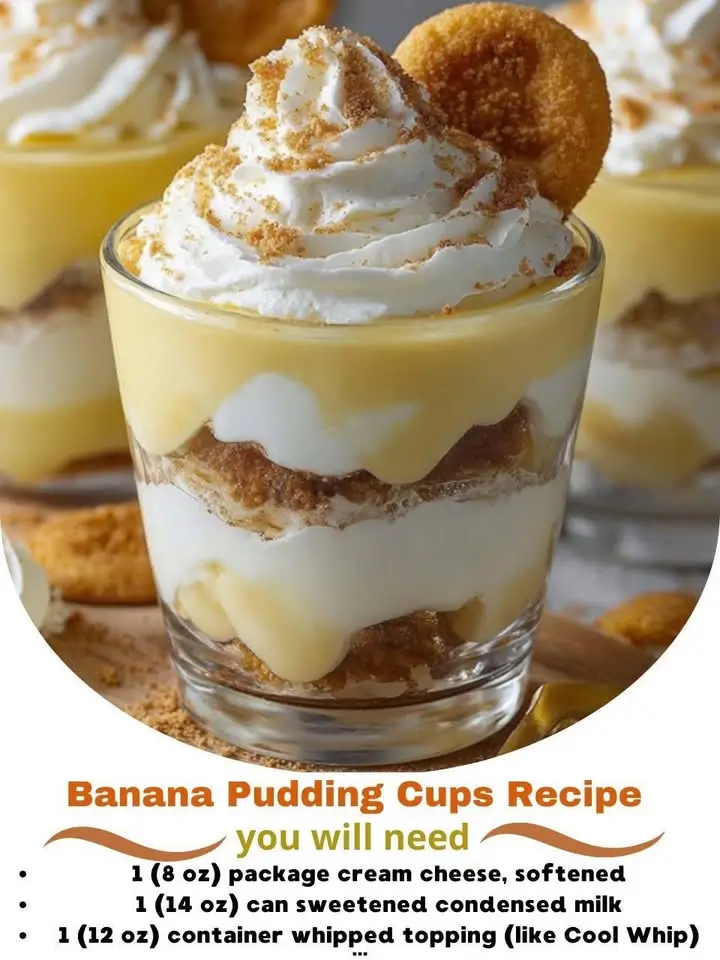
Banana pudding cups are a modern twist on a classic Southern dessert that has delighted generations with its creamy, sweet, and nostalgic flavors. Portable, portion-controlled, and visually appealing, these individual servings bring the beloved taste of traditional banana pudding into a convenient and elegant format perfect for parties, potlucks, or quiet after-dinner treats. Whether served at family gatherings, baby showers, or holiday dinners, banana pudding cups offer the same rich layers of vanilla wafers, ripe bananas, and luscious custard—but in charming little cups that make serving and enjoying effortless.
What makes banana pudding cups especially popular today is their adaptability. You can prepare them ahead of time, customize them to suit dietary needs, and even elevate them with gourmet touches like homemade custard or bourbon-infused whipped cream. Their simplicity and universal appeal make them a go-to dessert for both novice bakers and seasoned cooks alike. In this comprehensive guide, we’ll explore every aspect of making perfect banana pudding cups—from the history of this iconic dish to ingredient breakdowns, detailed step-by-step instructions, expert tips, variations, nutritional insights, and frequently asked questions—so you can create a batch that’s as delicious as it is beautiful.
The History
The roots of banana pudding trace back to the late 19th century, emerging during a time when American home cooking began embracing new ingredients made available through advances in transportation and refrigeration. Bananas, once considered an exotic tropical fruit, became more accessible in the United States thanks to improved shipping routes from Central and South America. Around the same time, pre-packaged vanilla wafers (such as Nabisco’s Nilla Wafers, introduced in 1898) and powdered instant pudding mixes entered the market, making it easier than ever for home cooks to experiment with layered desserts.
By the early 20th century, banana pudding had become a staple in Southern households. It was commonly prepared in large glass dishes and baked or chilled to set the layers. The dessert gained popularity due to its affordability, ease of preparation, and comforting flavor profile. Regional cookbooks and church fundraisers often featured banana pudding recipes, each with slight variations based on local preferences.
In recent decades, the dessert evolved into portable versions, including parfaits and cup servings, reflecting changing lifestyles and the growing demand for grab-and-go treats. Banana pudding cups emerged as a stylish and practical alternative, allowing hosts to serve elegant desserts without the mess of slicing and plating. Today, this classic treat continues to be reinvented with modern techniques, international influences, and creative garnishes—yet it remains deeply rooted in tradition, evoking memories of family kitchens and Sunday dinners.
Ingredients Breakdown
The magic of banana pudding cups lies in the harmony of simple, high-quality ingredients coming together to create something truly special. Here’s a detailed look at each component and why it matters:
- Vanilla Pudding Mix (or Homemade Custard): Instant vanilla pudding mix offers convenience and consistent texture, while homemade custard provides a richer, more authentic flavor. Both thicken quickly and bind the layers beautifully.
- Milk: Whole milk is ideal for creaminess, though 2% can be used for a lighter version. For dairy-free options, almond, oat, or coconut milk work well—just ensure they’re unsweetened and unflavored unless desired otherwise.
- Heavy Whipping Cream: Used to make fluffy whipped topping, adding airiness and richness. Chilled cream whips better and holds its shape longer.
- Sweetened Condensed Milk (Optional): Often added to the whipped cream for extra sweetness and stability, especially in no-bake versions where longevity is key.
- Vanilla Extract: Enhances flavor depth in both pudding and whipped cream. Pure extract yields a superior taste compared to artificial variants.
- Nilla Wafers (or Vanilla Wafers): These crisp cookies provide structure and a buttery-sweet base layer. Gluten-free versions are available for those with sensitivities.
- Ripe Bananas: Choose bananas that are yellow with minimal brown spots—sweet but firm enough to hold their shape. Overripe bananas can turn mushy and overpower other flavors.
- Lemon Juice (Optional): A small splash helps prevent bananas from browning too quickly, preserving color and freshness.
- Whipped Topping (e.g., Cool Whip): Can be substituted for freshly whipped cream for convenience, though homemade tastes fresher and less processed.
- Garnishes (Optional): Caramelized banana slices, crushed wafers, chocolate shavings, toasted coconut, or a sprinkle of cinnamon add visual flair and complexity.
Step-by-Step Recipe
Follow these detailed steps to assemble flawless banana pudding cups that impress both in taste and presentation.
- Prepare the Pudding: In a large bowl, whisk together 1 package (about 3.4 oz) of instant vanilla pudding mix and 2 cups of cold whole milk. Stir vigorously for about 2 minutes until the mixture begins to thicken. Set aside to continue setting for 5–10 minutes.
- Make the Whipped Cream: In a chilled mixing bowl, pour 1 cup of cold heavy whipping cream. Using a hand mixer or stand mixer, beat on medium-high speed until soft peaks form (about 3–4 minutes). Add 2 tablespoons of powdered sugar and 1 teaspoon of pure vanilla extract. Continue beating until stiff peaks form. For a more stable topping, fold in ½ cup of sweetened condensed milk gently.
- Combine Pudding and Whipped Cream: Gently fold half of the whipped cream into the prepared pudding until fully incorporated. This creates a light, airy filling. Reserve the remaining whipped cream for topping.
- Prep the Bananas: Peel 3 medium ripe bananas and slice them into ¼-inch thick rounds. To prevent oxidation and browning, toss them lightly with 1 tablespoon of fresh lemon juice.
- Assemble the Cups: Using clear plastic or glass cups (8 oz size recommended), begin layering:
- Start with a layer of vanilla wafers (about 4–5 cookies per cup).
- Add a layer of banana slices (6–8 pieces).
- Top with a generous scoop of the pudding mixture.
- Repeat the layers: wafers, bananas, pudding.
- Finish with a final dollop of reserved whipped cream.
- Garnish and Chill: Sprinkle crushed vanilla wafers or a dusting of cinnamon on top. Cover each cup with plastic wrap or a lid and refrigerate for at least 2 hours—or up to 24 hours—to allow flavors to meld and textures to soften slightly.
- Serve: Remove from the refrigerator 10 minutes before serving for optimal creaminess. Serve chilled.
Tips
- Use Cold Ingredients: Ensure your milk and heavy cream are well-chilled to achieve the best consistency in both pudding and whipped cream.
- Don’t Overmix When Folding: When combining whipped cream and pudding, use a spatula and gentle folding motions to preserve airiness.
- Layer Thoughtfully: Press wafers gently into the pudding to prevent floating, but avoid crushing them entirely to maintain texture contrast.
- Prevent Browning: Always coat banana slices with a bit of lemon or pineapple juice to keep them looking fresh and appetizing.
- Chill Bowls and Beaters: For fluffier whipped cream, place mixing bowl and beaters in the freezer for 10–15 minutes before whipping.
- Customize Serving Vessels: Use mason jars, dessert glasses, or disposable clear cups for different occasions. Mini cups are great for parties!
- Make Ahead Smartly: Assemble up to one day in advance, but wait to garnish until just before serving to maintain freshness.
- Avoid Soggy Layers: If preparing more than 6 hours ahead, consider placing the final wafer layer just before serving to retain crunch.
- Taste as You Go: Adjust sweetness by adding more sugar or vanilla if needed, especially when using low-sugar substitutes.
- Label Dietary Info: If serving guests, label cups with allergens (gluten, dairy) or note if they’re vegan/dairy-free.
Variations and Customizations
Banana pudding cups are incredibly versatile. Here are some exciting ways to personalize them:
- Chocolate Banana Pudding Cups: Substitute chocolate pudding mix for vanilla and add chocolate chips or shaved chocolate between layers.
- Bourbon Banana Pudding: Add 1–2 teaspoons of bourbon to the pudding or whipped cream for an adult twist.
- Peanut Butter Swirl: Swirl peanut butter into the pudding layer or drizzle on top before serving.
- Caramel Banana Delight: Drizzle salted caramel sauce between layers and on top for a decadent touch.
- Tropical Version: Replace some banana with diced mango or pineapple and add toasted coconut flakes.
- Strawberry-Banana Fusion: Layer sliced strawberries with bananas for a fruity medley.
- Gluten-Free: Use gluten-free vanilla wafers and ensure pudding mix is certified GF.
- Dairy-Free/Vegan: Use coconut milk-based pudding, aquafaba or coconut cream for whipping, and vegan cookies.
- Protein Boost: Mix in a scoop of vanilla protein powder into the pudding or use Greek yogurt instead of part of the whipped cream.
- Kid-Friendly Fun: Add colorful sprinkles, edible glitter, or mini marshmallows for birthday parties.
- Coffee-Infused: Add a shot of cooled espresso or instant coffee to the pudding for a mocha-banana combo.
- Boozy Adult Pops: Pour mixture into popsicle molds and freeze for banana pudding ice pop treats.
Health Considerations and Nutritional Value
While banana pudding cups are undeniably indulgent, understanding their nutritional content allows for mindful enjoyment. A standard 8-ounce serving (made with full-fat ingredients) contains approximately:
- Calories: 320–380 kcal
- Fat: 15–20g (mostly from cream and milk)
- Saturated Fat: 9–12g
- Carbohydrates: 45–50g (including natural sugars from bananas and added sugars from pudding and condensed milk)
- Sugars: 30–35g
- Protein: 5–7g
- Fiber: 2–3g (mainly from bananas and whole grain wafers if used)
- Potassium: High (from bananas, supports heart and muscle function)
- Calcium & Vitamin D: Moderate (from dairy ingredients)
- Vitamin B6, C, and Manganese: Present in bananas
Health Notes:
- The high sugar and saturated fat content means these should be enjoyed in moderation, especially for those managing diabetes, heart health, or weight goals.
- Bananas contribute beneficial fiber and potassium, which help regulate blood pressure and digestion.
- Using low-fat milk, reduced-sugar pudding, or sugar-free wafers can cut calories by up to 25%.
- Substituting Greek yogurt for some whipped cream boosts protein and reduces fat.
- For a lower glycemic impact, limit added sugars and pair with a source of protein or healthy fat when serving.
Ingredients
- 1 package (3.4 oz) instant vanilla pudding mix
- 2 cups cold whole milk (or dairy-free alternative)
- 1 cup heavy whipping cream, cold
- 2 tablespoons powdered sugar
- 1 teaspoon pure vanilla extract
- ½ cup sweetened condensed milk (optional, for stabilized whipped cream)
- 3 medium ripe bananas
- 1 tablespoon fresh lemon juice
- 24–32 vanilla wafers (Nilla Wafers or gluten-free alternative)
- Crushed wafers or cinnamon for garnish (optional)
Directions
- In a large bowl, whisk the vanilla pudding mix and cold milk for 2 minutes until thickened. Let sit for 5 minutes to fully set.
- In a separate chilled bowl, beat the heavy cream, powdered sugar, and vanilla extract until stiff peaks form. Gently fold in sweetened condensed milk (if using) and set aside ¾ cup for topping.
- Fold half of the remaining whipped cream into the pudding mixture until smooth and fluffy.
- Slice bananas and toss with lemon juice to prevent browning.
- Begin layering in 8-ounce clear cups: 4–5 wafers, a layer of banana slices, then a scoop of pudding mixture. Repeat the layers.
- Top each cup with a swirl of reserved whipped cream and a sprinkle of crushed wafers or cinnamon.
- Cover and refrigerate for at least 2 hours before serving.
- Serve chilled and enjoy within 24 hours for best texture and appearance.
FAQ
Can I make banana pudding cups ahead of time?
Yes! They can be assembled up to 24 hours in advance. Keep refrigerated and covered. Add final garnishes just before serving.
Why are my banana slices turning brown?
Bananas oxidize when exposed to air. Tossing them with lemon, orange, or pineapple juice slows this process significantly.
Can I freeze banana pudding cups?
Freezing is not recommended, as the texture of the bananas becomes mushy and the whipped cream may separate upon thawing.
How long do banana pudding cups last in the fridge?
They’re best consumed within 24 hours. After 48 hours, the wafers become overly soft and bananas may darken.
Can I use cooked custard instead of instant pudding?
Absolutely. Use a homemade vanilla custard (cooked with egg yolks, sugar, milk, cornstarch, and vanilla), cooled completely before assembling.
Are banana pudding cups gluten-free?
Only if you use certified gluten-free vanilla wafers and pudding mix. Always check labels carefully.
Can I make them dairy-free?
Yes. Use plant-based milk, coconut cream (chilled overnight), and dairy-free pudding mix. Opt for vegan cookies.
What size cups should I use?
8-ounce cups are ideal. You’ll need about 6–8 depending on serving size. Smaller 4-oz cups work for appetizers or kids.
Can I add other fruits?
Yes! Strawberries, blueberries, mango, or kiwi pair well. Just be mindful of moisture content to avoid sogginess.
Why didn’t my whipped cream thicken?
Ensure cream is cold, equipment is chilled, and you’re using heavy whipping cream (not light cream or half-and-half). Avoid overbeating, which can turn it into butter.
Summary
Banana pudding cups combine creamy vanilla pudding, ripe bananas, and crunchy vanilla wafers in delightful, portable layers that capture the essence of a Southern classic. Easy to customize and perfect for any occasion, they’re a crowd-pleasing dessert that balances nostalgia with modern convenience.