Introduction
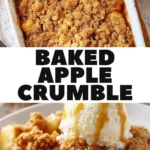
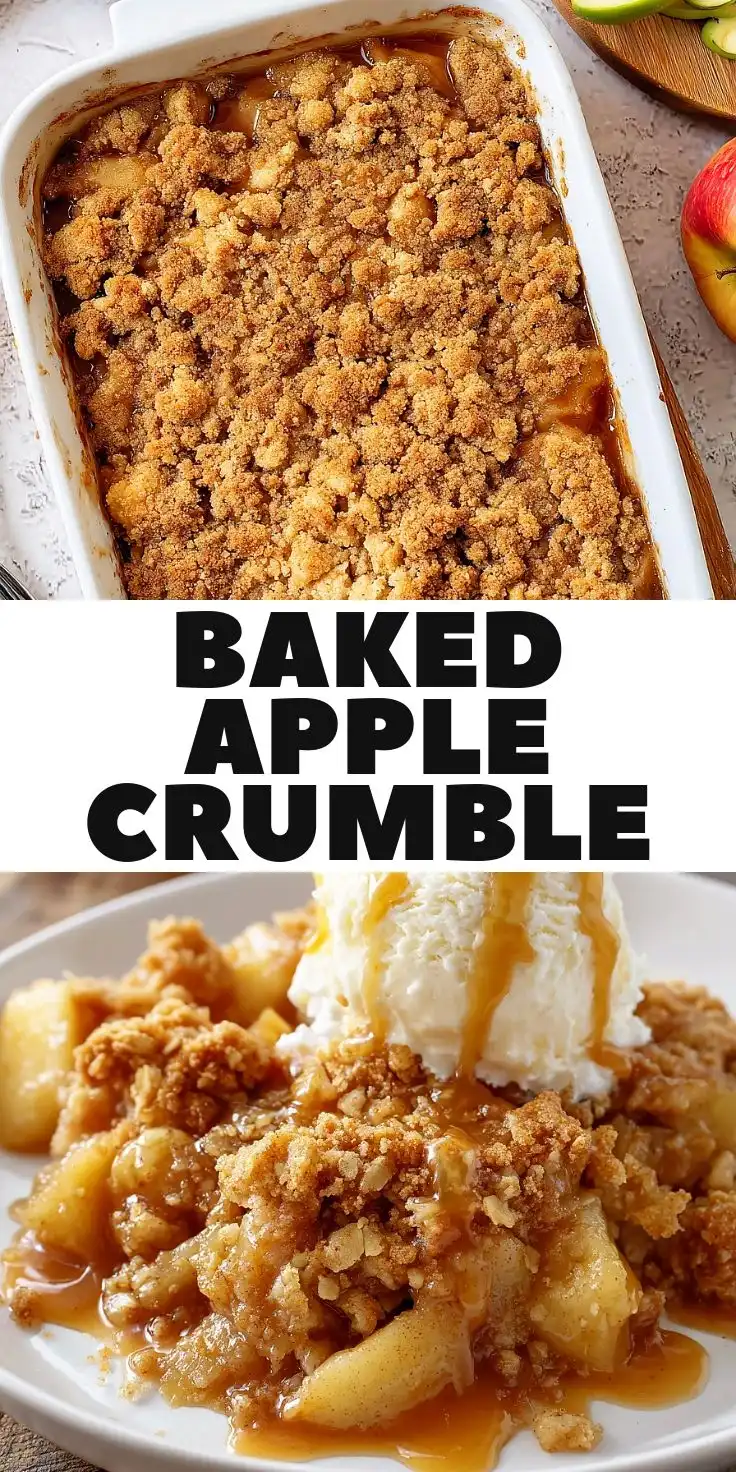
Baked Apple Crumble is a timeless, beloved dessert that embodies the cozy essence of home baking—warm, aromatic, and deeply comforting. With its tender spiced apples nestled beneath a golden, buttery, oat-studded topping, this classic treat bridges generations and geographies, appearing on holiday tables, Sunday suppers, and casual weeknight desserts alike. Unlike pies that demand precision or crisps that lean toward minimalism, the crumble strikes a perfect balance: rustic yet elegant, simple to prepare yet rich in texture and flavor. Its genius lies in its accessibility—requiring no special equipment beyond a baking dish and mixing bowls—and its forgiving nature, making it an ideal entry point for novice bakers and a reliable favorite for seasoned ones. Whether served solo, crowned with a scoop of vanilla ice cream, or drizzled with caramel sauce, baked apple crumble delivers pure, unadulterated nostalgia in every bite.
The History
The origins of apple crumble trace back to early 20th-century Britain, emerging most notably during World War II as a practical, resource-conscious alternative to traditional fruit pies. With wartime rationing limiting access to pastry ingredients—especially butter, lard, and refined flour—home cooks turned to pantry staples like rolled oats, brown sugar, and flour to create a sturdy, crumbly topping that required less fat and no rolling or shaping. The word “crumble” itself first appeared in print in the UK’s Ministry of Food Cookbook (1940), a government-published guide designed to help households make nourishing meals under strict ration constraints. While apple-based desserts had existed for centuries—think medieval English “apple tarts” and colonial American “apple betties”—the modern crumble format, defined by its coarse, streusel-like topping and baked-in simplicity, solidified during this era. By the 1950s, crumbles had become a mainstay of British teatime culture, later crossing the Atlantic where they evolved with regional twists—American versions often incorporate more butter, cinnamon-heavy spice blends, and sometimes even nuts or yogurt in the topping. Today, the baked apple crumble stands not only as a culinary artifact of resilience and ingenuity but also as a globally cherished symbol of hearth, heritage, and heartfelt hospitality.
Ingredients Breakdown
Understanding each component of a baked apple crumble reveals why it works so beautifully—and how subtle adjustments yield dramatically different results. Let’s explore the two essential layers in detail:
The Apple Filling
- Apples: A mix of varieties is key—combine tart, firm apples (like Granny Smith or Braeburn) with sweeter, softer ones (such as Honeycrisp, Fuji, or Golden Delicious). This ensures balanced sweetness, nuanced flavor depth, and optimal texture: enough structure to hold shape without turning mushy, yet tender enough to melt luxuriously when baked.
- Sugar: Granulated white sugar provides clean sweetness and helps draw out juices; brown sugar (light or dark) adds molasses notes, moisture retention, and caramelized complexity. Many recipes use both for harmony.
- Spices: Ground cinnamon is non-negotiable, offering warmth and aroma. Complementary spices include freshly grated nutmeg (earthy and sweet), allspice (jammy and clove-like), cardamom (floral and citrusy), and a whisper of ground ginger for brightness. Toasting whole spices before grinding intensifies their oils and aroma.
- Thickener: Cornstarch is most common—reliable, neutral, and effective at low concentrations (1–2 tsp per 6 cups apples). Tapioca starch yields a glossier, more transparent gel and handles prolonged baking well. Flour works in a pinch but can mute flavor and create slight cloudiness or pastiness if overused.
- Liquid & Acid: A splash of lemon juice brightens flavor, balances sweetness, and prevents browning pre-bake. Apple cider or unsweetened apple juice can replace part of the water content for deeper orchard notes. A teaspoon of apple brandy or Calvados adds sophisticated depth (optional but recommended for adult palates).
- Butter (optional): A small knob (1 tbsp) stirred into the filling just before baking lends richness and helps emulsify the juices for a silkier consistency.
The Crumble Topping
- Oats: Old-fashioned rolled oats are ideal—chewy, absorbent, and toasting beautifully. Quick oats yield a finer, denser texture; steel-cut oats are too hard and won’t soften properly. For gluten-free versions, certified GF oats are essential (not just “oat-free” substitutes like almond flour alone, which lack binding and crunch).
- Flour: All-purpose flour provides structure and binds the topping. Whole wheat pastry flour adds nuttiness and fiber without heaviness; spelt or oat flour offer gentle alternatives. Avoid bread flour—it’s too high in gluten and creates toughness.
- Sugar: Brown sugar dominates for moisture and caramel notes; granulated sugar adds crispness and aids browning. Turbinado or demerara sugar sprinkled on top before baking gives delightful crunchy crystals.
- Fat: Unsalted butter is traditional—cold, cubed, and cut in by hand, pastry cutter, or food processor until pebbly. For vegan versions, cold coconut oil (refined for neutrality) or European-style plant-based butter (high-fat, low-water) performs best. Lard or leaf lard introduces old-world flakiness but alters flavor profile significantly.
- Texture Enhancers (Optional but Recommended): Chopped toasted walnuts, pecans, or hazelnuts add crunch, richness, and protein. Shredded coconut (unsweetened) lends tropical nuance and chew. A pinch of flaky sea salt tossed into the topping heightens all other flavors.
- Leavening (Rare but Effective): A ¼ tsp of baking powder in the topping can encourage slight lift and airiness—particularly helpful in high-altitude baking or when using dense whole-grain flours.
Step-by-Step Recipe
- Preheat & Prep: Position oven rack in the center and preheat to 375°F (190°C). Generously grease a 9×13-inch rectangular baking dish or a deep 10-inch cast-iron skillet (for superior heat retention and crust development). Line the bottom with parchment paper for effortless removal, if desired.
- Peel, Core & Slice Apples: Using a sharp Y-peeler, remove apple skins completely (peels can turn tough and fibrous when baked). Quarter each apple, remove cores and seeds with a melon baller or paring knife, then slice into uniform ¼-inch thick wedges. Place in a large stainless-steel or glass mixing bowl—avoid reactive metals like aluminum, which may discolor apples.
- Acidulate & Season: Immediately toss apple slices with lemon juice, ensuring full coverage to prevent oxidation. Add sugars, spices, salt, and thickener. Gently fold with a silicone spatula until evenly coated—do not crush. Let sit 15 minutes at room temperature; this draws out natural juices and begins the maceration process, concentrating flavor and improving syrup consistency.
- Prepare Topping: In a separate medium bowl, whisk together flour, oats, brown sugar, granulated sugar, salt, and optional spices (e.g., extra cinnamon or nutmeg). Add cold, cubed butter. Using your fingertips, a pastry blender, or two forks, work the butter into the dry mixture until it resembles coarse crumbs with some pea-sized pieces remaining. For maximum control, chill the topping for 10 minutes before assembling—this prevents premature melting and ensures distinct craggy clusters.
- Layer Thoughtfully: Pour macerated apples—including all accumulated juices—into the prepared baking dish. Spread evenly with a spatula, pressing down gently to level. Sprinkle crumble topping uniformly over the surface. Do not press down—preserve air pockets for lift and crispness. For visual appeal and extra crunch, reserve ¼ cup of topping, mix with 1 tsp turbinado sugar, and scatter over the top.
- Bake with Strategy: Place dish on a parchment-lined or foil-lined baking sheet (to catch inevitable bubbling overflow). Bake for 25 minutes uncovered—this sets the topping’s structure. Then, loosely tent with aluminum foil to prevent over-browning while allowing steam to escape. Continue baking 25–35 minutes, rotating pan halfway through, until the filling bubbles vigorously around the edges, the topping is deep golden brown with crisp, shattery edges, and a skewer inserted into the center meets slight resistance (not liquid, not raw apple). Total bake time: 50–60 minutes.
- Cool with Patience: Remove from oven and place on a wire rack. Resist cutting or serving immediately—let rest for *at least* 30 minutes. This crucial step allows the filling to thicken fully via starch retrogradation; serving too soon yields soupy results. For optimal texture and sliceability, cool 1–2 hours for room-temp service, or chill overnight for cold crumble bars (reheat gently before serving).
- Serve & Store: Scoop warm portions into bowls. Offer accompaniments on the side: premium vanilla bean ice cream, crème fraîche whipped with maple syrup, spiced whipped cream, or a drizzle of reduced apple cider syrup. Store leftovers covered in the refrigerator for up to 5 days. Reheat individual portions in a toaster oven or air fryer (350°F for 8–10 min) to revive crispness—microwaving makes topping soggy.
Tips
- Apple Selection Matters More Than You Think: Never rely on a single variety. Aim for a 2:1 ratio of tart-to-sweet apples (e.g., 4 Granny Smith + 2 Honeycrisp per 6 cups). Underripe apples hold shape better; overripe ones disintegrate. Taste-test raw slices—if they’re bland, they’ll be bland baked.
- Cut Uniformly: Slicing apples to consistent thickness ensures even cooking. Use a mandoline with guard for speed and safety—or invest in an apple corer/slicer that produces even rings.
- Don’t Skip the Maceration: That 15-minute rest isn’t optional—it jumpstarts flavor infusion and controls excess water. If your kitchen is hot, refrigerate the bowl during maceration to slow enzymatic breakdown.
- Butter Temperature Is Critical: Butter should be cold but pliable—not icy (won’t blend) nor soft (creates paste). Chill cubes for 10 minutes after cutting. If it starts to smear, pop the bowl in the freezer for 2 minutes.
- Understand Your Oven: Convection ovens reduce bake time by ~15% and promote browning—lower temp to 350°F and check at 40 minutes. Gas ovens often have hotter tops; rotate pan front-to-back, not top-to-bottom.
- Watch the Bubbling: Filling should bubble *vigorously* at the edges—not just steam or simmer. If bubbling is timid after 50 minutes, increase heat to 400°F for 5–7 minutes—but watch closely to avoid scorching.
- Revive Stale Topping: Leftover crumble topping freezes beautifully for up to 6 months. Portion into 1-cup bags, label, and bake straight from frozen—add 3–5 minutes to bake time.
- Prevent Soggy Bottoms: If your dish consistently yields a wet underside, try sprinkling 1 tsp of quick-cooking tapioca over the bottom of the dish *before* adding apples—it absorbs excess moisture at the interface.
- Golden Rule of Texture: For extra crunch, toast oats and nuts separately in a dry skillet over medium-low heat until fragrant (3–4 minutes), then cool before mixing into topping.
- Batch Scaling: To double? Use a 13x9x2-inch dish and increase bake time by 10–15 minutes—but keep initial temp and foil timing the same. Stirring filling mid-bake is not advised—it disrupts setting.
Variations and Customizations
The beauty of baked apple crumble lies in its extraordinary adaptability. Below are inspired, chef-tested variations—each preserving the crumble’s soul while inviting creativity, dietary needs, and seasonal abundance:
Regional & Global Twists
- British “Sticky Toffee” Crumble: Replace ¼ cup brown sugar in topping with date syrup; stir ½ cup chopped Medjool dates into apple filling. Finish with a drizzle of toffee sauce (butter + brown sugar + heavy cream + sea salt) before serving.
- French Normandy Crumble: Add 2 tbsp Calvados to filling; swap half the oats for crushed amaretti cookies in topping; fold ½ cup crumbled goat cheese into topping for tangy contrast.
- Maple-Pecan Vermont Crumble: Use pure maple syrup instead of part of the sugar in filling; toast 1 cup pecans and fold into topping; finish with flaky Maldon salt.
Dietary Adaptations
- Gluten-Free: Use 1:1 GF baking flour blend (with xanthan gum) + certified GF oats. Add ½ tsp psyllium husk powder to topping for binding. Verify all spices are GF-certified (some blends contain wheat fillers).
- Vegan: Substitute cold refined coconut oil or high-fat vegan butter; use maple syrup or coconut sugar in filling; ensure oats are vegan-certified (some are processed with honey-derived additives). Add 1 tbsp almond milk to topping if too dry.
- Low-Sugar / Diabetic-Friendly: Replace sugars with monk fruit-erythritol blend (1:1 ratio); increase cinnamon and vanilla; use tart apples exclusively; add 1 tbsp chia seeds to filling for natural thickening and blood-sugar stabilization.
- Nut-Free: Omit nuts entirely; boost crunch with toasted sunflower or pumpkin seeds (pepitas); add 2 tbsp shredded coconut for chew.
Seasonal & Ingredient-Driven Innovations
- Autumn Harvest Crumble: Fold in 1 cup roasted butternut squash cubes and ½ tsp sage into filling; top with candied ginger and black pepper.
- Spiced Pear-Apple Crumble: Replace 2 cups apples with ripe Bartlett or Anjou pears; add star anise to poaching liquid; garnish with pear chips.
- Blackberry-Apple Crumble: Stir 1 cup fresh blackberries (tossed with 1 tsp cornstarch) into apples before baking; add lemon zest to topping.
- Chai-Spiced Crumble: Infuse filling with chai tea (steep 2 bags in ¼ cup hot water, cool, then add); use cardamom, ginger, cloves, and black pepper in topping.
- Boozy Bourbon Caramel Crumble: Simmer ¼ cup bourbon with ½ cup caramel sauce until reduced by ⅓; swirl into filling pre-bake; sprinkle topping with bourbon-soaked raisins.
Format Transformations
- Crumble Bars: Press half the topping into a parchment-lined 9×13 pan as a base; add filling; crumble remaining topping over top. Bake 45–50 min. Chill 4+ hours, then cut into squares.
- Mini Mason Jar Crumbles: Layer filling and topping in 12-oz wide-mouth mason jars (¾ full). Bake on sheet at 375°F for 35–40 min. Great for gifting or portion control.
- Skillet Crumble with Biscuit Topping: Use cast iron; top filling with drop biscuits (buttermilk biscuit dough) instead of crumble. Bake 25–30 min until biscuits are golden and cooked through.
- Overnight Refrigerator Crumble: Assemble filling and topping in dish; cover tightly and refrigerate up to 16 hours. Bake straight from fridge—add 5–8 minutes to bake time.
Health Considerations and Nutritional Value
A 1-cup serving (approx. 240g) of classic baked apple crumble—with moderate butter and brown sugar—provides roughly 320–380 calories, depending on topping density and apple variety. While traditionally viewed as indulgent, mindful ingredient swaps and portion awareness transform it into a nutrient-dense, balanced dessert with functional benefits:
Nutritional Highlights
- Fiber Powerhouse: Apples (with skin) deliver 4–5g of soluble and insoluble fiber per serving—pectin supports gut microbiota, lowers LDL cholesterol, and promotes satiety. Oats contribute beta-glucan, clinically shown to improve heart health.
- Phytonutrient Richness: Apples contain quercetin (anti-inflammatory flavonoid), catechin (antioxidant), and chlorogenic acid (blood sugar modulator). Cinnamon enhances insulin sensitivity and offers potent polyphenols.
- Healthy Fats (When Modified): Swapping half the butter for walnut or almond oil introduces omega-3s and vitamin E. Toasted nuts add plant sterols that further support cholesterol metabolism.
- Low Sodium Profile: Naturally low in sodium (<50mg per serving), especially when unsalted butter and no added salt in topping—ideal for hypertension-conscious diets.
Smart Modifications for Health Goals
- For Blood Sugar Balance: Prioritize tart apples (higher malic acid slows glucose absorption); pair with protein-rich toppings (Greek yogurt, cottage cheese) or serve alongside a handful of almonds to lower glycemic load.
- For Gut Health: Add 1 tbsp ground flaxseed or chia to topping for prebiotic fiber; serve with a spoonful of unsweetened applesauce fermented with probiotic cultures.
- For Weight Management: Reduce topping by 25% and stretch with extra oats and toasted seeds; use 90% lean turkey bacon bits (crisped and cooled) for savory-sweet umami depth without added fat.
- For Antioxidant Maximization: Choose heirloom red-fleshed apples (e.g., Mountain Rose or Pink Pearl)—their anthocyanin-rich flesh doubles antioxidant capacity versus standard varieties.
Considerations & Cautions
- Sugar Awareness: Traditional recipes often exceed 35g added sugar per serving. The American Heart Association recommends ≤25g/day for women and ≤36g for men. Opt for natural sweeteners (date paste, mashed banana) or reduce sugar by ⅓ without sacrificing texture if apples are ripe.
- Gluten Sensitivity: Oats are naturally GF but cross-contaminated in 90% of commercial brands. Always choose certified gluten-free oats—even for “gluten-aware” individuals with non-celiac sensitivity.
- Calorie Density: Butter and brown sugar contribute significant calories. One solution: use ¾ cup butter instead of 1 cup, and compensate with 2 tbsp unsweetened applesauce in topping for moisture and binding.
- Allergen Note: Tree nuts (common in variations) are top-9 allergens. Always label clearly when serving to groups, and provide nut-free alternatives.
Ingredients
Makes 10–12 servings
For the Apple Filling:
- 6 cups (about 2 lbs / 900g) mixed apples, peeled, cored, and sliced ¼-inch thick (e.g., 4 Granny Smith + 2 Honeycrisp)
- ⅓ cup (65g) granulated sugar
- ⅓ cup (75g) light brown sugar, packed
- 1½ tbsp (12g) cornstarch (or 1 tbsp tapioca starch)
- 1½ tsp ground cinnamon
- ¼ tsp freshly grated nutmeg
- ¼ tsp ground allspice
- ½ tsp fine sea salt
- 2 tbsp fresh lemon juice (about 1 medium lemon)
- 1 tbsp unsalted butter, cold and cubed (optional, for richness)
- 1 tsp pure vanilla extract
For the Crumble Topping:
- 1 cup (90g) old-fashioned rolled oats (certified GF if needed)
- ¾ cup (95g) all-purpose flour (or 1:1 GF blend)
- ½ cup (100g) light brown sugar, packed
- ¼ cup (50g) granulated sugar
- ½ tsp ground cinnamon
- ½ tsp fine sea salt
- ¾ cup (170g) unsalted butter, cold and cubed
- ½ cup (60g) chopped toasted walnuts or pecans (optional)
- 1 tbsp turbinado or demerara sugar (for finishing)
Directions
- Preheat oven to 375°F (190°C). Grease a 9×13-inch baking dish or 10-inch cast-iron skillet; line bottom with parchment paper for easy release.
- In a large bowl, combine apple slices and lemon juice; toss to coat. Add granulated sugar, brown sugar, cornstarch, cinnamon, nutmeg, allspice, and salt. Gently fold until apples are evenly coated. Let sit at room temperature for 15 minutes.
- In a medium bowl, whisk together oats, flour, brown sugar, granulated sugar, cinnamon, and salt. Add cold cubed butter. Using your fingertips, a pastry cutter, or two forks, cut butter into dry ingredients until mixture resembles coarse crumbs with some pea-sized butter pieces remaining. Stir in nuts, if using. Refrigerate topping for 10 minutes.
- Stir vanilla extract and cold butter into macerated apples. Pour apple mixture—including all juices—into prepared baking dish. Spread evenly.
- Sprinkle chilled crumble topping uniformly over apples. Do not press down. Scatter turbinado sugar over top.
- Place dish on a parchment- or foil-lined baking sheet to catch drips. Bake for 25 minutes uncovered.
- Loosely tent with aluminum foil and continue baking 25–35 minutes, rotating pan halfway through, until filling bubbles vigorously at edges and topping is deep golden brown with crisp, shattery texture.
- Remove from oven and cool on a wire rack for at least 30 minutes before serving. For clean slices, cool 1–2 hours.
- Serve warm or at room temperature. Accompany with vanilla ice cream, crème fraîche, or spiced whipped cream.
FAQ
- Can I make this crumble ahead of time?
- Yes! Assemble up to 24 hours in advance: prepare filling and topping separately, refrigerate covered, then layer and bake just before serving. For longer storage, freeze unbaked crumble (tightly wrapped) up to 3 months—bake from frozen, adding 10–15 minutes to total time.
- Why is my crumble topping soggy or greasy?
- Common causes: butter too warm (melts prematurely), insufficient baking time (moisture doesn’t evaporate), or covering too early (traps steam). Ensure butter is cold, bake until vigorous bubbling occurs, and only tent foil *after* initial 25 minutes.
- Can I use apple pie filling from a can?
- Not recommended. Canned fillings contain excessive gums, artificial flavors, and water—diluting taste and creating a gluey texture. Fresh apples offer superior flavor, texture control, and nutritional value.
- My filling is too runny after baking—what went wrong?
- Likely culprits: under-maceration (juices didn’t concentrate), under-baking (starch didn’t fully activate), or insufficient thickener. Next time, extend maceration to 20 minutes, verify bubbling is vigorous, and consider increasing cornstarch by ½ tsp.
- Is it safe to leave crumble at room temperature?
- Due to high sugar and low moisture content, baked apple crumble is shelf-stable for up to 2 days at room temperature if covered. For food safety beyond that, refrigerate—especially in humid climates or above 75°F (24°C).
- Can I substitute gluten-free flour 1:1?
- Yes—if using a reputable 1:1 blend containing xanthan gum. Avoid single-ingredient GF flours (e.g., almond or coconut) unless recipe is specifically reformulated—they lack binding and absorbency.
- How do I reheat leftover crumble without ruining the texture?
- Avoid microwaves. Instead, place portion in an oven-safe ramekin, cover loosely with foil, and bake at 325°F (165°C) for 12–15 minutes. Or use an air fryer at 350°F for 6–8 minutes—topping regains remarkable crispness.
- Can I add other fruits to the apple filling?
- Absolutely—just adjust thickener. For every 1 cup of additional fruit (e.g., berries, pears, rh