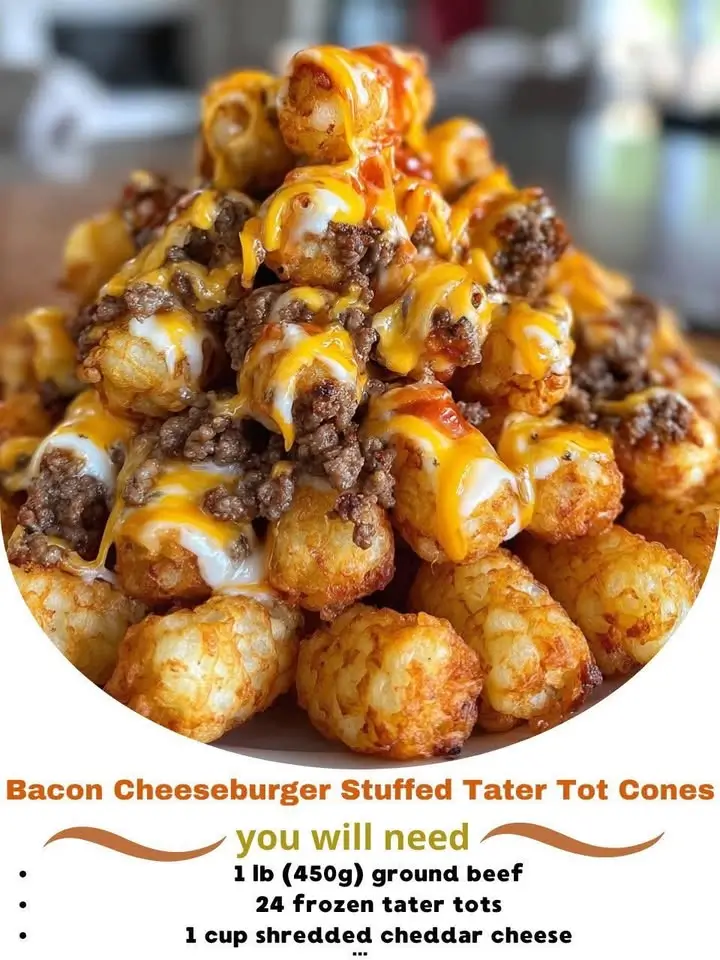
Bacon Cheeseburger Stuffed Tater Tot Cones
Imagine the classic flavors of a bacon cheeseburger—juicy ground beef, crispy bacon, melted cheese, and tangy condiments—but served in a fun, handheld, edible cone made entirely of golden, crispy Tater Tots. That’s exactly what you get with Bacon Cheesebuger Stuffed Tater Tot Cones: a modern twist on comfort food that combines indulgence, creativity, and convenience into one unforgettable bite. Whether you’re hosting a game-day party, planning a family dinner, or just craving something deliciously over-the-top, these stuffed cones are sure to be a crowd-pleaser. Packed with savory layers and served in a crunchy tot shell, they’re as fun to eat as they are to make.
The History
The concept of stuffing foods into other foods has deep roots in culinary tradition—from stuffed peppers and jalapeño poppers to stuffed mushrooms and deviled eggs. The idea of using Tater Tots as a vessel for fillings emerged more recently, gaining popularity in the 2010s alongside the rise of “tater tot cups” and “tater tot casseroles.” These innovations capitalized on the beloved texture and flavor of crispy tater tots while transforming them into functional serving dishes.
Bacon Cheeseburger Stuffed Tater Tot Cones evolved from this trend, combining two American classics: the cheeseburger and loaded tots. Fast-casual restaurants and food bloggers began experimenting with shaping tots into bowls, cups, and even cones to hold burger-style ingredients. The cone shape was particularly popular at fairs, festivals, and sports venues where portability and mess-free eating were key. By blending the nostalgic crunch of Tater Tots with the rich satisfaction of a bacon cheeseburger, this dish represents the best of modern comfort fusion cuisine—a playful yet satisfying meal that feels both innovative and familiar.
Ingredients Breakdown
To create the perfect Bacon Cheeseburger Stuffed Tater Tot Cones, it’s essential to understand each ingredient’s role in building layers of flavor, texture, and structure.
- Tater Tots – The star of the show. When baked or fried in a cone mold, they form a sturdy, crispy shell that holds all the fillings without getting soggy.
- Ground Beef (80/20) – Provides juicy, savory depth. The 20% fat content ensures moisture and rich flavor when cooked.
- Bacon – Adds smoky, salty crispiness. Pre-cooked and crumbled, it enhances both topping and filling textures.
- Cheddar Cheese – Melts beautifully into the beef and oozes inside the tot cone. Sharp cheddar adds tang, while mild cheddar blends smoothly.
- Onion (diced) – Brings aromatic sweetness when sautéed, balancing the richness of the meat and cheese.
- Garlic (minced) – Enhances umami and complexity in the beef mixture.
- Lettuce (shredded) – Adds freshness and crunch, mimicking the salad element of a traditional burger.
- Tomato (diced) – Offers juicy brightness and color contrast.
- Pickle Slices (chopped) – Delivers that classic dill tang essential to any great cheeseburger.
- Burger Sauce (or special sauce) – A creamy blend of mayonnaise, ketchup, mustard, relish, and spices that ties everything together.
- Salt & Pepper – Fundamental seasonings that enhance all other flavors.
- Paprika (optional) – For a subtle warmth and deeper color in the beef.
- Cooking Spray or Oil – Prevents sticking when baking the tots in molds.
Optional upgrades include caramelized onions, sautéed mushrooms, jalapeños for heat, or blue cheese crumbles for boldness.
Step-by-Step Recipe
- Preheat Oven: Set your oven to 425°F (220°C). This high temperature is crucial for achieving a deep golden-brown, crispy exterior on the Tater Tots.
- Prepare Cone Molds: Use aluminum foil muffin cups, silicone cone molds, or inverted ice cream cones lined with parchment and sprayed generously with non-stick cooking spray. If molds aren’t available, shape foil into cone forms and place in a muffin tin for support.
- Form Tater Tot Shells: Press frozen Tater Tots firmly into the molds, overlapping them slightly to create a solid, seamless shell. Fill the bottom and sides completely, ensuring no gaps. You can lightly crush some tots to act as “binder” between whole ones.
- Bake Tater Tots: Place molds in the preheated oven and bake for 20–25 minutes, rotating the pan halfway through, until deeply golden and crispy. Remove carefully and let cool slightly before handling.
- Cook the Bacon: While the tots bake, cook 6–8 slices of bacon in a skillet over medium heat until crispy. Transfer to paper towels to drain, then crumble into small pieces.
- Cook the Burger Filling: In the same skillet (reserve some bacon grease for flavor), add 1 pound of ground beef. Cook over medium-high heat, breaking it apart with a spoon. Add ½ cup finely diced onion and 2 cloves minced garlic. Season with salt, pepper, and a pinch of paprika. Cook until browned and no pink remains. Drain excess fat if needed.
- Add Cheese to Beef: Stir in ½ cup shredded cheddar cheese until melted and well incorporated. Keep warm.
- Prepare Toppings: Assemble fresh toppings: shred lettuce, dice tomatoes, chop pickles, and mix your burger sauce (combine ¼ cup mayo, 2 tbsp ketchup, 1 tsp yellow mustard, 1 tsp sweet pickle relish, and a dash of garlic powder).
- Assemble the Cones: Carefully remove the baked tot shells from the molds. Spoon a layer of warm cheesy beef into each cone. Top with crumbled bacon, a sprinkle more cheddar, then add shredded lettuce, diced tomato, and chopped pickles.
- Drizzle and Serve: Finish each cone with a generous drizzle of burger sauce. Serve immediately while hot and crispy.
Tips
- Use Frozen Tater Tots Straight from the Freezer: They hold their shape better and crisp up more evenly than thawed ones.
- Don’t Skip the Mold Prep: Greasing the molds thoroughly prevents the tots from sticking and ensures clean release after baking.
- Press Firmly: Apply strong pressure when packing the tots into the mold to avoid crumbling upon removal.
- Double-Stack Tots: For extra durability, especially with heavier fillings, consider a double layer of tots around the sides.
- Keep Components Separate Until Serving: To maintain crispness, assemble just before eating. Prepare all components ahead of time and store separately.
- Broil for Extra Crisp: For the final 1–2 minutes of baking, switch to broil (watch closely!) to deepen color and crunch.
- Use Lean Beef if Desired: While 80/20 beef is ideal for juiciness, you can use leaner cuts if preferred—just add a bit of oil during cooking to prevent dryness.
- Make Ahead Tip: Pre-form tot cones and freeze them unbaked. When ready, bake straight from frozen—add 5–7 minutes to cooking time.
Variations and Customizations
The beauty of Bacon Cheeseburger Stuffed Tater Tot Cones lies in their versatility. Here are some creative ways to customize them for different tastes, diets, or themes:
- Breakfast Version: Swap the beef for scrambled eggs, hash browns, and sausage or ham. Top with cheese and green onions—perfect for brunch!
- Veggie Lover’s: Replace beef with plant-based crumbles or seasoned lentils. Add roasted bell peppers, zucchini, and avocado slices.
- Spicy Kick: Mix jalapeños into the beef, use pepper jack cheese, and drizzle with sriracha mayo.
- Hawaiian Style: Use grilled pineapple chunks, teriyaki-glazed beef, and Swiss cheese instead of cheddar.
- Texas-Style: Add chili, pinto beans, corn, and top with sour cream and green onions.
- Gourmet Upgrade: Use angus beef, smoked gouda, arugula, and truffle aioli for a restaurant-quality experience.
- Keto-Friendly: Ensure sugar-free ketchup and check labels on tots—some brands offer low-carb versions. Load up with extra cheese and bacon.
- Gluten-Free: Most Tater Tots are naturally gluten-free, but always verify packaging. Use gluten-free condiments.
- Mexican Fusion: Fill with taco-seasoned beef, black beans, pico de gallo, and Monterey Jack. Drizzle with chipotle crema.
- Dessert Twist: Yes, really! Make sweet tot cones with cinnamon-sugar tots, filled with chocolate pudding, whipped cream, and berries.
Health Considerations and Nutritional Value
While undeniably indulgent, Bacon Cheeseburger Stuffed Tater Tot Cones can be adapted to fit various dietary goals. Let’s break down the nutritional profile of a typical serving (one cone):
- Calories: ~550–700 depending on size and ingredients
- Fat: 35–45g (including saturated fat from cheese and beef)
- Protein: 25–30g (excellent source from beef and cheese)
- Carbohydrates: 40–50g (primarily from Tater Tots and minimal sauce)
- Fiber: 3–5g (from potatoes, vegetables)
- Sodium: 900–1,300mg (can be high due to processed ingredients like bacon, cheese, and sauces)
Health Tips:
- Choose lean ground beef (90/10) or turkey to reduce saturated fat.
- Use turkey bacon or reduce bacon quantity for lower sodium and fat.
- Increase vegetable content by adding spinach, cucumbers, or coleslaw mix.
- Opt for reduced-fat cheese or nutritional yeast for a lighter option.
- Make homemade tots using grated potatoes and less oil to control ingredients.
- Use Greek yogurt instead of mayo in the sauce for added protein and reduced calories.
- Portion control: Serve mini versions as appetizers rather than full entrées.
While not a low-calorie dish, it offers balanced macronutrients and can be part of a flexible diet when enjoyed in moderation.
Ingredients
- 1 (32 oz) bag frozen Tater Tots
- 1 lb (450g) ground beef (80/20 recommended)
- 6–8 slices bacon
- 1 cup shredded cheddar cheese, divided
- ½ cup finely diced onion
- 2 cloves garlic, minced
- 1 cup shredded lettuce
- ½ cup diced tomatoes
- ¼ cup chopped dill pickles
- Salt and freshly ground black pepper, to taste
- ½ tsp paprika (optional)
- Non-stick cooking spray or olive oil
For the Burger Sauce:
- ¼ cup mayonnaise
- 2 tbsp ketchup
- 1 tsp yellow mustard
- 1 tsp sweet pickle relish
- ¼ tsp garlic powder
- Pinch of onion powder
Directions
- Preheat oven to 425°F (220°C). Prepare muffin tin with foil liners or silicone cone molds. Spray each mold generously with non-stick spray.
- Press Tater Tots tightly into the molds, forming a solid cone shape with no gaps. Overlap tots and press firmly against the sides and base.
- Bake for 20–25 minutes, until golden brown and crispy. Rotate the pan halfway through. Remove and let cool slightly.
- In a large skillet, cook bacon over medium heat until crispy. Transfer to paper towels, then crumble.
- In the same skillet, add ground beef, onion, and garlic. Cook over medium-high heat until browned, about 8–10 minutes. Drain excess fat.
- Season beef with salt, pepper, and paprika. Stir in ½ cup cheddar cheese until melted. Keep warm.
- Prepare burger sauce by mixing mayonnaise, ketchup, mustard, relish, garlic powder, and onion powder. Refrigerate until use.
- Prepare fresh toppings: lettuce, tomatoes, pickles.
- Once tot cones are cool enough to handle, carefully remove from molds.
- Fill each cone with cheesy beef mixture. Top with crumbled bacon, remaining cheddar, lettuce, tomato, and pickles.
- Drizzle generously with burger sauce. Serve immediately.
FAQ
Can I make these ahead of time?
Yes! You can pre-bake the tot cones and store them in an airtight container for up to 2 days. Re-crisp in the oven at 400°F for 5 minutes. Prepare fillings ahead and refrigerate. Assemble just before serving.
Can I freeze the tot cones?
Absolutely. Freeze unbaked or baked tot cones in a single layer, then transfer to a freezer bag. Bake from frozen—add 5–7 minutes to cooking time.
What can I use instead of molds?
You can shape foil into cones and place them in a deep muffin tin or ramekins for support. Cupcake liners work if reinforced with extra tots.
Are there healthier substitutes?
Yes—use turkey bacon, lean beef or plant-based crumbles, low-fat cheese, and Greek yogurt-based sauce. Bake tots instead of frying.
Why did my tot cones fall apart?
This usually happens if tots weren’t packed tightly, underbaked, or removed too soon. Cool slightly before unmolding and use firm pressure when shaping.
Can I air fry these?
Yes! Air fry pre-shaped tot cones at 400°F for 12–15 minutes, shaking gently halfway. Monitor closely to avoid burning.
Can kids help make these?
Definitely! Shaping the tots, mixing toppings, and assembling are great kid-friendly tasks. Supervise near the oven.
Summary
Bacon Cheeseburger Stuffed Tater Tot Cones are a decadent, flavorful mashup of two beloved comfort foods—served in a crispy, edible tot cone for maximum fun and minimal mess.
Packed with juicy beef, crispy bacon, melty cheese, and fresh toppings, they’re perfect for parties, weeknight dinners, or anytime you want to treat yourself to something truly satisfying.